

Hello my lovelies! Today I am going to show you how to make the American Girl Ice Cream Cart! We have been eyeing up this cart for a while now, and we finally decided that we have to have it in our life! So what do we do when we fall in love with something, but it is out of our price range? We DIY of course! 🙂
Here is what you need:
A sturdy box
Foam board
Hot glue
Tacky glue
Duct tape
Contact paper (optional)
Exacto knife
Washi tape for decoration
Pringles singles containers
Mini box
Cotton balls
Paint
Wooden bead or drawer pull
Sprinkles (optional)
Okay let’s get started!
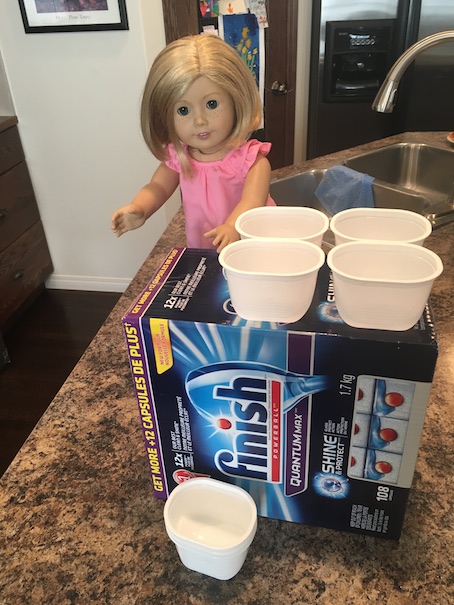
First gather your supplies. I had this dishwasher tab box. It is surprisingly sturdy, and the measurements are perfect.
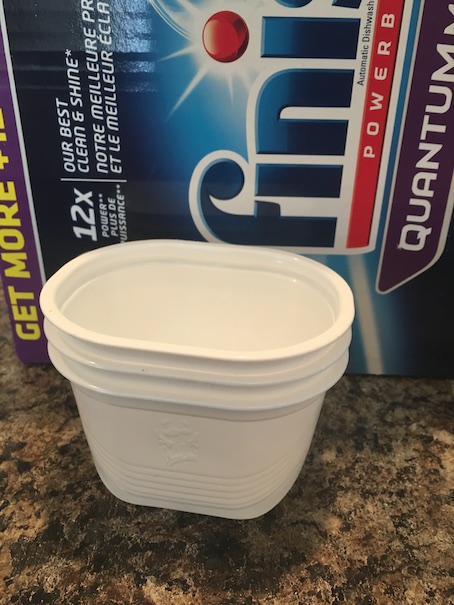
I also saved these Pringles singles containers that we had from last Halloween. They are a great size for the ice cream tubs. Any other small containers that have a lip would work too.
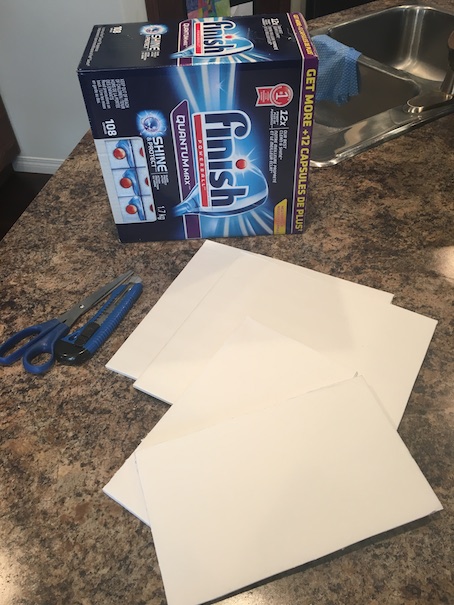
First, measure and cut your foam board. You will need pieces to cover your box.

Use hot glue to cover the front and sides of your box with your foam board pieces. Do not cover the back of your box yet.
As you can see, the corners of my foam board did not meet up properly, so a bit of the box peeks through. I had to use some pretty duct tape to cover my corners. Be sure that you measure correctly if you would like to have flush corners, and to avoid gaps.
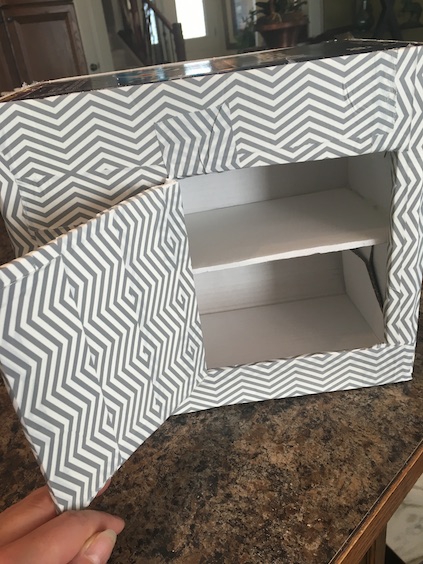
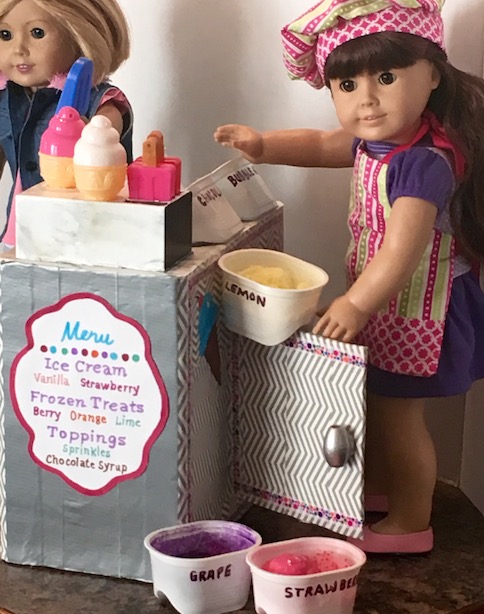
Using an exacto knife, draw and cut out a large square from the back of your box. Measure and cut a piece of foam board for a shelf. Hot glue the shelf to the inside of the box.
Next, cut a door in the piece of foam board you previously cut for the back. Be sure that your door matches up with the square hole that you cut in the back of the box. Do not cut through the hinge side of the door. Instead, cut only halfway through the foam board so that your door is still attached and will swing. Hot glue the piece of foam board with the door to the back of the box. You can use pretty duct tape to help give the door more stability.

Decorate the back of the box how you like. I covered the entire back with duct tape. Then I used some cute washi tape to decorate.

Decorate the front of your box how you like. I used more washi tape. Then I free handed something similar to AG’s original design.
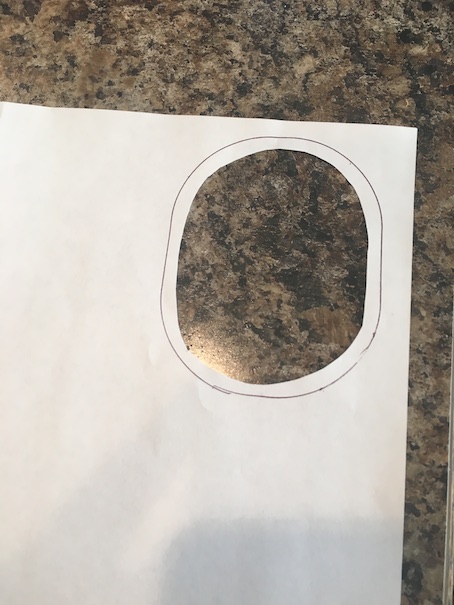
Trace the top of the Pringles singles container onto paper. Cut a hole a bit smaller than the outline you traced.

Be sure that your container fits in the hole.
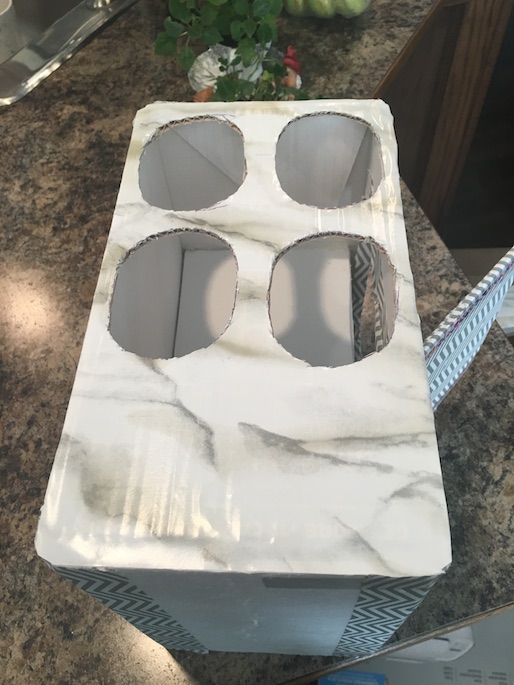
I covered the top of the ice cream cart with faux marble contact paper. Then I traced holes for the ice cream tubs, using an exacto knife to cut them out.
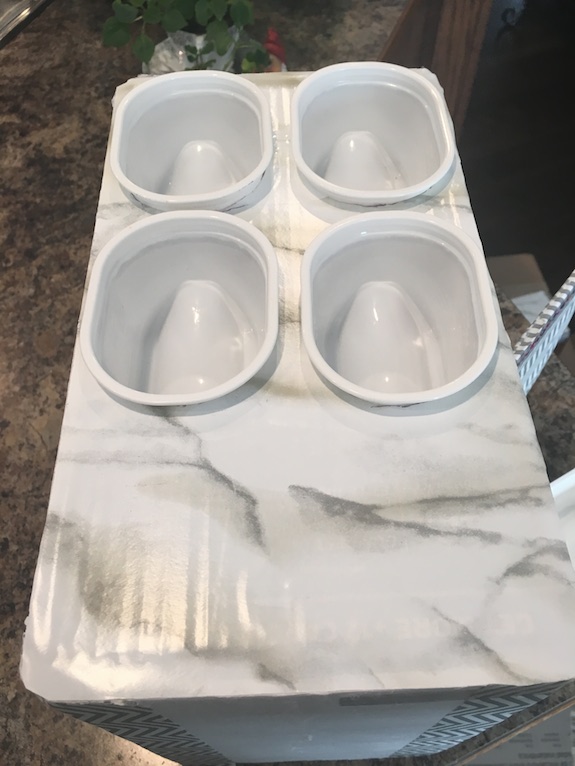
Perfect fit!

Time to fill the ice cream tubs!
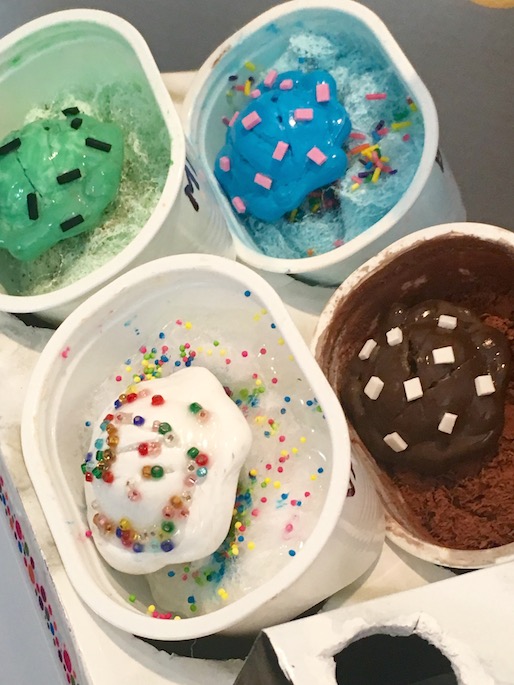
To fill the ice cream tubs we used cotton batting, glue and paint. We had a few extra Pringles containers, so we made some extra flavours.

Squirt a good amount of white paint mixed with tacky glue into the bottom of your container.

Add food colouring or paint to get the colour that you like.
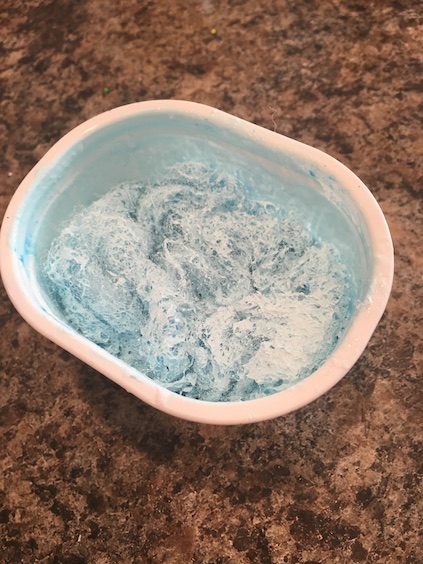
Add cotton balls or cotton batting a little bit at a time. Stir well to completely saturate the cotton with the paint mixture.
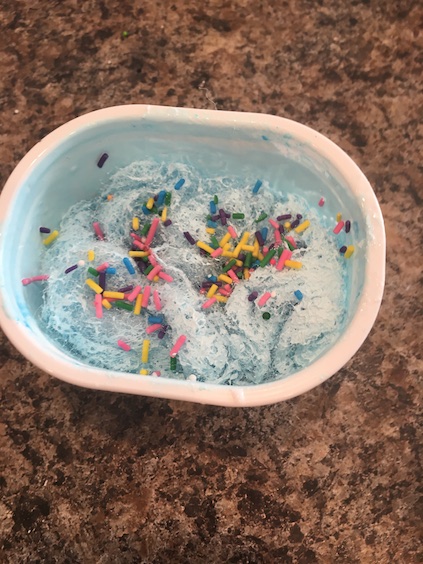
Add sprinkles or bits of coloured paper to the top.
(Once dry I suggest sealing the entire thing with another layer of white glue)

Make plenty of flavours. 🙂
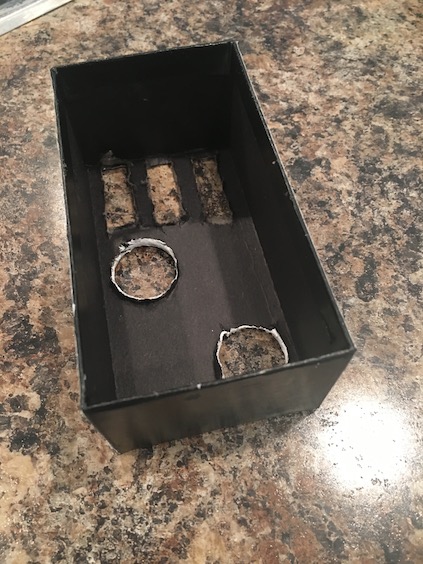
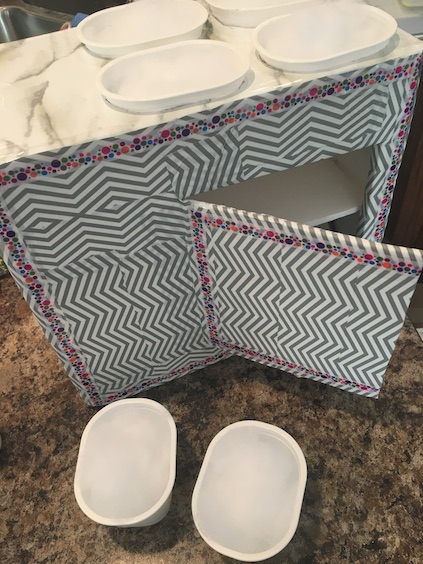
To make the popsicle holder, we used a smaller box.

I covered the smaller box in contact paper. Then I marked out some spots for the popsicles and the ice cream cones that we had. I used an exacto knife to cut out the slots.

Hot glue the popsicle holder to the top of the ice cream counter.
I used a wooden bead painted silver for the door handle. You could also use a drawer pull if you have one handy.

Now it’s time to stock your cart! 🙂

Add all of your popsicles and ice cream cones to the holder. We found the plastic popsicles and the ice cream cones at the dollar store. They used to be bubbles containers. We just removed the bubble wands and rinsed them out.

You can store the other flavours of ice cream as well as any other accessories on the shelf inside the cart. I used metallic duct tape to finish the sides and the bottom of the cart. I have yet to add wheels, but I don’t think I will. My daughter could care less about wheels, and I don’t want to compromise the stability of the cart.

To make the menu, I just freehanded something similar to AG. I used markers on card stock paper. We have more flavours than just strawberry and vanilla, but I liked the look of the menu, so it is mainly for decoration. We also don’t have any lime popsicles. LOL! Oh well.
Hot glue the menu to the side of your ice cream cart.
Use a permanent marker to label your tubs of ice cream. The bottom of the Pringles singles containers are curved. This enables the tubs of ice cream to rest at an angle. We like the ice cream tubs on an angle because then the customers can see the ice cream flavours, and the clerk behind the cart can see the ice cream labels. 🙂
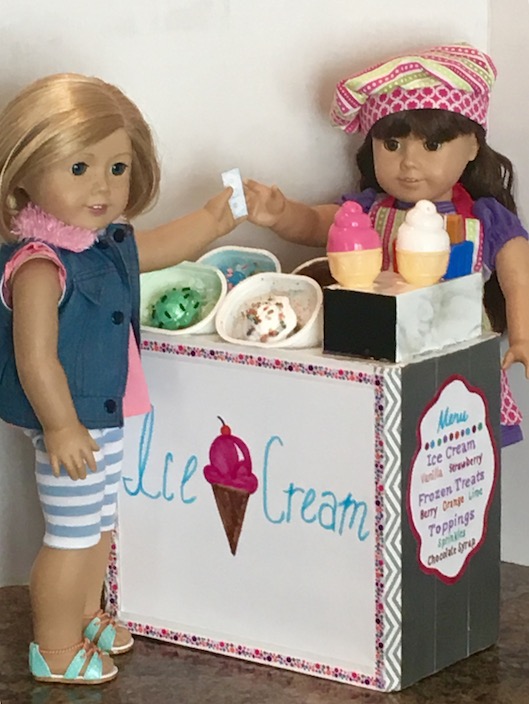
Now your dolls are ready to sell their ice cream!

Angelina is all set to start making some sales! And here comes her first customer now!

Kit: Hi Angie! Are you open for business?

Angelina: You bet! What can I get you?
Kit: Well, what flavours do you have?
Angelina: I’ve got chocolate, vanilla, mint, and bubblegum here up top…
…but I also have grape, strawberry and lemon in stock!

Kit: Wow! Okay, hang on. I just have to run home quick, and get some money.
Kit: (out of breath) I’m back! Here you go Angie! I’ve got five dollars!
Angelina: So what will it be then?
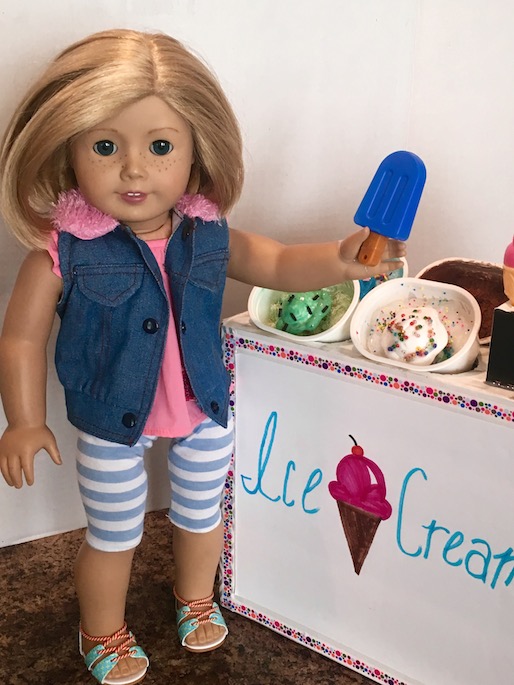
Kit: I will get this blueberry popsicle please.
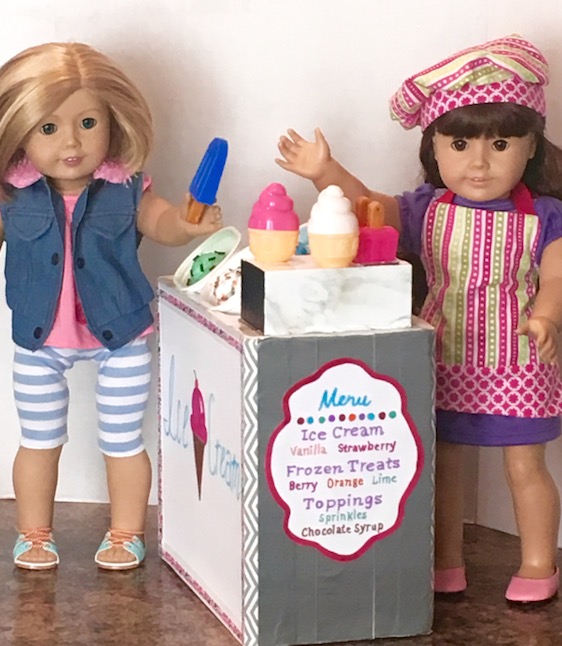
Angelina: That’s all? But there is so much to choose from!

Angelina: See the menu? We even have sprinkles and chocolate syrup! You can’t just get one popsicle!

Kit: But that’s all I want.
Angelina: (rummaging around) Look, there has to be something else in here that you might like.

Kit: I like this popsicle.
Angelina: Here now, I’ve got grape, strawberry, lemon, chocolate, vanilla, mint, and bubblegum. If you like you could even mix it up a bit. Have a lemon grape or a strawberry chocolate, or…or a mint bubblegum!

Kit: (wrinkling her nose) Mint bubblegum?
Angelina: Okay, scratch that. But come on! Aren’t you going to try anything else?

Kit: (laughing) Okay, okay! You’ve convinced me. I’ll take one vanilla cone please.

Angelina: (sarcastic) Really?

Kit: (still laughing) What? I can’t have an ice cream cone either?

Angelina: (shakes her head in disbelief) Seriously, how do you live? Where is your sense of adventure?!
❤
I hope you enjoyed, and I hope you have a crafty sort of day!
To make ice cream scoops and chef’s apron set
What is your favourite ice cream flavour?
Leave a comment below!
❤ ❤ ❤

Wow! That’s such an awesome cart! 😀 Hm… My favorite ice cream flavor… I don’t know! I haven’t ever really found the one I like more than any other. 😉
-Emma-
LikeLike
This is adorable!!!! You are so creative! 😉 ❤
LikeLike
Aww thank you! 🙂
LikeLiked by 1 person
Your welcome! ❤
LikeLike
How can you not like chocolate ice cream!? My favorite is chocolate peanut butter. I loved this cart, your ice cream looks way more real than AG.
LikeLike
Thank you! I really wanted the dolls to have more flavours than just vanilla and strawberry. Variety!! 🙂 I actually really do like chocolate peanut butter ice cream (Reese’s yum!). I just don’t like regular chocolate ice cream. I’m not a fan of chocolate milk or hot chocolate either. LOL! 🙂
LikeLiked by 1 person
Oh, okay, that’s better!
LikeLike
🙂
LikeLike
That is so cool! My favorite ice cream flavor is chocolate. 🙂
~Christian Homeschooler
LikeLiked by 1 person
Thank you! It’s funny, my favourite thing in the world is chocolate, and yet I don’t like chocolate ice cream or chocolate cake. Weird huh? 🙂
LikeLike
Wow, that is strange! So, do you just like to eat chocolate candy bars?
LikeLike
Yup! 🙂
LikeLike