
Hello all! I hope you’ve been having fun crafting up a storm of doll foods with us! We’ve made many doll desserts in the past, but never using thick craft foam, so today, that is what we are going to do!
Come along with us! 🙂 Let’s make some desserts for our dolls!
What you need:
Thick craft foam
(Found at Michael’s for $1.20 per sheet)
Thin craft foam in all colours
Tacky or school glue
Hot glue
Paint or markers
Hole punch
Puffy paint
Toothpicks
Bamboo skewers
Small styrofoam balls
Seed beads
DESSERT
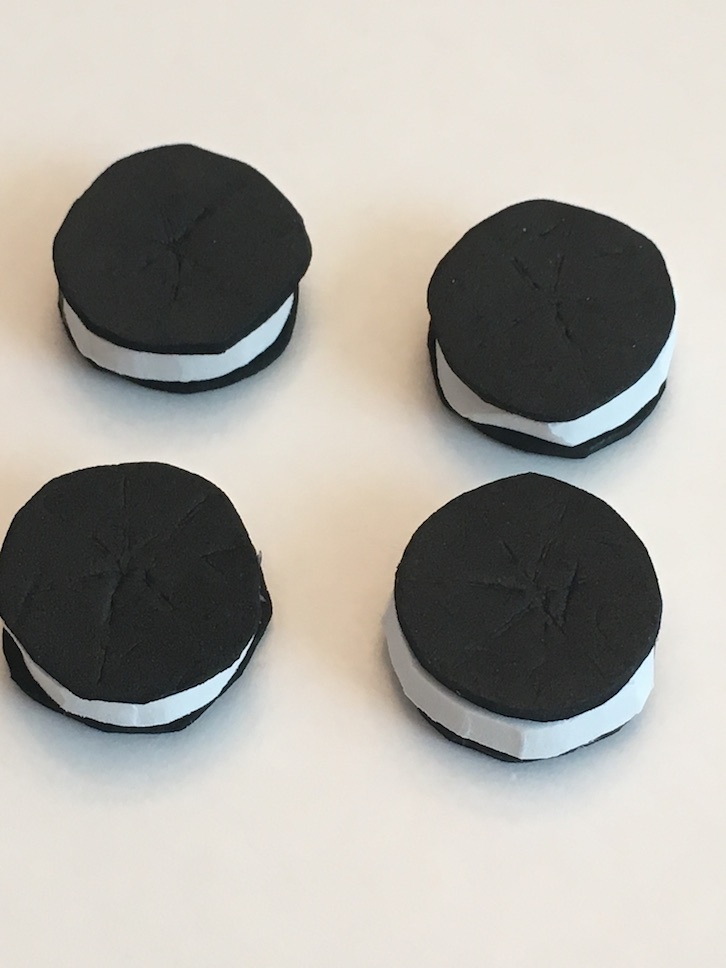
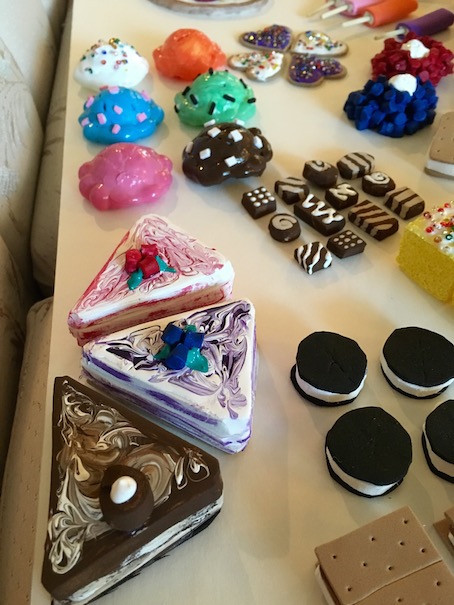
Oreo Cookies – Cut out two circles from black craft foam. Cut out one circle from thick craft foam. Stack your circles and hot glue them together. You can make some marks in the top and bottom of your cookie to make them look more realistic. You can also use this technique to make Oreo ice cream sandwiches. Just cut bigger circles.
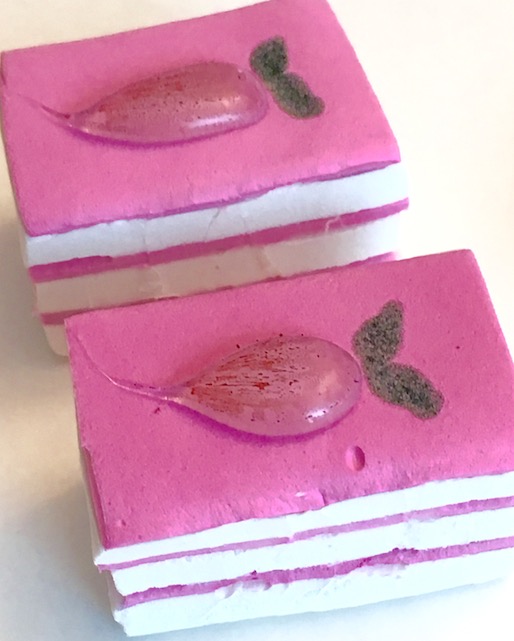
Pink Cream Cake – This pretty cake is so easy to make. Simply stack layers of thick craft foam and thin craft foam in the colour of your choice. To make the decoration on top, I just put a blob of hot glue and when it dried, I coloured it with marker. You could paint it instead if you like. Too cute! Pink cream cake is my daughter’s favourite cake to eat. 🙂
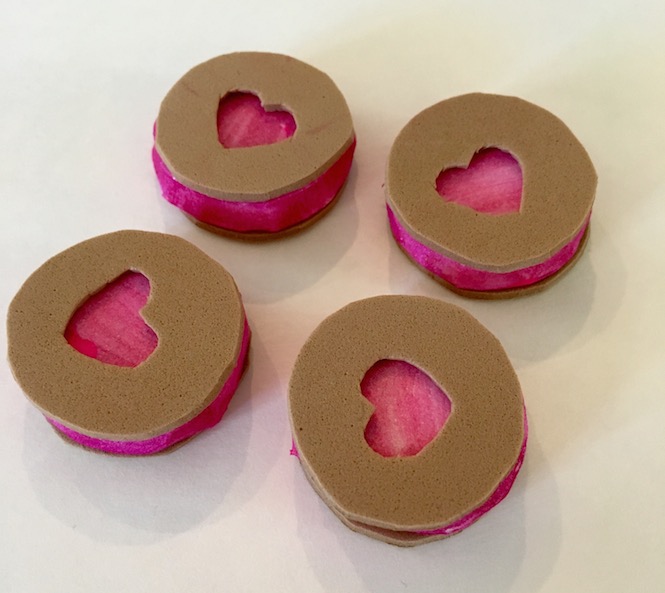
Jam Filled Cookies – These are so cute! Seriously. 🙂 First cut out two circles from tan foam and one circle from thick craft foam. Colour the thick craft foam circle pink. Punch a heart in one of the tan circles. I have a heart shaped punch, but you can just draw a heart on and cut it out if you don’t have one. Glue all three circles together.
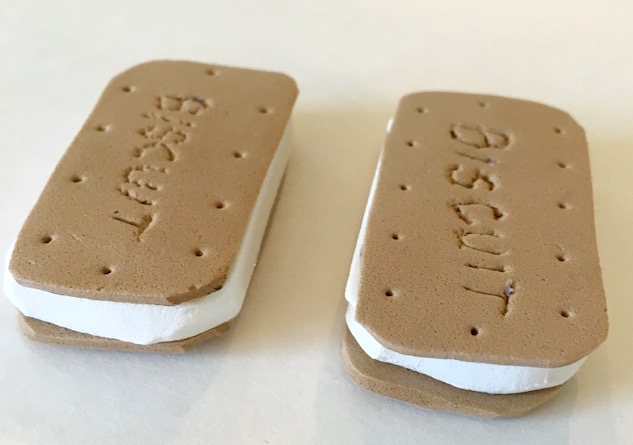
Cream Filled Biscuit Cookies – Cut out two rounded rectangles from tan craft foam and one rounded rectangle from thick craft foam. Use a toothpick to write the word Biscuit on both of the tan rectangles. Then poke some holes all the way around. Glue all three rectangles together.
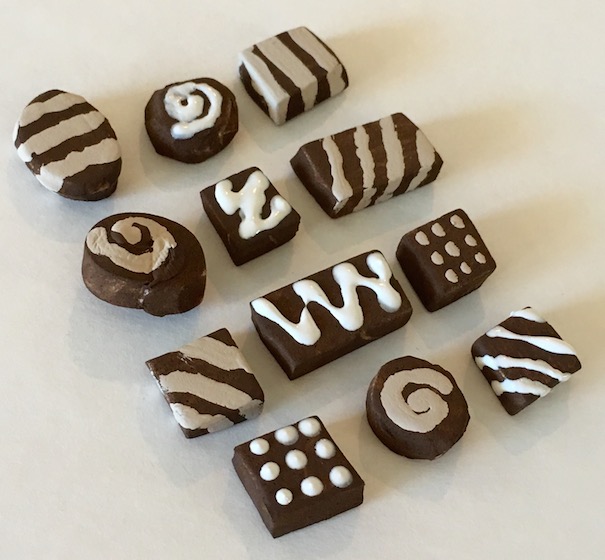
Chocolate Bon Bons – Cut out small squares, rectangles and circles from thick craft foam. Paint them chocolate brown. Use a tan coloured paint to make swirls and lines on the chocolates. We also used some white puffy paint on some of the chocolates for variety.
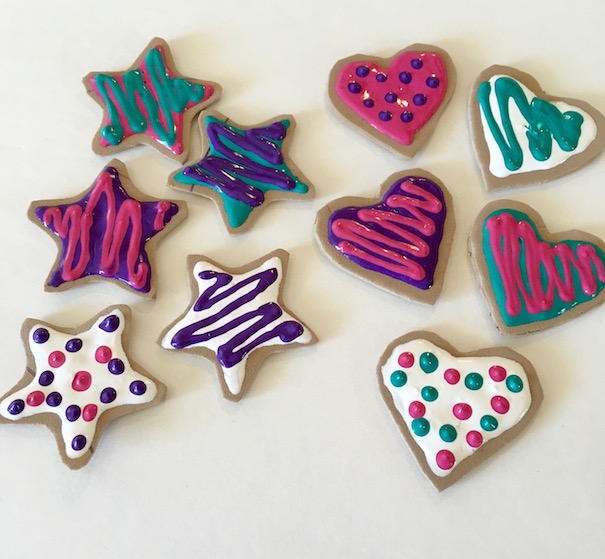
Sugar Cookies – Cut out cookie shapes from tan craft foam. We pressed small cookie cutters into the foam. Use puffy paint to decorate.
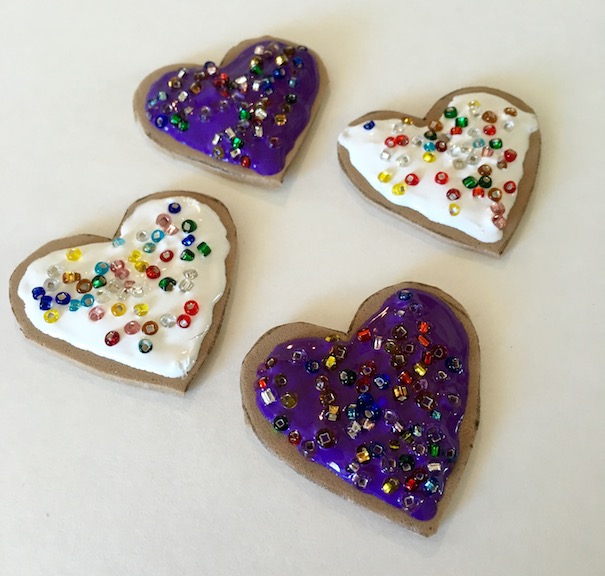
Sugar Cookies with Sprinkles – To add sprinkles to your sugar cookies, cover in puffy paint. Then sprinkle some colourful seed beads on top. You could also use glitter.
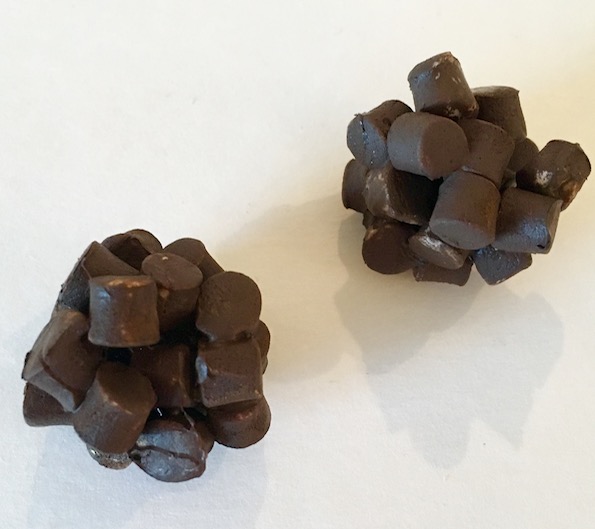
Chocolate Cluster Cookies – Use a hole punch to punch holes in thick craft foam. Put them in a bowl. Pour brown paint over top. Stir until they are all covered. Pile onto a piece of wax paper. Once dry, peel it off the paper. You can seal them with mod podge if you like.
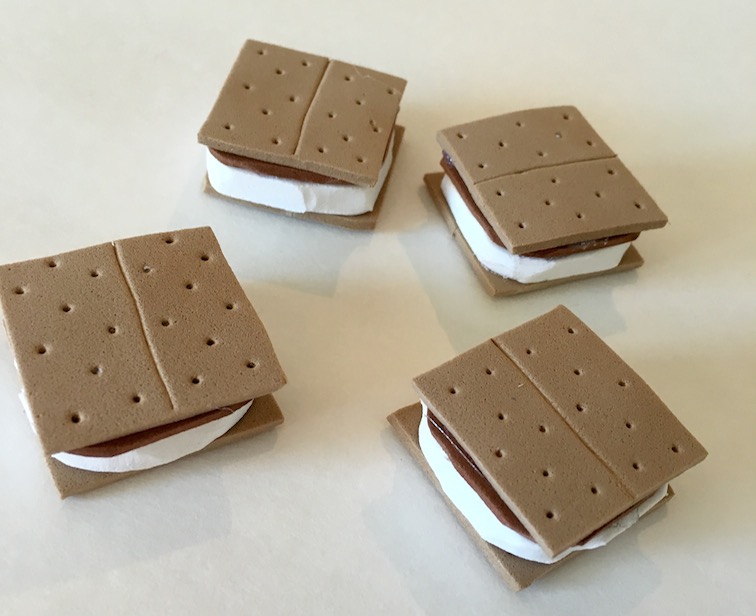
S’mores – Cut two squares from tan craft foam. Cut a rounded square from thick craft foam. Cut another rounded square from dark brown craft foam. Using a toothpick, draw a line down the centre of both squares of tan craft foam. Then poke some holes on either side of the line. Glue all three pieces together. So cute!
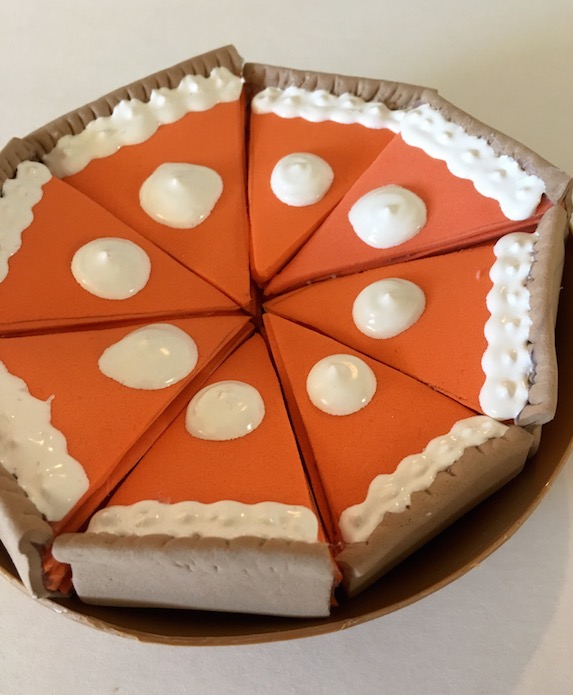
Pumpkin Pie – Okay, I can’t take credit for this amazing idea for how to make a pumpkin pie from craft foam and puffy paint. Over at Fun with AG Fan is an awesome tutorial. You just have to go check it out. 🙂
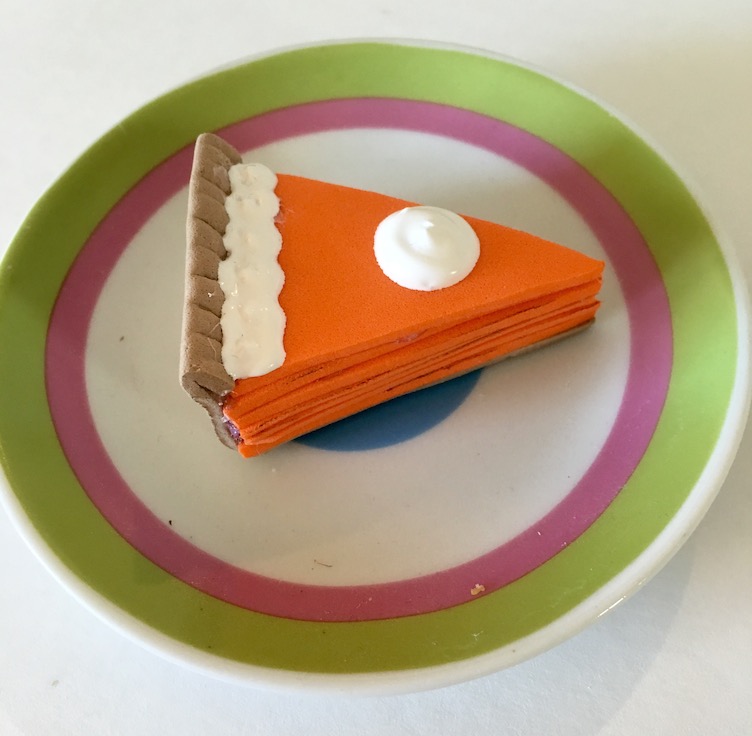
So cute! 🙂
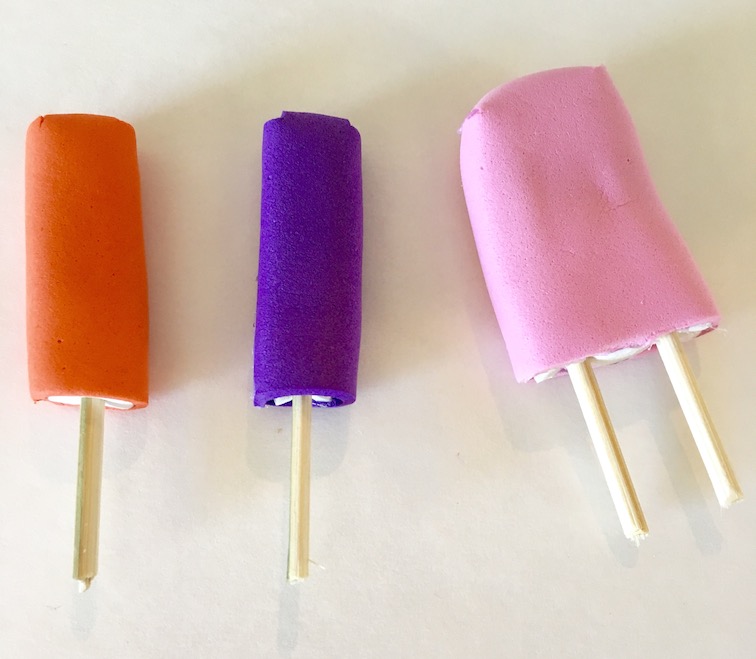
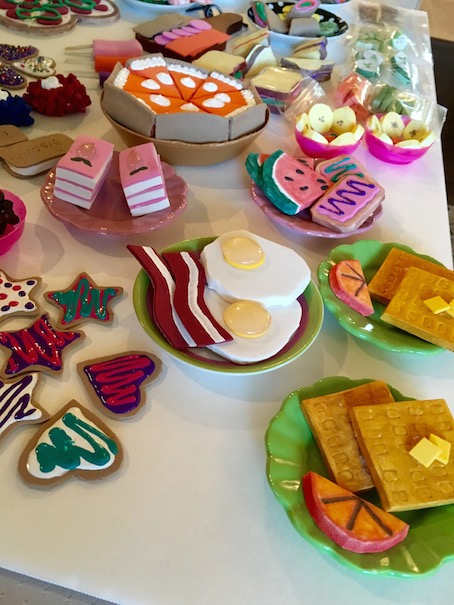
Popsicles – Cut a popsicle shape from thick craft foam. We made singles and doubles. Next, wrap your popsicle in thin craft foam in the colour of your choice using hot glue to secure it in place. Clip the corners to make the foam less difficult to wrap. I left the bottom open. It kind of looks like there is ice cream in there. Cut bamboo skewers to use for popsicle sticks.
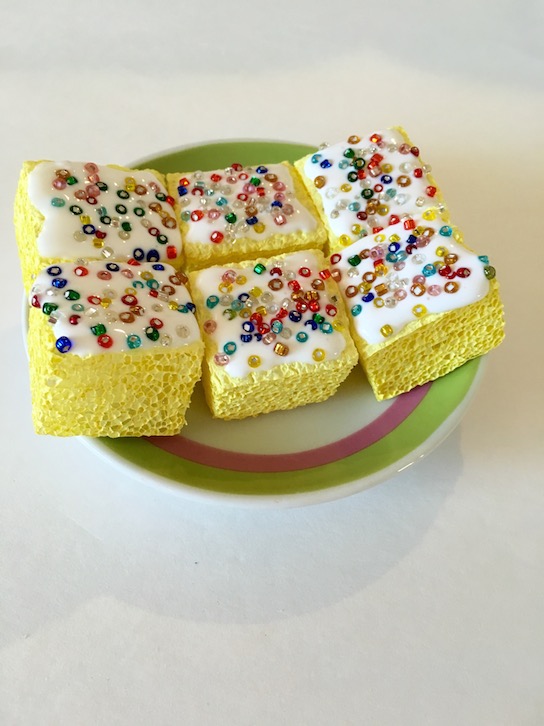
Lemon Squares – I used some spongy plastic styrofoam packaging for this one. Just cut squares and paint them yellow. If you don’t have styrofoam packaging, you could just use a yellow sponge. Spread tacky glue or white puffy paint, and sprinkle some coloured seed beads on top.
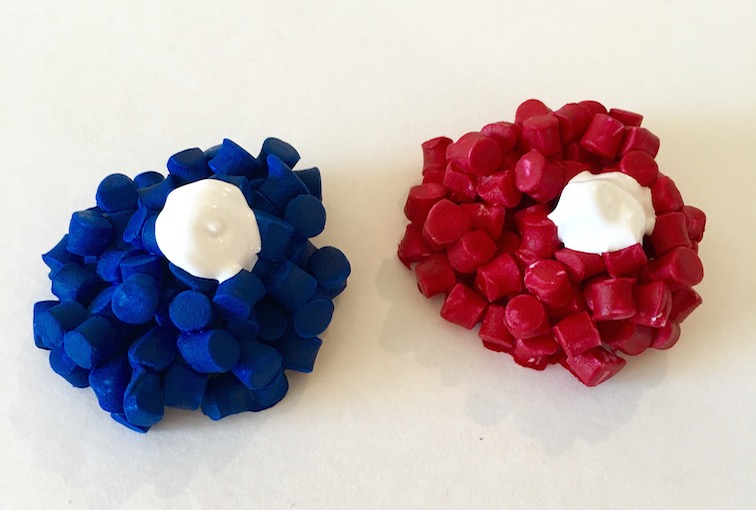
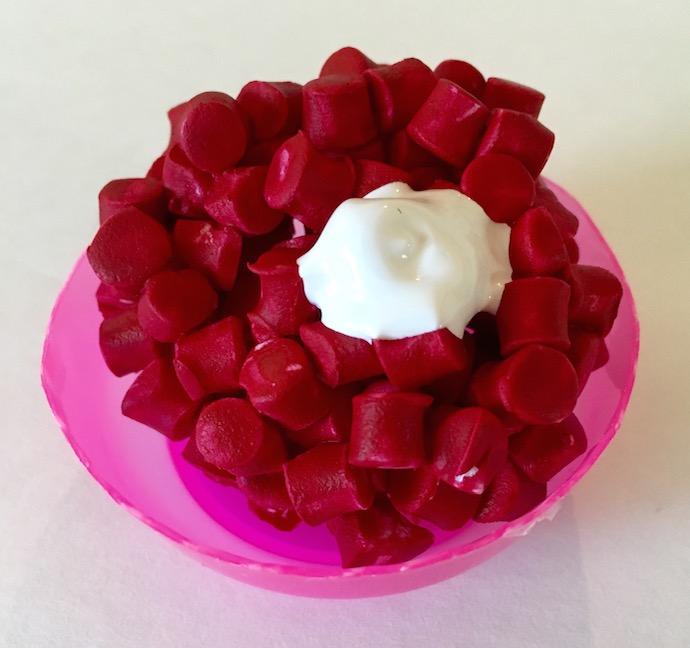
Blueberry and Raspberry Compote – Use a hole punch to punch holes from thick craft foam. Put a pile in a bowl. Pour paint over each pile, blue for blueberry and red for raspberry. Stir to cover. Pour onto wax paper. Let dry. Once dry I used a blob of puffy paint for whipped cream on top.

You can put the compote in a bowl or use it as a side for cake or pie.
Too cute! 🙂 ❤
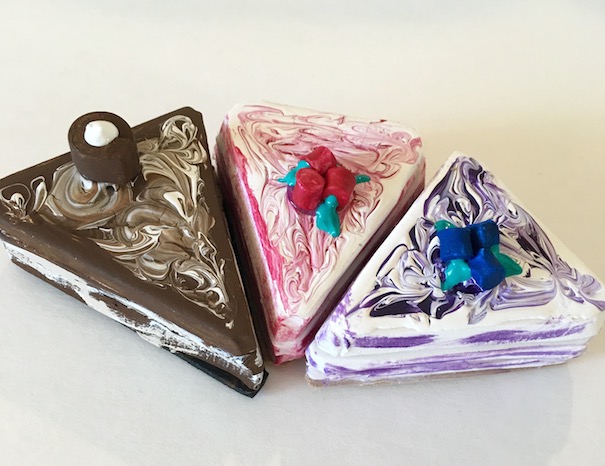
Cheesecake – Cut a stack of three triangles of thick craft foam.
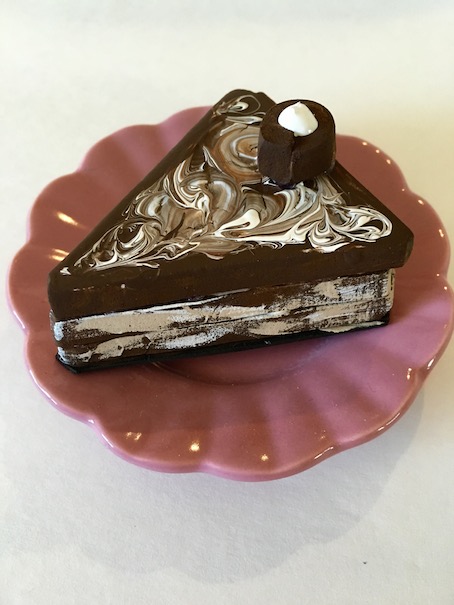
Chocolate Swirl Cheesecake – On top of the first triangle, spread a thick layer of brown paint. Add a few drops of white paint. Then using a toothpick, make swirls in the white paint. Paint the other two triangles brown. Glue all three triangles together. For the crust, glue the cake to a piece of thin black craft foam. Use white and tan coloured paint to add a bit of detail to the sides. Add a chocolate bon bon to the top.
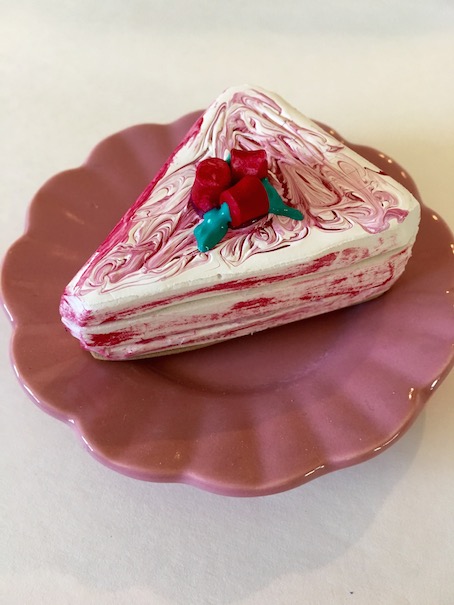
Raspberry Cheesecake – On top of the first triangle, spread a thick layer of white paint. Add a few drops of red paint. Then using a toothpick, make swirls in the red paint. Glue all three triangles together. For the crust, glue the cake to a piece of thin tan craft foam. Use red paint to add details to the side. Use a hole punch to punch out three berries from thick craft foam. Paint them red and glue them to the top of the cake. Using green puffy paint, add leaves to the berries. Repeat for blueberry cheesecake below.
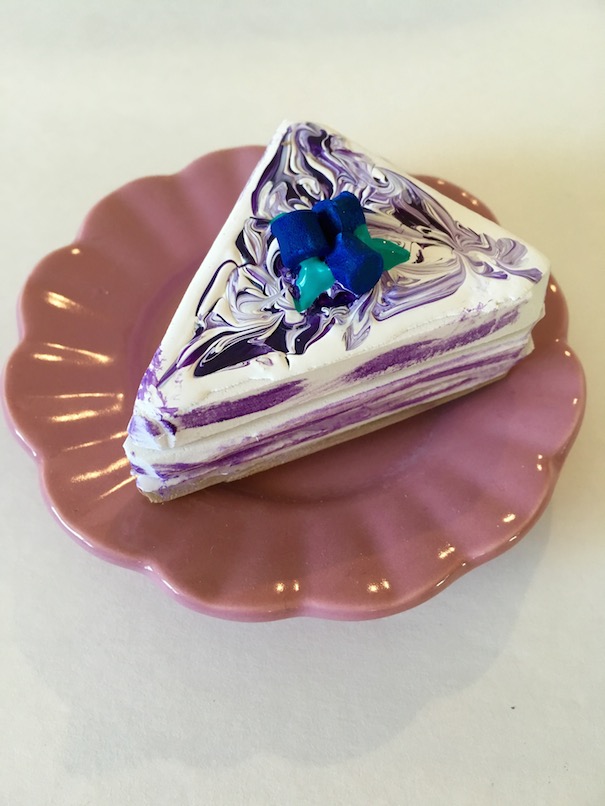
Blueberry Cheesecake – Repeat steps above.
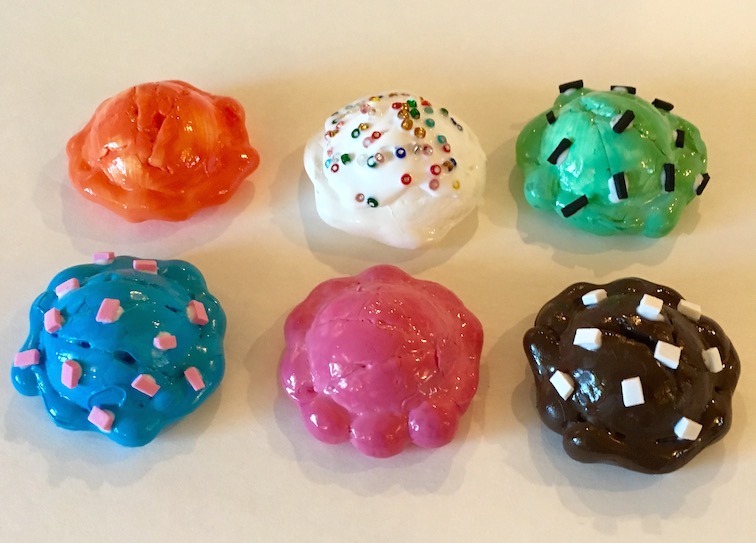
Ice Cream Scoops – Cut a styrofoam ball in half. Use hot glue in blobs to make a thick layer around the edge of the ball. I did a few blobs, let them dry, and then did a few more.
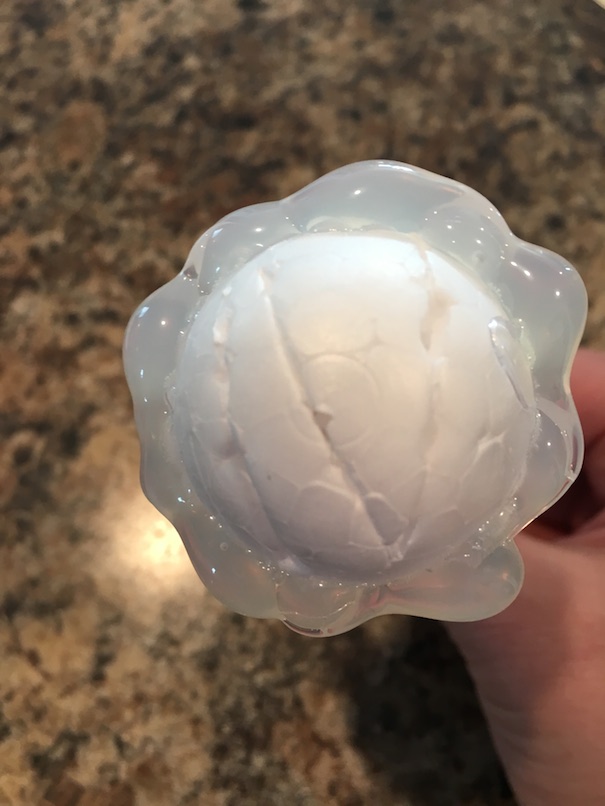
Use an exacto knife to make a few slices in the top of the styrofoam ball. Then paint in the colour of your choice. I used mod podge to seal in the colour.
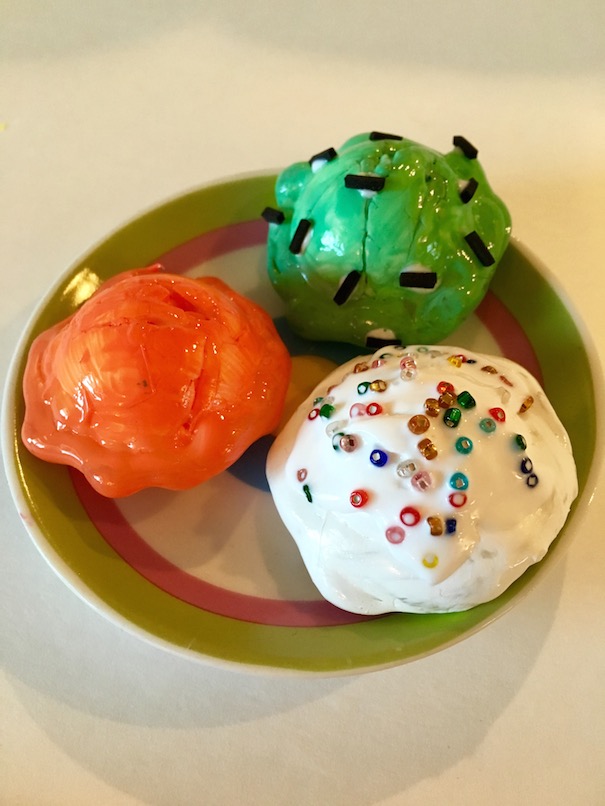
Glue on black craft foam pieces for mint chocolate chips, or seed beads for sprinkles.
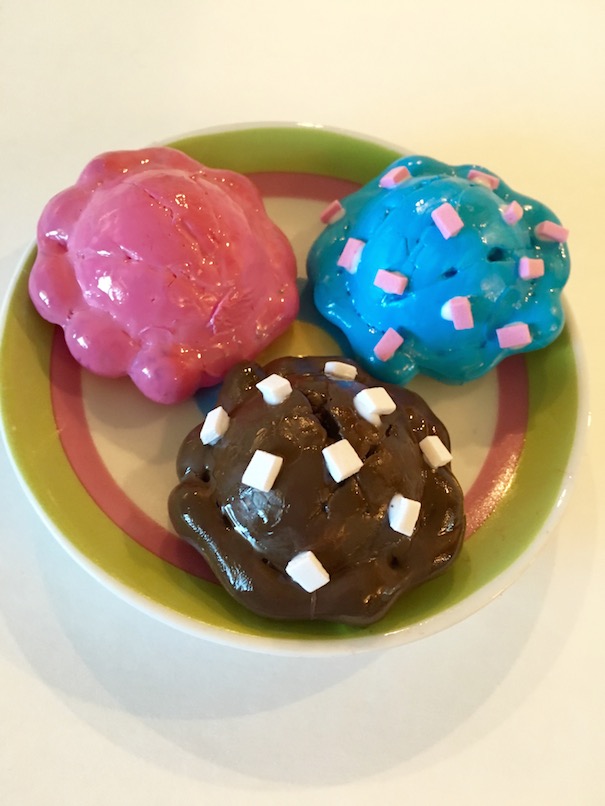
Glue on pink craft foam pieces for bubblegum, or white craft foam pieces for marshmallow rocky road.
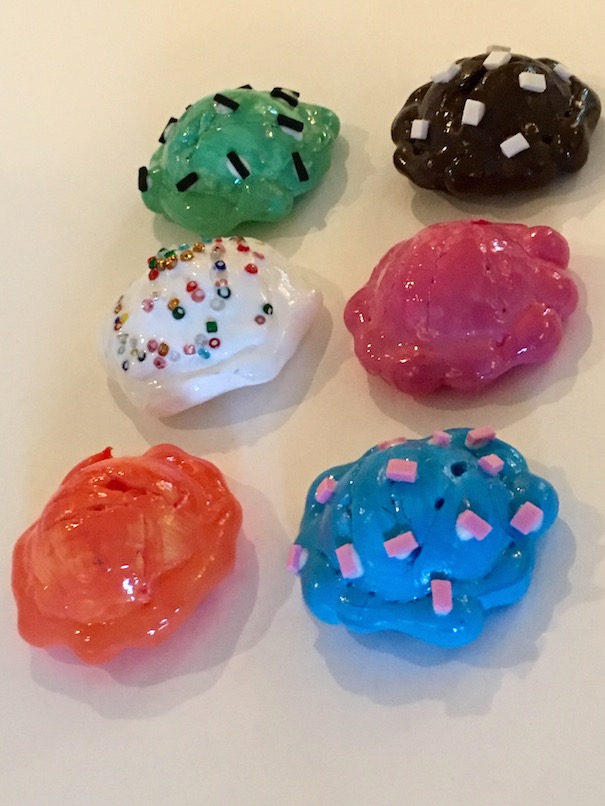
Serious cuteness overload! 🙂 ❤
I hope you’ve enjoyed making doll desserts with us today!!
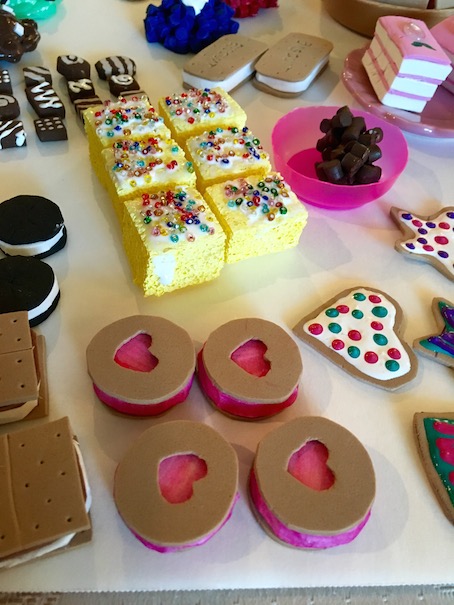
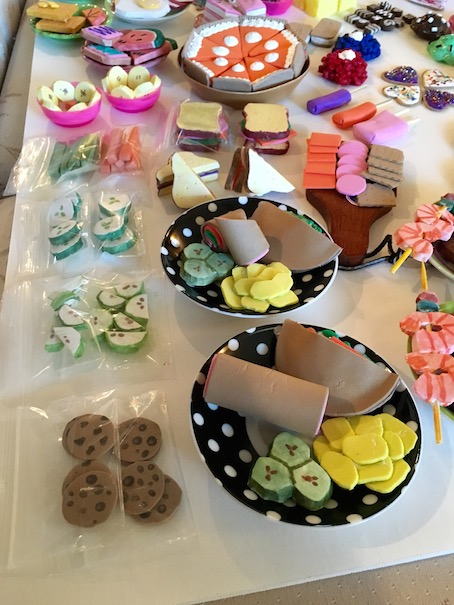
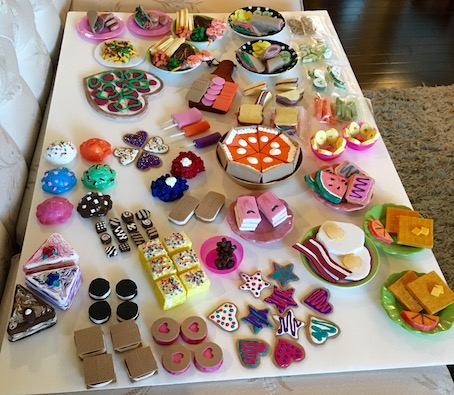
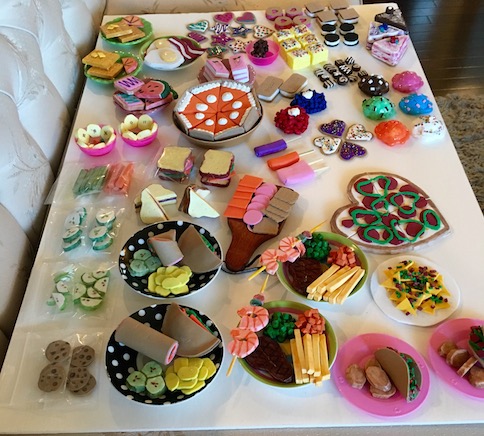
Now let’s see everything we made this week all laid out, shall we?

Haha! Just look at all of that doll food loveliness! Who says that you have to spend an arm and a leg for your dolls to eat well? 🙂
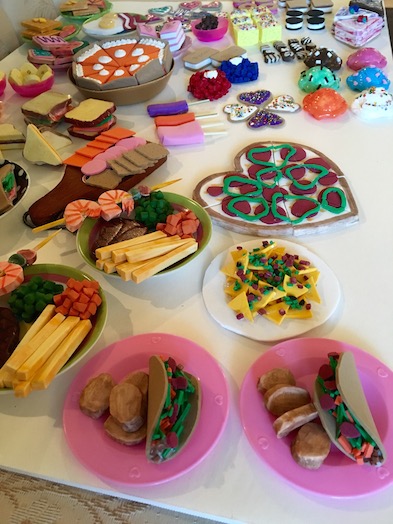
I hope that this inspires you to try your hand at making some food for your own dolls.
Thank you so much for cooking with us!
Okay, I just can’t get over the cuteness! ❤
Love! ❤
If you missed it this week, here are our other food tutorials:
Now go out there, and have a crafty kind of day! 🙂
Leave a comment below!
❤ ❤ ❤

Wow! Look at all that food. Nicely done!
LikeLiked by 1 person
Thank you! Yup, we’ve been busy! LoL! 🙂
LikeLike
AHHH!!! LOVE LOVE LOVE!!!!!!!!!!!!!!!!!!!!!!!!!!! Thank you so much!!!!!!
LikeLiked by 1 person
You’re so welcome! I just thought it would be nice to have a whole lot of doll food DIY all in one place. 🙂
LikeLike