

Hi guys, and welcome back to our blog! Today we have a very fun tutorial on how to make historical doll, Nanea’s lunch! CUTE!
This also gives me the opportunity to introduce a new series that I want to start showcasing on this blog.
I have a confession to make. Our historical dolls are often neglected. Isn’t that sad? 😭 That’s not to say that we haven’t done a whole lot of crafting for our historical dolls in the past, and in fact, many of our historical crafts, we still have to this day.
We have crafted everything from Josefina’s oven to Julie’s egg chair, and so much more in between. You can check it all out HERE.
But from now on, I want to be more accountable to our historicals. So I have decided to give them their own series.
All of this in hopes that I can revamp this blog into something that has more regular programming. Up until now, a lot of our content has been pretty random. I would like to change that.
This isn’t to say that we will no longer have modern doll crafts. We still want to continue our doll home decor series as well. This is just adding in more regular content to the existing randomness.
Without further ado, let’s move on to today’s craft!
WHAT YOU NEED
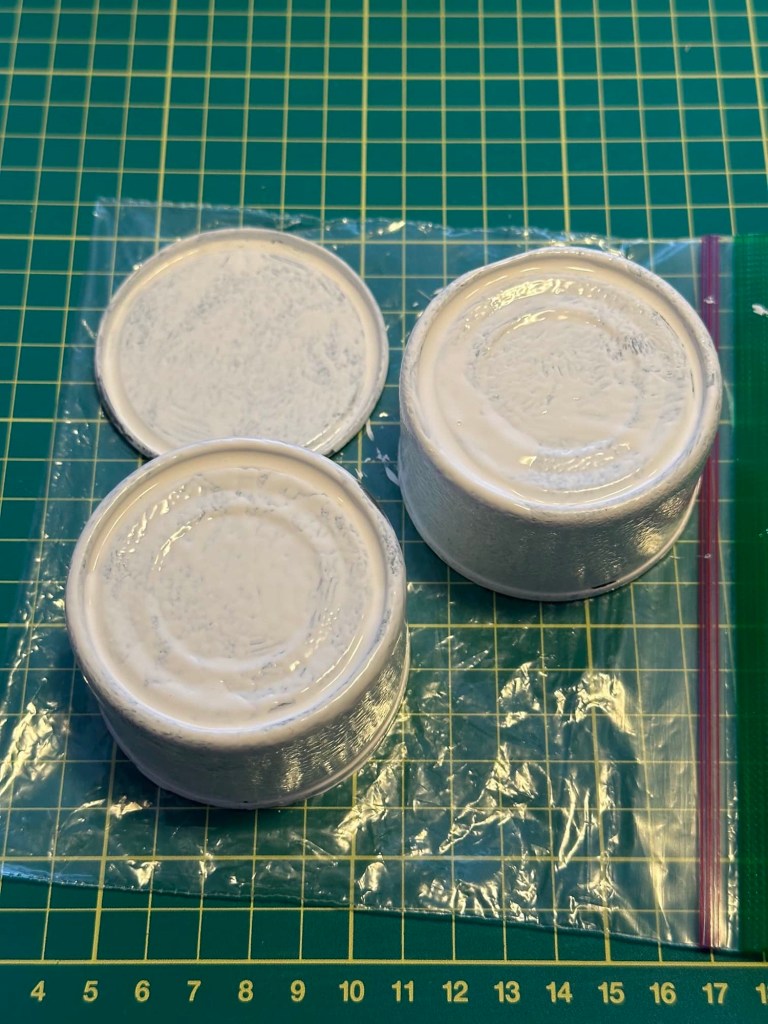
Two mini tuna cans
Frozen juice can lid
Paint and primer or spray paint
Stickers (optional)
Coat hanger
Button or wooden bead
Hammer and nail (I used an awl punch)
Craft varnish or other sealant
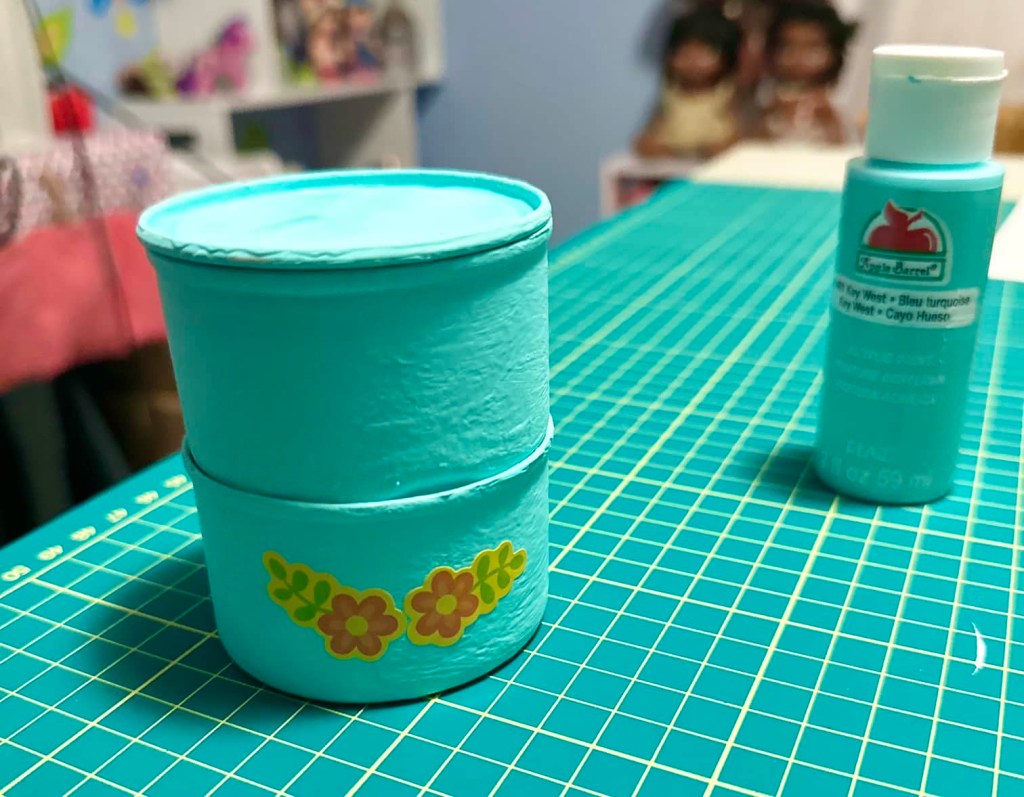
First, we will make the lunch container. For this we will use the mini tuna cans. Be sure they are all cleaned out and the labels removed.

Paint or spray paint the cans. I used a primer first to help the paint adhere.
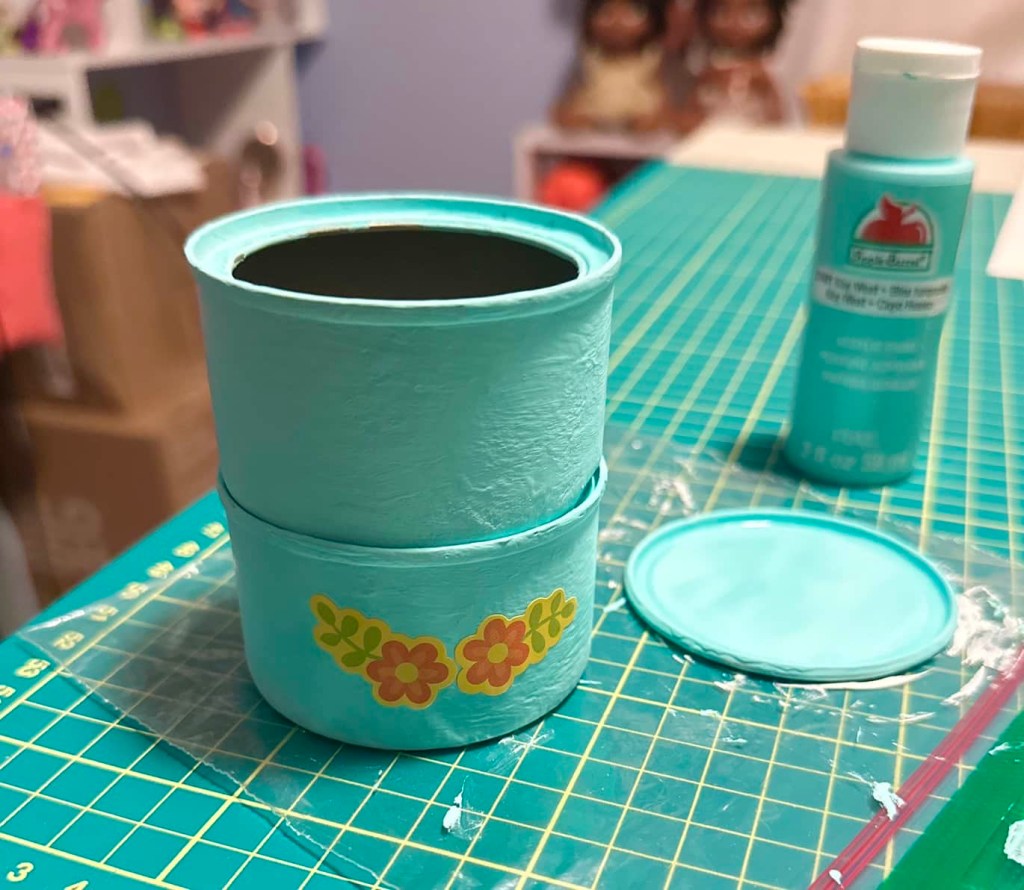
Next, I used this turquoise shade of craft paint from Apple Barrel to paint the lunch container.
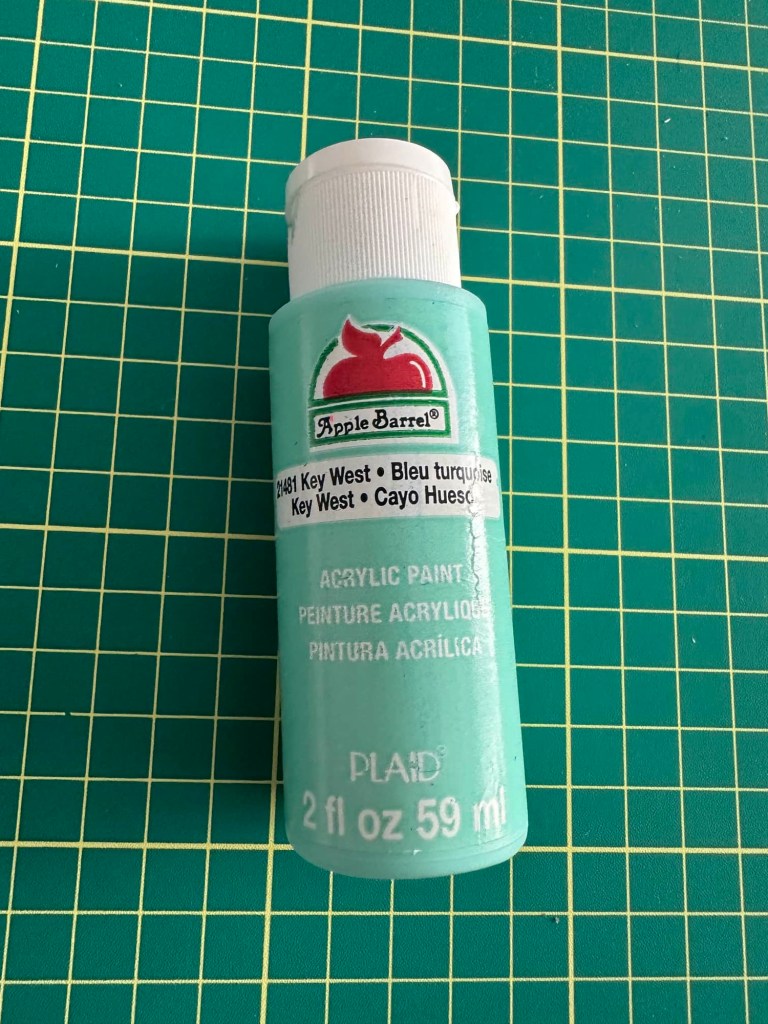
It’s not exact, but I think it is pretty close.

The next part is entirely up to you. You can either paint flowers on by hand or use a stencil. I chose to use these flower stickers I had on hand.
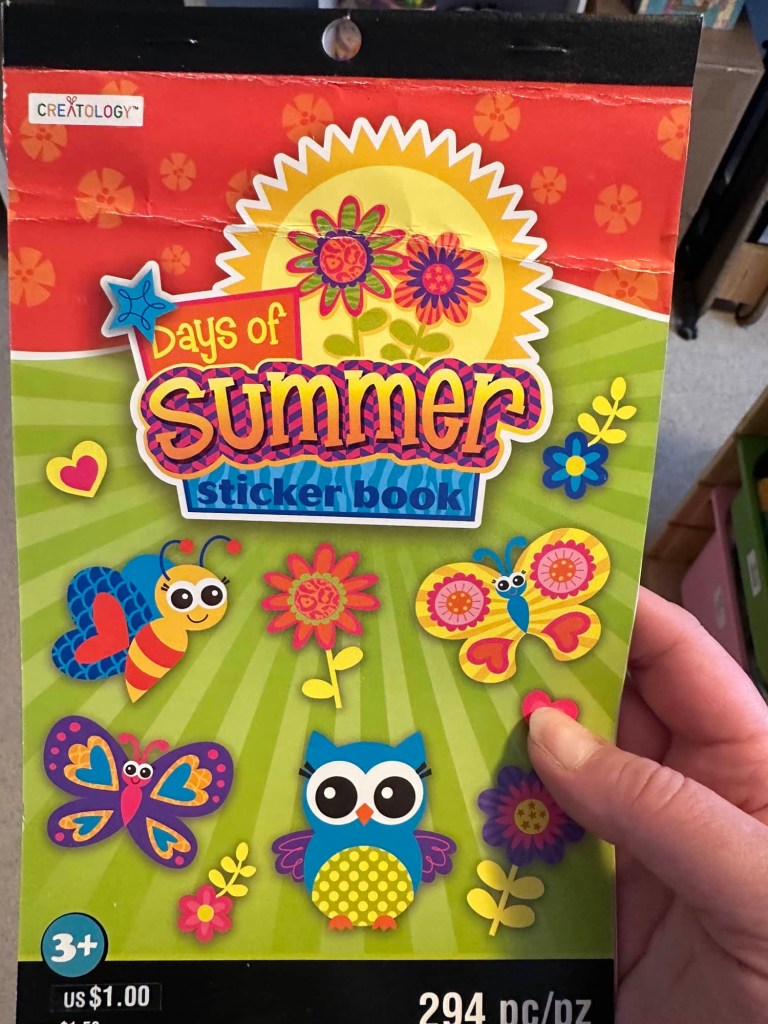
At first, I put two on either side of the bottom lunch compartment. But then later I decided to add more stickers to the top. Like I said, it is entirely up to you how you would like to design your lunch container.
I actually own the real AG Nanea’s Lunch Set already, so I may make another set in a fuschia colour with other stickers to make it completely different. Maybe Nanea has a best friend who also needs a lunch bucket. 😊
For now though, I think it looks really cute. ❤️
Next, let’s make a handle. We got the brilliant idea to use a coat hanger for the handle from our friends over at Always Dolls. If you haven’t had a chance, be sure to check out and subscribe to their amazing channel!

Use wire cutters to cut the coat hanger to size. Parental assistance required.
Next, bend the wire coat hanger as shown to fit your lunch pail.

Take your hammer and nail or leather awl and punch a hole in either side of the bottom tuna can.
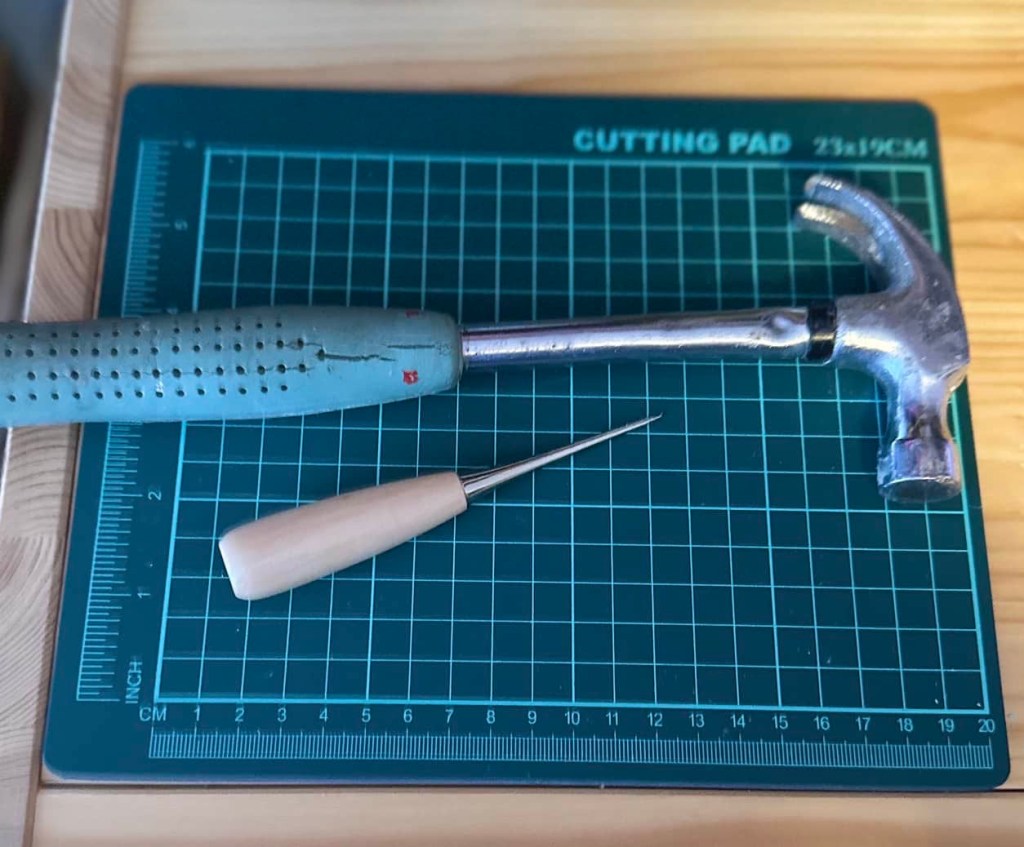
Be sure they are even.


Add your handle by inserting the coat hanger in the holes.
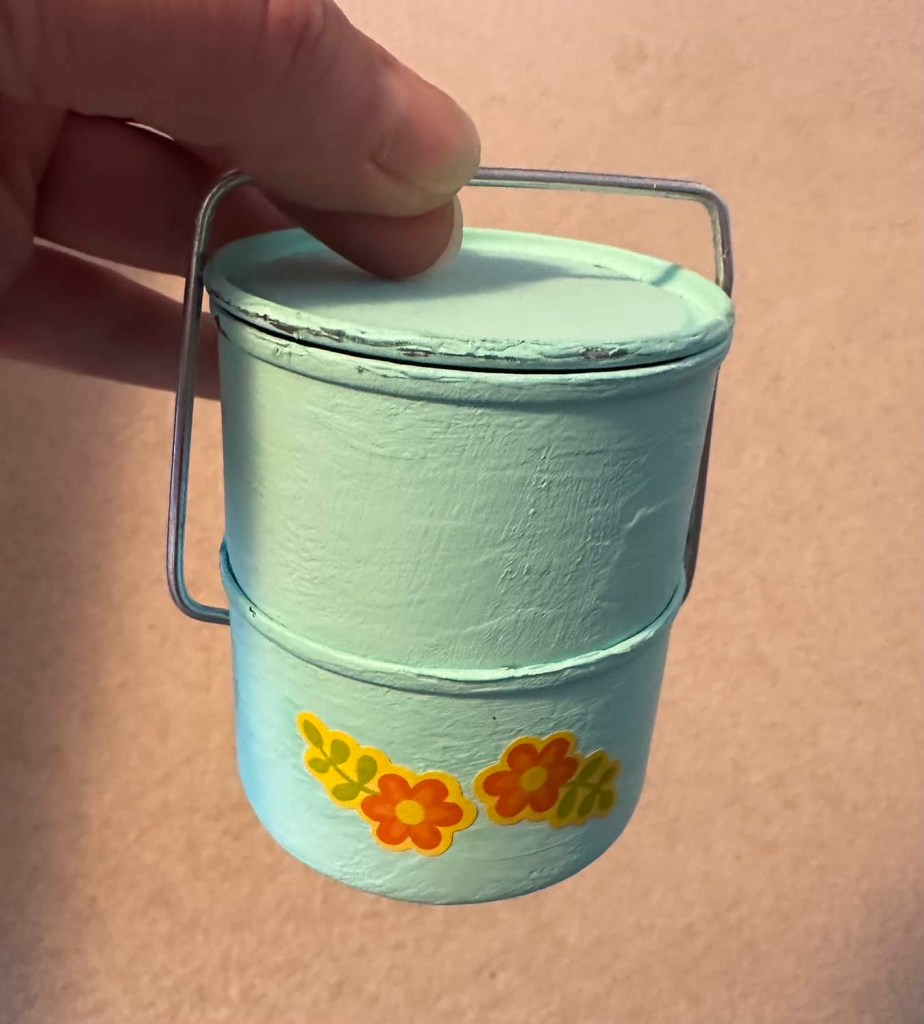
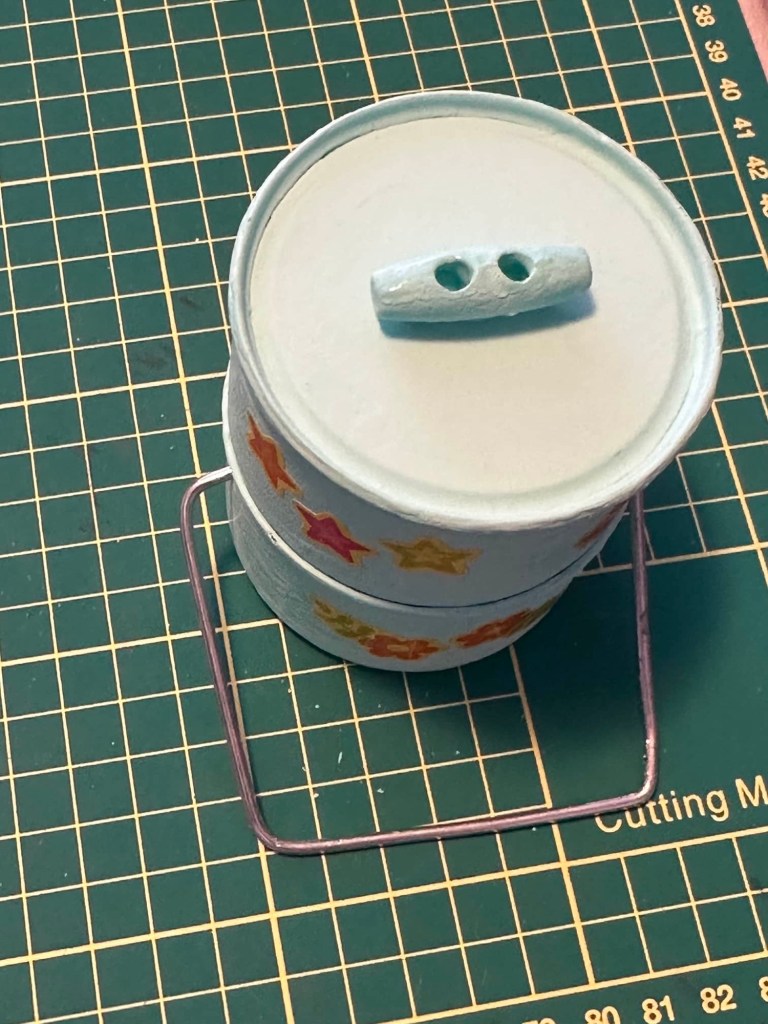
Now paint your button or wood bead to match your lunch pail and hot glue it to the lid.
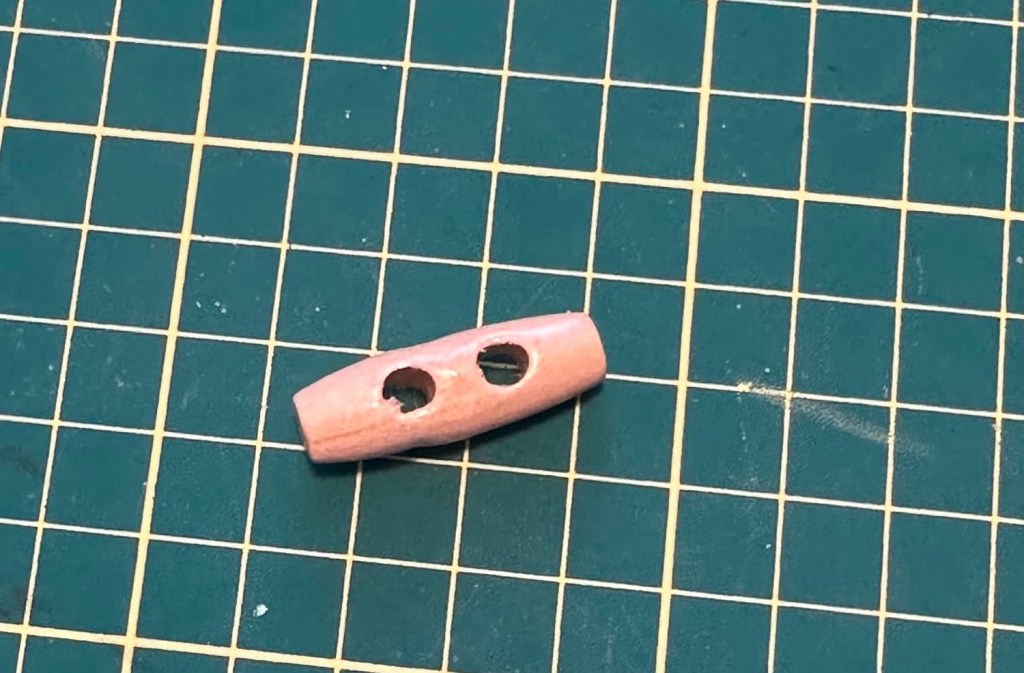
We used this wooden bead that we had on hand but you can use whatever you want.
And you’re done!

We were noticing that the parts of the lunch box like where it stacked and where the handle moved against was causing some of the paint to wear a little, so if you wanted you could add a coat of sealant over the entire thing.
Here it is beside the AG version.
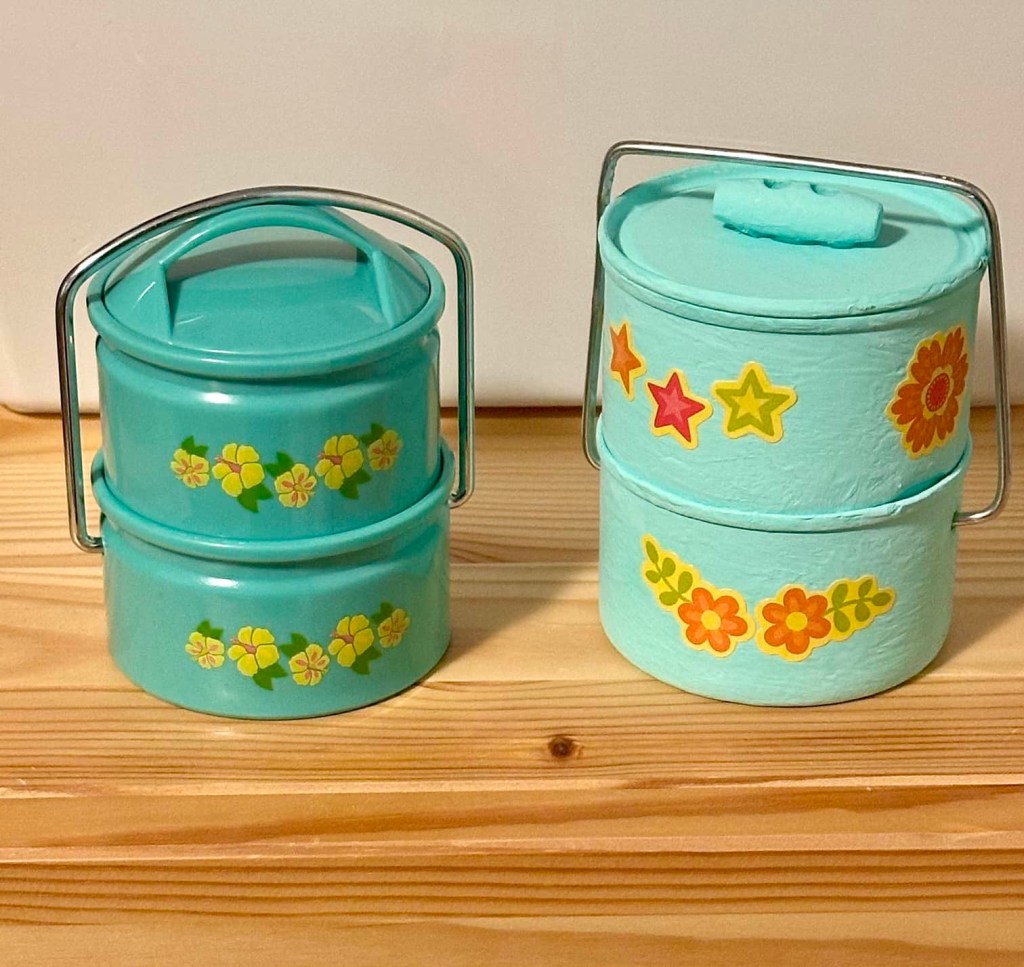
Love!! ❤️
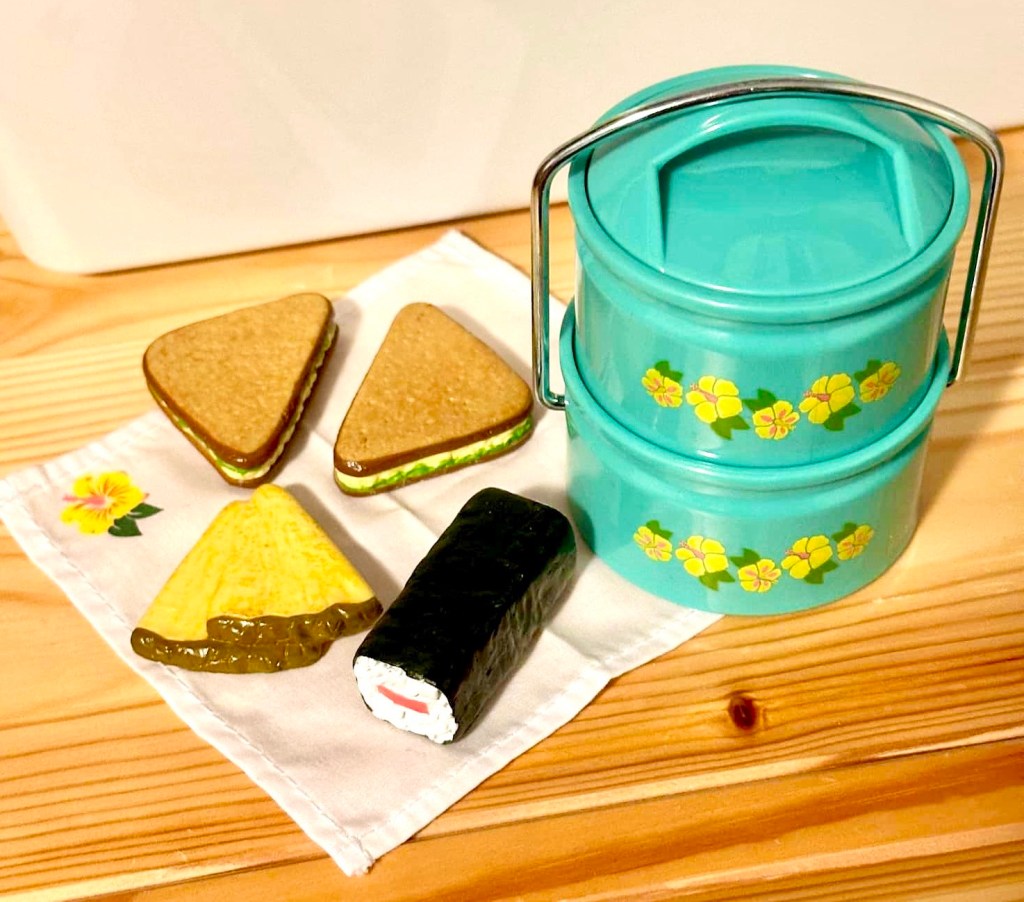
Okay, now let’s make some lunch.
WHAT YOU NEED
Sanding block
Exacto blade/scissors
White puffy paint
Glossy/metallic black paint
Other acrylic craft paints
Small detail paintbrush
White cotton fabric
Sewing machine or needle/thread
Fabric scissors
I have made sushi for the dolls before a few times. You can check it out here and here but I thought I would try again today. Using an exacto blade, cut a piece from the sanding block. Mine is about 4cm by 1.5cm by 1.5cm.
Squeeze white puffy paint to fully cover either end of the sushi roll for the rice.
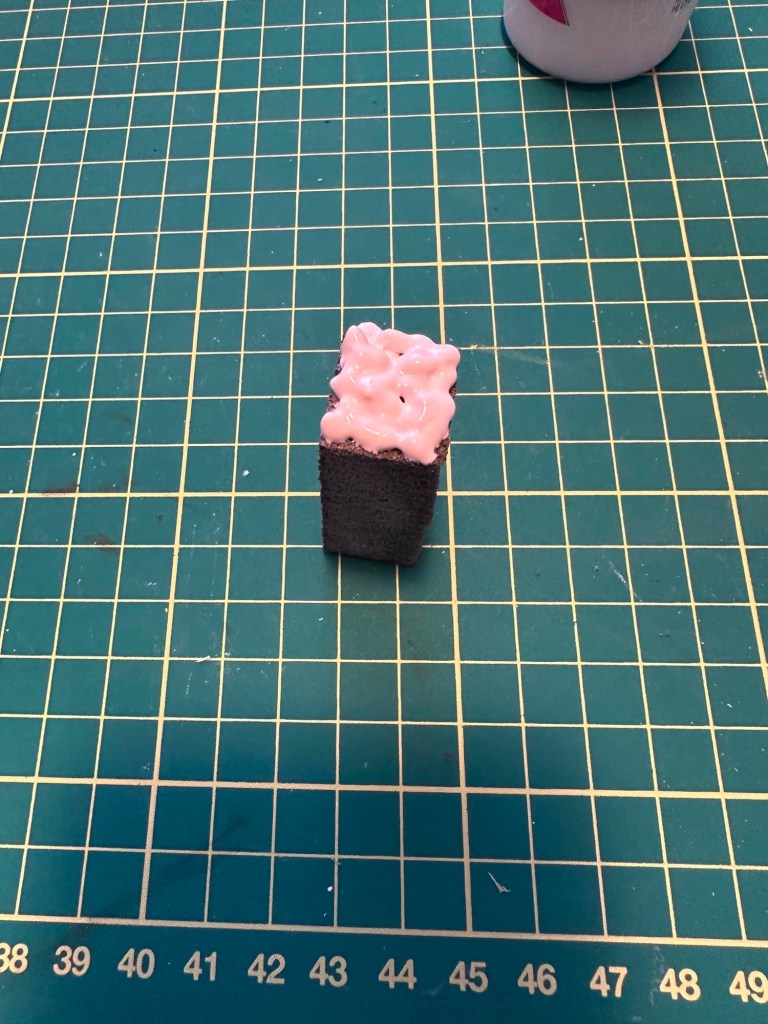
I just used a toothpick to hold it up while it dried.

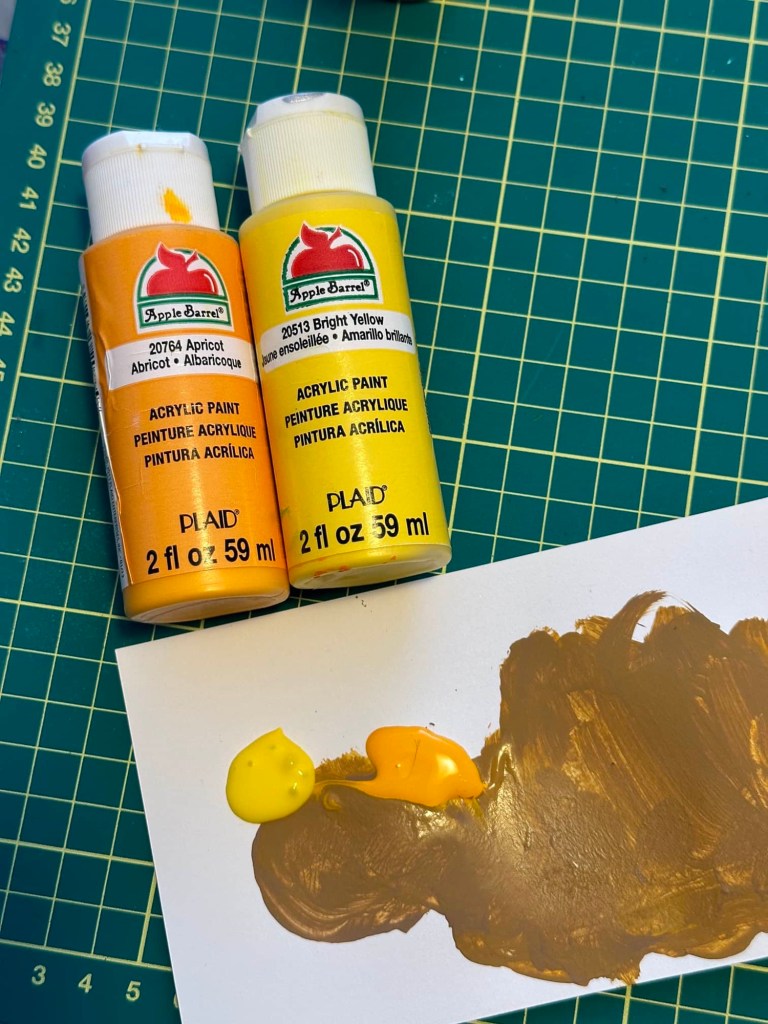
Paint an orange strip in the middle and let it dry.

Next, paint the black seaweed wrap. I used metallic black or glossy black paint for this. You could also use a craft varnish for a more glossy finish. This turned out really cute.

I like using the sanding block for food projects because it is quite dense which makes for a fairly firm and solid result, especially after it is painted. Just be advised that it may dull your scissors a bit when cutting.
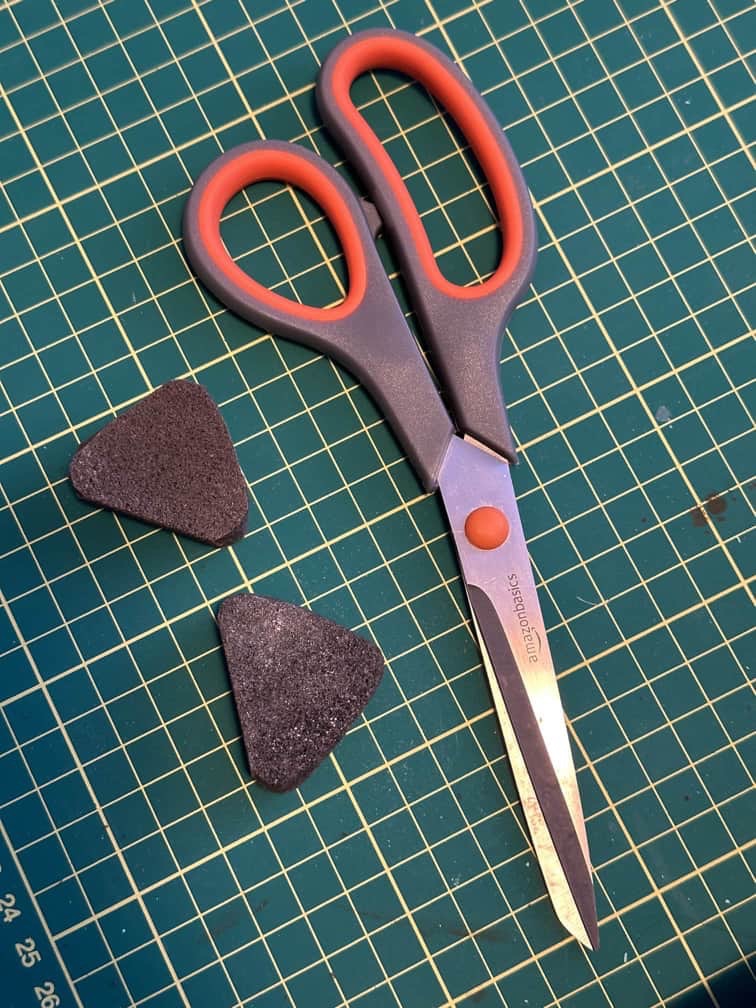
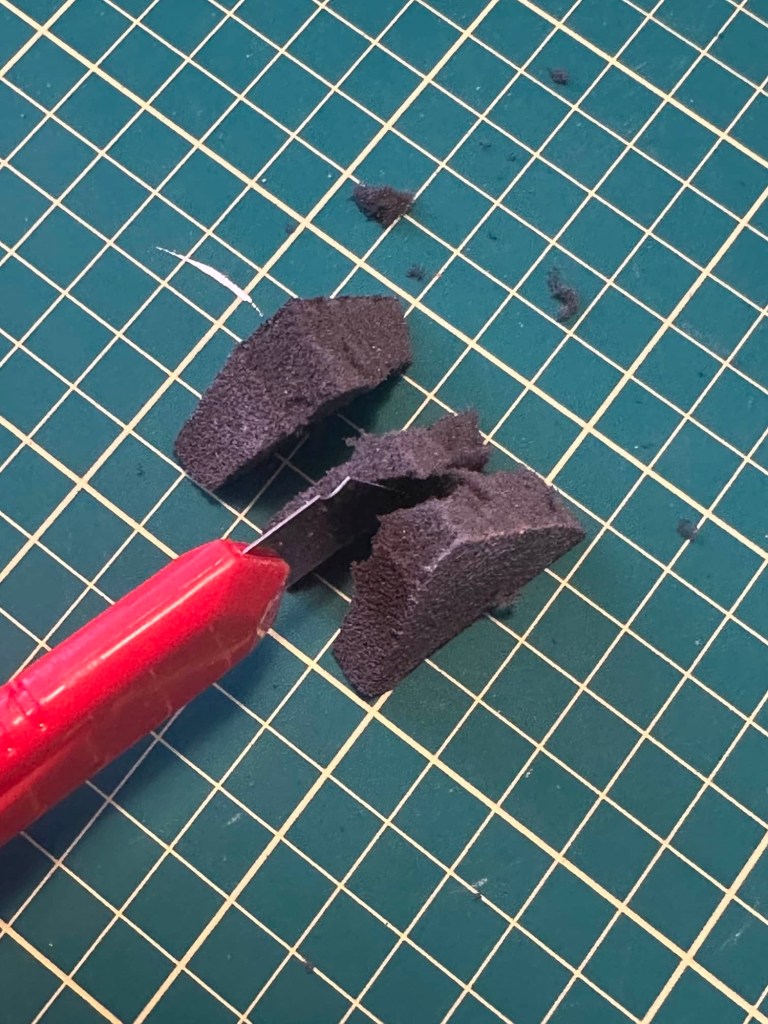
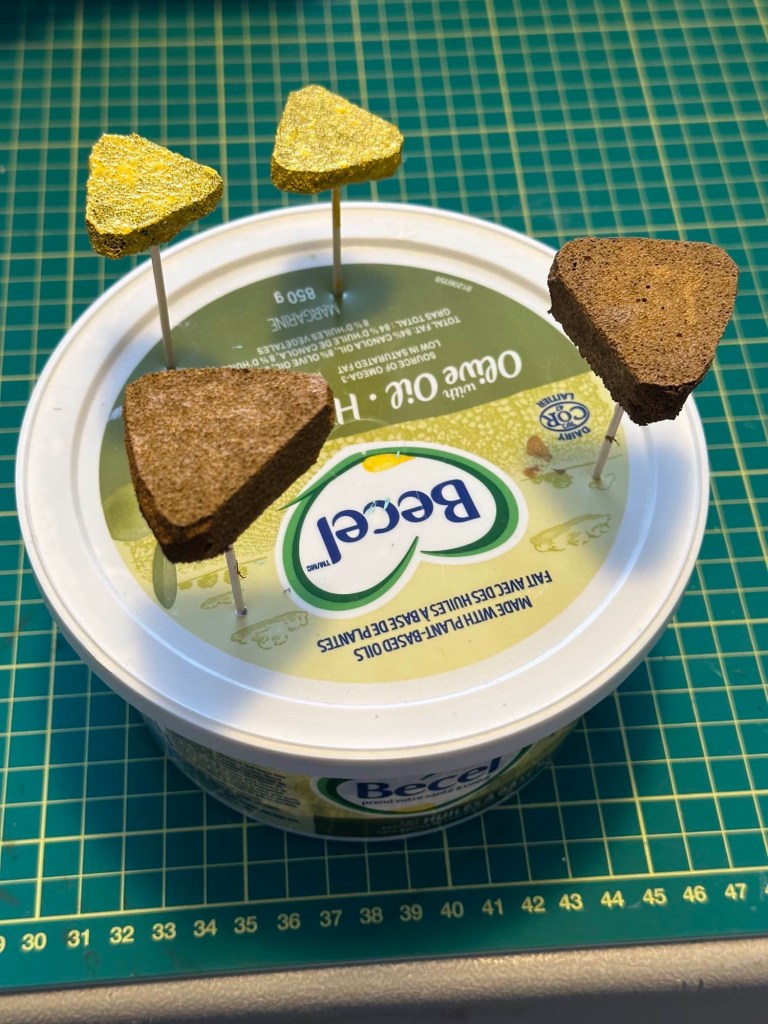
To make the sandwiches, use an exacto blade to cut a triangle shape from the sanding block. These are about 4cm base and 3.5cm in height. Don’t worry about perfection at this point. You can shape the sandwiches later with a pair of scissors.

Cut the triangle in half through the center of the sanding block to make two sandwiches. Again it doesn’t have to be perfect.

Now use scissors to begin trimming and shaping the sandwiches.

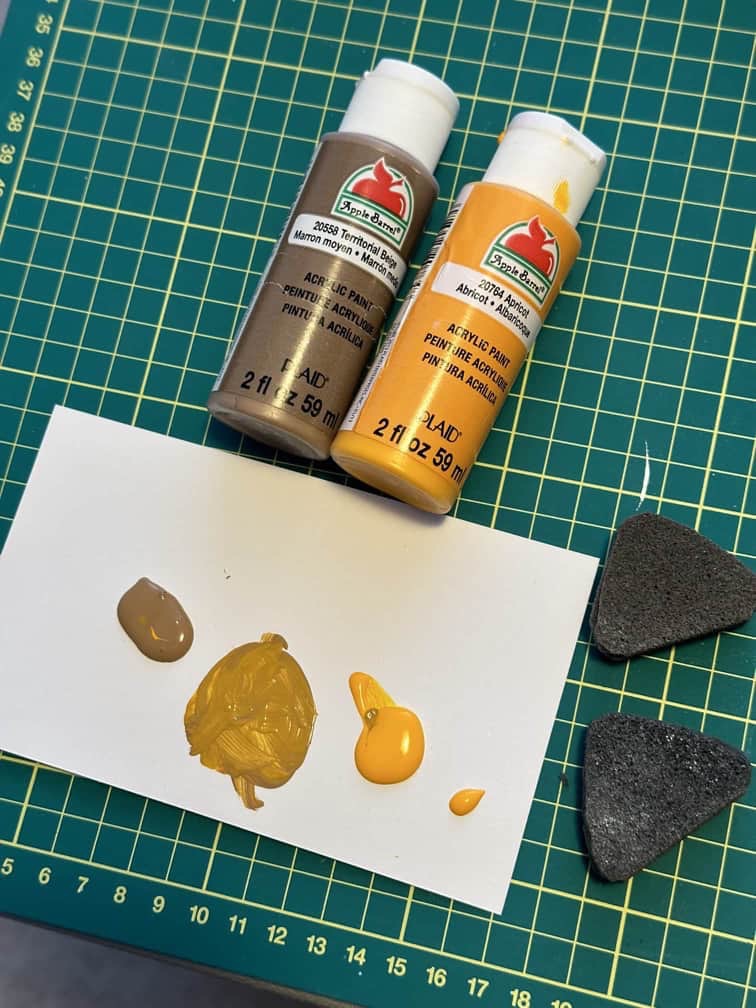
Paint your sandwiches and stick on top of toothpicks to dry. I used a mix of these colours.
Other people crafting:
Me crafting:

Yes, this is when I spilled the toothpicks all over the floor. Believe me when I say, I am trudging along in the crafting trenches just the same as everyone else. No magical filters or perfect crafting going on over here. 😂
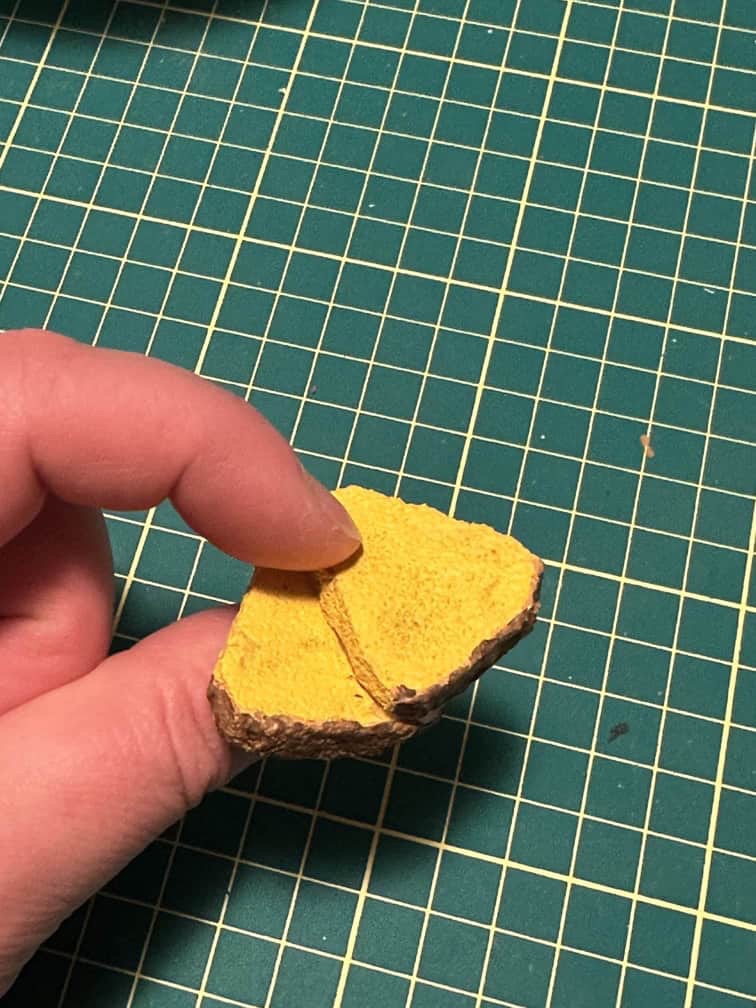
Now cut a triangle shape in the sanding block for your pineapple. Mine are about 3cm base and 3.5cm in height.

Again, perfection is not necessary.
Cut the triangle down the middle to make two triangles. These should be much thinner than the sandwiches.
Now trim and shape the same as before.

I mixed these colours to paint my pineapples.
Then I stuck them on toothpicks to dry. I ended up using two coats of paint for better coverage on these.
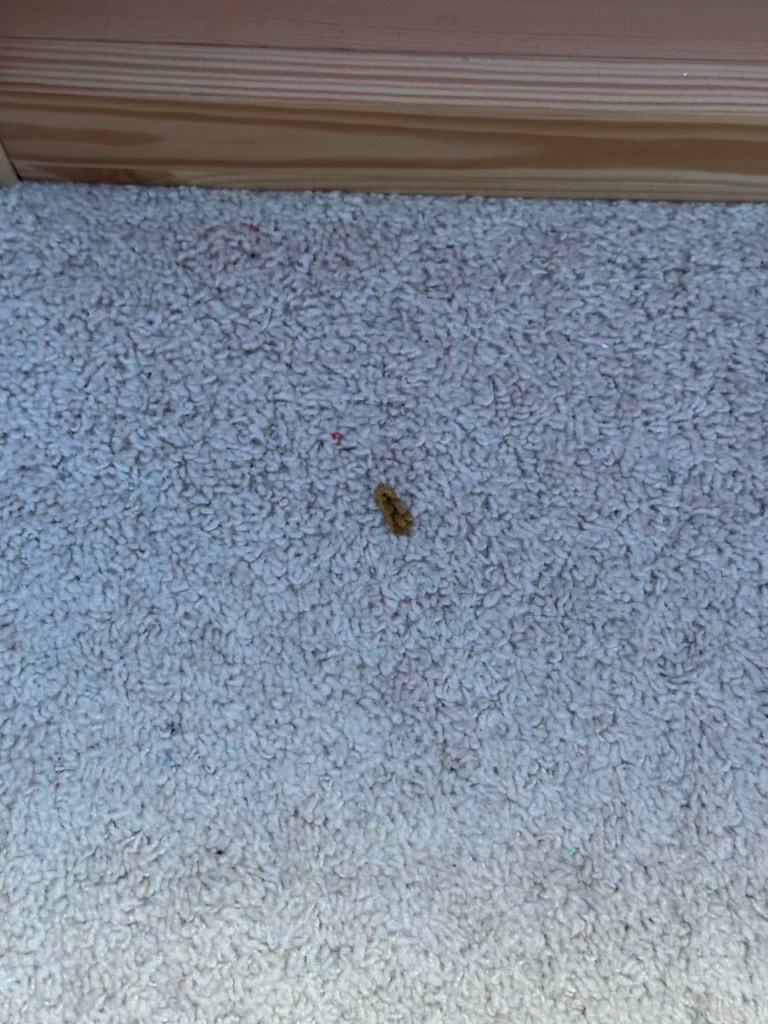
And here’s where I dropped my paintbrush on the carpet. 🤦🏻♀️
Do I want to quit sometimes? Yes.
Do I quit? Nope, not today. 😂😭
Little Miss also has laryngitis at the moment, so it’s been a pretty yucky week. Even so, the show must go on!
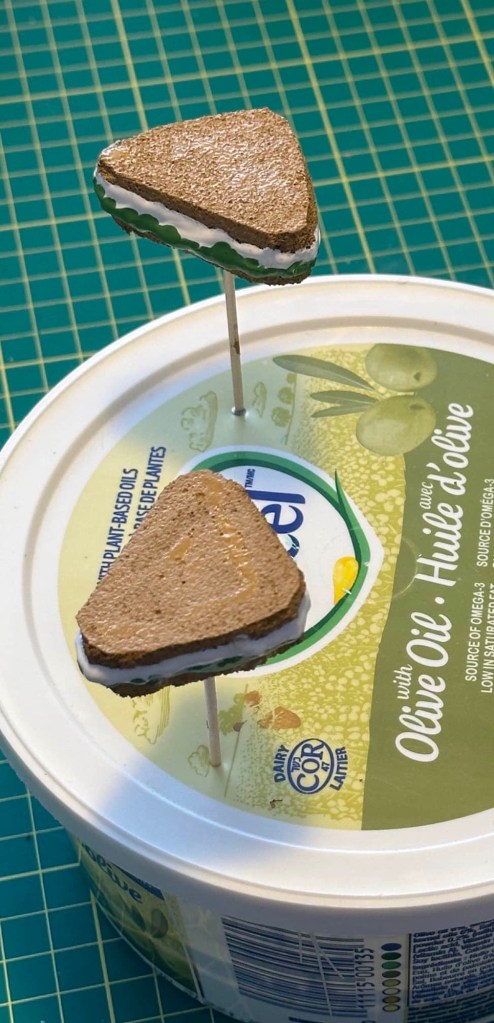
Add a strip of white puffy paint around the middle of the sandwiches for filling. Don’t add too much. I ended up adding a little and then using my toothpick to spread it. Let it dry. Then add a bit of green paint for the lettuce.
Next, mix a bit of dark brown paint with white puffy paint to paint the rind of the pineapples. I ended up using a lighter yellow to do the second coat on these because they were turning out too orange.
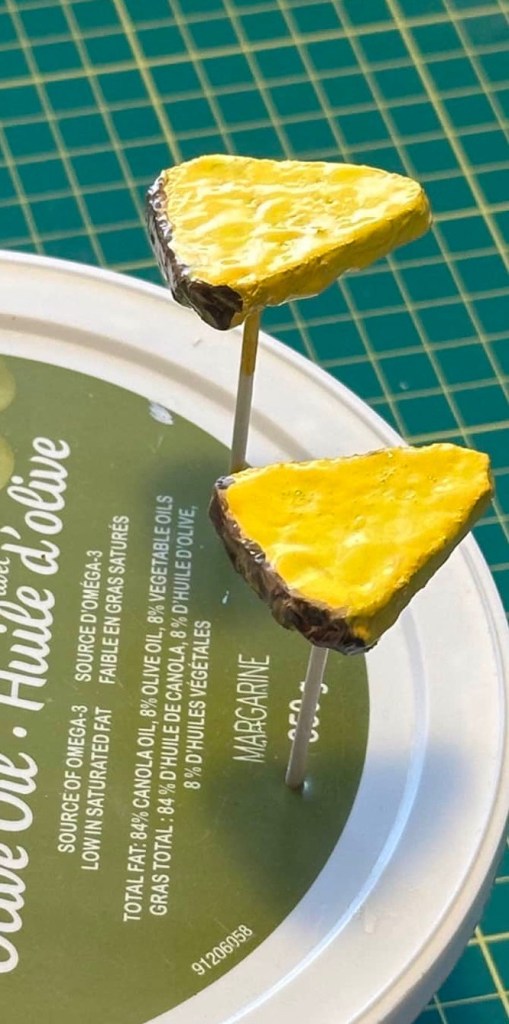
Let dry completely.
Using hot glue, secure the two pineapple pieces together in an overlap as shown.
The last thing to make is the napkin.
Cut a square of the white cotton fabric. Mine is 5.5” all sides. Hem the edges using a 1/8” hem. You can use a sewing machine or needle/thread for this.
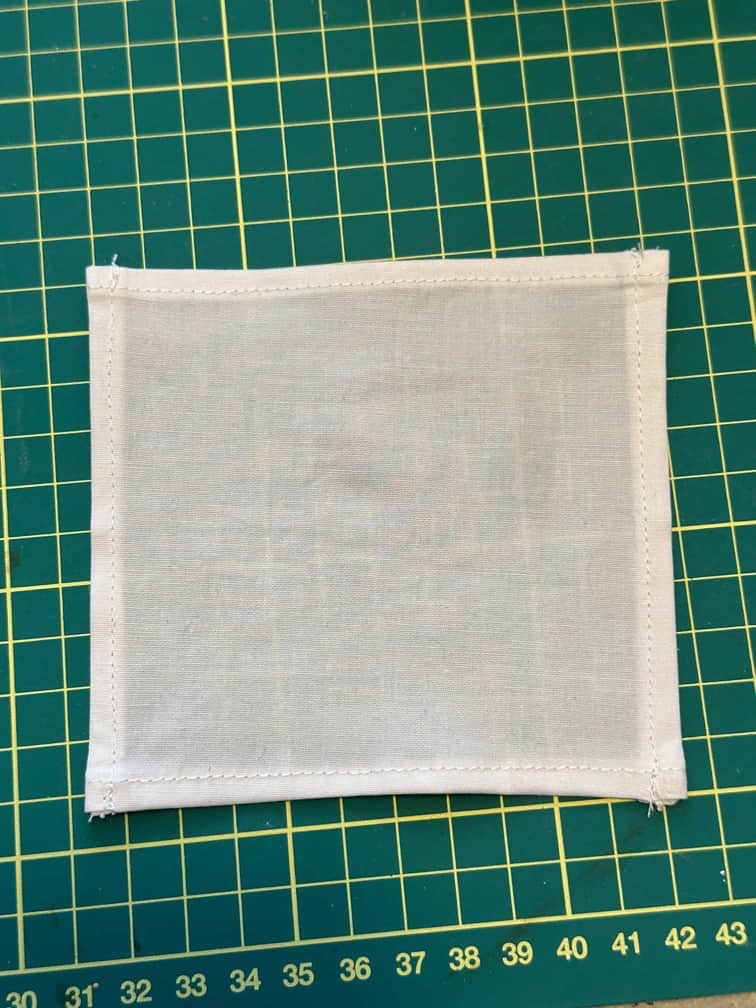
Use a bit of craft paint in whatever colour you like and a small detail paintbrush to add a flower. The napkin in the AG set has a yellow hibiscus flower, so I made my DIY one pink.

And you’re done!
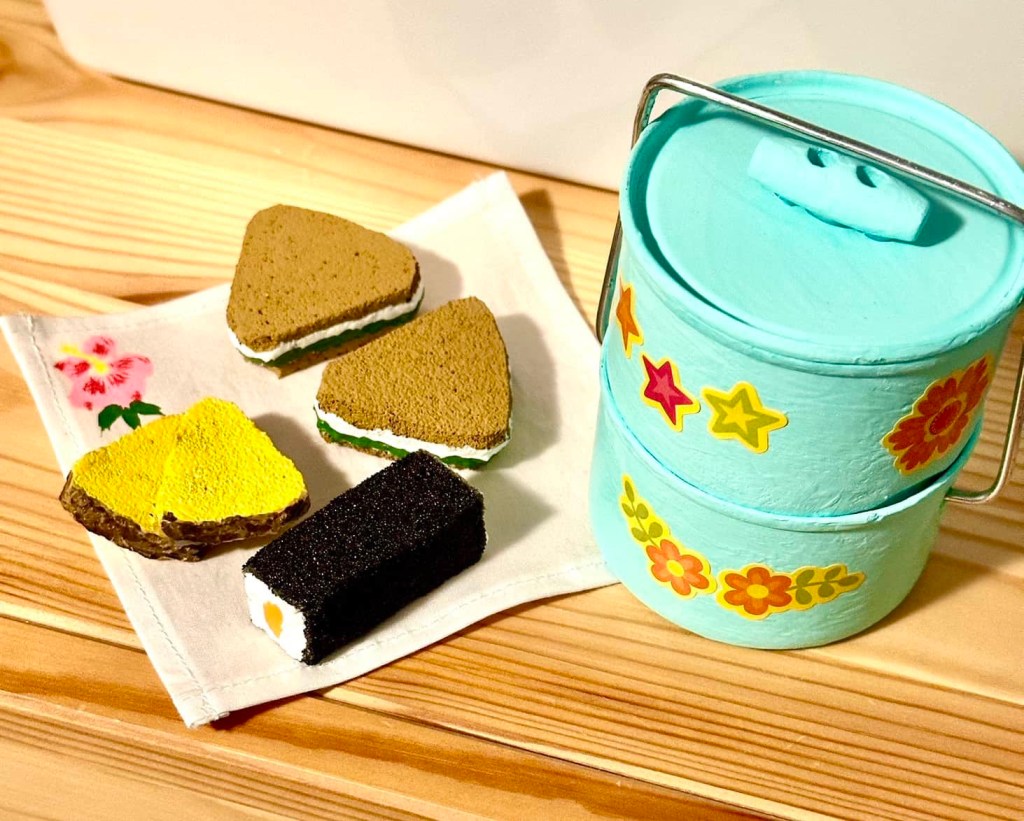
Here is my DIY Nanea’s Lunch set.

🥰
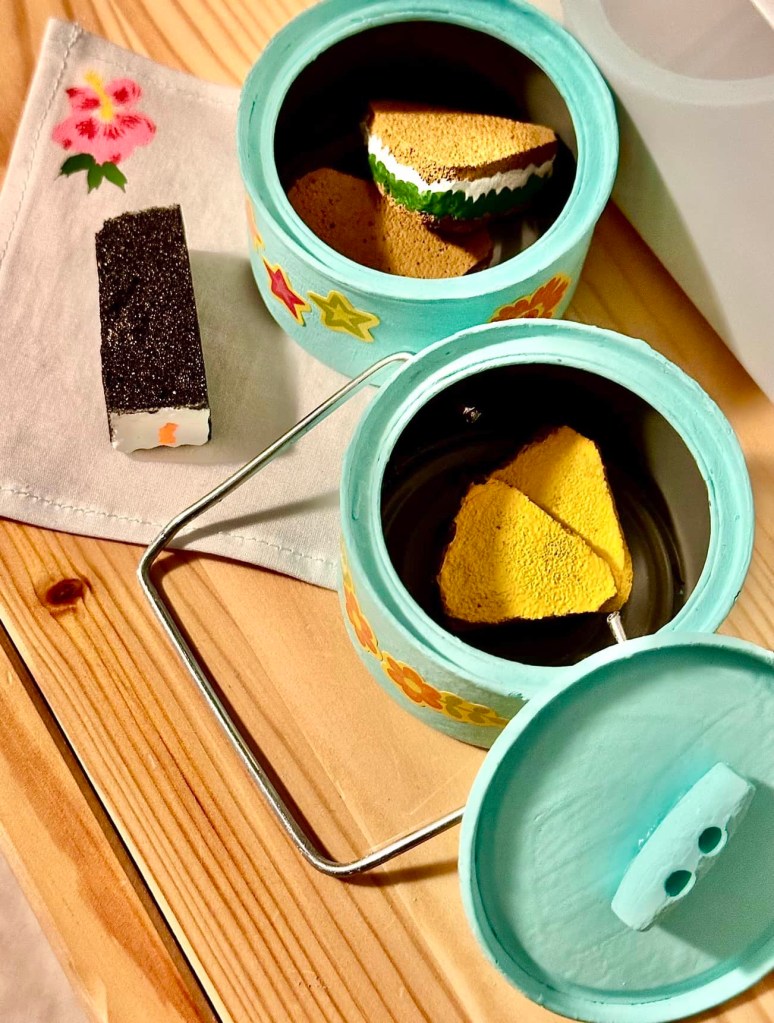
❤️❤️❤️
And here is the set from AG.
I hope you like it and I hope you enjoyed!! I have to admit I am kind of obsessed with the historical doll lunch sets. I don’t know why, but they are just too cute! I think that in this new series, I am going to have to try to craft many if not all of the historical lunch sets for our dolls.
Also, if you would like to see a real vintage 1940’s stackable lunchpail, here is one that I found online that I thought was super cute. 😍

Enjoy the rest of your day!
Leave a comment below!
❤️❤️❤️

I like your pink hibiscus napkin even better than the AG one!
LikeLiked by 1 person
Aw thank you! I wanted a different look. I think it turned out pretty good! 😊
LikeLike
Ginny, this project is amazing!!!! Everything looks great! How tall and wide are your cans? I wonder if Vienna sausage cans would work or be too tall or wide. Since American Girl ideas is no longer, do you have any print outs for the macadamia nuts ? I did make the canned Spam when they first posted. I am thrilled that you are going to craft more historical doll items as that is what I am most interested in, however, I do love the modern items that you crafted also! Keep up the good work!😊
LikeLiked by 1 person
Thank you so much! I am so glad you enjoyed! I don’t have the macadamia nut printable unfortunately. I was so sad to see that blog channel go dark. As for the tuna cans, they are 1.5” tall with a 2.5” diameter. I am looking forward to crafting more historical items! I am also looking forward to posting more regularly now that life has settled down. Stop by again soon!😊
LikeLike
please make the lunch sets for the other AG dolls.
LikeLiked by 1 person
I am definitely going to try! Lunch sets and historical doll beds are my favourite historical doll items. 😊
LikeLike
I really like everything about your Nanea’s lunch set. All of the pieces turned out perfectly, and I vividly remember lamenting my lunch pail looking less than pristine within just a few days of getting it! Also thank you so much for mentioning using a primer to help the finished paint look better. I often forget that step! I am also an Always Dolls fan, and appreciate you both for your great ideas and instructions. Thanks once again,
Terry in Colorado
LikeLiked by 1 person
Thank you so much! I love Always Dolls too! I have never had a lunch pail. We always came home for lunch. Primer is a must! It helps so much when painting smooth surfaces. I am so glad you dropped by! 😊
LikeLike