
 Hey guys! Do you ever have a doll clothing item in mind, but no matter where you look, you can’t find a pattern for it? Well, that’s what inspired me to design this Knit A-Line Skirt pattern! Soon after I designed it, someone mentioned to me that I should offer a tutorial of the pattern here on the blog, and I thought that was a great idea! ❤️Thanks Kathy!❤️ So here is the pattern! I hope you enjoy!
Although I’m not really fancy with downloads or printables, bear with me anyway, because this pattern is truly very simple. There are only two pattern pieces total. What?? Cool!
Here’s what you need:
Paper and pencil, ruler, graph paper
Knit fabric, thread, fabric scissors, pins, small piece of Velcro
Sewing machine (or you can sew by hand)
Okay, first and foremost let’s talk fabric, because this pattern will not turn out nice with just any type of knit. Don’t get me wrong, I love jersey knit and sweater knits and well, all knit fabrics really, but this pattern is for a specific kind of skirt, one that I had in mind, so only certain kinds of knit will do. Most importantly, I think, is that it must be a knit with a bit of stretch to it, but not a lot of stretch. You do not want lightweight really stretchy, flimsy knit fabrics for this pattern. Try to find a bit of a medium or heavier weight knit with just a bit of stretch in it. That said, you don’t want a super heavy knit or you will get buckling in the waistband like I did with the pink houndstooth knit version I made. You want a knit fabric that will hang nice and flat as one layer on its own and something that won’t get wrinkled up at the slightest movement, or appear clingy. Jersey knit is not a good choice for this pattern. Neither is t-shirt material.
A knit fabric with a little bit of Spandex is fine. A very lightweight sweatshirt fabric with some stretch in it would also work. Fancy knit could work too as well as velour, but again, not too heavy and not too stretchy/flimsy. There is a very fine line, I think. A nice lightweight tiny sequin knit would be really cute, too. Do not use woven fabrics with this pattern as the skirt won’t fit the doll. I found the less stretch, the tighter and smaller the finished skirt was. The more stretch, and the heavier the knit, the looser and bulkier the skirt became.
Let’s take a look at some of my doll skirt inspiration for this pattern, so that you can better see what I mean by choosing your fabrics wisely. Choosing fabric is probably the most important part of the entire process anyway.
Inspiration time!!
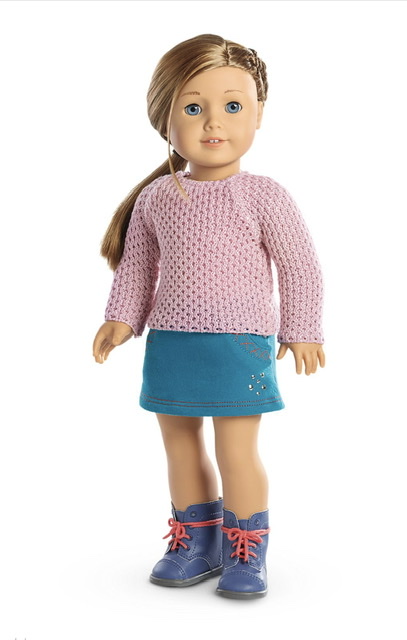
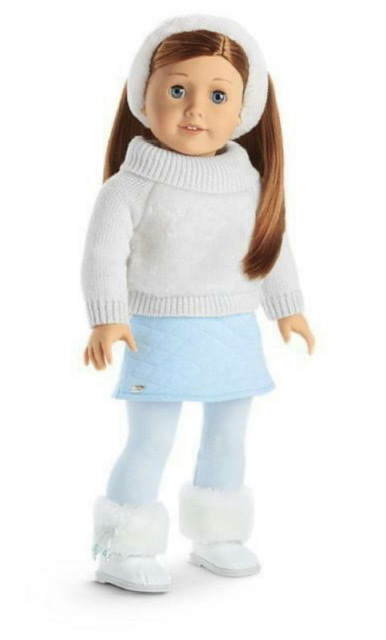
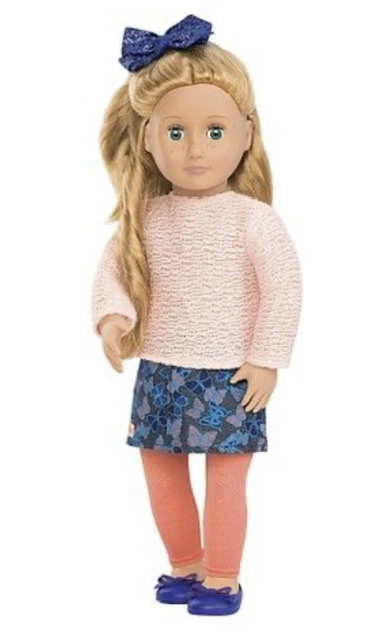

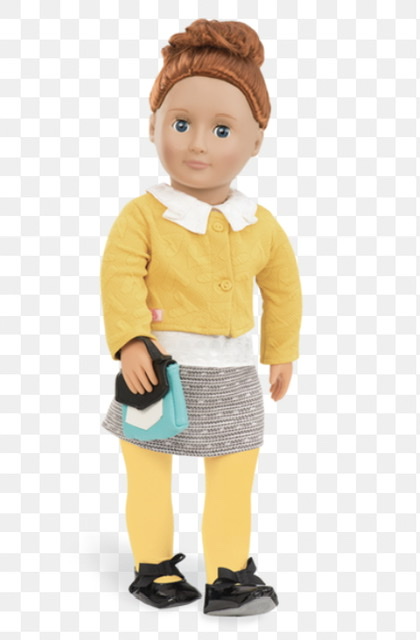 As you can see there are lots of different fabric choices to be had for this Knit A-Line Skirt.
Now, let’s make our pattern! Using your graph paper and a pencil, sketch your pattern as shown in the photo below.
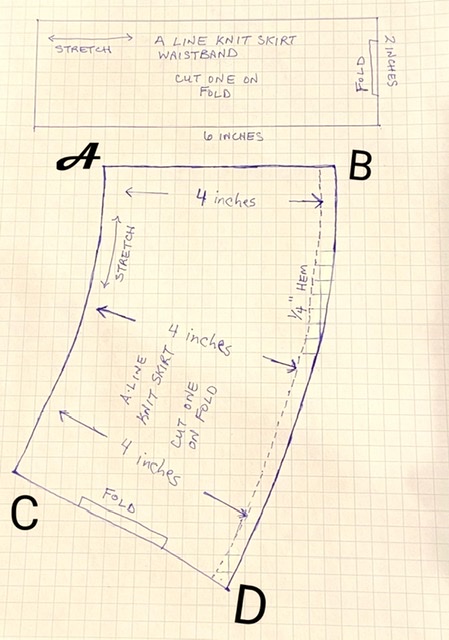 Count all the grid squares, be aware of the measurements especially all the way along that skirt curve, and use your ruler to be sure your lines are straight.
First, mark the corner points of the skirt ABCD by counting the grid squares. Next, connect points A-B and points C-D. Be absolutely certain that line AB and line CD are both 4 inches long. Create the curves by connecting points A-C and points B-D. Be sure to measure and mark all the way along the curve at 4 inches. It doesn’t have to be super perfect as mine clearly isn’t. If it helps, the grid squares in the photo show where to draw the curves.
For the skirt waistband, simply use your ruler to draw a 2 inch by 6 inch rectangle. Be sure to include all pattern markings such as FOLD, STRETCH LINE, and HEM.
Once you have finished drawing it, you can cut out the pattern pieces. Yay!! Time to get to work!
Before creating this pattern tutorial, I had already made four of these little skirts. 
 They are all completely different depending on the fabric I used. So I was excited to make another. This time I chose a lightweight sweatshirt material upcycled from a thrift store find.
  This material has a lot of sparkle that I hoped would give my skirt some pizzazz.
  Here you can kind of see the thickness of the material.
Alright! Let’s get started!! First lay out your pattern pieces so the stretch of your material matches the direction of the stretch line on your pattern. Pin the pattern pieces to your fabric on the fold. 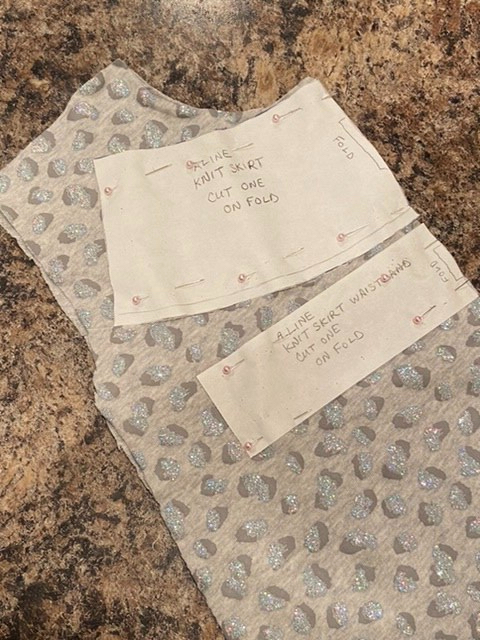 I just cut all the seams off the thrift store shirt to reduce bulk. Cut out your pieces, one of each. You should have this:
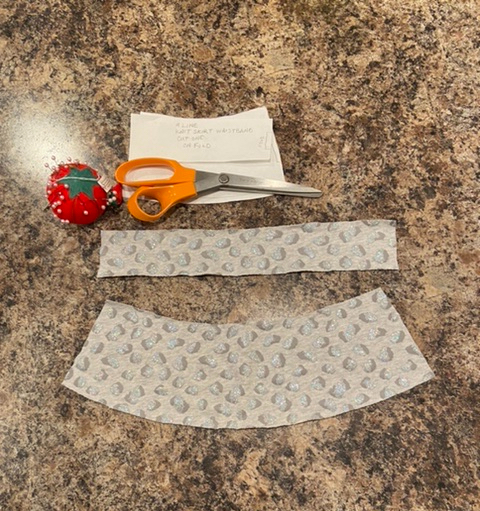 Fold the waistband in half lengthwise. If your material can be pressed, do that. My material had glitter glued on it that I feared might melt or go crispy under an iron so I steered clear. Instead, I just pinned mine in half.
  Pin the waistband to the skirt, raw edges together as shown. With knit fabric, I always pin both sides, then stretch to find the middle, and then continue to stretch evenly as you pin. This prevents the fabric from being unevenly stretched as it is sewn which causes puckering and warping.
 Pin both ends.
  Gently stretch to find the middle. Then finish pinning. Stitch the waistband to the skirt all the way along the top using a 1/4 inch seam.
 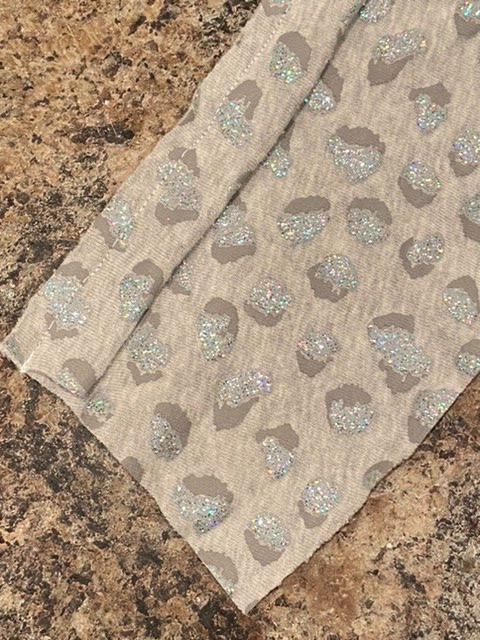 If your knit fabric will fray, serge or zig zag the top edge. My knit fabric will not fray, so I skipped that part. Press seam toward waistband. Again, I could not iron my fabric so instead, I just pressed the seam with my fingers as best I could. Topstitch the seam in place.
 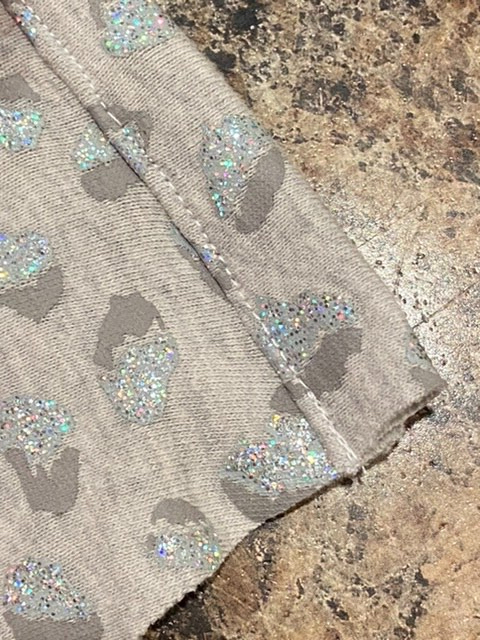 Front.
  Back.
Back.
To hem the skirt, serge or zig zag the bottom edge. Then press a 1/4 inch hem. I didn’t need to zig zag my edge. I also couldn’t iron the hem so I just pinned it in place. I do have clip pins designed for unruly knit fabric and I highly recommend them, but I wanted to show that it can be done without. 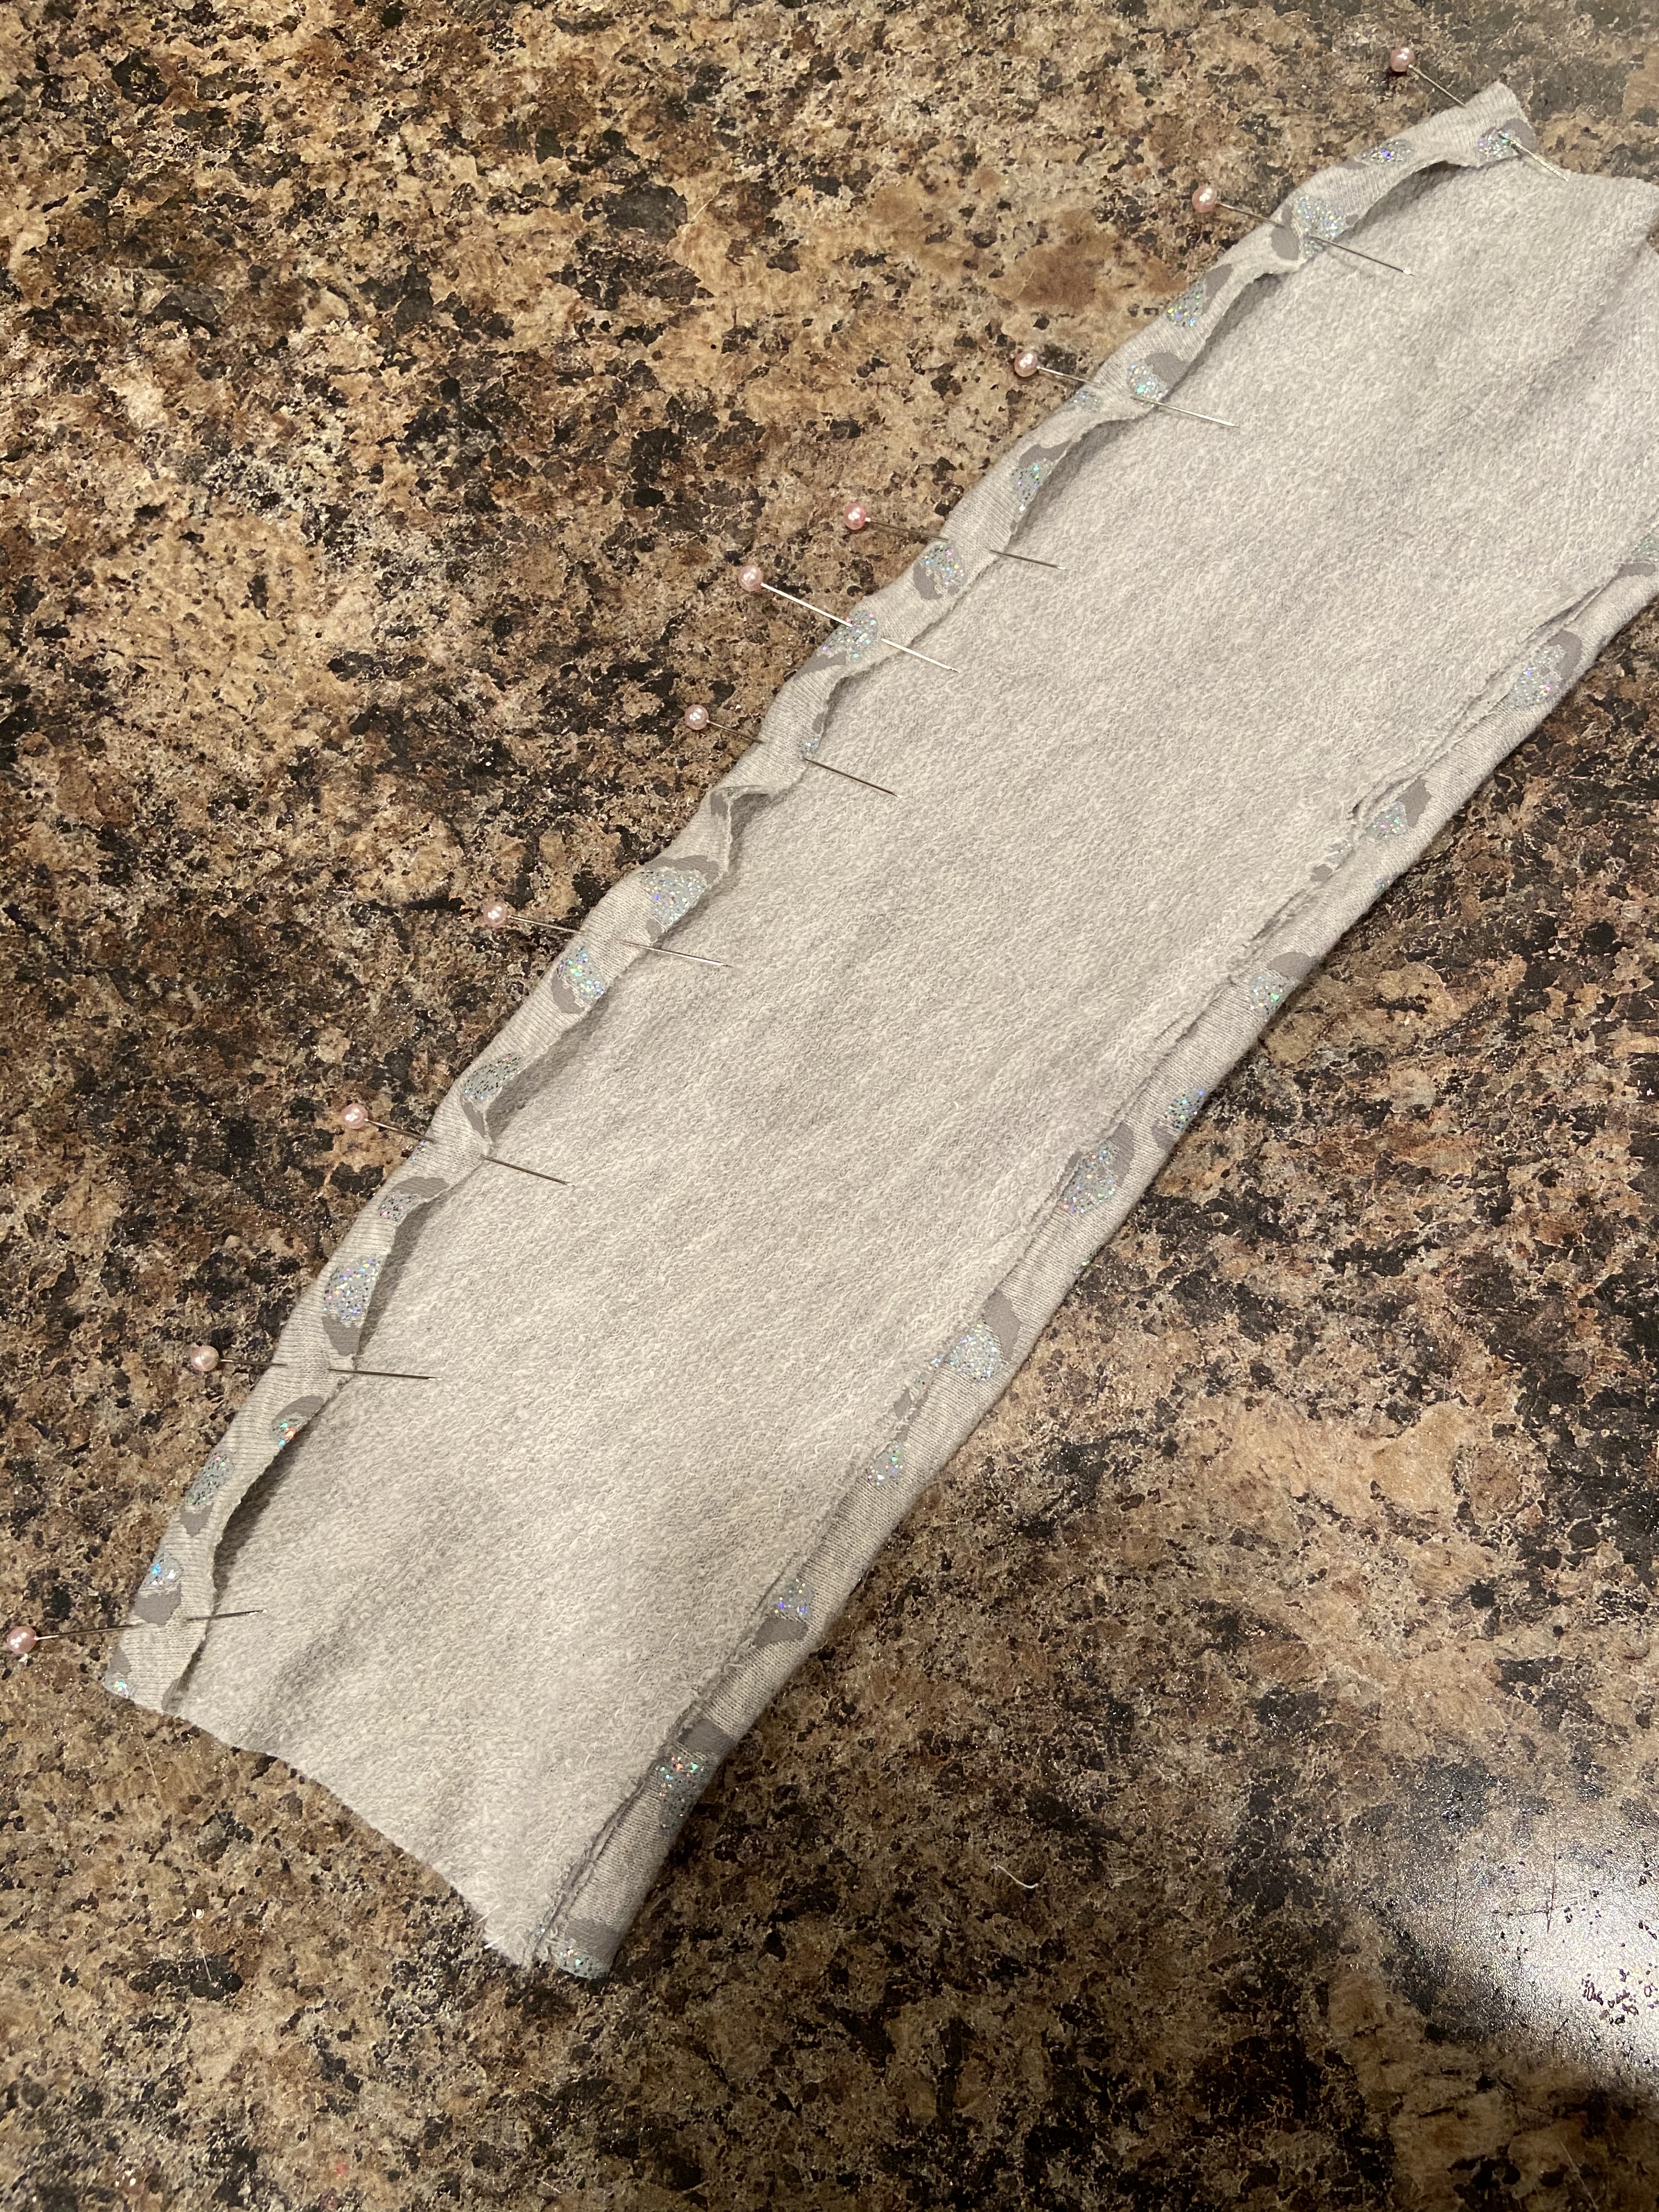 It’s a bit wavy, but it turned out fine. Sometimes, I spray knit hems with a bit of water if I can’t use the iron. It helps the fabric lay flat.
 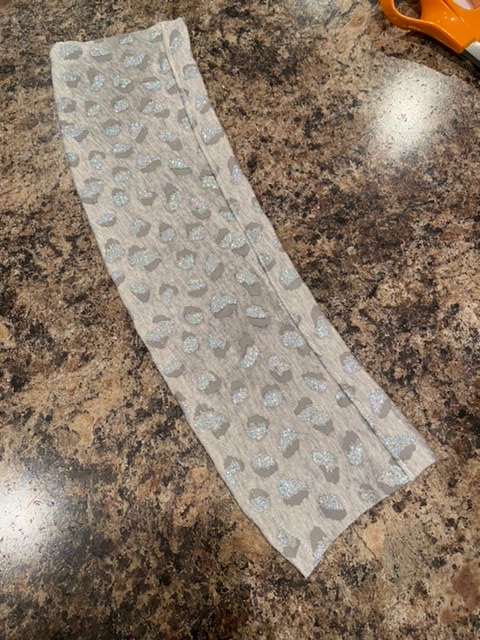 At this point, I was having some puckering so I spritzed the skirt with water and did a very light press with my iron on the wrong side. This helped immensely, but I was being very careful on a very low heat setting with quick, light passes.
Time to serge both sides of the skirt if you need to. I didn’t so I skipped it.  Fold the skirt in half and line up the back edges. Pin at the center of the back seam. Stitch from the hem to the pin with a 1/4 inch seam.
  Press open the back seam and pin. Tack stitch the seam in place.
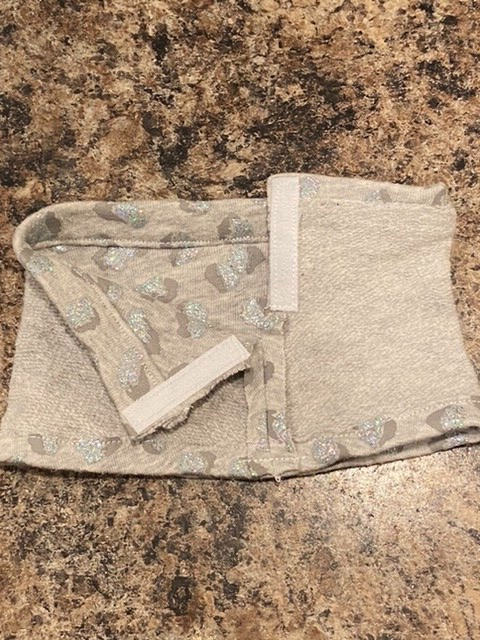
  Time to sew on the Velcro. One side is attached to the folded seam and the other side is attached to the flat seam. Make sure the Velcro pieces are the same length.
 And you’re done!
 So cute, but way better on the doll.
 Tada!! Saige wanted to be the model today. She just got brand new beautiful curls and they’ve been holding up nicely.
  My photos are so blurry lately. My iPhone 11 is acting up but I see it’s a problem for everyone. It wasn’t doing this before. The photos are so nice and clear in the editing tool, but then when you look at them in the camera roll they are super blurry, and when downloaded to the blog or Instagram they are also blurry. It’s maddening because this is a brand new phone. Btw you can find us on Instagram @fim_studios ❤️
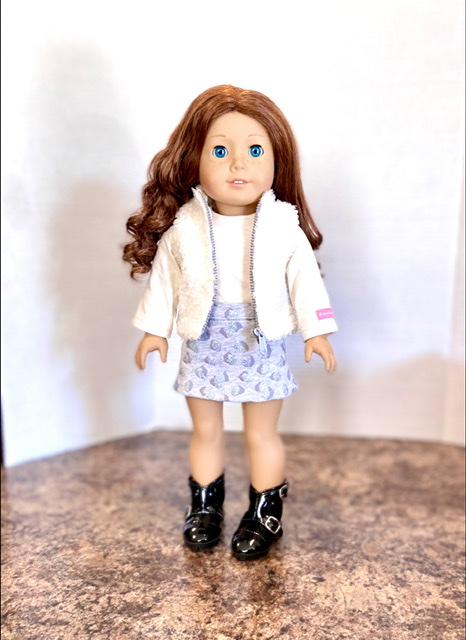

And here’s the back! This skirt turned out super cute! I’m happy with the fabric I chose. It isn’t too flimsy but it also isn’t too bulky. Five stars, I say.
I hope you enjoyed my pattern tutorial, and I hope this helps you make a bunch of cute skirts for your own dolls! Stay tuned as we have lots to do and I am still blogging from my phone so no more long stretches between posts! I feel like I have a real chance to actually get caught up on here, as long as WordPress doesn’t go and change everything about the platform. I keep seeing new changes everyday. Some are actually really good long time coming changes, some not so much. Why can’t they just leave well enough alone. Ah well, I guess if I have to relearn an entire blogging platform so be it, but it’s pretty annoying.
Anyway, keep on smiling you guys, and have a crafty day!
Leave a comment below!
❤️❤️❤️

One thought on “FREE DOLL MINI SKIRT PATTERN”