Hi guys! Last month, I felt like I was behind on absolutely everything due mainly to Christmas, but I finally feel like I am starting to get caught up! Today, I wanted to show you a project that I have been building for the dollhouse condo. I call it the dollhouse condo because it was the very first dollhouse that we built.
Ever since we embarked on the Mega Dollhouse Project, the dollhouse condo has been in a state of constant flux. You see, I’ve been told that no one wants to live in the tiny little condo when there are huge, beautiful rooms available in the mega dollhouse. LOL!
I decided that things needed to change in a hurry, so I promptly ordered some Christmas gifts that I hoped might make the situation a little bit better. More on that later. Right now, I wanted to tackle the conundrum that was the living room in the place.
Anyone who was with us back then knows that the struggle is real! LOL!
It started like this:
Oh my goodness! That’s not very inviting at all! LOL! Not long after, it became this:
It was better, but still kind of pathetic. (okay a lot pathetic)
Finally, it settled somewhat into this:
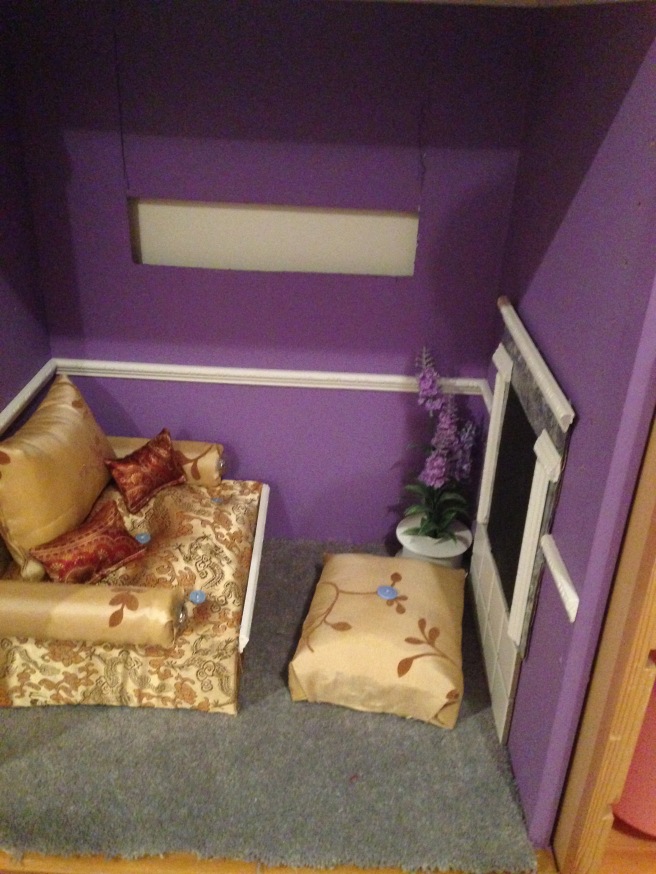
That is, until the girls promptly stole the blue couch to use as the diner booth in the Seaside Diner. That’s when the living room went sadly back to this:
And there it stayed, but it didn’t mean that we were happy with it. 😦 Boo.
Well, this is it folks! This is the year that the dollhouse condo becomes an actual place of doll residence! (rather than just a place to store random junk that we aren’t using at the time!!)
How exciting!
First things first, a PURPLE living room?? What in the world were we thinking??
Oh yeah, I remember. We were thinking CHEAP.
LOL! 😛
So that had to go immediately. I decided there and then to repaint the space a pretty shade of yellow instead. But that’s not what I want to focus on today. 🙂
Today, I want to talk about furniture!
For this space, we really needed some actual furniture, something that would not only fit in the space, but would be usable in the space as well. And it had to cost exactly zero dollars which is generally how all of my crafting goes. I usually only use what I have on hand. 🙂
I put my thinking cap on, and finally decided to stick with the original plan of a sectional couch, one that was similar to the blue couch that was in there before. I felt like it was the best way to maximize what little space there was.
Onto the build!! Okay just to be clear, I am not an expert carpenter by any means. I used wood for mine, but I think that if you wanted to make this project from foam board or even cardboard it would work relatively the same way.
First, measure out your pieces. I used a spare piece of 1/4 inch plywood, but like I said you can use stiff cardboard or foam board.
I used measurements so that the sectional could fit properly into the space in the dollhouse condo living room, but just be sure that you make it large enough for your doll to fit on the seat.
Here I have used Kit to measure the seat of the couch.
Next, you need to join the pieces together. If you are using cardboard or foam board a hot glue gun is required. If you are using wood like me, then you need to use wood glue and finishing nails.
First run a line of glue down the edge of the wood. Next, align the two pieces and push them up against a sturdy wall at a ninety degree angle. This will make it easier to hammer the nails in.
Use a nail about every inch or so for a sturdy hold.
Here are the first four pieces connected. Next you must attach the front legs.
This is what the pieces should look like now. For the back legs you need a couple of wood blocks. If you are using cardboard or foam board simply measure, and cut another length for the back legs.
I cut my back legs from these wood blocks that I had lying around. If you wanted to you could also use pre made wooden pieces from the craft store for the back legs. I just tend to kind of wing it mostly. 😛
Before I attached the back legs, however, I upholstered the entire thing.
Using a staple gun, I attached the cotton batting. Then I wrapped the whole thing with a fabric of my choice.
This process takes a bit of patience. You just have to sort of tug and pull the fabric so that it is taut. Then just staple it into place.
I’m trying to show it as best I can! 🙂 You want your edges to be as smooth as possible, tucking the raw edge of the fabric under as well as you can, and stapling it down. (my iron board background is beautiful I know. 😛 )
Once you have both pieces covered, it should look like this:
Now as you can see, when I put the two pieces together, there is a gap.
So that wasn’t working. I measured and cut another piece of wood to fit in the space. I used some cotton to upholster the new piece, and I nailed it into place over the gap.
I also painted the back legs white and nailed them on.
Okay, so we’re nearly done! Now all we have to do is add the cushions!
I like that it works as a sectional or separates into two pieces. 🙂
For the cushions, I just measured out a few layers of quilting batting.
Cut a piece of fabric and wrap it up tightly like a birthday present.
Use hot glue to secure the fabric in place. I know, it’s not pretty but all of the raw edges will be beneath the cushion.
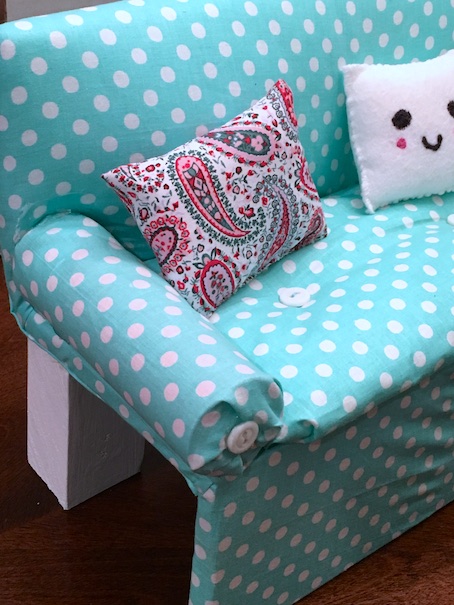
Pretty! You can leave the cushion plain like this, or you can do what I did and sew on some buttons.
I wanted to add a bolster roll arm to the one side of my couch, so I took a sturdy cardboard roll and wrapped it up with the same fabric. Then I hot glued it to the couch.
I added another button to the end of the bolster roll.
Make up a few cute throw pillows and you’re done!!
I love it! I can’t wait to put it in the dollhouse condo living room. Of course first I have to finish painting the room. 🙂
I love this cute little kawaii throw pillow too. I made it out of white felt. I embroidered the face on by hand, then I stitched it up and stuffed it. Adorable! ❤
I hope you enjoyed! I will definitely be doing an update on the rest of the dollhouse condo soon. 🙂
Leave a comment below and have a crafty kind of day!
❤ ❤ ❤


Very nice, I especially like the fabric you picked. I’m hoping to make a better sofa for the dollhouse here soon, I’ve never been happy with the one I have. I have lots of ideas, just need some time now.
LikeLike
I recommend making something out of wood. It’s sturdy, and it feels like furniture. I just cut all of the pieces with a large hand saw. I have a jig saw as well as a circular saw, but I like the hand saw because it isn’t loud and there is less chance of cutting my arm off. LOL! 🙂
LikeLike
How cute! Thank you for sharing. Especially the no cost point. I’m trying it this year for doll furniture. I can’t wait to see the freshly painted room with the new furniture.
LikeLike
Thanks! I really enjoy constructing simple doll furniture, nothing too fancy mind you, but the kid’s don’t seem to notice. 🙂
LikeLike
That is so cute!!!
LikeLiked by 1 person
Thank you! I have to make more of those adorable kawaii pillows. I think they really make an impact visually. They also boost the cuteness factor tenfold.
LikeLiked by 1 person
They do!
LikeLike
Very cool! I tried making a couch out of shoeboxes once and it didn’t work. But my dolls are fine using their beds as couches.
LikeLiked by 1 person
I made the chair in the living room before picture above from a waffle box, but I was never truly happy with it. I have found that the wooden furniture pieces I’ve made are much sturdier, and more like true furniture. I think the secret is in the gorilla wood glue. It’s not really strong enough for life sized furniture, but it works wonders for doll pieces. I try to keep my wood designs very simple. Like I said, I’m not an expert. 🙂
LikeLiked by 1 person
Wow, this looks amazing!
LikeLiked by 1 person
Thank you! I was really thrilled with how it turned out! 🙂
LikeLiked by 1 person