

Hello and a Happy Christmas! Okay it’s a little bit late, but everything in my world has been a whirlwind of crazy busy. You have to believe me when I say, that I haven’t had one iota of time for this blog. Usually that means that I have a backlog of posts that I need to catch up on, which means that you will have to bear with me, but don’t worry, it will all work itself out eventually.
Lately, the kiddo has become more interested in her 18 inch dolls. I mean, she liked them before, but lately, it has become a bit of an obsession. To tell the truth, I don’t know whether it is my obsession or hers. Who knows. Maybe it is just part of turning seven, which is also coming up super quick. Where on earth does the time go??
Anyhow, a lot of doll wonder and excitement has been circulating through my house lately. Part of the joy was established when a doll catalogue turned up in the mail. It was instantly snatched up by my girl with plenty of oohs and ahhs to be had for the next few weeks.
As a crafter, I must say, I was impressed by all of the shiny fanciness of the catalogue too, but my gears were also beginning to turn, as they so often do, especially when my girl, upon spying the doll ice cream parlour, instantly fell in spontaneous love with it at first sight.
I knew right away that it was the kind of love that never lasts, and that it really wasn’t worth the whopping $300 that said toy demands, but I could still feel the twinge of magic that lit up in my heart every time I gazed at the adorableness of it.
Of course, I recognized it immediately for what it really was. It was a parent trap, and an ingenious one at that. Well played toy makers, well played.
So, I was not to be played. Besides, my husband would kill me if I gave in to such temptations. But I was still tempted, and I had to know if I was up for the challenge.
And that’s how it all began…again.
Ten o’clock at night and the kiddo in bed, I started searching. I started out with boxes of all different sizes. We had quite a few sturdy boxes in the recycling at the time. I suggest that you keep shipping boxes if you ever get them. They are made of some seriously sturdy cardboard. Those and waffle boxes. Who knew?

We don’t buy the chocolate chip waffles, but now that I see those, maybe I might try them. 🙂
Anywho, besides boxes, I gathered:
-hot glue gun
-staple gun
-packing tape
-paint
-rainbow duct tape
-craft foam board
-MDF shelf
-shipping tubes (sturdy wrapping paper tubes would also work)
Once I had all my supplies, I got to work laying out my design. I wanted to build two main structures, an ice cream countertop and an ice cream stand/hutch (at least that’s what it looked like to me).
I had a leftover piece of MDF shelf lying around from when I added another shelf to her Monster High Dollhouse. It made the perfect countertop because it was already painted and finished.
I took one of my waffle boxes and cut it in half. Then I hot glued it together back to back. I lined it up with the largest rectangular box to make an L shape. I cut out the side where the waffle box meets the other box (this cut out is shown as D in the diagram below). Then I secured it with loads of packing tape and hot glue. If your boxes are not heavy duty sturdy, this will not work as they might collapse when you add the MDF board counter to the top. In the end you should have something that looks like this:
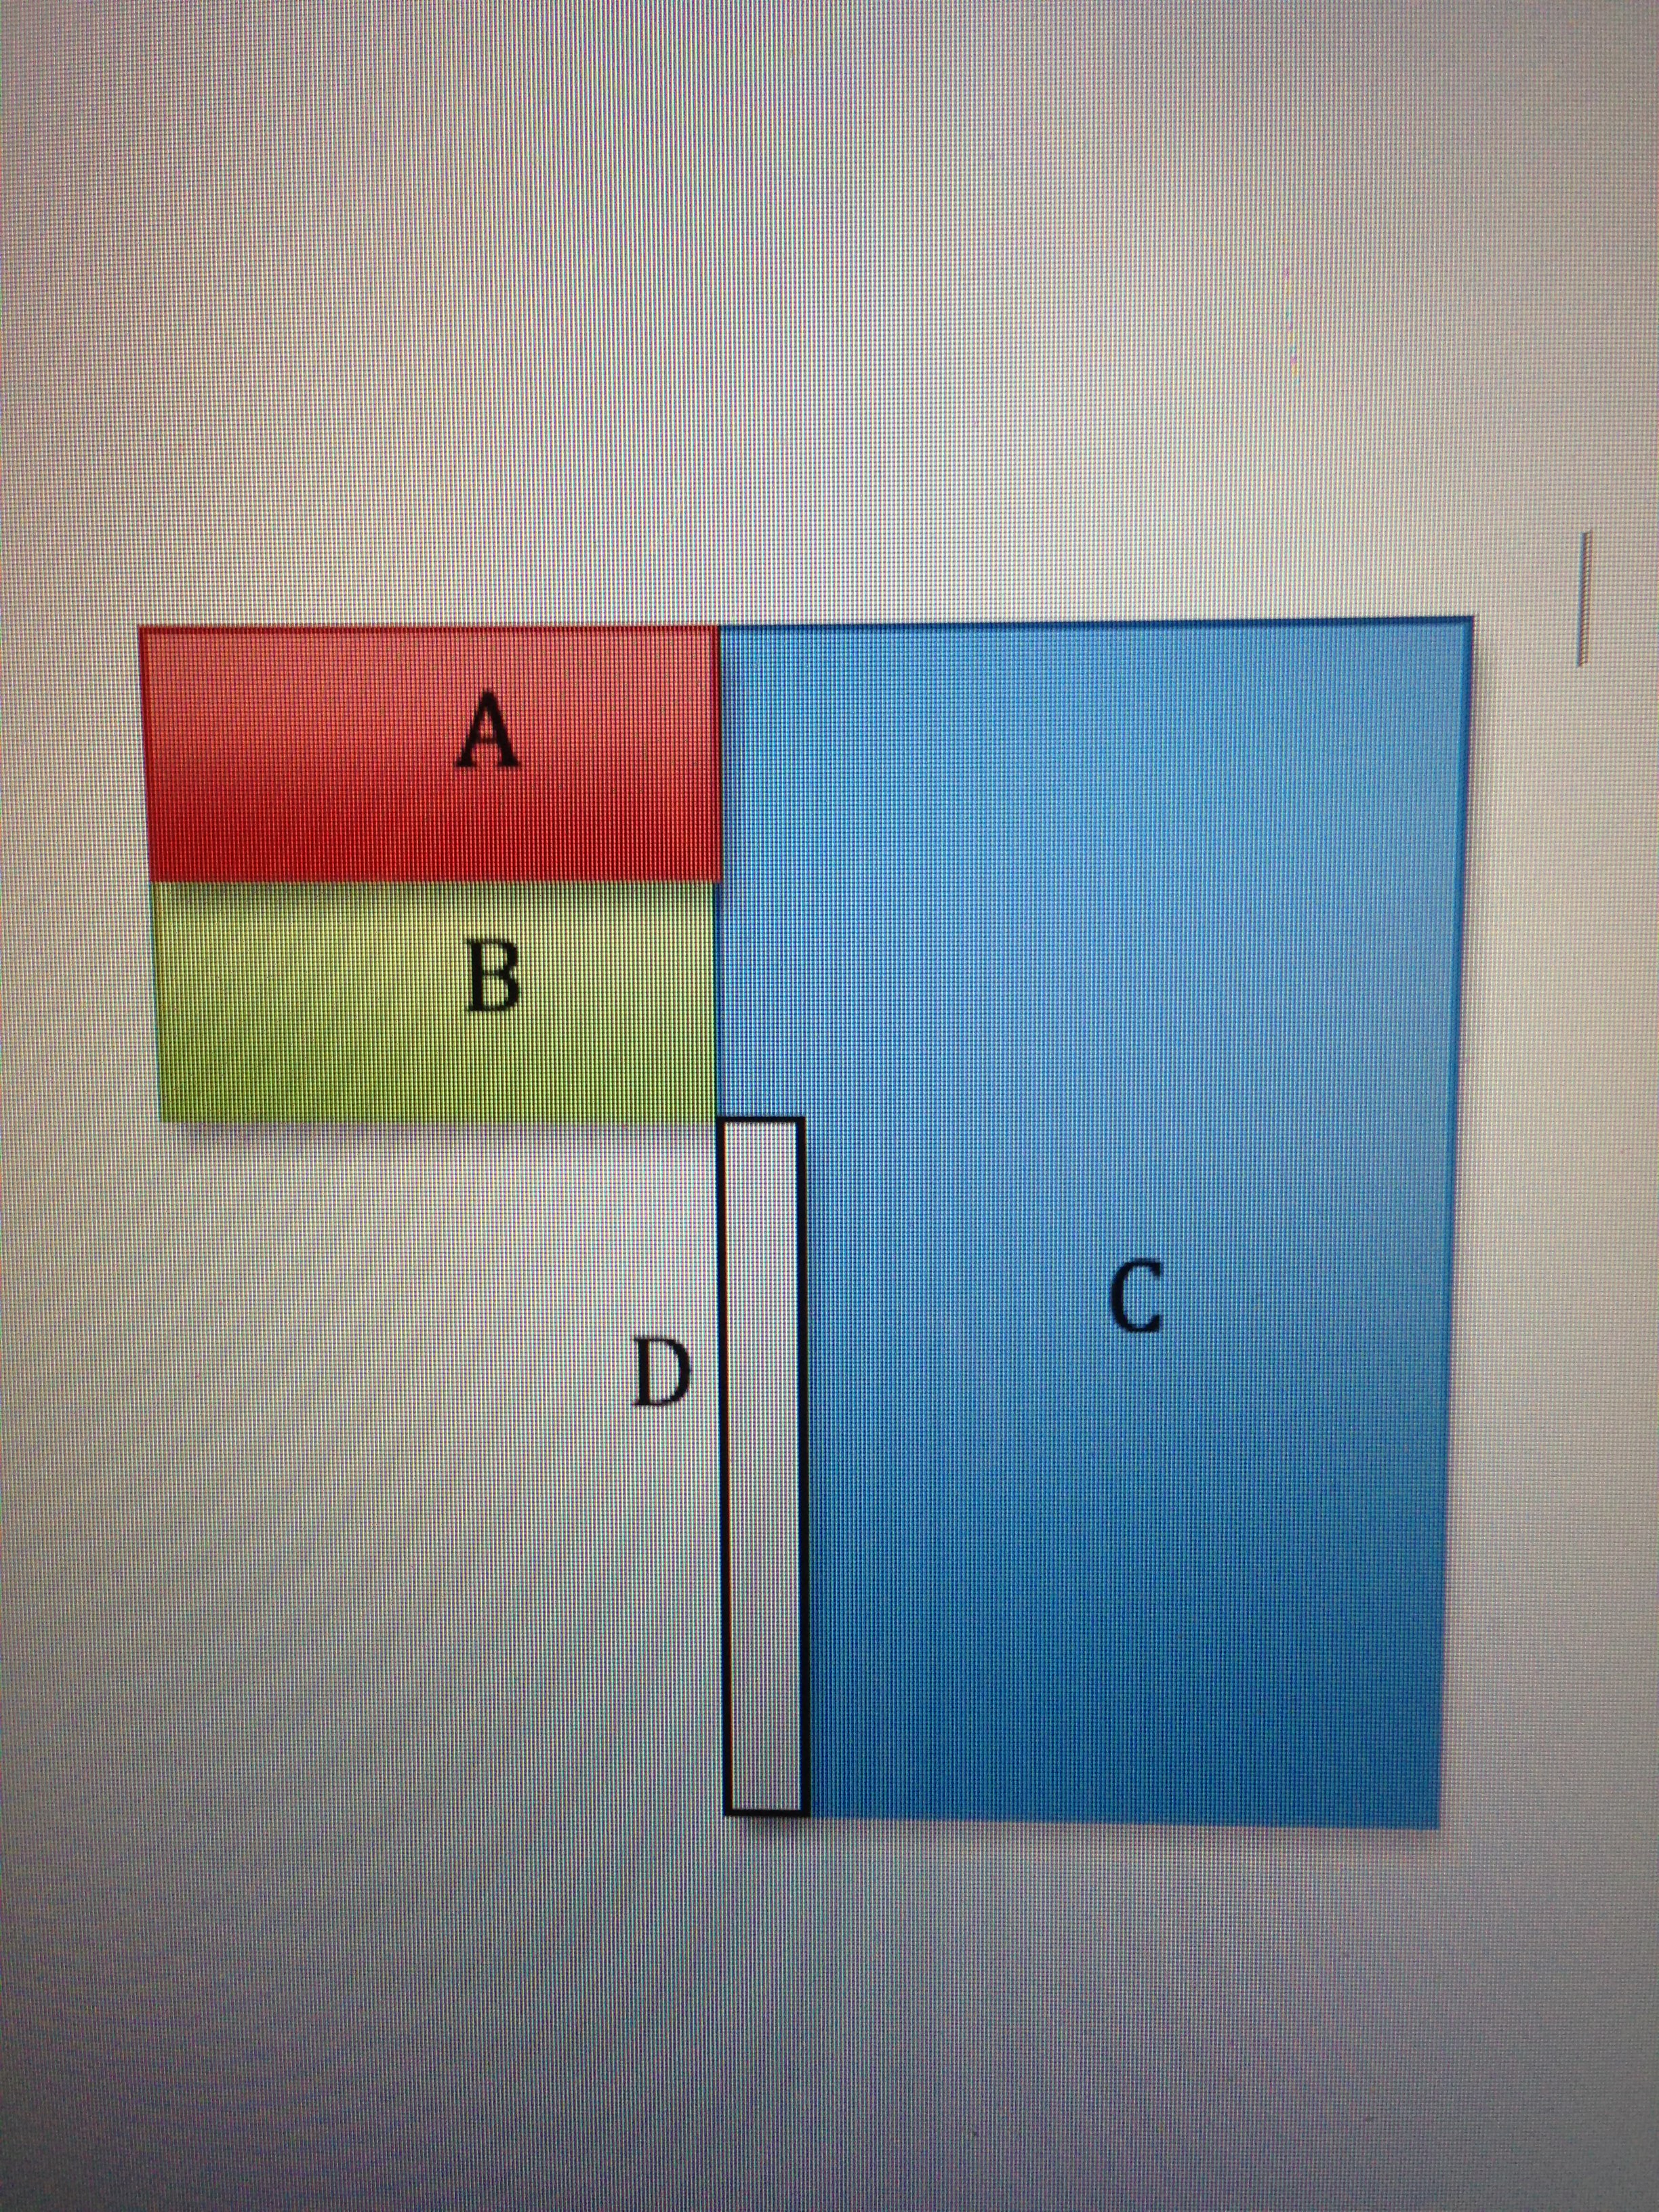
A and B are the waffle box halves glued together back to back and C is the large rectangular box with the cut out for D. The above picture was really the best way for me to try to explain it. I hope it helps.
Here is another picture of how the two waffle boxes are secured together before I added the lovely rainbow duct tape.
For the countertop, I laid my MDF board on top of the boxes and measured to cut. Basically you need a long piece and a short piece that will fit your box tops and form the L shape. After I cut, I took my heavy duty staple gun and stapled the bejeezus out of the thing. That countertop is not coming off for nothing and nobody. A coat of paint later and I was nearly done. (I tried spray paint, but it was not cooperating at all, so in the end, I just used a good paintbrush, and that worked best)
Once I painted it, strange things started happening as they always do when I take on these projects. Especially if it is midnight which by that time, it was well past. The sides of my ultra sturdy, extra strength cardboard boxes began to sag, just a little, under the weight of the MDF board.
Noooooooooo!
Or at least that’s what I was thinking. LOL
I think it was mostly the paint that compromised it. I put quite a bit of it on there and so the cardboard got a little damp. Nonetheless, I couldn’t have sagging. I couldn’t risk that it might all collapse if I didn’t do something about it.
So I reinforced the sides of it with some craft foam board. I just measured it to size and glue gunned it on there. Then I used a whole bunch of packing tape to ensure that it was never going to come apart. Later, I rainbow duct taped part of the structure as well and that made it just about as sturdy as ever.
Last, I cut and measured some shelves out of craft foam board and hot glue gunned them inside the waffle box halves. You can see them empty here. There is tons of storage in the other side as well which is great.

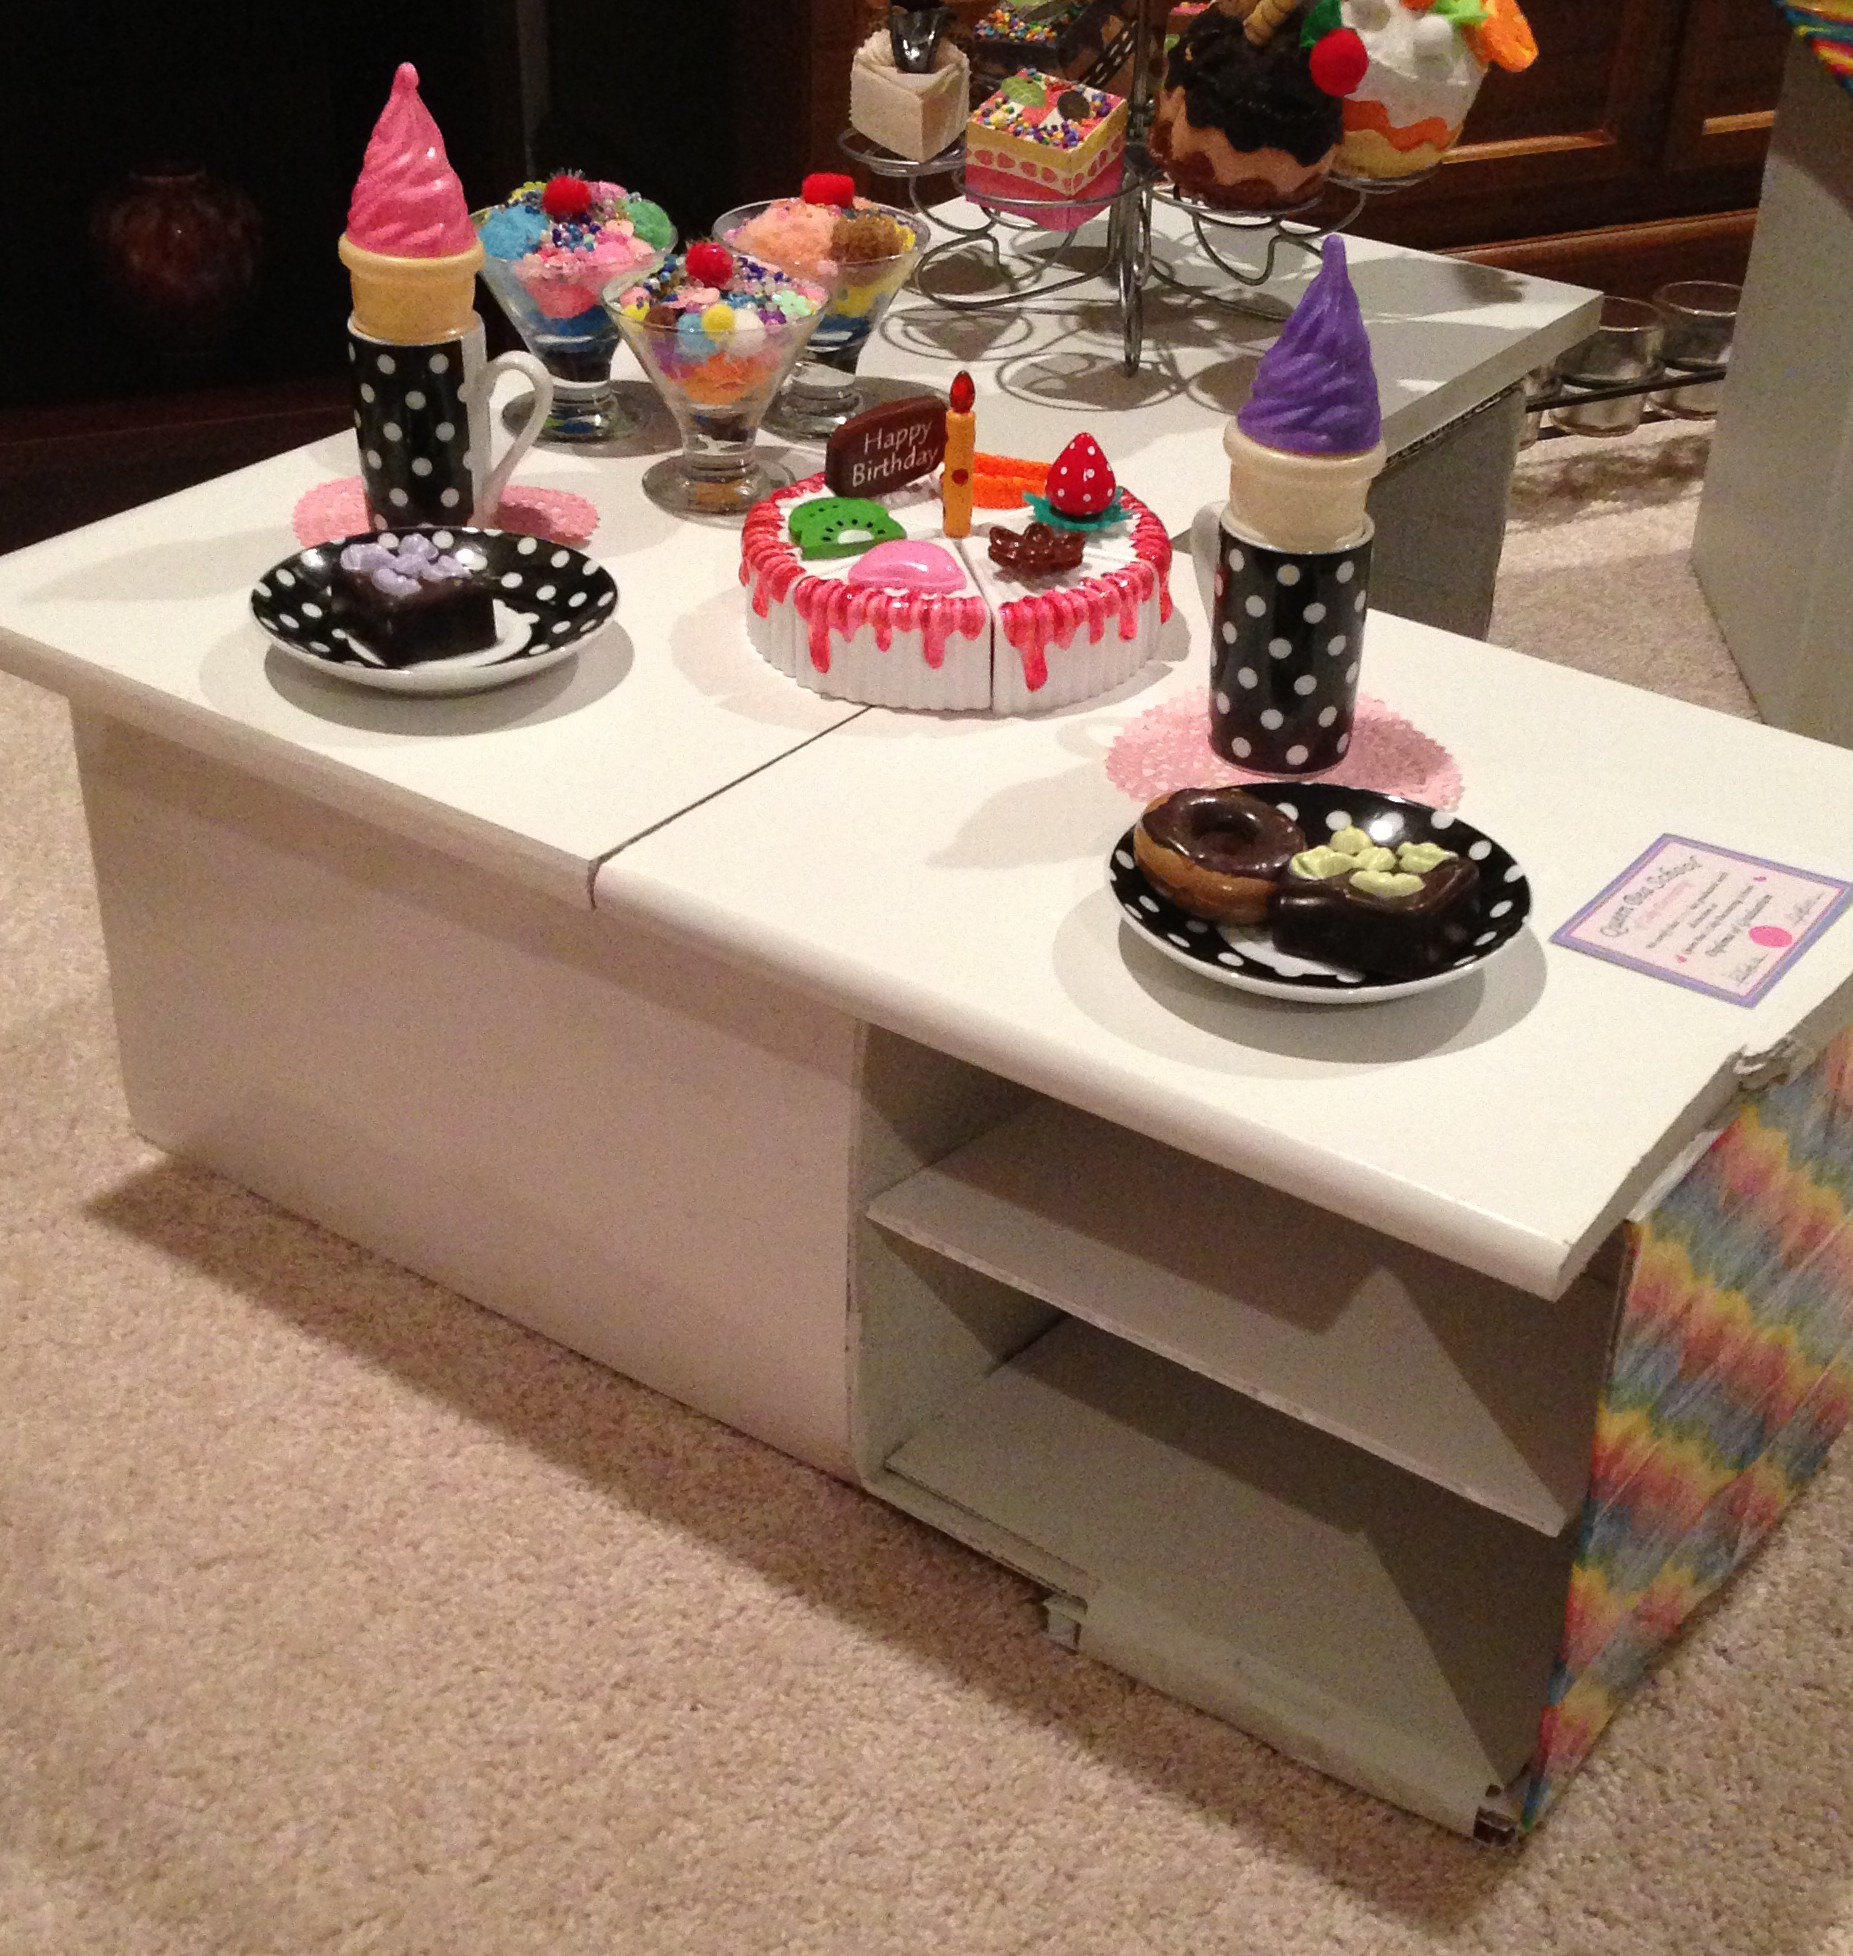
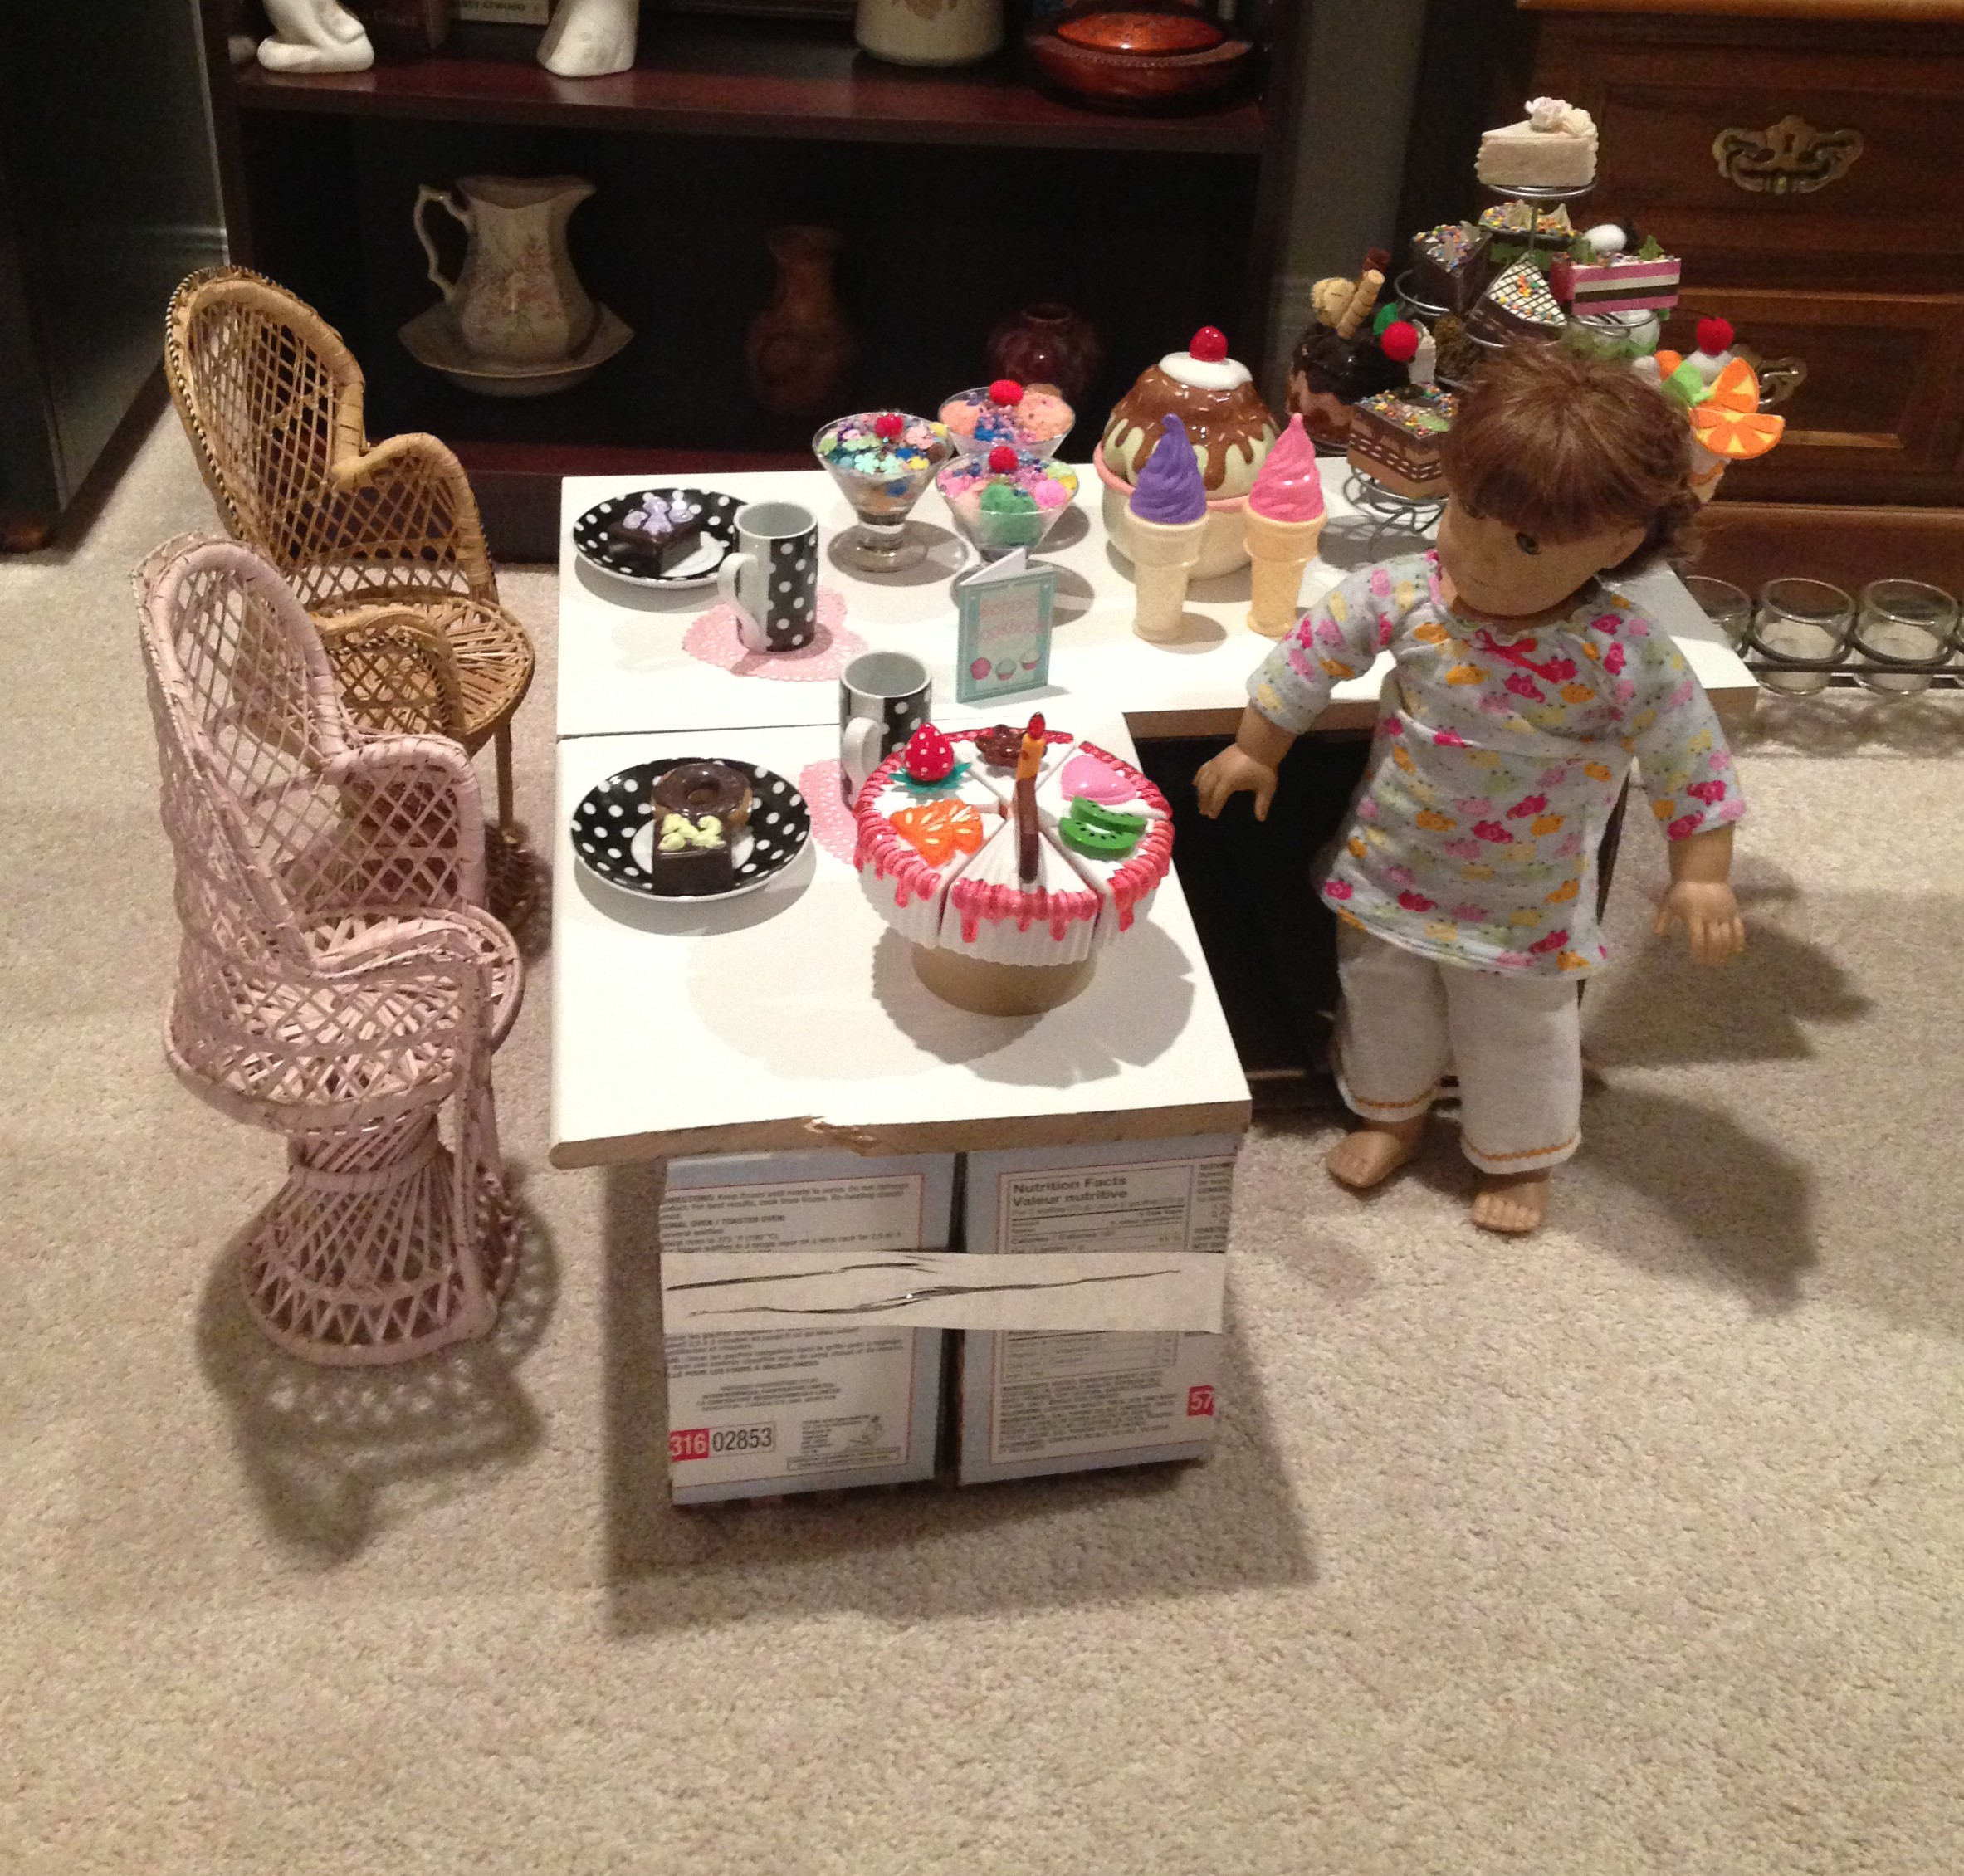
There you have it, our ice cream parlour countertop, where dolly can sit and eat ice cream sundaes and cupcakes to her heart’s content. I’m told that it sort of doubles as a bakery type shop as well.


We already had the two chairs. As you can see they are the same chair, just different colours. I have yet to break out the spray paint again for those. I might wait until it’s not a deep freeze in my garage which was part of the spray paint catastrophe to begin with.
The accessories are simply some of the pretties that we had already made. You can find some of those ideas here.
Next, I wanted to build the ice cream stand. This was tricky. I didn’t have the foggiest idea of where to start so I did what I usually do. I took all of those cardboard boxes, and faked my way through it. That’s how I craft most of the time. I just wing it at whatever o’clock in the morning. Some call it crazy. I call it genius, and I really do understand why most of them, geniuses I mean, have crazy hair. Don’t judge me. 🙂
So there I was amid all of my cardboard, and I had this perfect length of MDF board left so I just laid it out flat and took a waffle box and laid it on the top and another larger sized box for the bottom of the stand.
Okay, I thought, I can work with this. I wanted the MDF board at the back for added stability. It really makes it seem less handmade as well, because it is half made of wood rather than all cardboard, not that handmade is a bad thing, it was just less wobbly and it stayed put.
Here is my original design plan:

First, I measured and cut the bottom off of the waffle box A. I discarded it. Then I covered the outside of the box entirely in rainbow duct tape. I cut out an archway E in the front of it.
Next, I cut square C out of the front of the bottom box. I got out my trusty staple gun again and stapled the bejeezus out of the thing attaching the two boxes to the MDF board. I am quite happy with the results. The staple gun turned out to be more handy than my glue gun for this project. It was less messy and far more fun.
After the entire thing was constructed I took my cardboard shipping tubes B and realized that I really should have measured for them before I tacked the whole thing together with heavy duty staples. So if you are reading this and would like to attempt the project yourself, do the next step before assembly.
I measured and cut a piece of foam board to use as the countertop. I covered the entire piece in rainbow duct tape. Then I took my cardboard tubes and drew and cut out circles in the foam board to fit. Just be sure that they line up with the waffle box at the top of your stand.
I laid the foam board on top of my bottom box and traced the circles. It was tricky to cut them out because the box was already attached at the back to the MDF board. That’s why I suggest you do this step beforehand. I inserted my cardboard tubes into the holes. Then I hot glued them inside the archway of the waffle box at the top. I think this makes more sense if you take a look at the pictures.

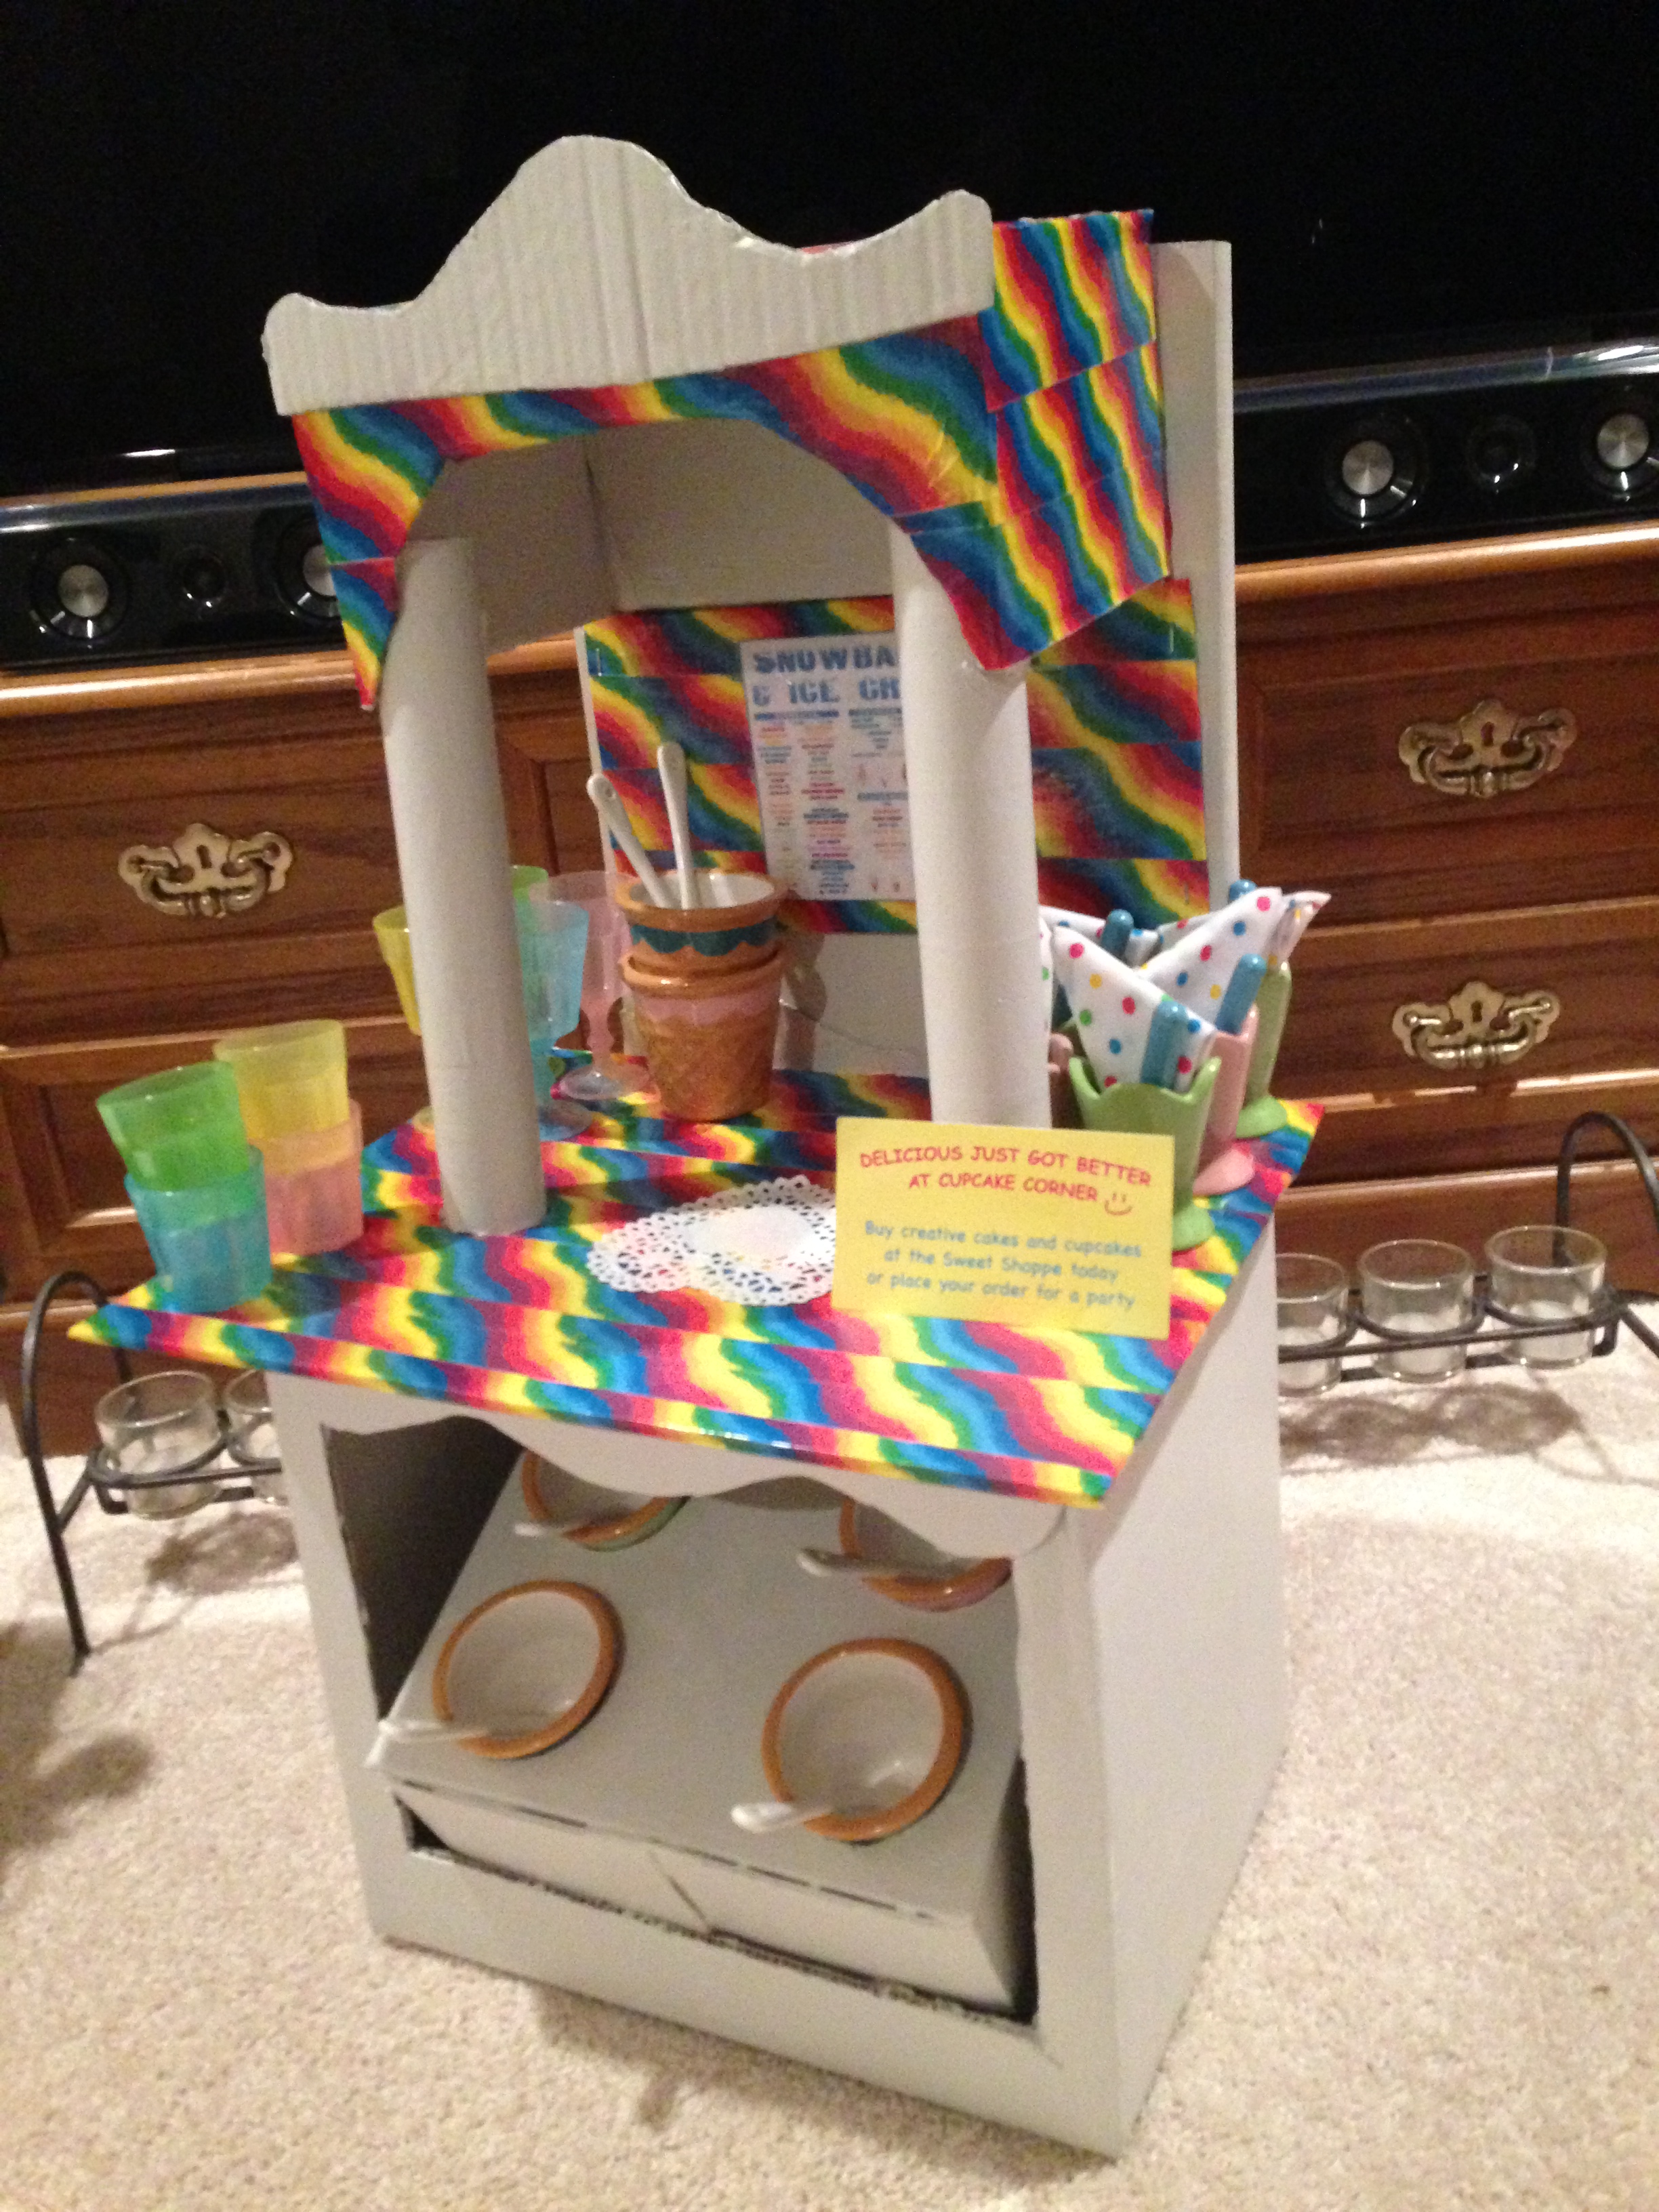
Once it was completely assembled, I painted the entire thing white. I added a small accented trim to the front window of the bottom of the box just for fun and detail. I also added a piece of trim to the very top of the stand. They are just strips of cardboard cut fancy and hot glued on.
I wanted the front of the stand to have a slanted bin that would hold ice cream buckets. So I took another waffle box (apparently we eat a lot of waffles lol) and cut it in half. I traced four circles on top that were just a little smaller than the lip of my little ice cream cups so that they would not fall through the holes.
I took a piece of cardboard to make a bit of a ledge within the bottom box that would prop up the bin up and allow it to sit on a slant.
Just add accessories and enjoy!
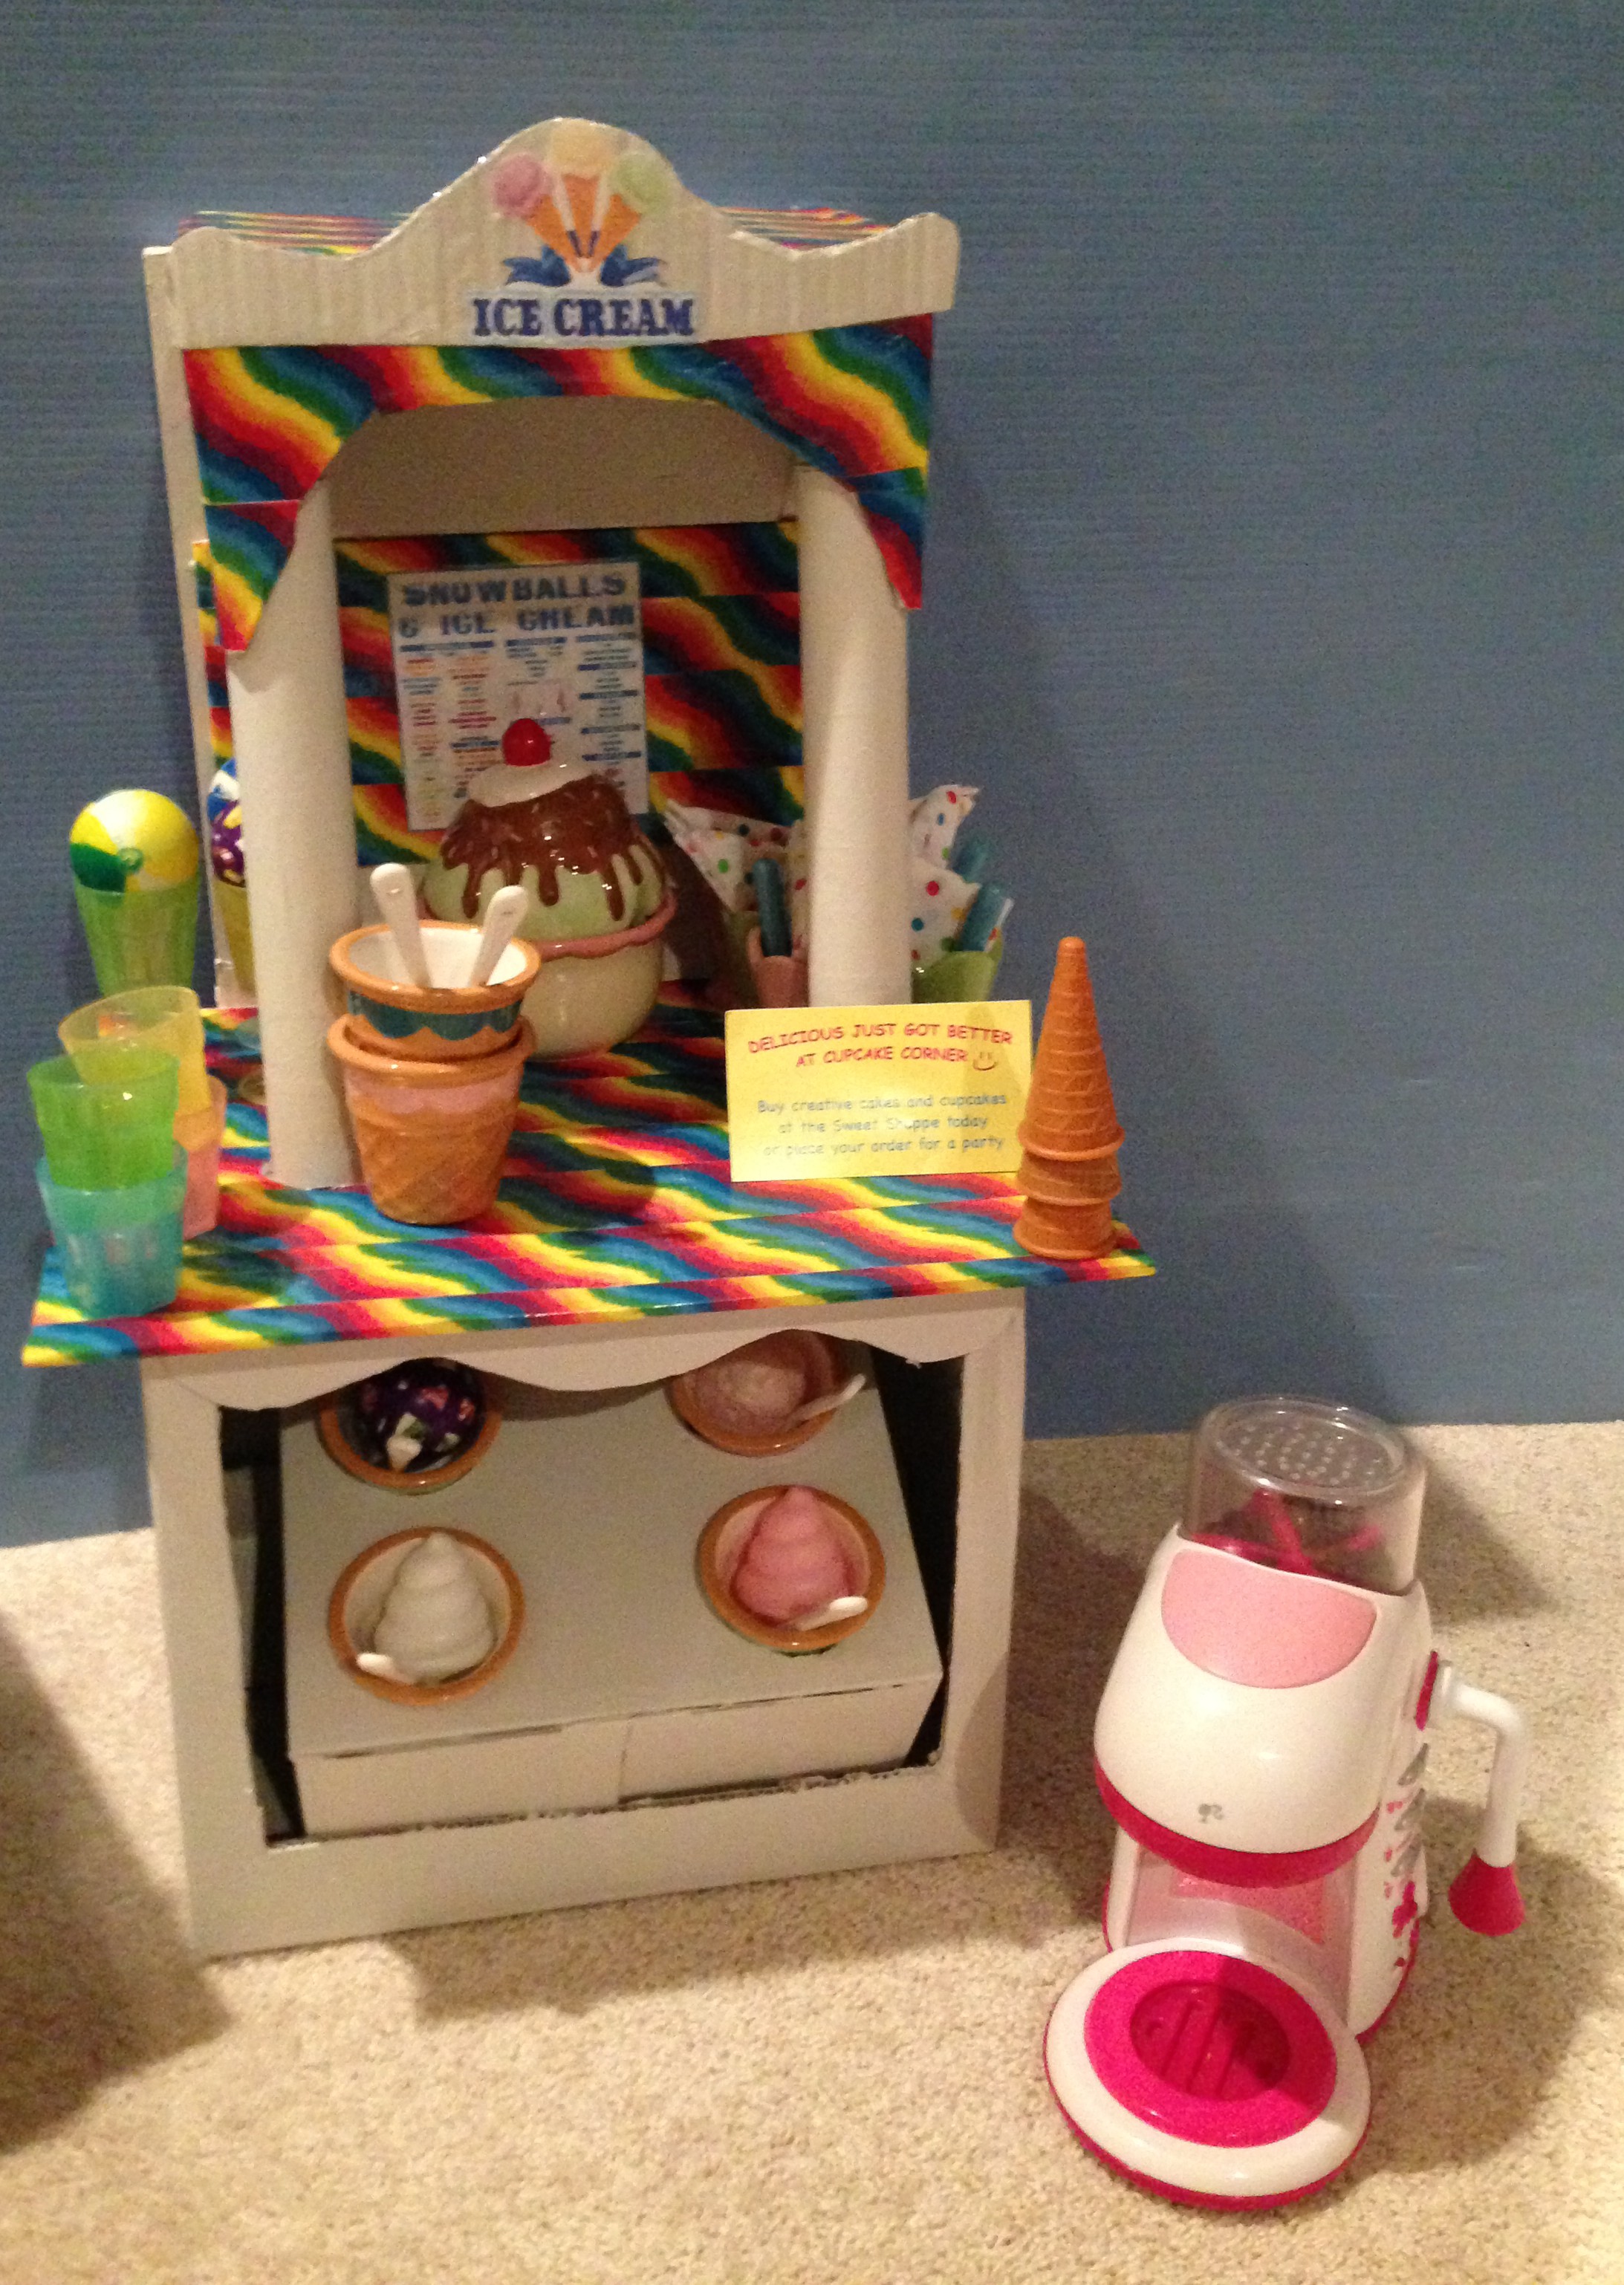
We had a few ice cream dishes and cones already. We have a couple of ice cream tops that we are using for ice cream scoops as well as some large colourful bouncy balls. It just goes to show that anything goes around here. Ha ha!
The little cappuccino machine is actually a Barbie toy, but it does a great job as an ice cream machine, don’t you think? I just love being able to put old things to new use.
I printed out an ice cream sign that read Snowballs & Ice Cream and taped it onto another piece of craft foam board cut to size that I covered in rainbow duct tape and hot glued to the MDF board at the back of the stand. I also added an ice cream logo to the top of the stand.
I really love that you can get duct tape in all different designs these days! What a fun idea!


Anyway, there you have it, your very own ice cream parlour for your dolls. I hope that you have fun with this. It really didn’t take as much time or effort as I thought it would. The most time spent was in the design.

Have a wonderful rest of your holiday season, and I will see you all in the new year!

You should see the basement playroom of Virginia and Mia’s home. Such great fun!!
LikeLiked by 1 person