
 Hello everyone!! Usually this would be a Sew Dolly! segment, but it was my nephew’s birthday this past weekend. Actually, it’s been everyone’s birthday all at once. My mom, my two sisters, my daughter, and my nephew. We have been birthday partying this month, let me tell you! LOL! 🙂
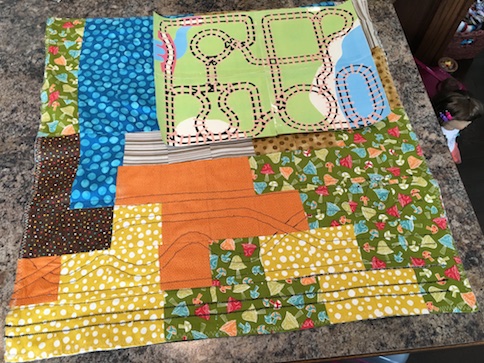
Anyway, I don’t often get to do fun sewing projects for the wee little men in my life. Usually they just want Lego or cars for their birthdays, but when I came across some mini Thomas trains, I knew that my 3 year old nephew would love them. I also knew that I just had to make a take along train mat to go with them.
The first thing I did was gather my fabrics. I wanted to create a double sided mat that resembled a quilt with abstract fabrics to represent different types of landscape. I had all of the fabric on hand to create this quilt mat. I used 3×3 cotton fabric squares, 9 rows of 8 in a slightly random pattern. I did not use any quilt batting for this. I just sewed a piece of flannel to the back.

Next, I purchased a train track printable from PrintablePlayMats on Etsy that was specifically designed for the mini Thomas trains. The printable is meant for laminating, but I just printed it onto regular printer paper, and taped it together how I wanted it to connect.

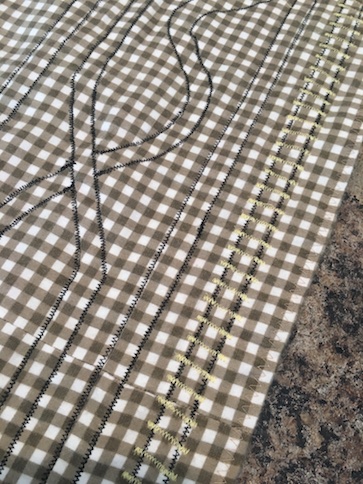
Then I pinned it right onto the quilt mat, and proceeded to sew the train tracks on right through the paper. I used a regular straight stitch for this. After I tore off the paper, I then reinforced my lines with a short zig zag stitch.

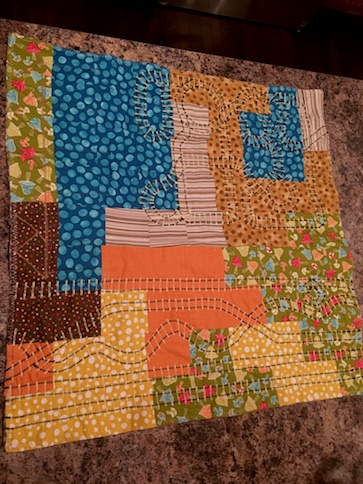
The tracks are what quilt the mat together. They also show through on the other side which automatically makes the mat reversible.
I’m not an expert by any means, but I loved the way that it turned out! It wasn’t difficult to tear the paper off through the stitching either.

I know, it’s very tricky to see, but that’s because it wasn’t done yet. 🙂

Look at all the cute little trains! ❤ Time to see if they fit the tracks!
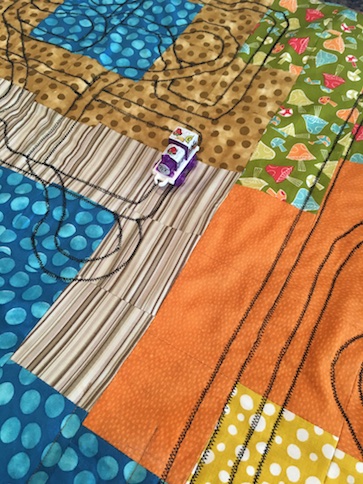
A perfect fit! Now to check the other side…

…awesome! Here’s a close up.
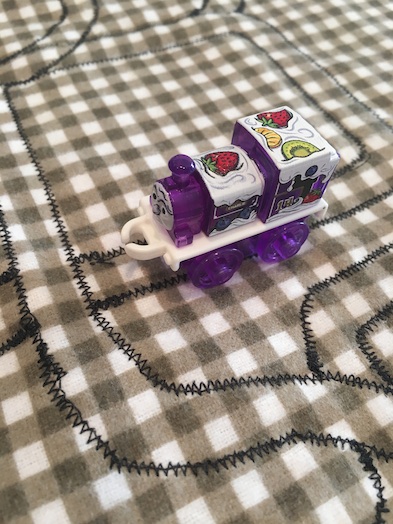
Not perfect, but still very cute! ❤
Next, it was time to add the railway ties.

Using the same short zig zag stitch, I sewed the ties on one by one. It was a big job, but I also found it kind of relaxing. 🙂

I really love all of the different fabrics in this mat.

The railway ties are very subtle. I was going to sew them all on there in bright red, but since I was sewing them on one by one, I didn’t want it to be super obvious that they weren’t all exactly the same.
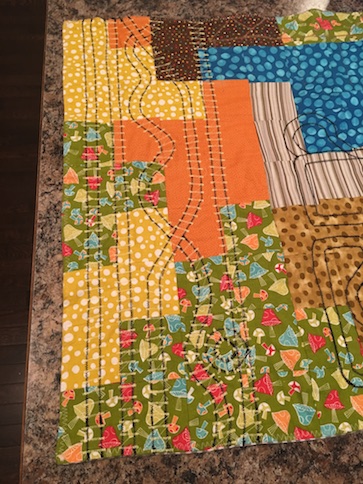
And of course, what you sew on the one side, automatically shows up on the other side.
My next order of business was to build the station house on the checkered side. I sewed four pockets for the mini trains to ‘sleep’ at night.
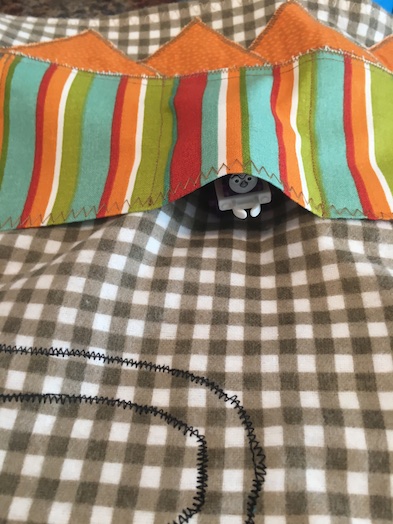
I appliqued the roof peaks to the quilt using the short zig zag stitch. Then I used black fabric paint to add a station house door.

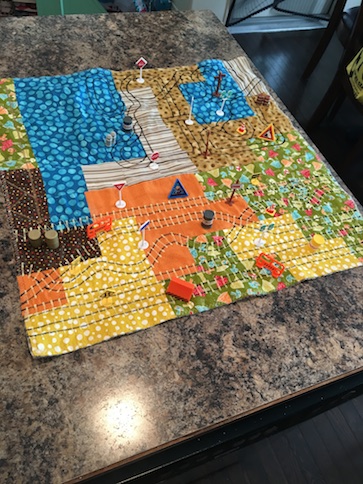
I was able to find some miniature signs and traffic related pieces at our local bargain shop that I thought worked perfectly for this set.
I know they aren’t actual train signs, but that can be remedied with a quick trip to the imagination. 🙂
I really love how it turned out!

Next, I printed an image from Google of a Mr. Tophamm Hat directly onto some heavy twill fabric. I sewed around him, cut him out, and stuffed him with cotton. I sewed a piece of velcro to his back so that he can velcro to the door of the station house. He also fits in the station house pockets.
Finally, I stitched up this matching drawstring bag for my nephew to carry all of his trains and accessories in. I used a tutorial from Not So Idle Hands. I just quilted the outside of the bag to match the train mat. I adjusted the bag pattern slightly to include a little handle.

So cute! 🙂
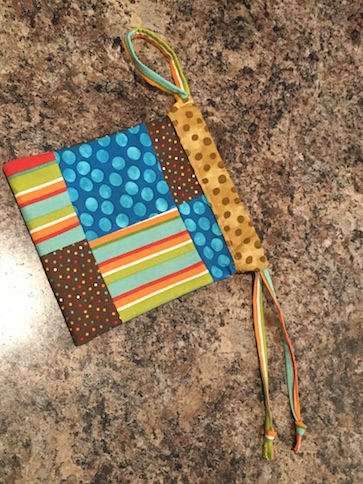
Speaking of little bags, I couldn’t resist sewing up this little knitting bag for my mom for her birthday too. I used an amazing tutorial that I found over at Craft Buds.

I used a fabric paint pen to do the lettering.
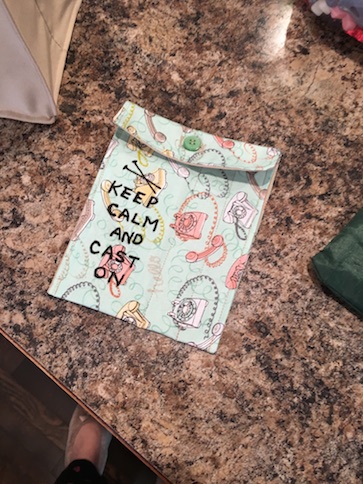
I also included this cute little pouch to hold her scissors, crochet hooks, and small needles. The retro telephone print matches the lining of the knitting bag. I think that it is so charming! 🙂
Mom is always knitting beautiful socks, and adorable doll items for everyone. We ❤ You!
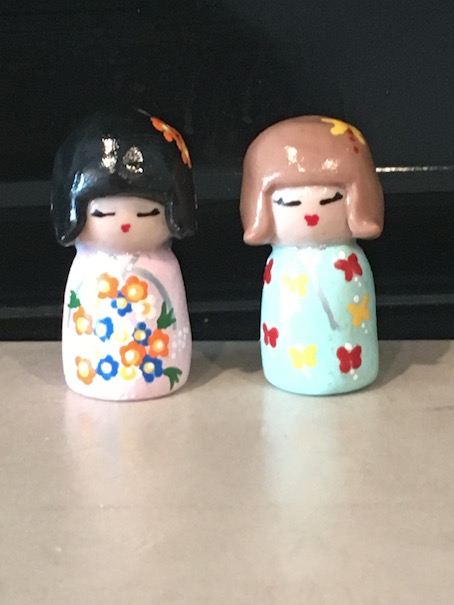
I know it’s not sewing, but mini Kokeshi Dolls were also on my mom’s birthday wish list, so I decided to craft some for her out of polymer clay.
They are so cute and teeny!
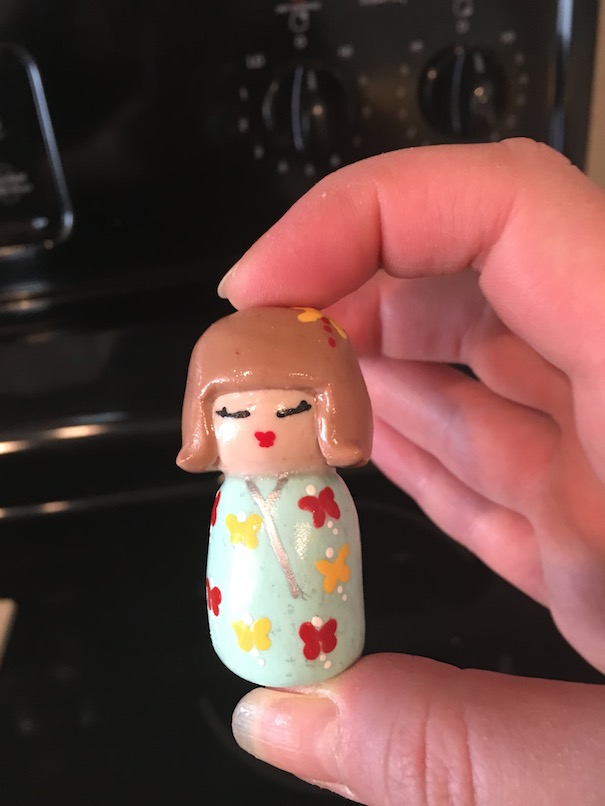
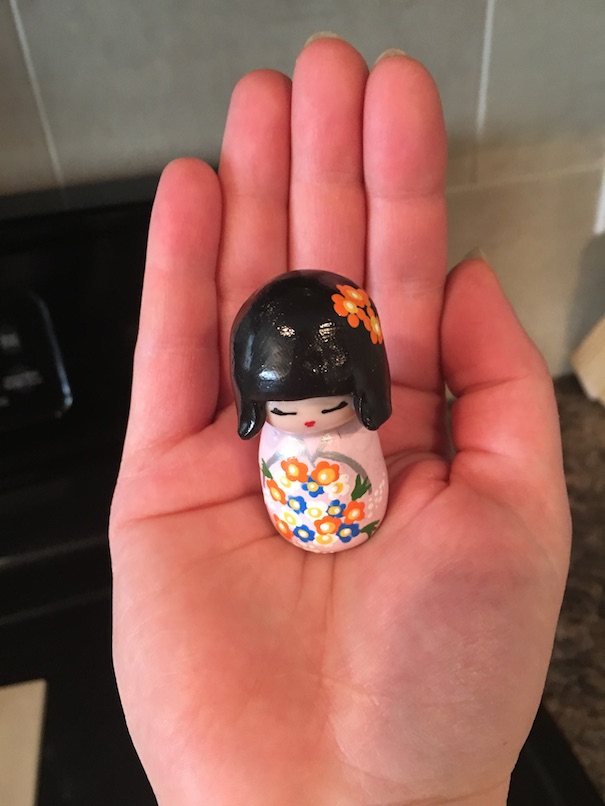
The Little Miss wanted to make one too. ❤ She did a pretty good job!

Whew! It’s been quite the birthday month! At least now we don’t have any more birthdays until my own, and that’s in July! 🙂
I hope you enjoyed!
Leave a comment below!
❤ ❤ ❤

So many fun things here! I bet your nephew loved the Thomas set.
LikeLike
He sure did! 🙂
LikeLike
I love this whole post! Speechless.
LikeLike
I am so glad that you enjoyed it! It’s been a busy birthday madness around here! 🙂
LikeLike
THE THOMAS SET IS ADORABLE. I may steal that idea for one of the kids I babysit… She loves Thomas. :p
LikeLiked by 1 person
Absolutely!! 🙂 My nephew was thrilled to bits!
LikeLike
Love that mini Thomas project!
LikeLiked by 1 person
Aw, me too! ❤ 🙂
LikeLike
You did a great job sewing the train mat! What a clever idea! 🙂
❤ , IrishAG
LikeLiked by 1 person
Thanks! It’s not often I get to sew something other than dolly clothes! 🙂
LikeLiked by 1 person