

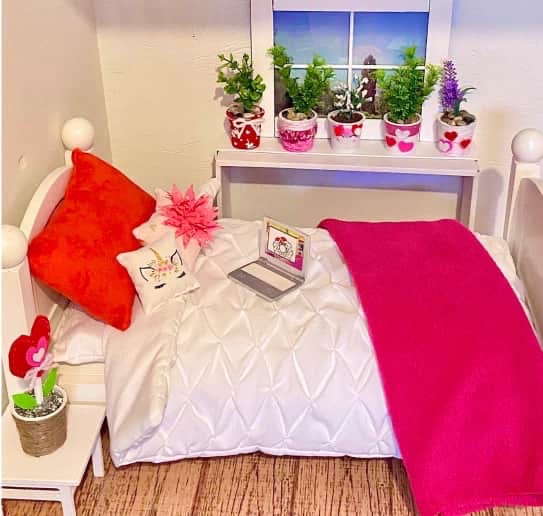
I love making Valentine’s decor for the dolls. Awhile back I made a few pieces, but not many. We made some Valentine’s pots.
We also made a Valentine’s love banner

and a Valentine tree branch vase.

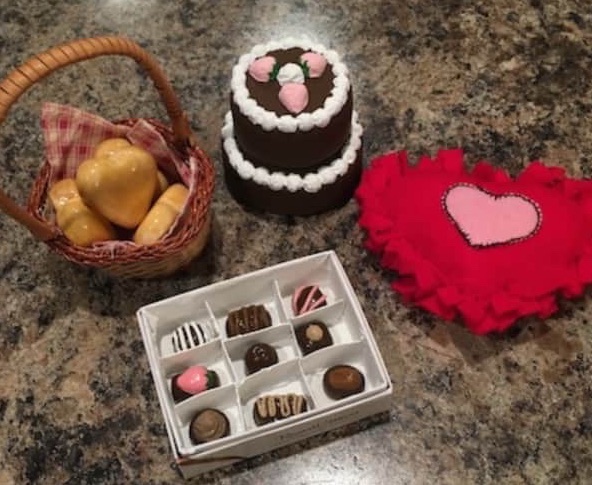
Other Valentine doll crafts include this adorable cake and chocolates set from our Secret Valentine Doll Exchange.
This year I wanted to make some more Pinterest vibe doll Valentine’s decor. I love home decor in general, so of course one of my favourite things to do is look on Pinterest for home decor ideas to make for the dollhouse.
I love holiday decor just as much so I took to Pinterest and I wasn’t disappointed. So much Valentine’s gorgeousness!! 😍 I decided then and there that I wanted to decorate both a tablescape and a side mantle.
The sad news is that in my last doll purge, I got rid of our doll fireplace. I know, I immediately regretted it too. 😭 So you can bet there will be a new doll fireplace craft coming soon.
In the meantime, I am just going to have to make do with what we have on hand.
Okay let’s get started! Here is all the crafting goodness that we are making today! So excited!!

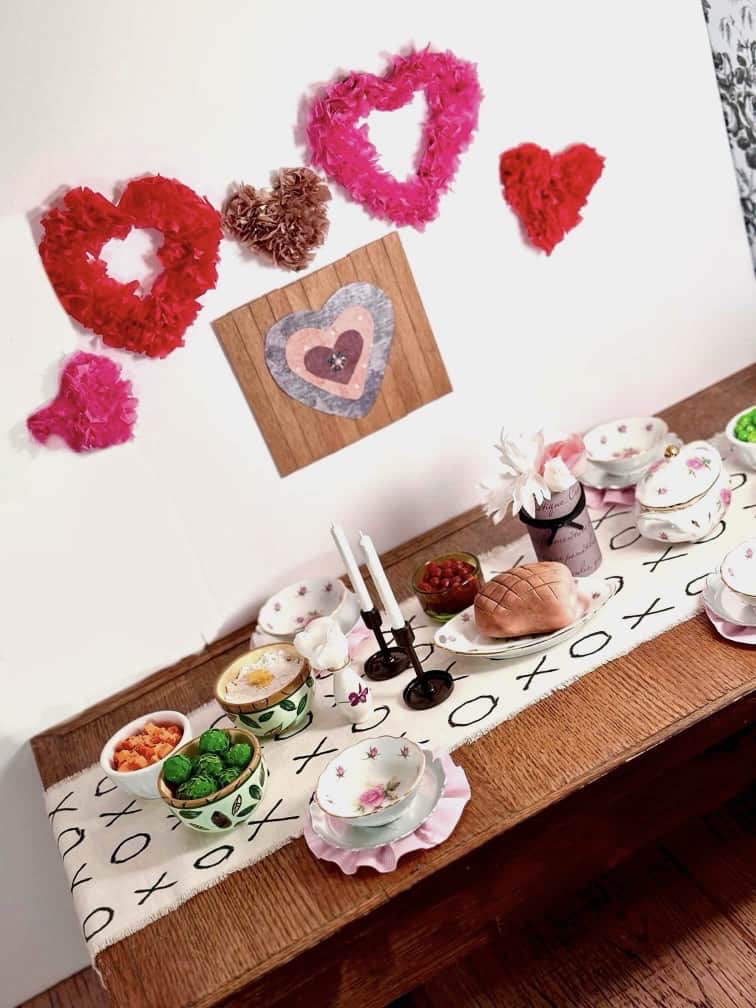
I just love these ruffled placemats! I just had to make some! I had this ruffled ribbon in my stash.

Honestly, I was so thrilled to be able to use it because I have no idea what it’s actually used for. If you don’t have ribbon that is ruffled, you can easily gather regular ribbon into ruffles using your sewing machine or by hand sewing.

I cut and hot glued the ribbon to form round rosettes. They look like little tutus. 😂 My ribbon had a top edge band sewn on, so I clipped it off to help them lay flat.

Then I cut out circles from cardstock and hot glued them on top.
These are so cute!!
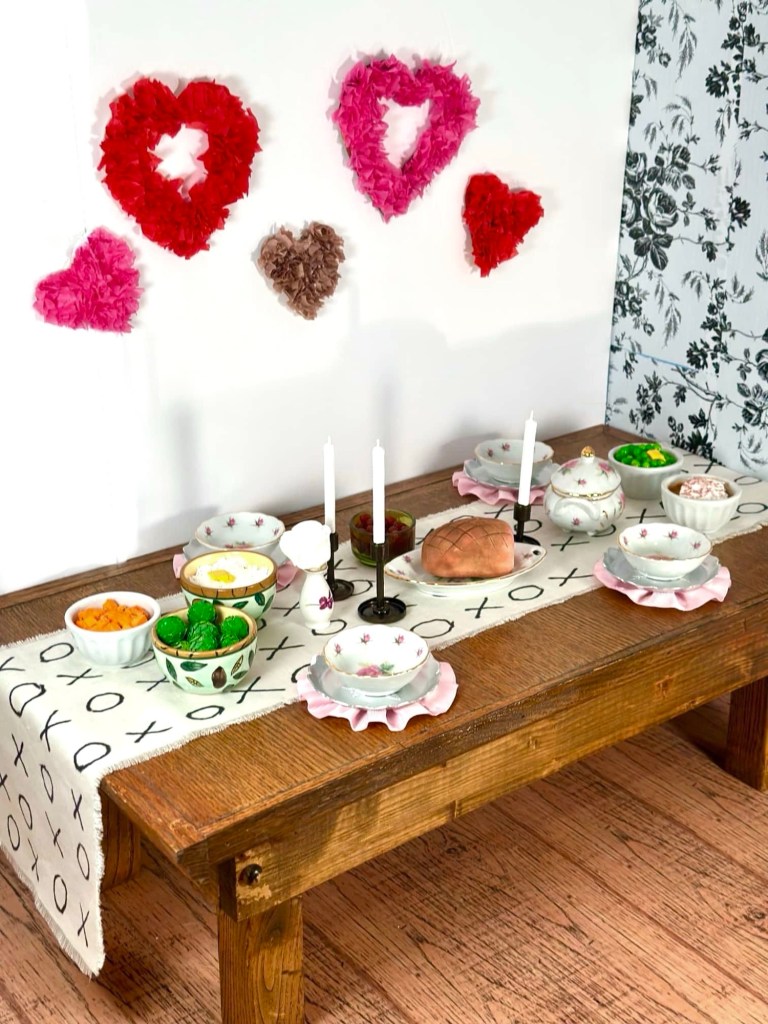
The next inspo from Pinterest was this table runner.
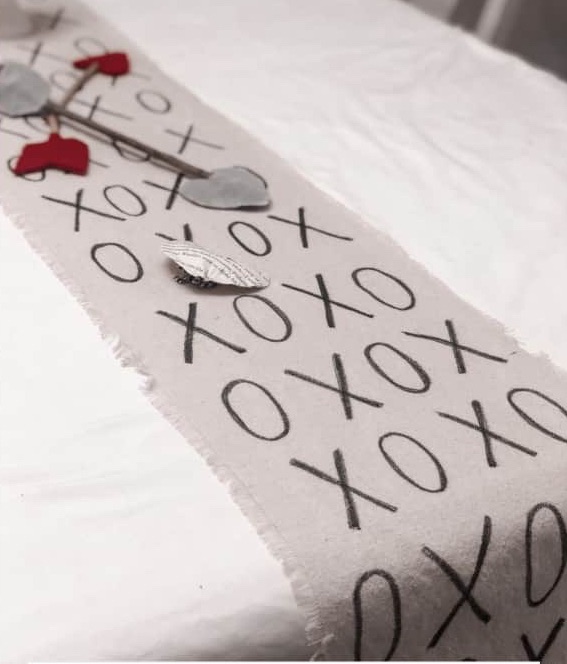
It is adorable! I had to have it for my dolls. I cut a rectangle of white fabric 31”x7”. It all depends how long your doll table is. You want your runner to hang over the end of your table at least two or 3 inches. I have a very long doll table, so my measurements might be overkill.
I frayed the edges of the runner by pulling some of the threads out. Then I used a permanent marker to draw on the X’s and the O’s.

Disclaimer: If you draw on fabric with a permanent marker, make sure you have something underneath it. Ask me how I know. Luckily, non-acetone nail polish remover took the permanent marker right off of my craft mat easily. 🤦🏻♀️

Adorable!!
Next up, are these rose hearts.
I didn’t have any roses, so I decided to make them with tissue paper instead. I had a ton from my gift bag stash.

I used a heart cookie cutter to trace my hearts onto recycled cardboard.

Just trace a larger heart around the smaller cookie cutter heart to make the heart shaped frame.

Cut out the inner heart using an exacto blade so you can still use it to make more heart shaped decor.

Use the first as a tracing template to make as many as you want.

Now use tissue paper and a glue stick to add dimension to your hearts. I think we all did this in grade school.
Cut small squares of tissue paper. Place some glue on your project. Wrap a square of tissue paper around the eraser end of a pencil.

Stick it on and pull the pencil away.

The fastest way to stick these little pieces on is to do it in sections. First cut out a mountain of small tissue paper squares. Place glue stick on a section of the heart frame and stick all of your tissue paper squares on the section.
Then move onto the next section. Keep going until your heart frame is covered. It goes much faster this way than to have to glue each piece.

Now you need to trim.
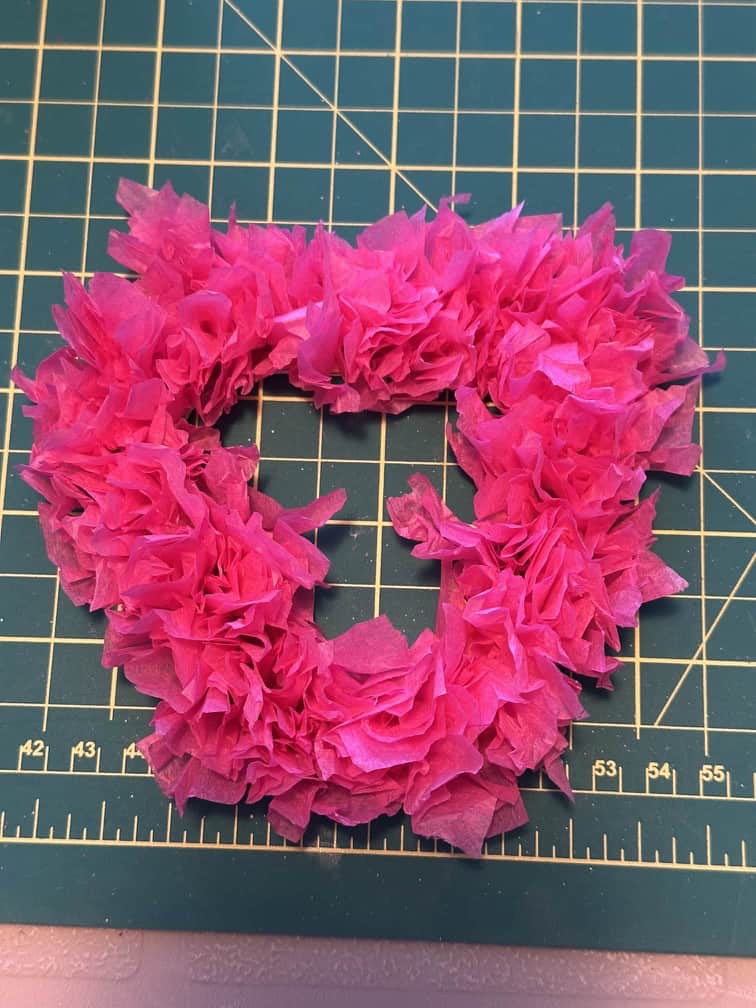
I also used a bit of glue to shape the top of the heart a little better. The tissue tends to make it difficult to see the heart shape. Just trim, scrunch and glue a bit to recreate the shape.

I made quite a few of the smaller hearts too. These turned out so sweet.
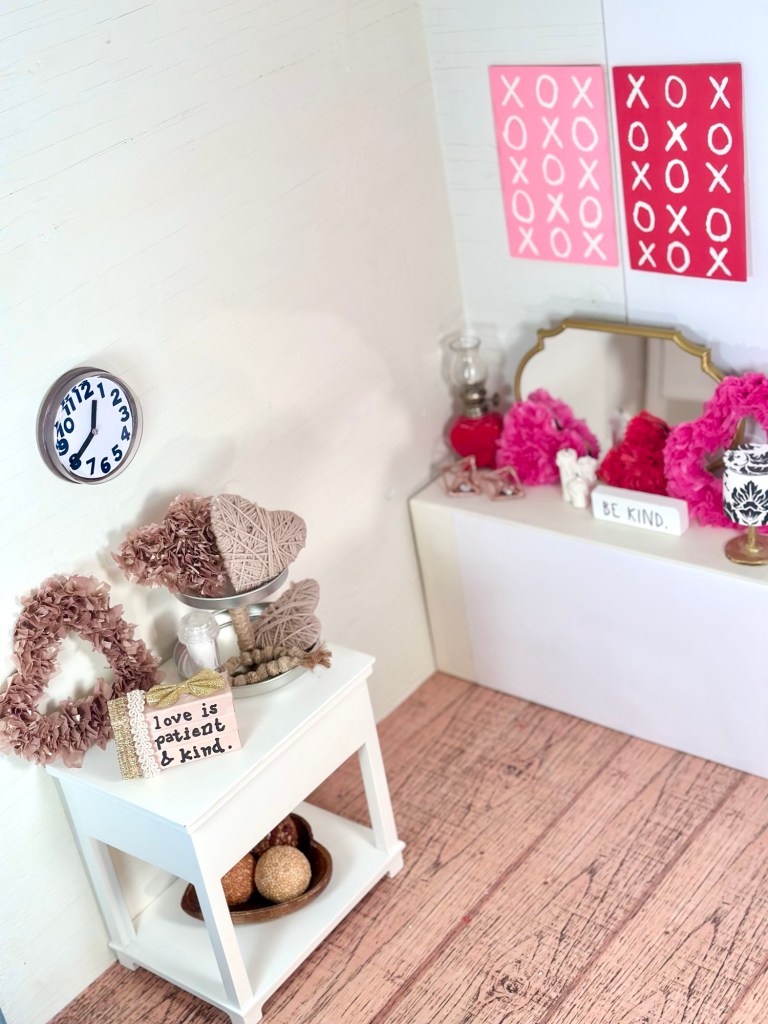
You can hang them on the wall or just prop them up on your doll’s mantle. I made red, pink and gold tissue hearts.
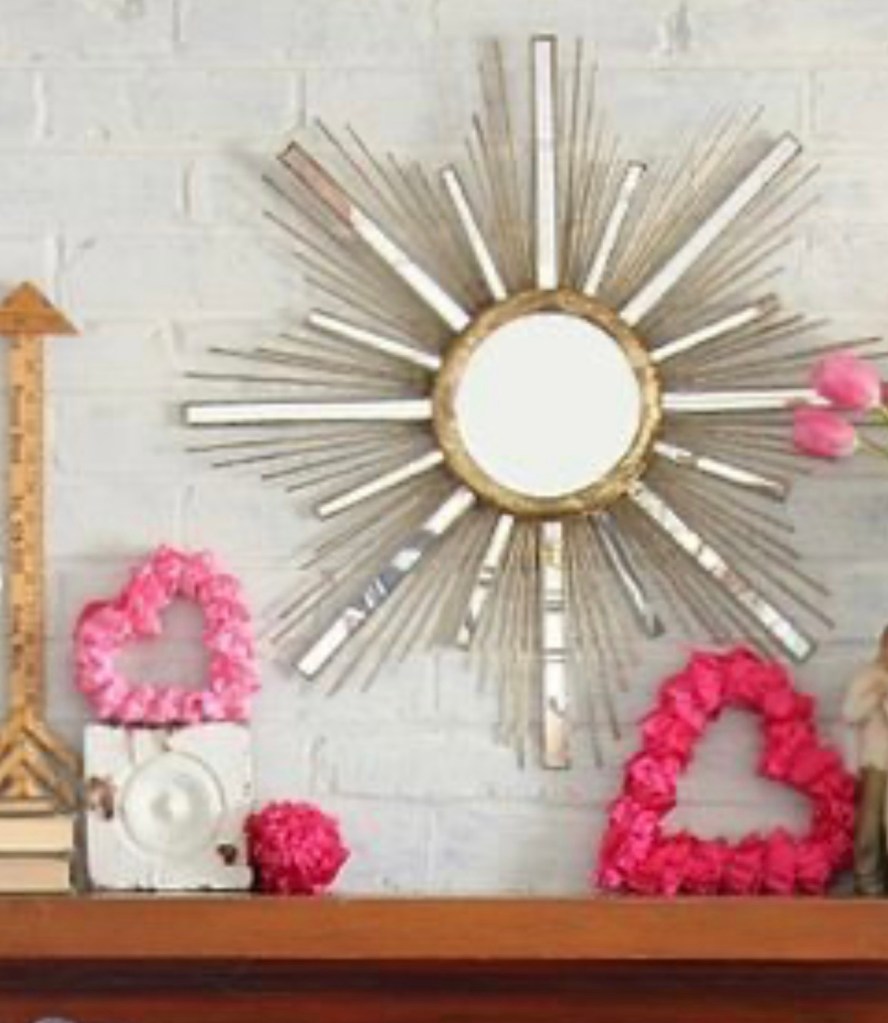
My next Valentines decor creation is inspired by these wall hangings.

How cute are these! I had to make them.

Starting with two wood pieces, I painted them red and pink.

You could also use cardboard for this or they sell small canvases at the dollar store. I was just using what I had in my stash.
I used a pencil to draw on the X’s and O’s. Then I went over the pencil with white paint.
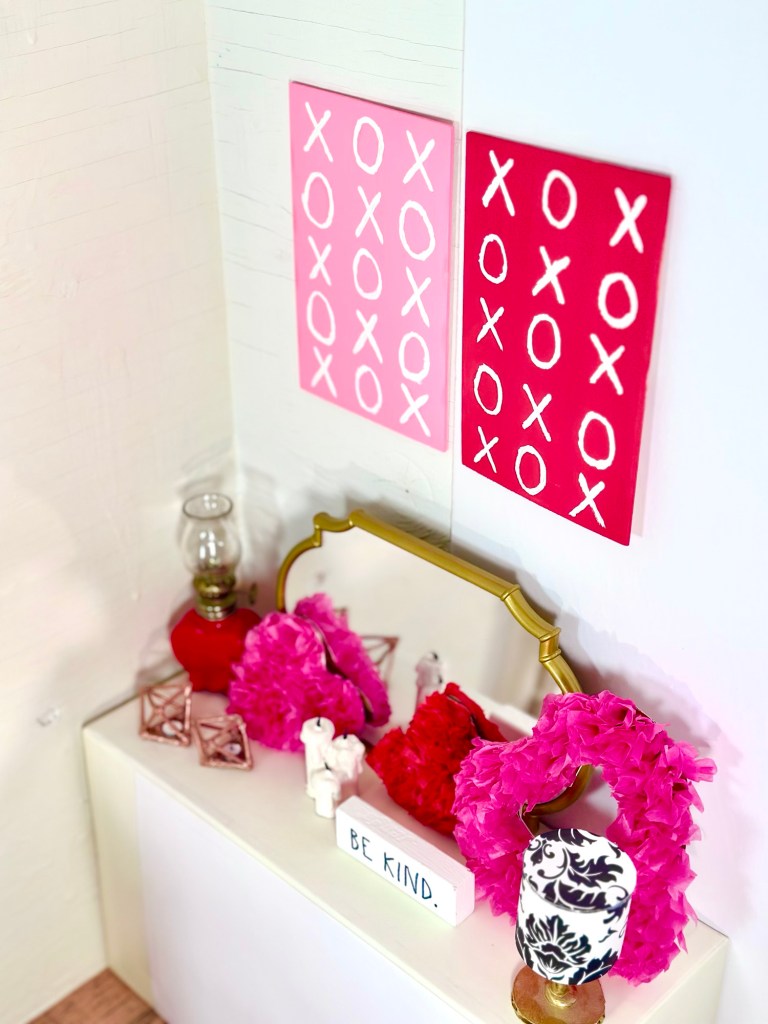
❤️Too cute!❤️
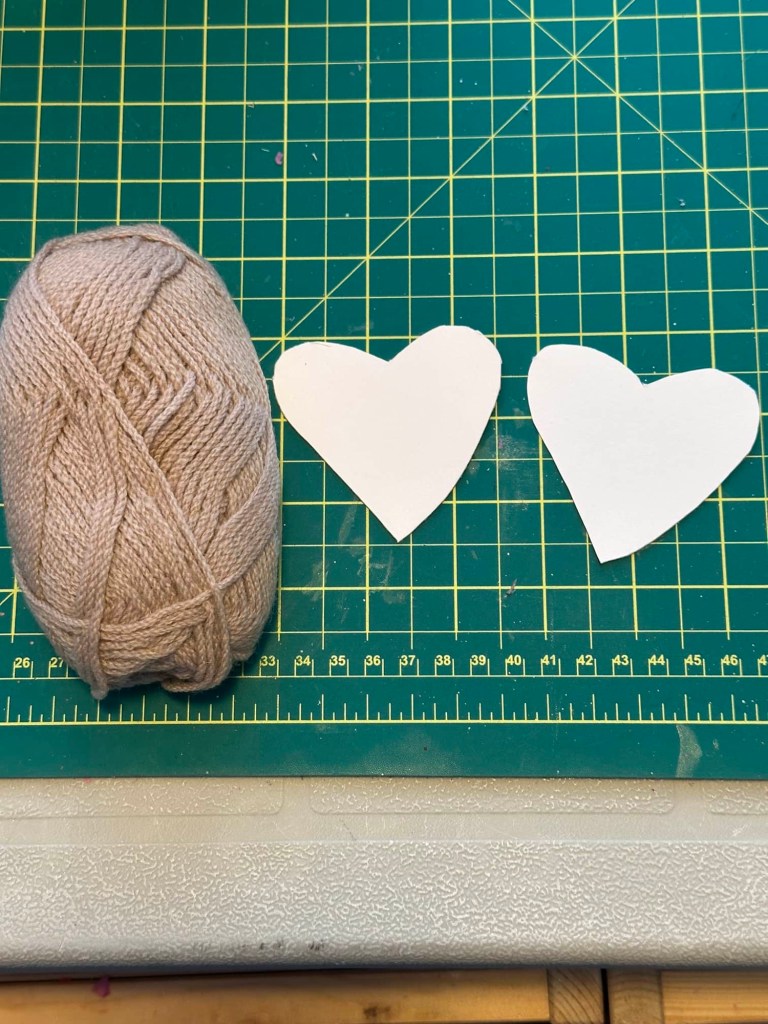
The easiest craft ever was these yarn hearts.

Just cut out a heart from cardboard and wrap with yarn.
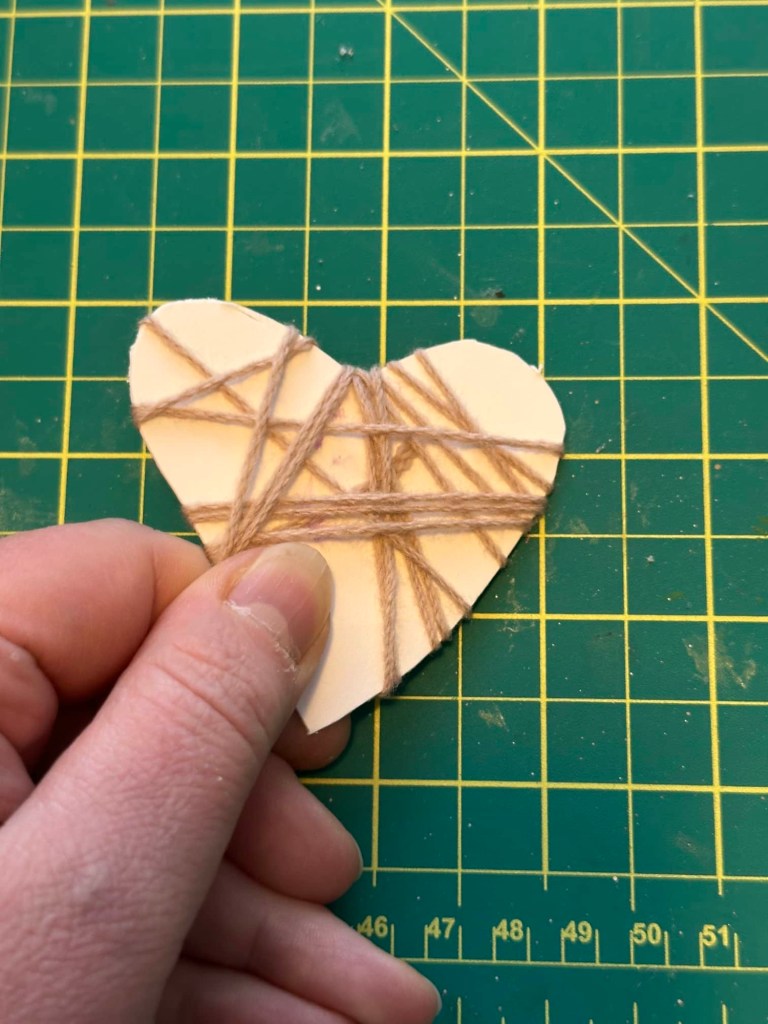
You can add a hanger or you can just put these on your dolls mantle or even on a tiered tray.

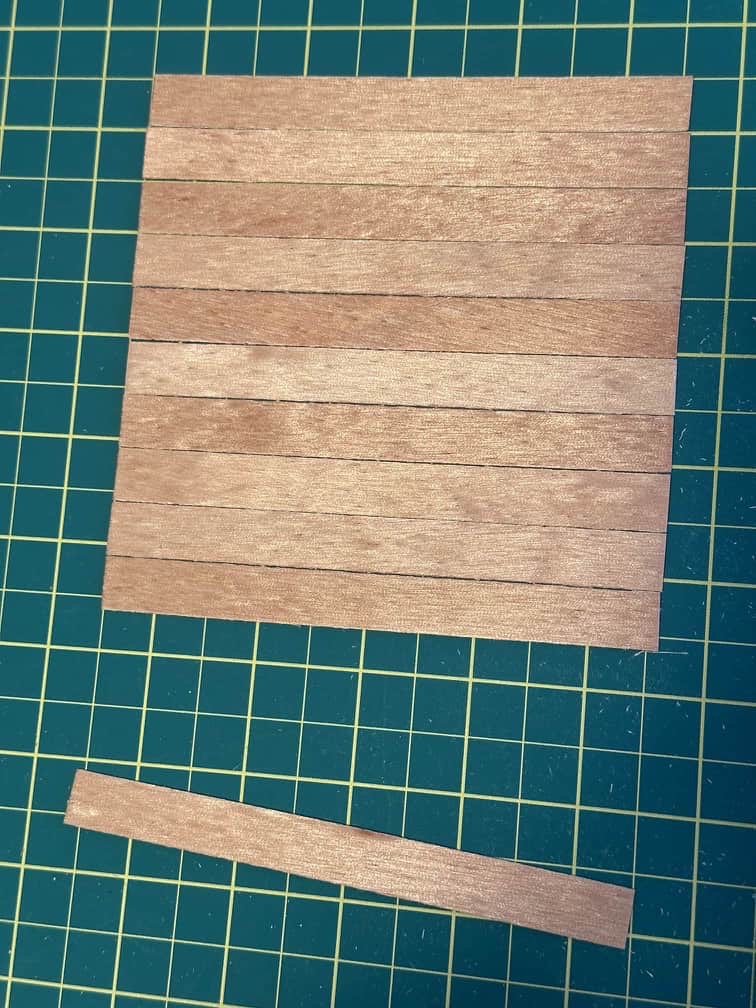
This cute three block piece is next on our list.

Just stack and hot glue together three tumbling tower blocks.

Wrap in scrapbook paper or paint.

I used scrapbook paper, so I made sure to score the lines between the blocks. Then embellish with ribbons and lace.

This piece can be used year round I think.
My next craft is a cross between these two heart hangings. I couldn’t decide so I used elements from both.


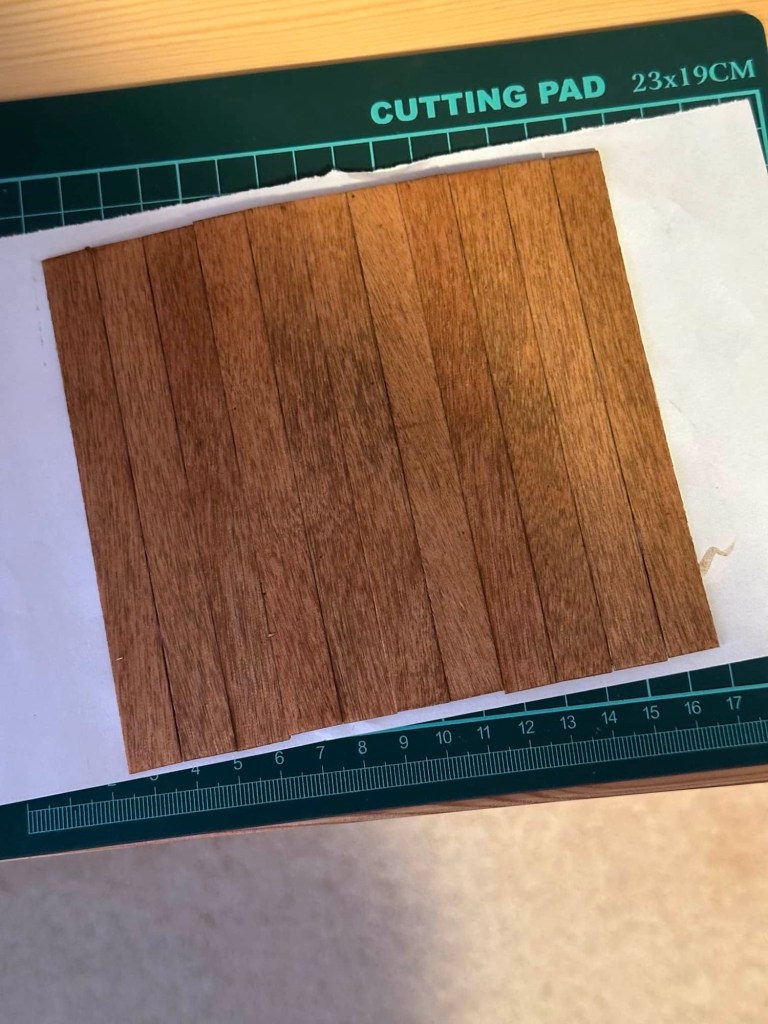
I had these craft sticks in my stash, so I decided to use them. Popsicle sticks would work just as well. I laid them out evenly. Then I glued three craft sticks on top to secure them.
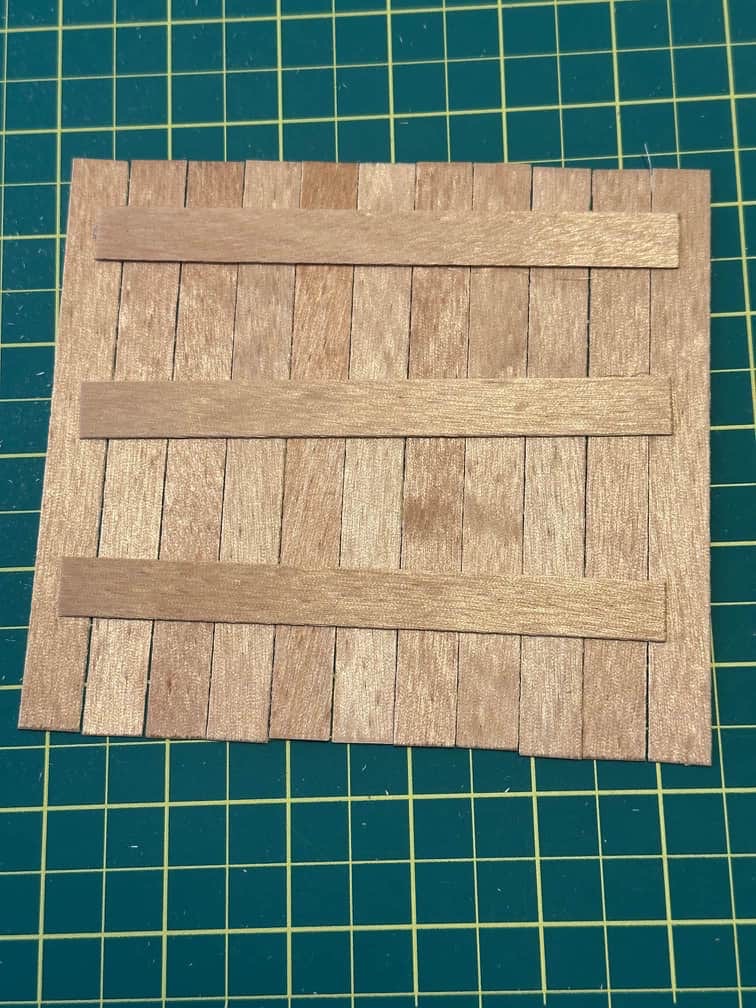
I didn’t like how orange the wood was pulling, so I decided to do a darker brown paint wash. Just use some watered down brown paint.
Next, I cut some heart shapes from scrapbook paper.

Use a glue stick to stack them. I added a decorative pearl accent to the top.
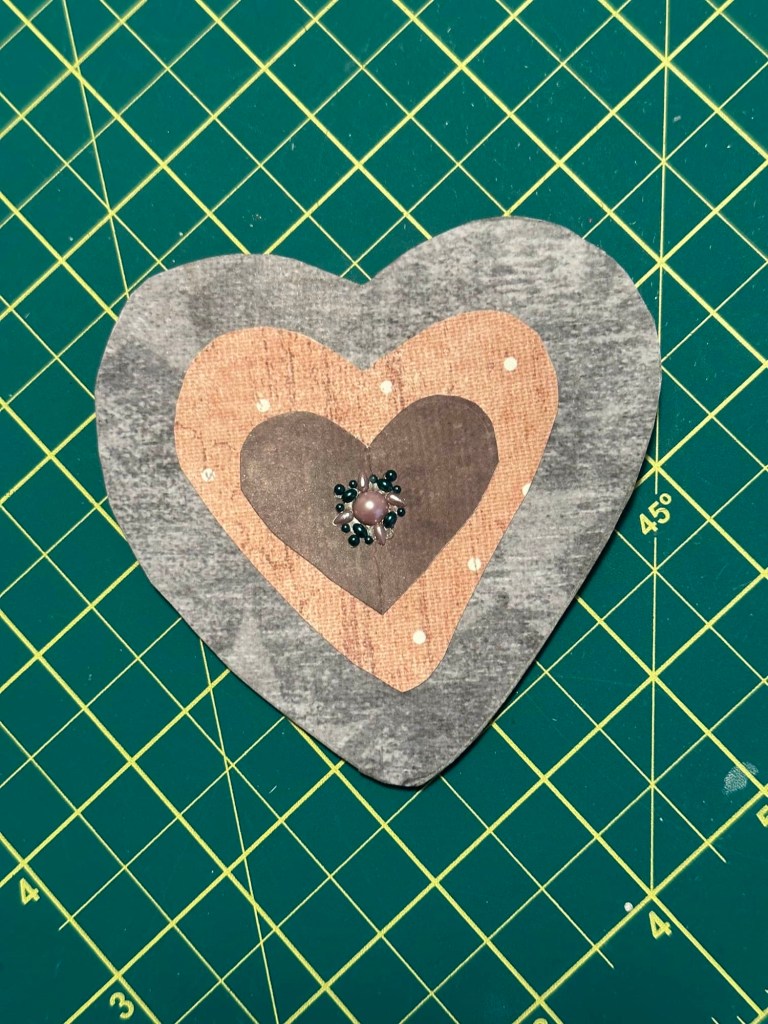
Now add your heart embellishment to the wooden frame with hot glue.

This is cute to hang on the wall or to prop up on a fireplace mantle. (If we had one 😭)

Lastly, I wanted to make this vase or a version of it.

This one is so simple. I have a lot of leftover dried out paint bottles. I save them all for exactly this reason. They make perfect vases.
Simply cut off the top with an exacto blade. Make sure to clean it out.


Then cut a piece of scrapbook paper to wrap around your vase.

Use cord or twine to make an embellishment for your vase. Wrap and tie it around the top.

Done!
Add some small flowers from dollar tree.

❤️Adorable!❤️
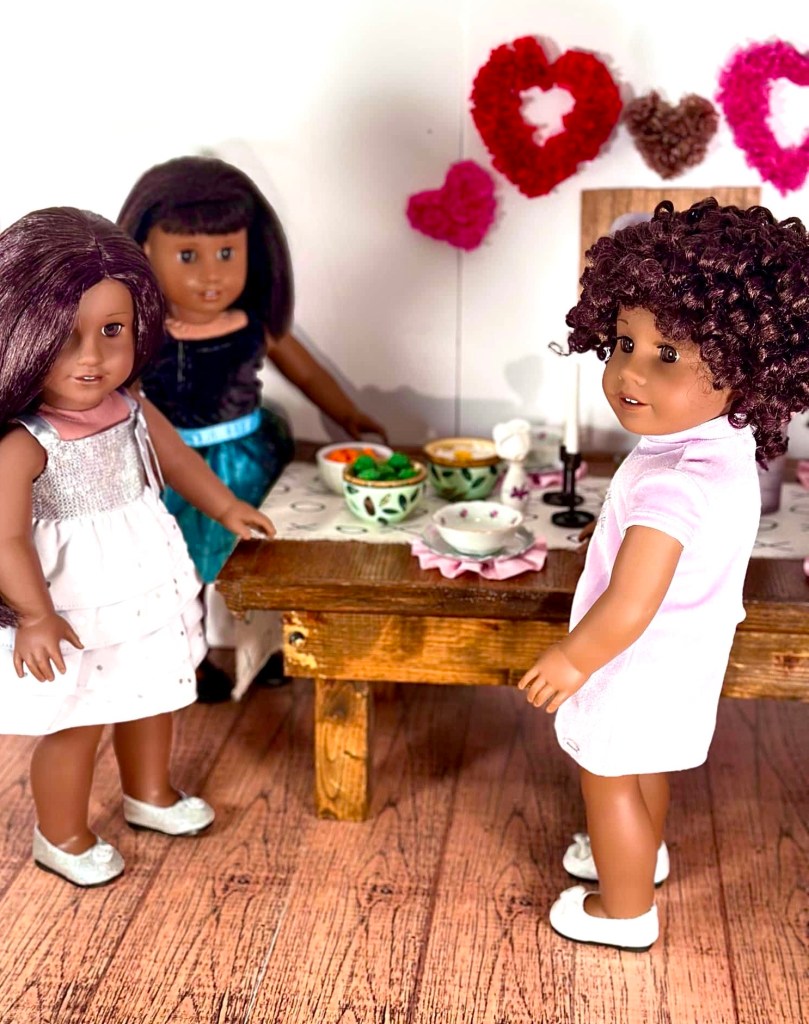
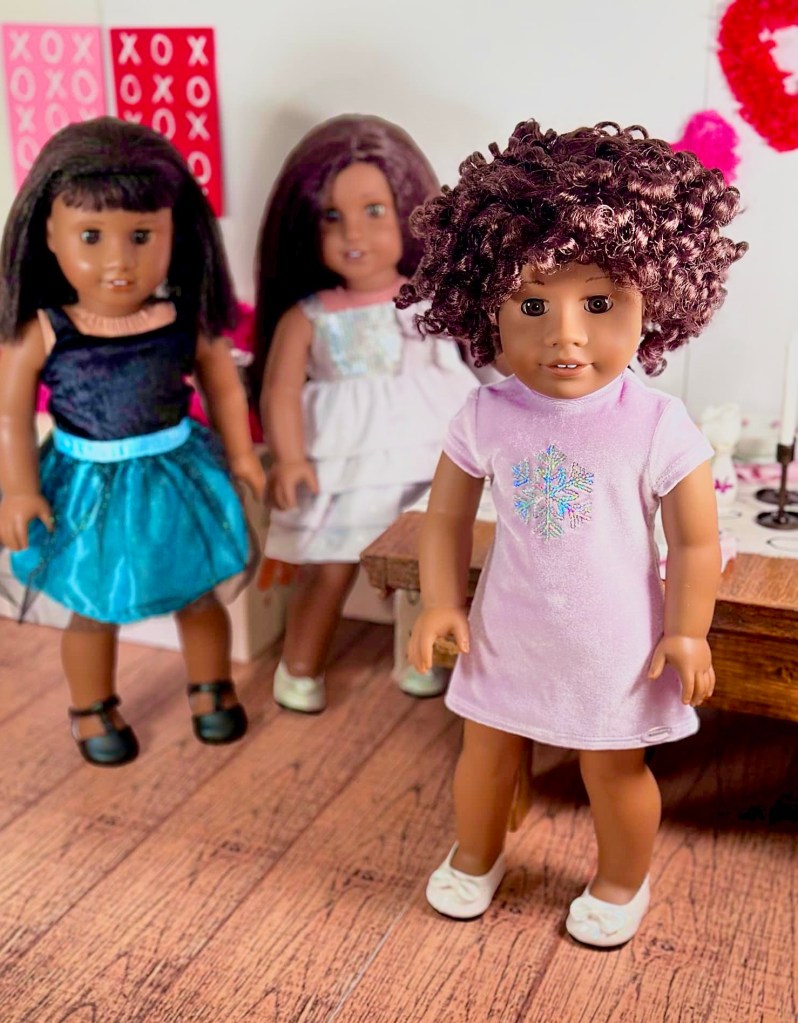
Oh look! Melody’s friends are arriving to the party! First, is Macy!

Hi Macy! Happy Valentine’s Day!

Here’s Nadia! Your dress is beautiful, Nadia!
It’s almost time to eat! Mom made a nice ham!

Everything looks so wonderful!

Where did you get all these decorations?
My mom made them!

Really? That’s amazing!

Yeah, she really is amazing. ❤️ Melody laughs.

Ooh here she comes! Hi mom!

Hello! You girls ready to eat?
Oh yes please! says Macy.
But wait! We nearly forgot!
Happy Valentine’s Day, Mom!

And a happy Valentine’s Day to all of you, too!!
I sure hope that you enjoyed and thank you so much for visiting with us today!
What do you have planned for Valentine’s Day?
Leave a comment below!!
❤️❤️❤️

The work that you put into your creations is stellar! I love the apple blossom twigs and the ruffled pink placemats.
LikeLiked by 1 person
Thank you so much!
LikeLike
I can’t begin to guess how many hours you put into making all of these projects! Congratulations for your creations and very cute party. 🙂 Just WOW! I think my favorite is your tissue paper hearts – they can be any size or color and beautify all kinds of areas in your dolly world. Thanks yet again!!
Terry in Colorado
LikeLiked by 1 person
Thank you! I always love your comments and kind words. It is definitely a labour of love!
LikeLike