

Hi guys! Last week I created a new pleated skirt pattern for the dolls! It turned out quite cute and it was pretty simple to make. So that is what we are making today!
What You Need
Sewing machine and thread
Cotton woven fabric
Iron
Fabric scissors or rotary cutter
Paper, pencil, ruler, scissors
Straight pins
Fabric chalk or marker
Snap closure or velcro
Let’s get started!
The first thing you need to do is make a pattern. Get your paper and measure out a rectangle for the skirt and another rectangle for the waistband.
Disclaimer: I used measurements for a doll with a 10” waist. If your doll has a larger waist, please add inches to both pattern pieces accordingly.
Skirt: 4.5 inches by 23.5 inches
Waistband: 5.25 inches by 2 inches

Pay attention to the stretch lines marked by the pink arrows. Both the waistband and the skirt are cut on the same grain line which is the opposite of the stretch line. You want the skirt to stretch around your doll’s body.
Also as you can see I just used the waistband from my Flat Waistband Skirt pattern since it already fits my dolls perfectly.
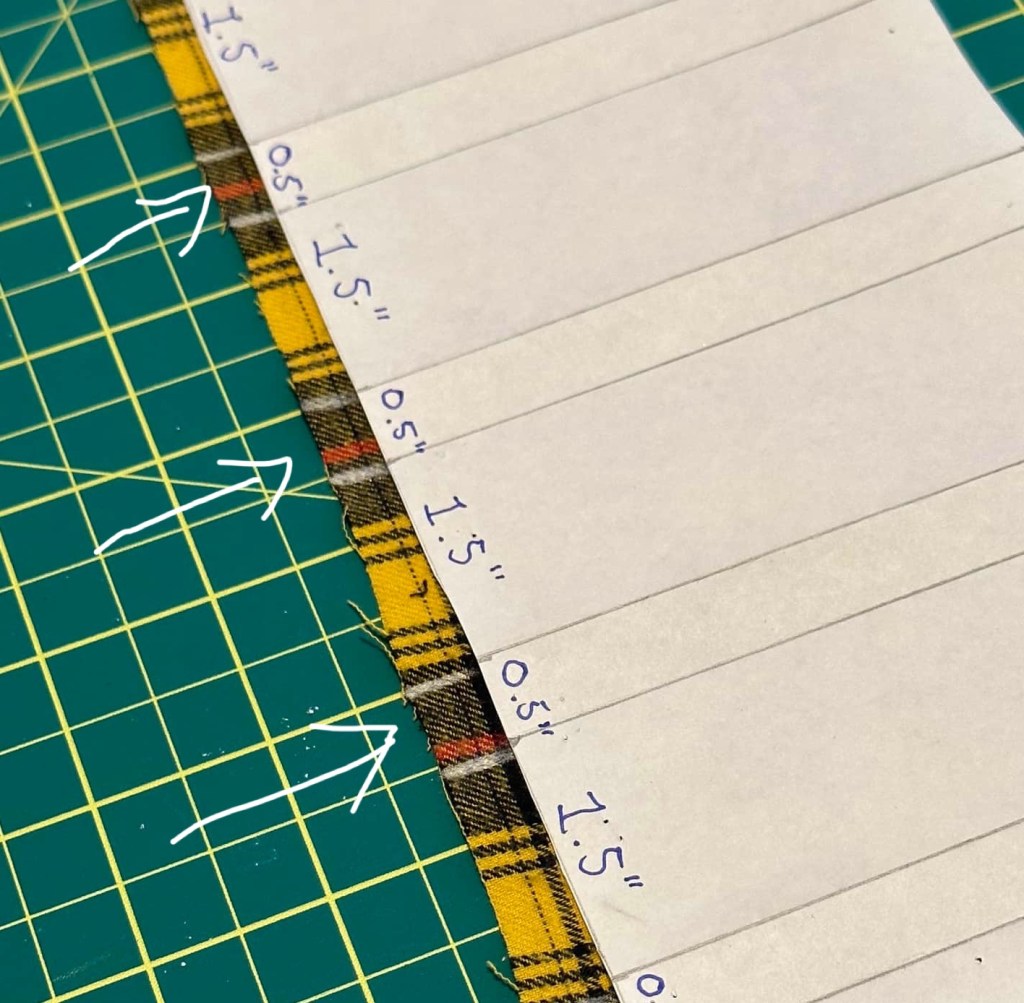
Once you have your two rectangles, take your skirt pattern and begin marking out the pleats. Starting at the 1.5” mark, measure out 0.5” pleats with 1.5” gaps in between each one as shown above.
Pin your pattern pieces, again pay attention to the stretch. Also, don’t forget that the waistband piece is placed on the fold.

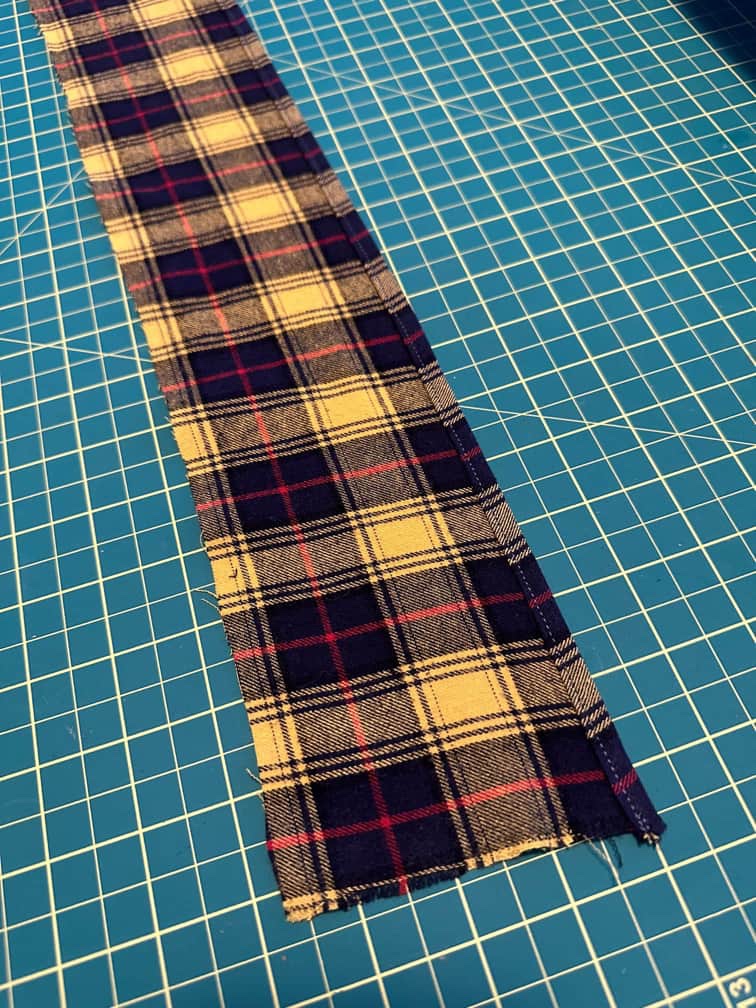
Cut out your pieces. Then take your skirt piece and hem the long edge by folding over and pressing 1/4” and then 1/4” again. This will make a nice enclosed quarter inch hem.
Now I don’t know about you, but every time I sew a hem it seems to stretch my fabric a bit.

As shown above, when replacing my pattern piece, I now have an extra half inch or so of fabric on the end. You don’t want this or your waistband will not fit properly. If your skirt piece doesn’t match your pattern piece at this point, trim off the end.
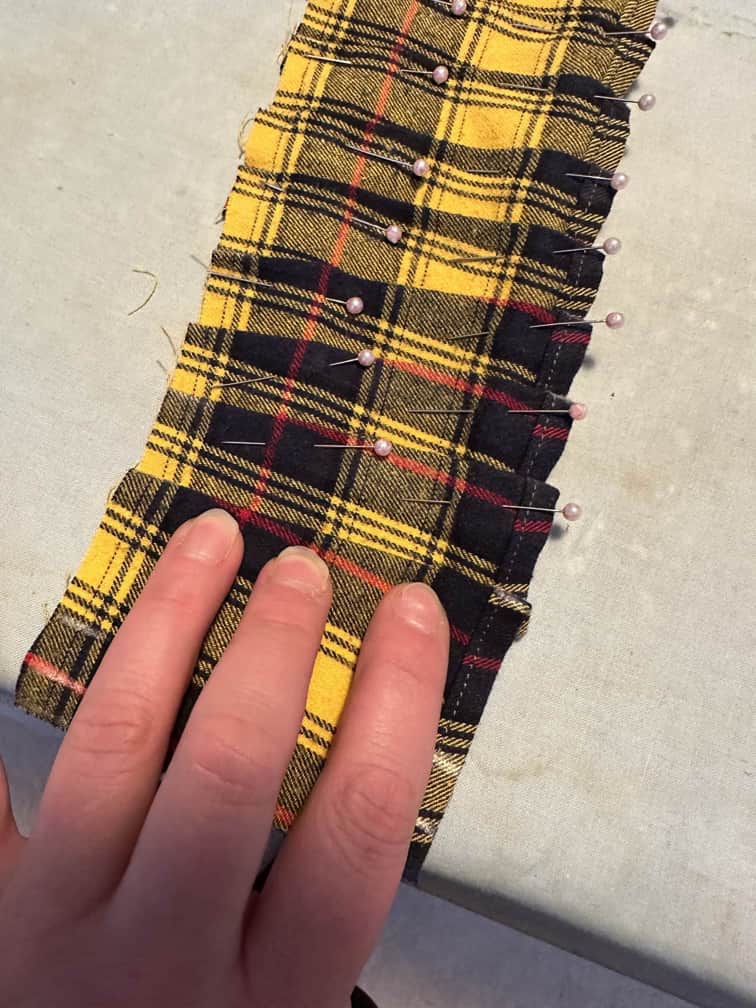
Time to mark your pleats on the skirt piece. Using your chalk or fabric marker, mark the pleats with your pattern as a guide.

I also have grid lines on my cutting mat that I can use to line up and mark the pleats properly. Be sure to mark on the wrong side of the skirt piece. Also be sure to mark both the top edge and the hem edge of the skirt.
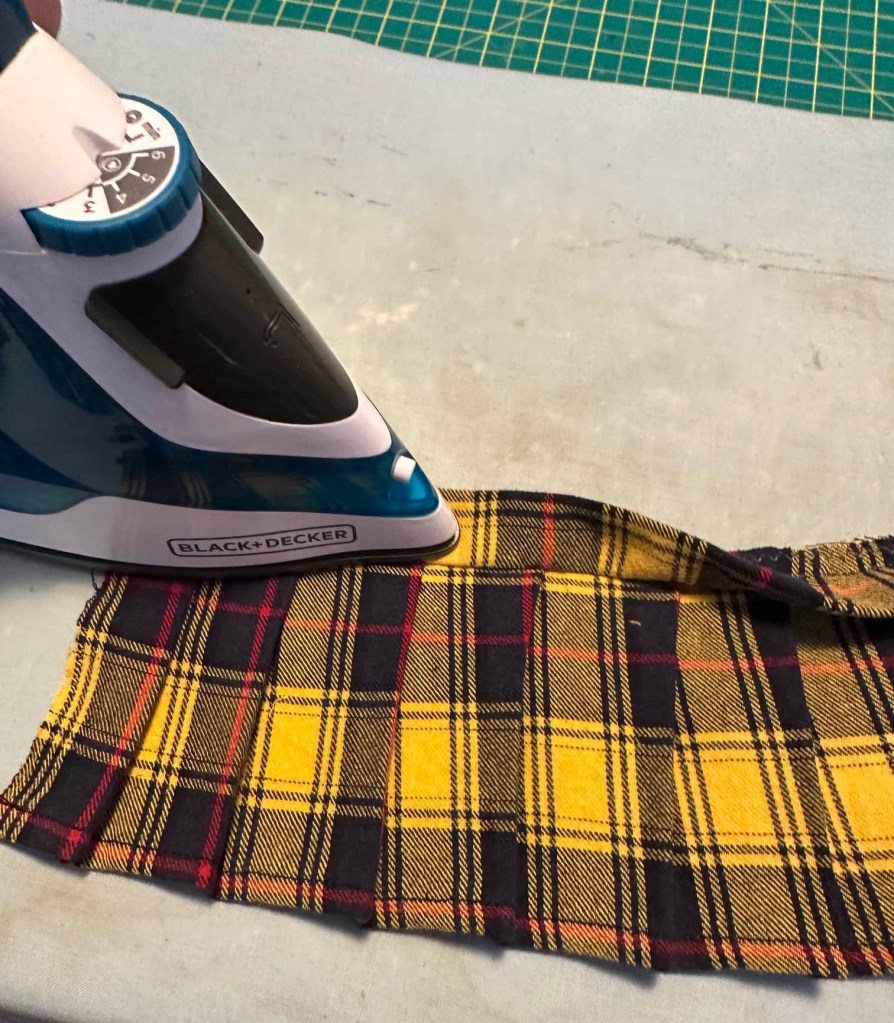
Once your skirt piece is marked, it is time to press the pleats.

It doesn’t matter which way your pleats face as long as they all face the same way.
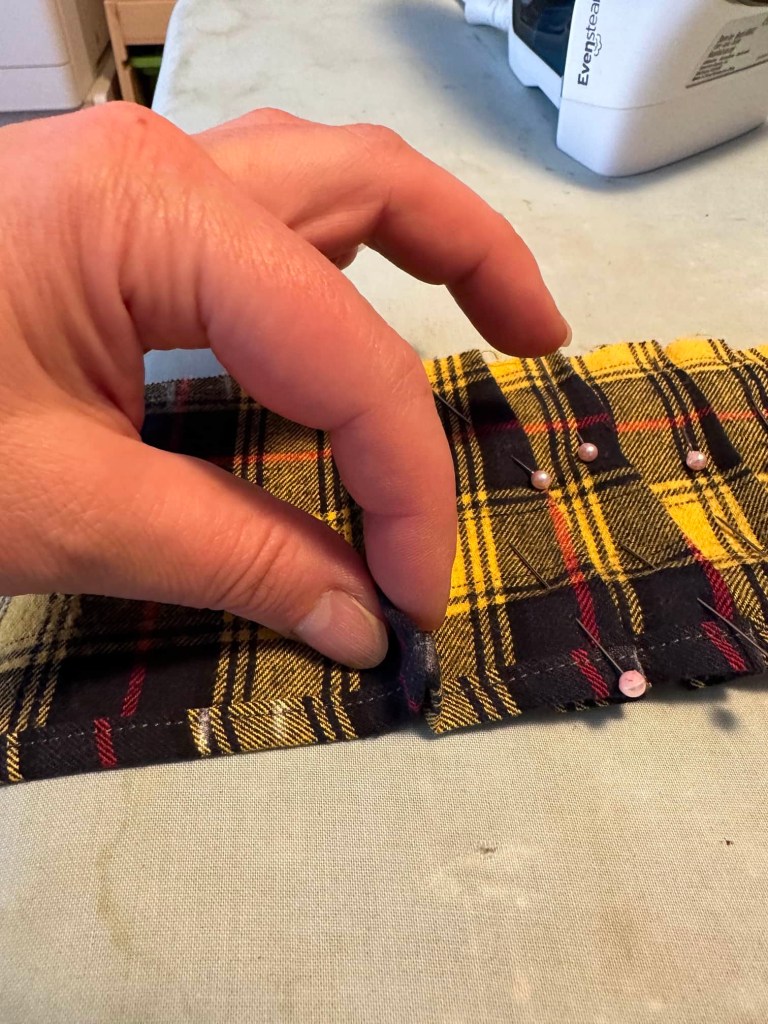
Press each fold of the pleat as you go. It is a bit like folding a fan.
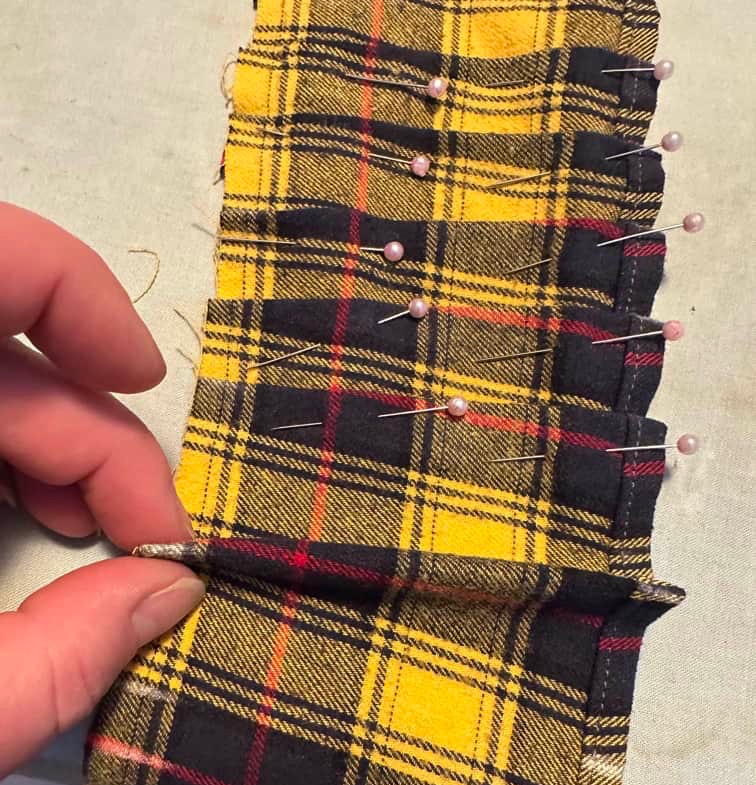
Be sure that your folds are an equal distance apart and very straight. I pin each fold as I go.
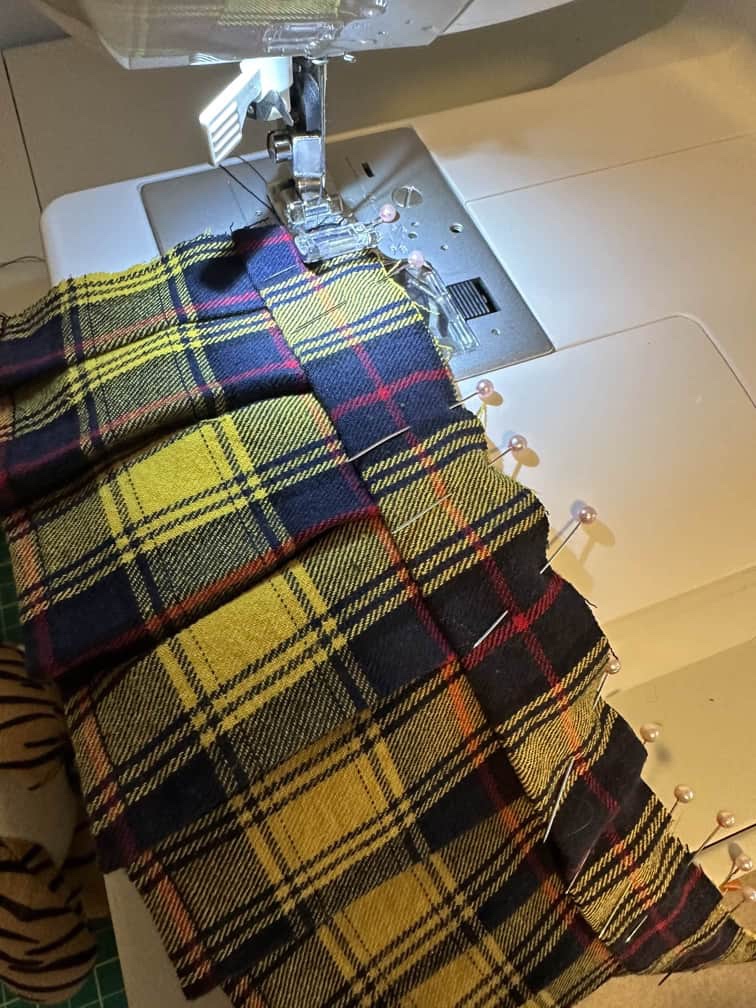
Once all the pleats are pressed and pinned in place, it is time to sew them.

Stitch straight across the top edge of the skirt at about 1/4”

Now we will attach the waistband. Fold the waistband in half lengthwise and press.

Now fold the waistband in half to find the center. Place a pin. Fold the skirt piece in half to find the center as well. Place another pin.

Line up the two center pins and pin the waistband to the top edge of the skirt, raw edges together. Also pin the two ends as shown.

Now stretch your waistband a little to attach it to the skirt piece. Do not stretch the pleats.
I pin little by little adjusting and nudging it into place as I go.
If you find that you just have too much skirt fabric, you may trim equal amounts from either end of the skirt piece, but don’t take off too much! Sometimes fabric stretches when it is sewn and some fabrics, even wovens are stretchier than others.

The important part is to get the waistband pinned on there evenly without stretching the pleats.
Stitch the waistband to the skirt using a 1/4” seam.
Then serge or zig zag stitch the top edge.

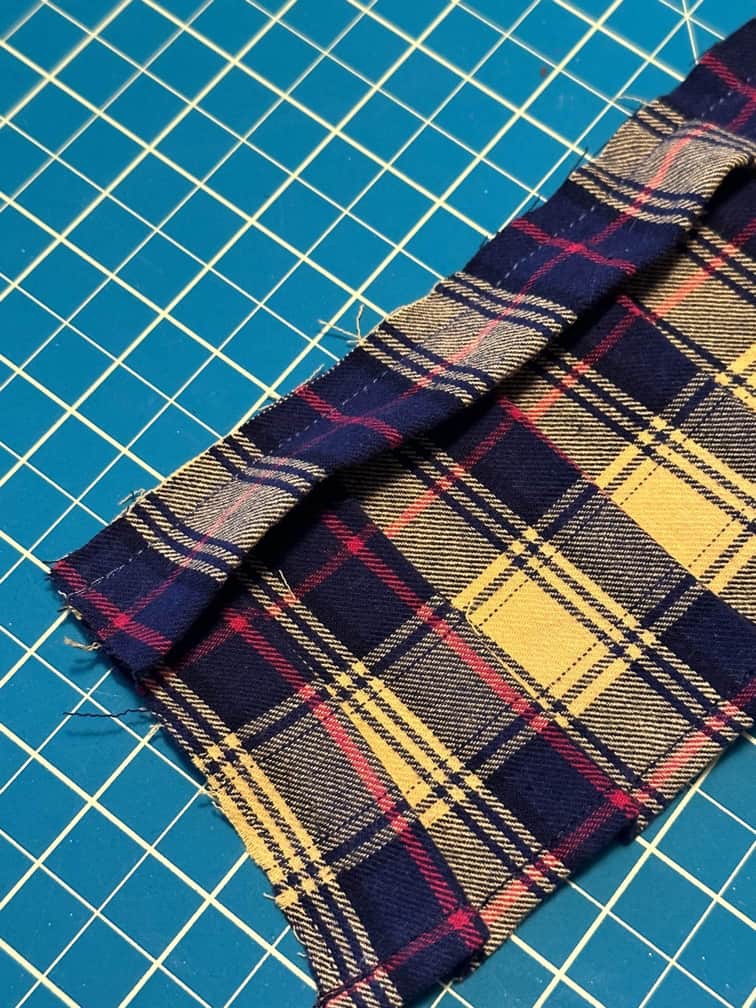
Next press the waistband up.
Topstitch along the waistband seam.

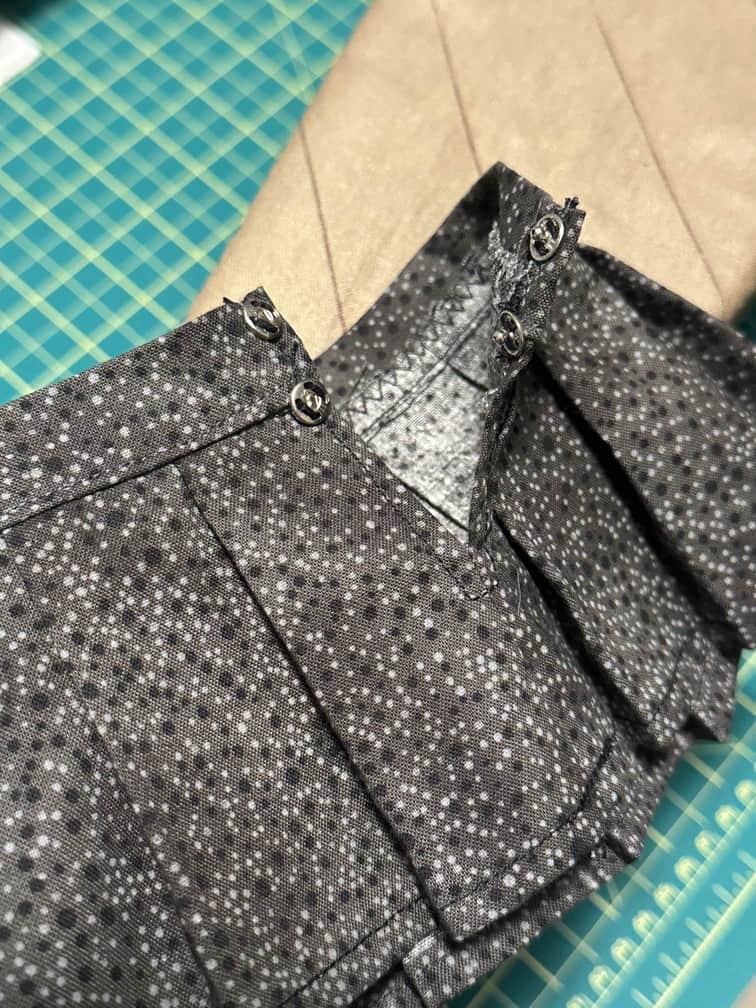
Now zig zag or serge to finish each of the raw back edges of the skirt.

Place the back edges of the skirt right sides together and measure 2 inches from the skirt hem. Pin.

Stitch starting at the hem up to the two inch mark.

Press the seam open and pin.

Stitch across the hem line to tack the seam open. Then stitch down one side, pivot, stitch across, pivot and stitch up the other side as shown in red.

Attach one or two snaps at the back or you can also use velcro for the closure.
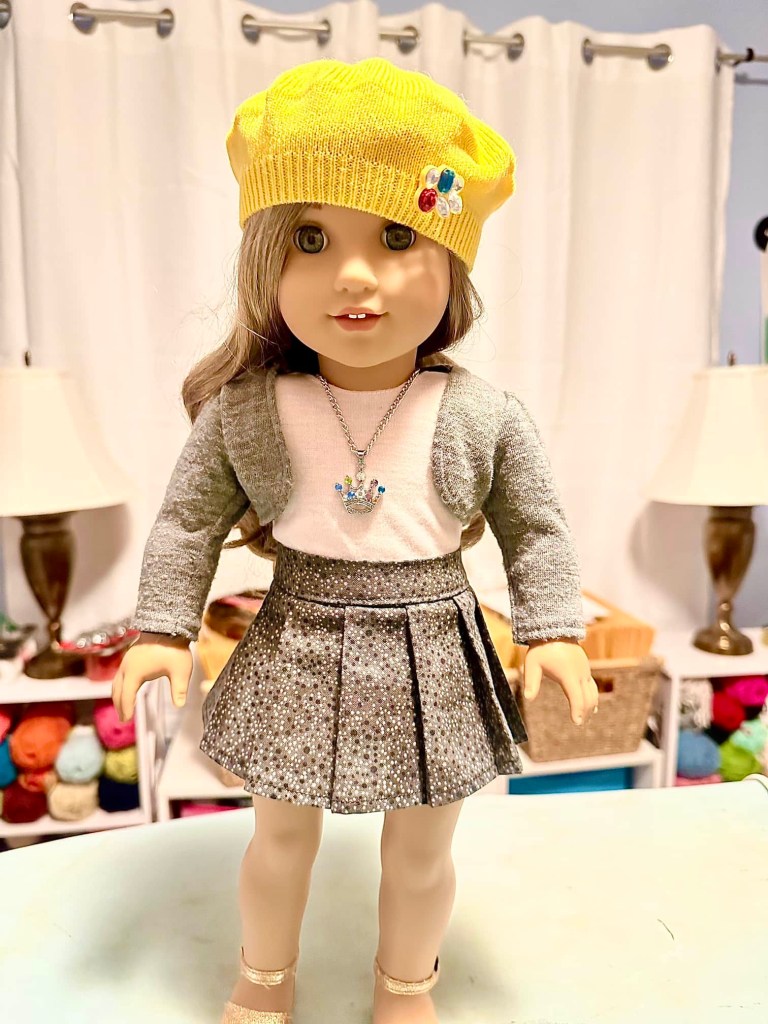
And you’re done!
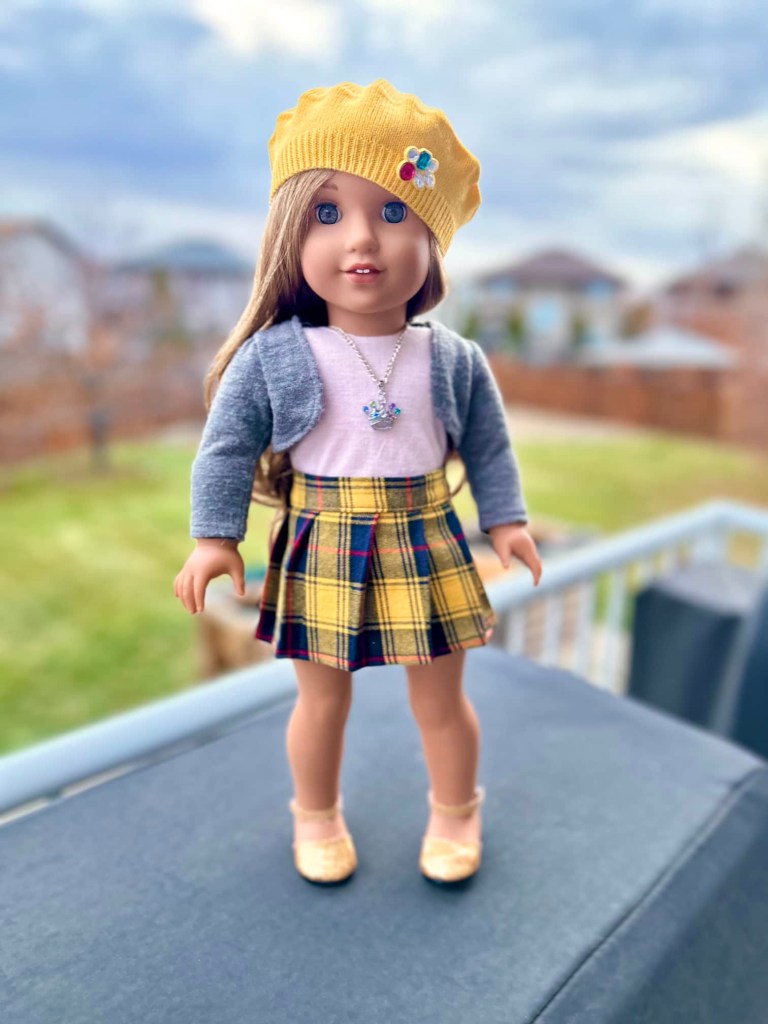
The plaid I used was a light flannel so the pleats are softer.

The cotton skirt pleats are sharper.

😊❤️ Love!

I hope you enjoy this pattern as much as I enjoyed creating it! It is so nice to be back at it sewing for the dolls again. It’s always been my happy place. 😊
Well I should be off, but as always, keep smiling and have a crafty kind of day.
Leave a comment below!
❤️❤️❤️

This pleated skirt is just what I need to make for my girls. Thank you so much for sharing your skills and pattern and instructions. I love it in the plaid, but I going to use a plainer fabric for the first few. It’s challenging to find a plaid in a small enough size to look good on our dolls but I do have some nice fabrics that will work well for this project. I’m glad that you’re having the fun of sewing again!
LikeLiked by 1 person
That’s awesome! I am so glad that you are going to make some for your dolls! I just love the look of pleated skirts, especially with sweaters and boots for fall! 😊
LikeLike
These skirts are everything! 🥰 I so badly want to make these but I can’t sew for the life of me, lol!
LikeLiked by 1 person
Thank you!! ❤️ I taught myself to sew mostly using Easy level patterns from Pixie Faire. They are the best, but the most important thing to have when learning to sew is a good machine that doesn’t jam up on you all the time. Sewing should be relaxing and easy. Often the problem is the machine, not the person using it. I always say buy a very basic brand new machine to learn on. That way you have all the manuals and you won’t come up against any issues that secondhand machines have. My second piece of advice, don’t start sewing at the very edge of the fabric. Start in a bit, then back stitch out and pull on the trailing threads to go forward again. Nine times out of ten this stops new sewists because the feed dogs eat the fabric and it is total frustration every time. I hope this helps, but no mind either way. Not everyone likes to sew and that is totally fine. 😊
LikeLiked by 1 person
That is so cool! Yeah, my grandma was teaching me how to sew on her older sewing machine. It jammed alot. When it wasn’t jamming though, it was really fun I found! Thank you so much for the advice, it is very helpful! 😃
LikeLiked by 1 person
You would be amazed how much fun sewing can be when the machine runs smoothly! I spent five years fighting a persnickety secondhand machine. It was a nightmare! Now I have a new machine and it sews like a dream every time! It is so worth it in my opinion. I learned on my mom’s secondhand machine growing up and it jammed all the time too so I thought that was just what sewing machines did! My new machine has never jammed not once in all the years I have had it. A huge difference!
LikeLike