

Hi all! We have been having a really rough go of it around here, illness in the family, so if I could ask all of my doll friends out there to just keep us in your thoughts and prayers, we would really super appreciate it. We love you guys all so much, and we know God can hear us. So please remember us during this difficult time. We believe in the power of prayer!
❤ ❤ ❤
Today we are here to share with you a little craft that is precious to my heart. Those who know me, know that I am a writer. I am passionate about books, stories, blogging, and really anything to do with the written word.
So it was obvious that I would fall in love with our resident doll writer, Kit Kittredge, and that she would eventually become one of my absolute faves. She even has a special little doll corner in the doll house where she can sit and dream, and write her stories all day long. The only thing that she was missing was her typewriter.
A couple of years ago, we purchased the OG Typewriter set, and I promise you it is the cutest darned thing that you ever did see.

The only problem is that it’s pink. (the horror!) Now rather than force Kit to write her stories on a pink typewriter, I promptly handed it over to Maryellen instead. She has a love of everything pastel coloured, and she had the perfect little desk for it in her Loft Bed space.
But that still left our poor Kit without a typewriter. As time went on, the problem began to really nag at me more and more. Could we really craft a typewriter? Keep in mind that we try to keep our doll crafts simple, light and easy, so that anyone out there can do them. We don’t have a lot of time or money to spend searching craft stores for supplies, so we always try to use what we have on hand.
My doubt kicked in. Maybe a typewriter was way out of our crafting league. So we went to Ebay, and that’s when we found THIS.

Not bad! It’s a music box. We were thrilled for a little while, but then the doubt kicked in again. Kit’s new typewriter was not pink, and it was sufficiently vintage. There was only one problem. It was way too big to fit on top of her desk. That meant that it would also not fit in her very special corner of the dollhouse where she could sit and dream and write her stories. Ugh. 😦
I finally decided that I wasn’t going to be truly happy until Kit had her very own perfect typewriter. The only question was HOW IN THE WORLD?????
Time went on.
Then one day while we were busy making items for Nanea’s Family Market, a very amazing fan (we love our readers) commented on our DIY Cash Register Tutorial:

Emmie, I believe that was you!! Thank you!!!!! ❤ 🙂
Well, holy moly, that’s when the lightbulb went on for me! Fast forward a few months, (it usually takes me a while to set a plan in motion) and we are finally ready to nail down a solid tutorial for you!
So, without further adieu, (boy, was that a lot of adieu 😛 ) let’s get started!!!
What you need:
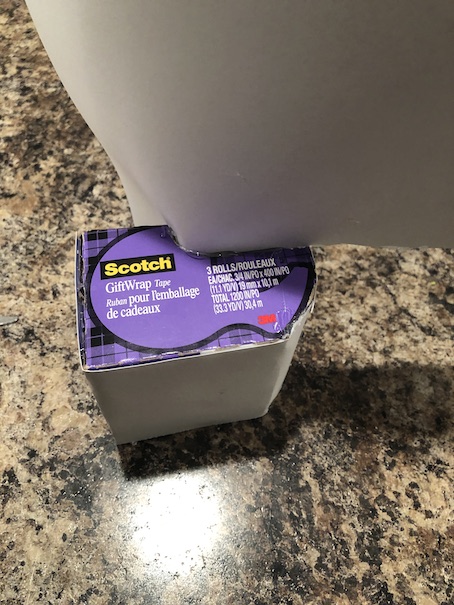
Bulk scotch tape box (I buy the pack of three)
Cardstock paper
Hot glue
Black and silver paint
Popsicle stick
Rubber band
Barbecue skewer
Jumbo slurpee/slushie straw
Black craft foam
Black construction paper
Hole punch
Tacky glue/white glue
Toothpick for smearing glue on
Glue stick
Black flat beads or buttons (optional)
Typewriter letter keys printed from online (we just googled typewriter keyboard, picked an image, and printed it out at a size that would fit)
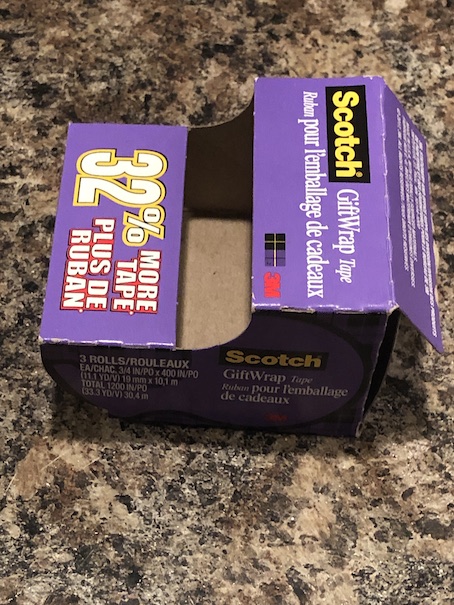
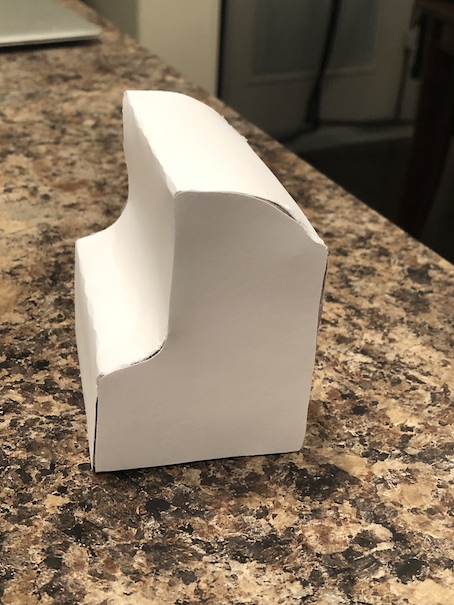
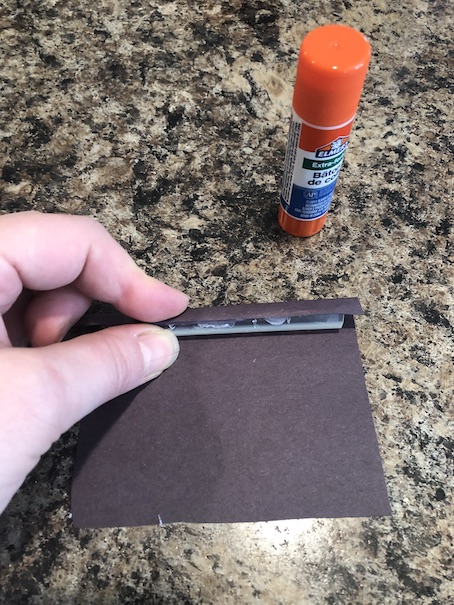
Okay, the first thing you want to do is cover your Scotch tape box with card stock paper. I use hot glue for this. Just bend and fold the paper around the shape of the box, gluing it in place as you go.
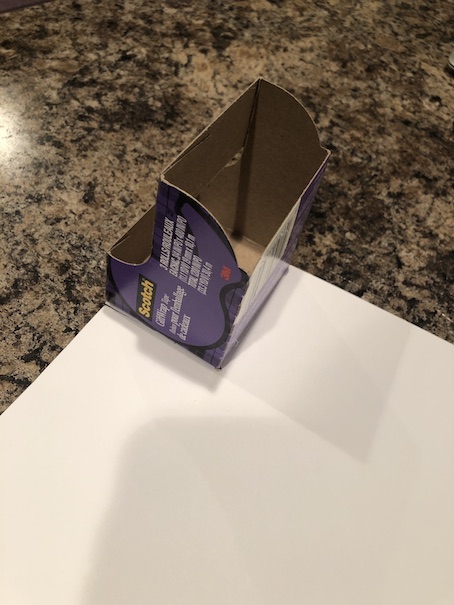
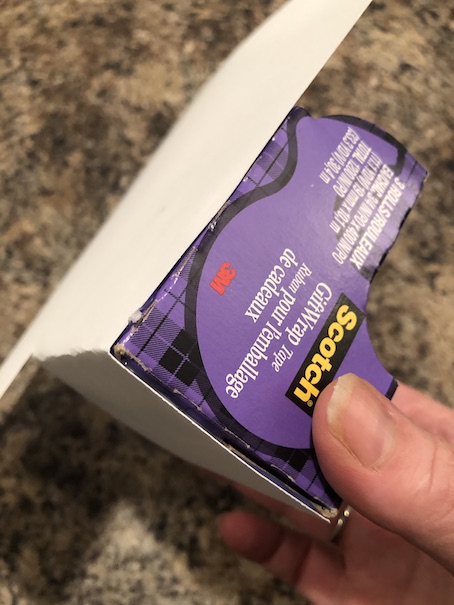

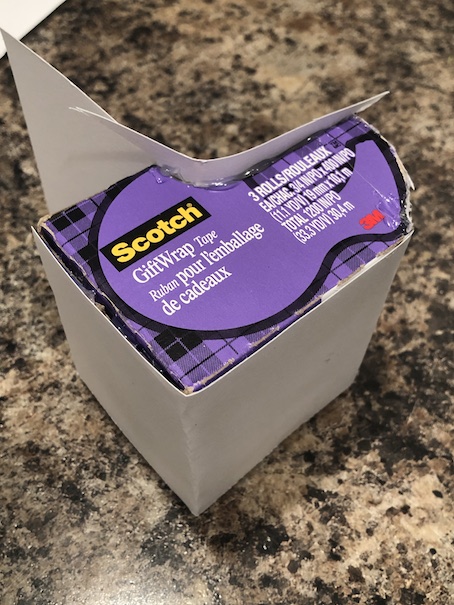
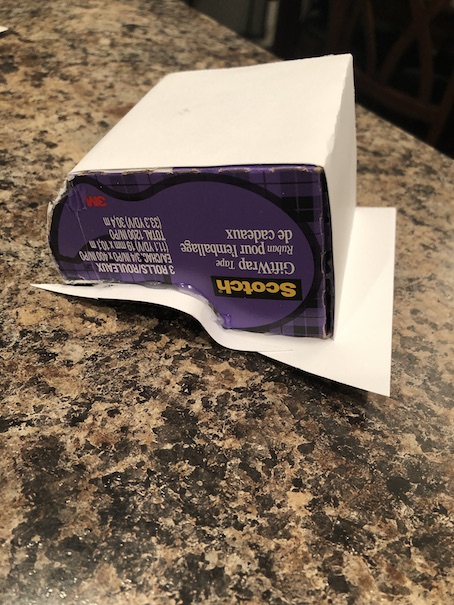
Once you have wrapped the card stock all the way around, it’s time to cover the sides. I just lay the box flat on the paper and trace each side. Cut it out and hot glue it in place.
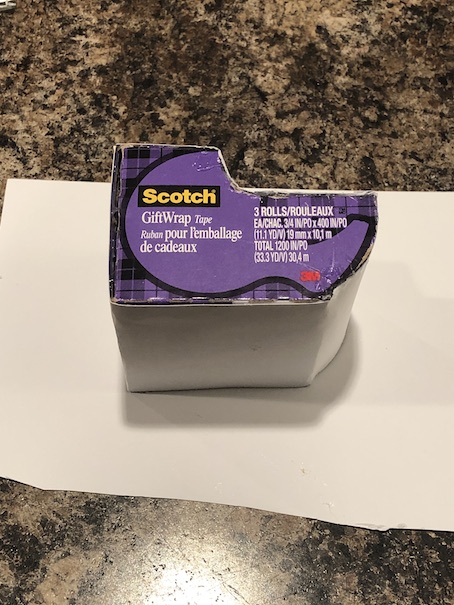
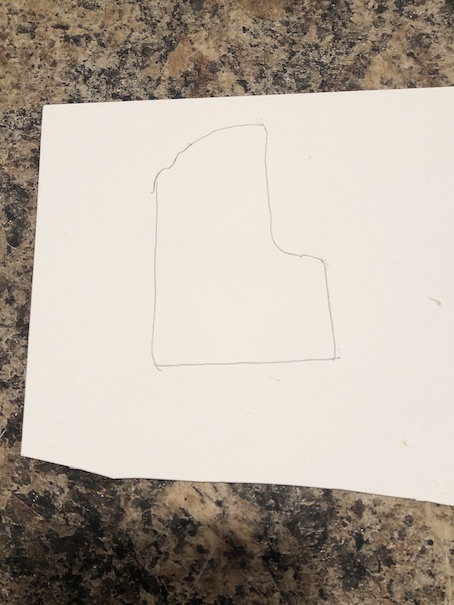
When you are done, you should have something that resembles this: If you were making our DIY Cash Register, you would turn your box like this instead:
 Now it is time to paint! For your typewriter, you will be painting the entire thing jet black. (for the cash register, we chose silver.)
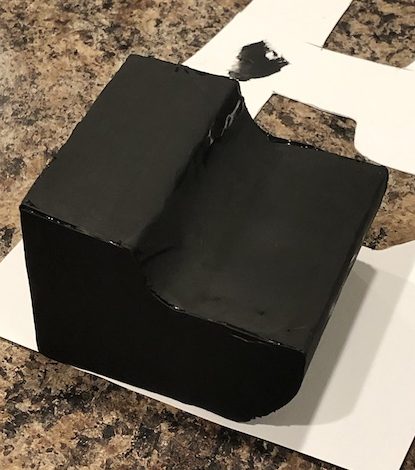 Let it dry.
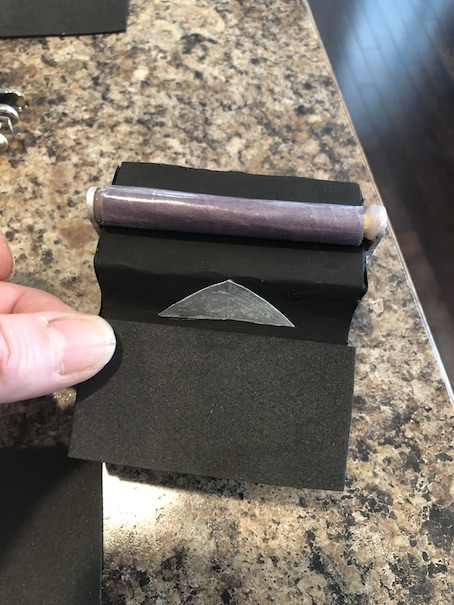
Now it’s time to add the paper roll!
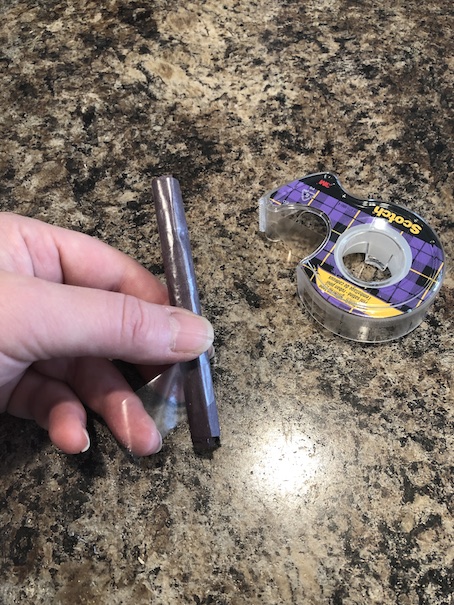
You will need hot glue, a jumbo straw, an elastic band, a popsicle stick and a barbecue skewer.
Cut a piece of jumbo straw a bit wider than your typewriter. Cover it with black construction paper. Hot glue it to the top of a strip of paper. Then wrap it around and secure with a glue stick.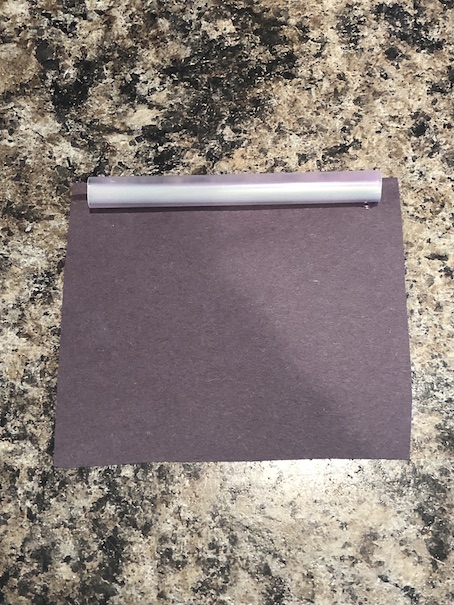
We just did this to cover the colour of the straw.
Once your straw is covered, wrap it fully in scotch tape. This will secure it, and make it more durable. Set aside.
Now cut your popsicle stick like this:
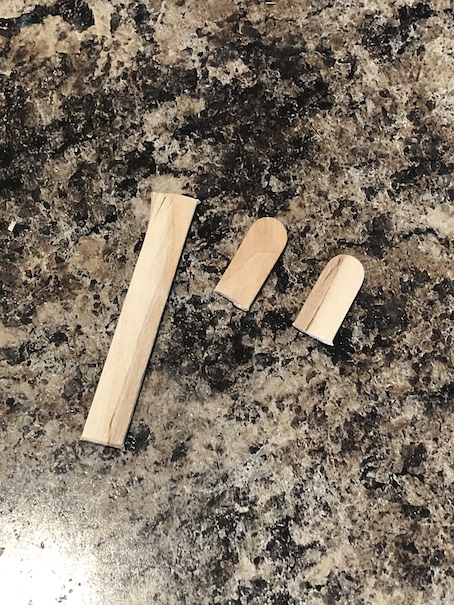 Cut your bamboo skewer like this:
 Take your pieces and hot glue them together like this:
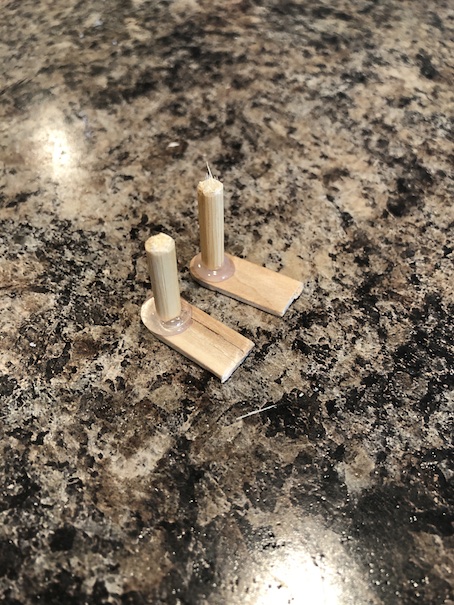 Hot glue one of these pieces to the side of your typewriter like this:
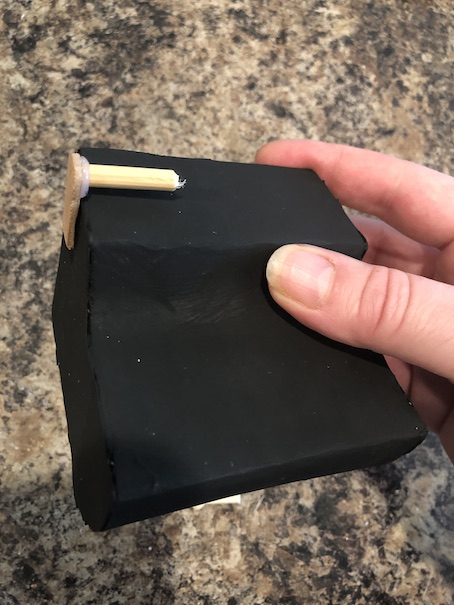 Make sure that your jumbo straw will fit on there. Trim the straw to size if you need to.
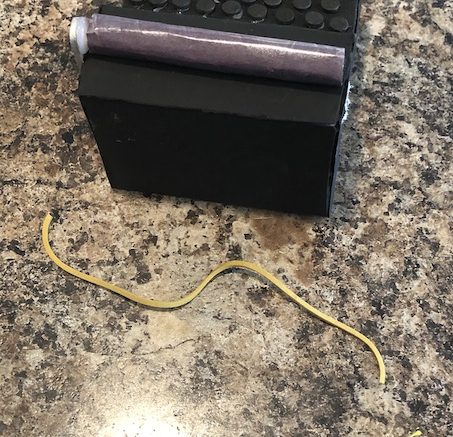
 Next take your elastic band, and cut it.
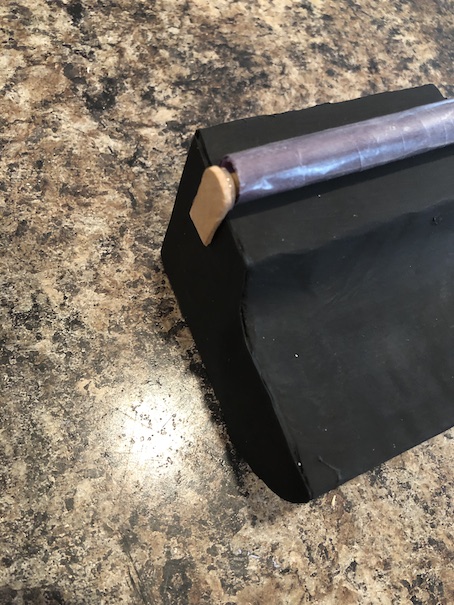
Thread it through your straw, and tie it off in the middle. This should be tightly tied against the straw.

Turn the elastic until the knot is hidden inside the straw.
Now you can attach the other popsicle stick arm of the paper roll.
(We clearly did this wrong the first time around. We didn’t attach the elastic so we had to remove one of the popsicle stick arms to do so. Lesson learned, but good news for you! Attach the elastic on there first!)
Here’s what you should have, with an elastic on it of course. The paper roll should turn easily.
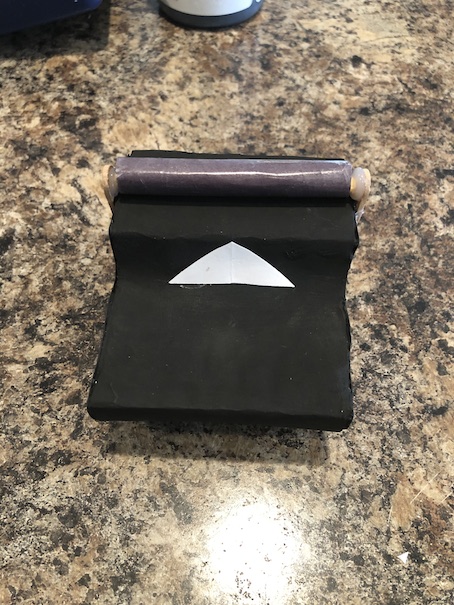
Next, cut a triangle piece from card stock and hot glue it on the front of the typewriter.

Paint the popsicle stick arms and the triangle silver.
Okay, time to make the keyboard!
Cut a piece of black craft foam to fit the top of your typewriter. This will be your keyboard panel.
 Next use the hole punch to punch out about 40 little black craft foam dots.
 Using a toothpick and tacky glue, secure the dots to the keyboard panel. You should have 4 rows of nine or ten, and then a space at the bottom for the space bar, and a few other option keys.
The keys don’t have to perfectly line up either, in fact it looks better if each line of dots is sort of offset to the others which is how they are on a real keyboard.
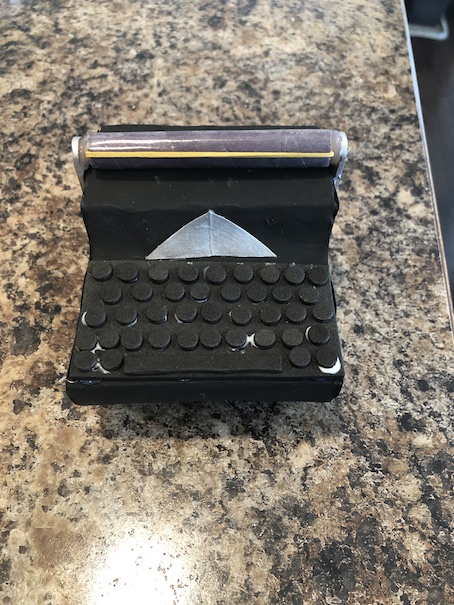 Hot glue your keyboard panel to your typewriter. Don’t forget to add in the space bar! I put two extra keys on either side of the space bar. Again, this doesn’t have to be perfect.
I was also experimenting with how the typewriter holds paper. Just slide the bottom of the piece of doll paper under the roller, and the top of the paper under the elastic band. It holds the paper perfectly!
 Now all you have to do is label the keys! I found this typewriter keyboard printable online. I printed it off at about 13% or so. It worked perfectly.
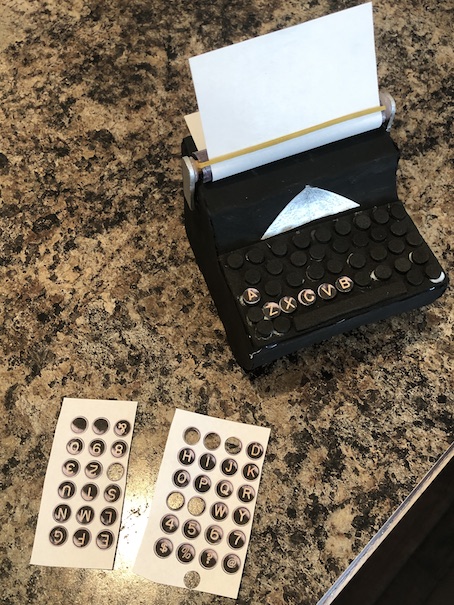
I just hole punched the letters out, and glued them on.
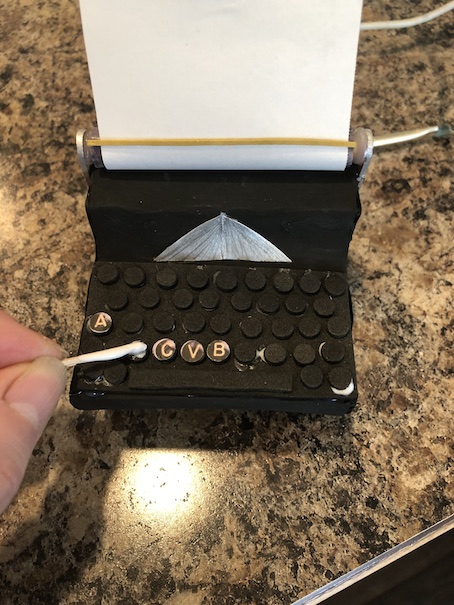 Again, the toothpick comes in handy for attaching these tiny keys!
 Just add glue. Then place the letter punch on the key with your finger.
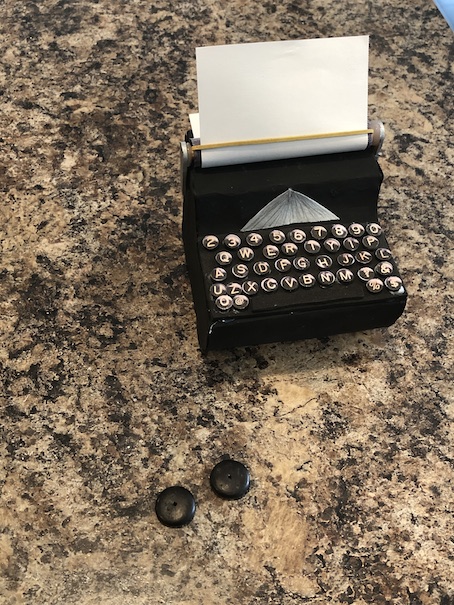 One last thing, and this is entirely optional. I had these small black flat beads. I hot glued them on the popsicle stick arms to look like little knobs. I just felt that it was one last detail that gave the typewriter more realism. You could also use black buttons.
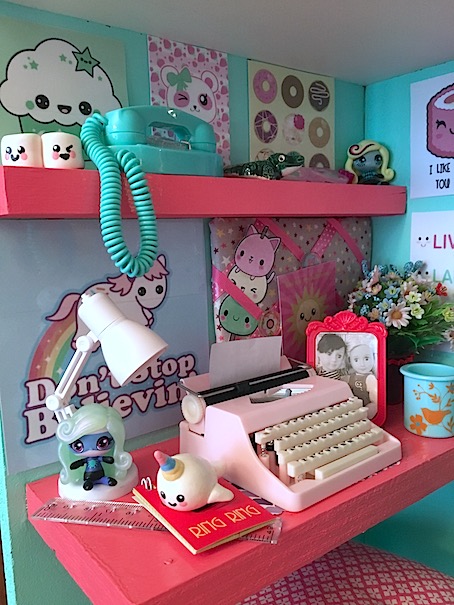
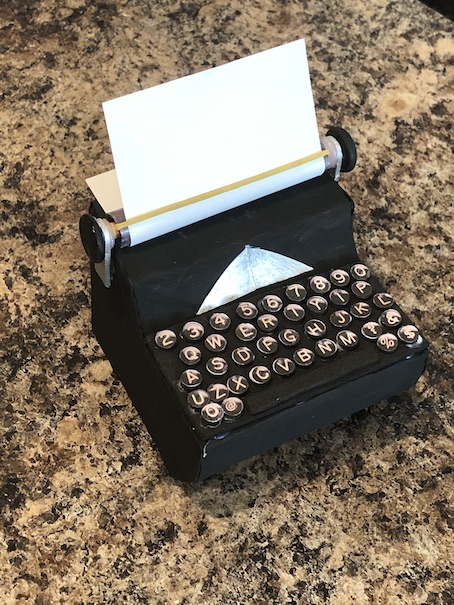 And you’re done! Isn’t this the cutest little typewriter you’ve ever seen???!!!!
 Eeeee!!! I can’t even with the cuteness right now! 🙂 ❤ ❤ ❤
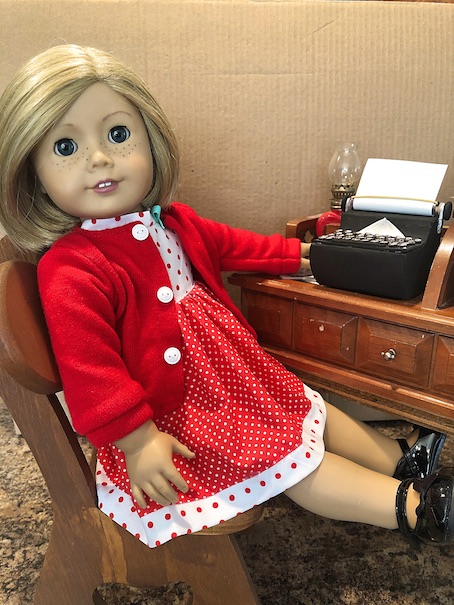
Of course, Kit just had to try it out immediately.
 Hooray! It’s the perfect size to fit on her desk!!! 🙂 Click the link to see how we made Kit’s Rolltop Desk.
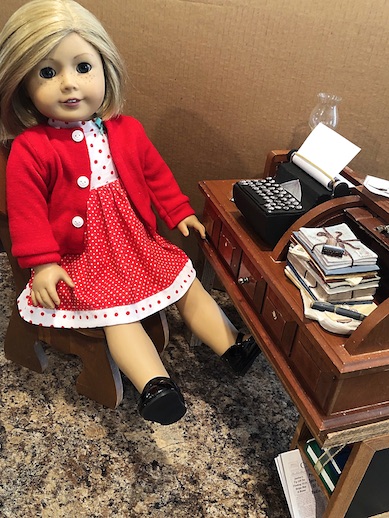
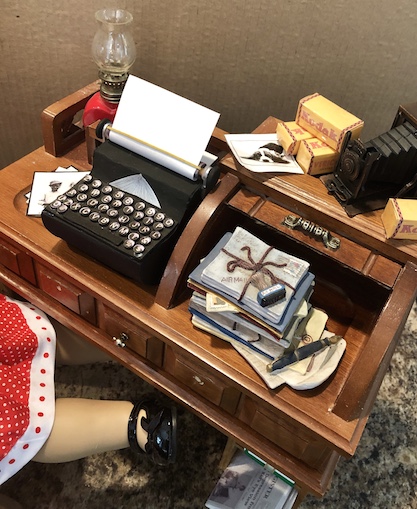 Now Kit can sit and write her stories to her heart’s content!
 Here are some more pics!
 ❤
❤
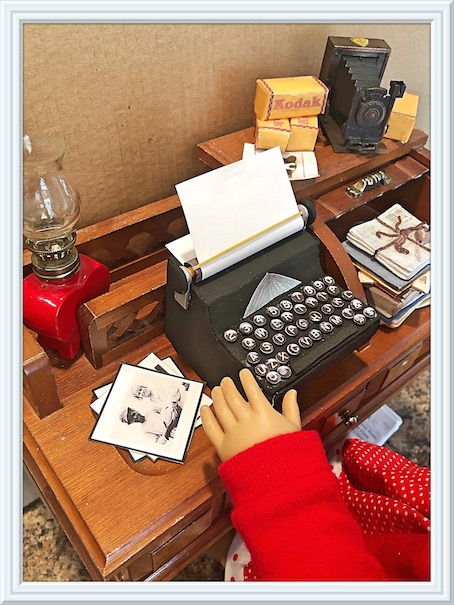 Now all she needs is some inspiration!
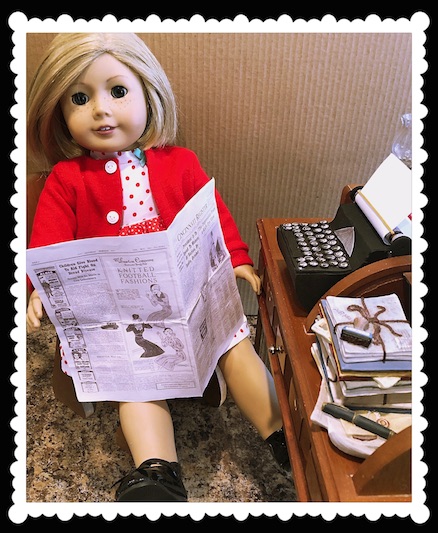 Hm. maybe the local paper will have some ideas.
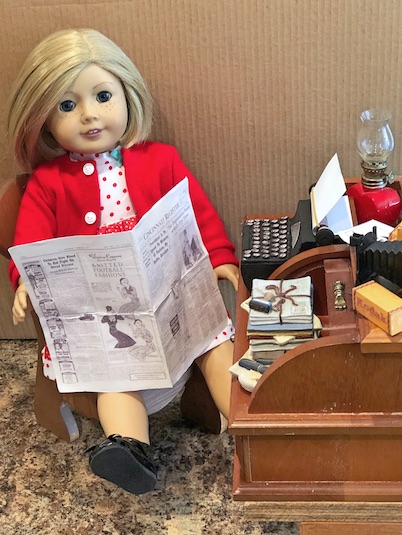
 Click the link if you would like to see how we made Kit’s Reporter Set.
 Still no ideas, Kit? Oh well, that won’t last long, I’m sure.
Soon you will be off on another high flying adventure that will just beg to be written down!
 I hope that you enjoyed this tutorial!
Please remember to pray for us, and have a crafty kind of day!!
Leave a comment below!
❤ ❤ ❤

Hi,
Please can you draw me a template for the type writer.
We don’t have that kind of box in New Zealand.
Thank you.
LikeLike
Another genius creation! It looks perfect. And, I totally loved your desk tutorial. I had that “WOW” moment when I saw what you used. We are now going to be on the lookout.
And, I have prayed for you and your family. God is good, and He’s got you covered. ❤
LikeLiked by 1 person
Thank you so much! It’s amazing what you can find to repurpose for the dolls, isn’t it? 🙂 Also, thank you so dearly for your prayers. We aren’t out of the woods yet, but sometimes miracles take time. You are right, God is good. We have been so blessed. I’m letting go, and putting all my faith in Him now. These things are not for me to understand, but to trust instead that everything is in good hands. ❤
LikeLike
This is so cute! Kit’s one of my favorite dolls. I’ll also be praying for your family!
LikeLiked by 1 person
Thank you so much! 🙂 ❤ ❤ ❤
LikeLiked by 1 person
That is so cute, Virginia.
LikeLiked by 1 person
Aww, I am so glad that you like it! 😀 ❤
LikeLike
Amazing! I just love it. Kit is one of my favourites as she reminds me so much of my Mom who was born in 1933. She had short bobbed blonde hair too.
LikeLiked by 1 person
Aw thank you! Kit is such a special doll! I just love her! 🙂 ❤
LikeLike
Excellent!
LikeLiked by 1 person
Thank you! I am so happy you enjoyed! 🙂
LikeLike
SO cute! Those tiny keys are adorable 🙂
LikeLiked by 1 person
I know! Everything in miniature is sooooooo cute! We love it! 🙂 ❤
LikeLike
What a wonderful typewriter, Kit will be very happy now (will we be able to read her stories when she finds the inspiration?!).
Congratulations on this wonderful work and your creative imagination.
I think strongly of you, and I hope with all my heart that prayers will be heard.
LikeLiked by 1 person
Thank you so much! Your prayers and thoughts are dear to me! ❤ I am sure that Kit will be busy busy with her writing now that she has such a sweet little typewriter to tap away on. 🙂 I wonder what she will write about…
LikeLike