
Hi guys! I know that we’ve done doll food specials before, you can find all of our doll food crafting here, but today we want to talk about Model Magic!
I am LOVING this stuff for doll food creation! One of the main reasons that I like it is that it is soft to work with. It is so much better than polymer clay which is very stiff to start out, and must be conditioned thoroughly before it can be formed. Model Magic is soft and pliable, which is a lifesaver for old and young fingers alike. You can just whip it out of the package, and get right to it.
It also doesn’t tend to get a lot of fingerprints in it, something that frustrates some polymer clay users. It doesn’t dye fingers different colours either. 🙂
I really appreciate the air drying feature. Don’t get me wrong, baked clay is fun too, but nothing is easier than just setting your creations aside, and coming back the next day to find that they are fully dry, and ready for play.
Because it is air dry, there is also more uniformity to it. There is no room for error here! There is no chance that you might burn your creations accidentally, which is utterly disappointing.
Model Magic is about as kid friendly as it gets, something that is always important at our house. I mean, ZERO parental supervision is necessary, because this stuff is about as foolproof as play dough, and yet the finished product is a lot better quality.
Finally, and I’m really becoming the spokesperson for the Model Magic industry here, aren’t I? LOL! This stuff is inexpensive! I mean, polymer clay is great, but 18 inch doll food eats that stuff up so quickly that you end up getting very little for your money. It’s almost not even worth it. In comparison, you get an entire package of Model magic for $5 CDN.
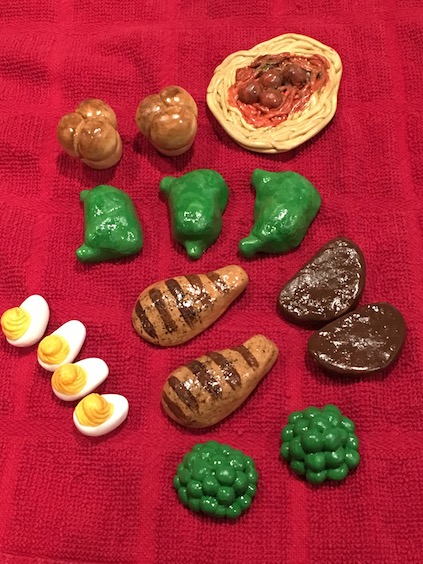
I bought two packages, and I was able to make all this!
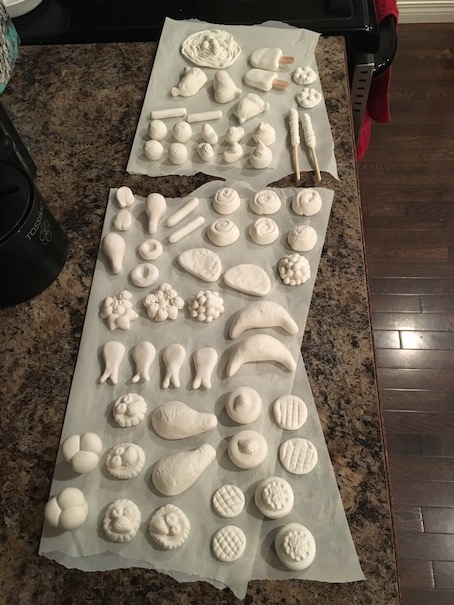
Let’s face it, all of that would have used A LOT of polymer clay!
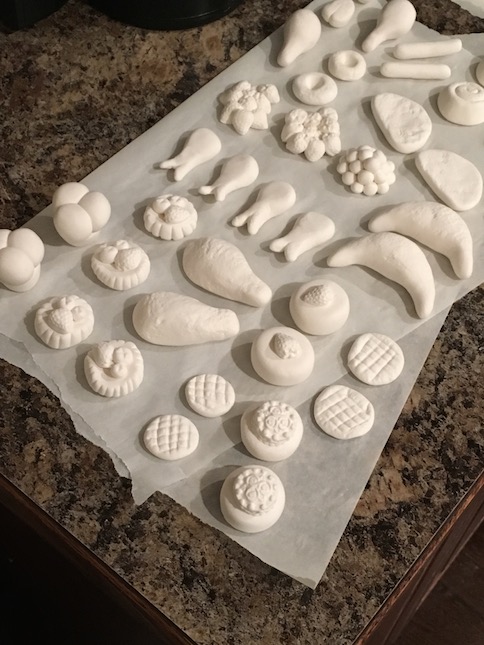
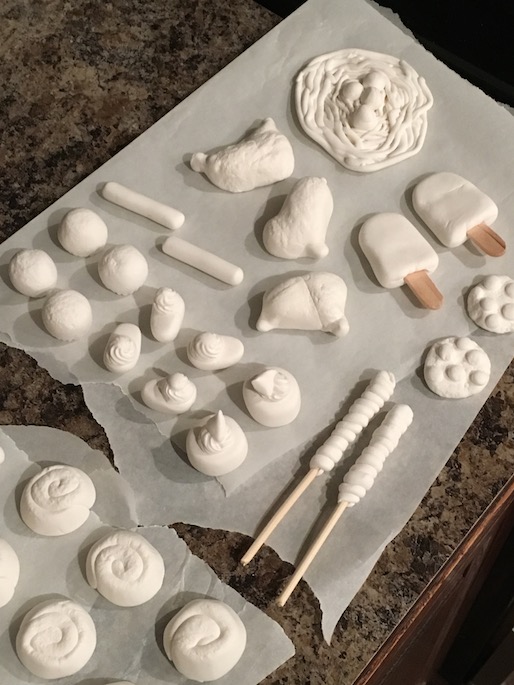
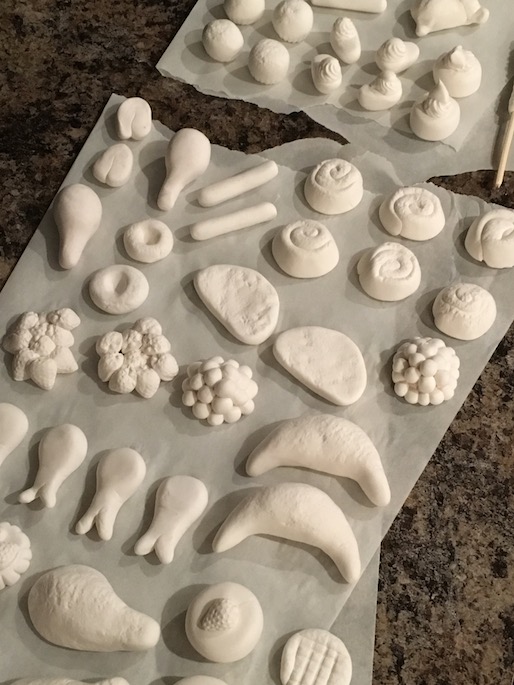
Okay, now it’s time to get down to the business of making it! I have split this post up into three parts. The first part we will be focusing on is SUPPER!
To get the hang of using the clay, it is best to find a flat surface, and play around with it a bit. What you’ll find is, it is a lot easier to work with than most clay. That means, it’s a lot quicker to craft up a whole ton of dolly goodness!
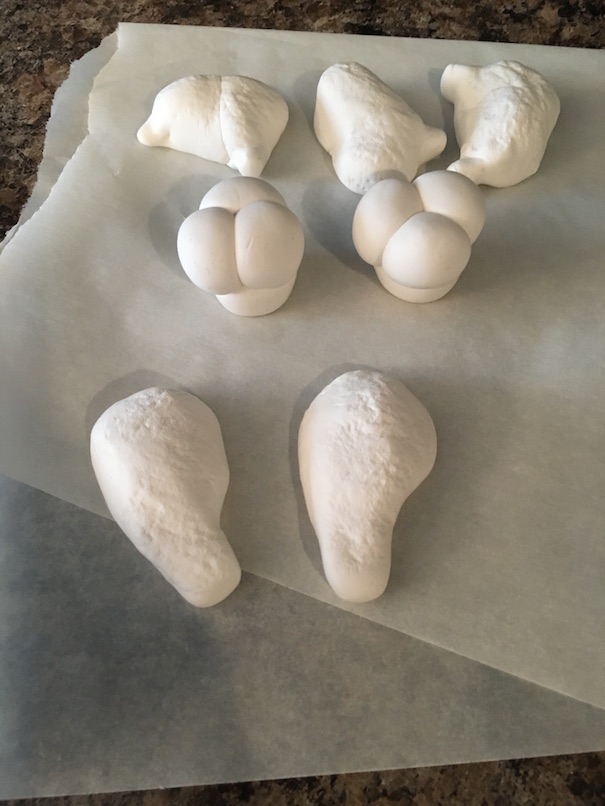
Now, I’m not going to tutorial everything that we made, but here are a few examples.
DINNER ROLLS

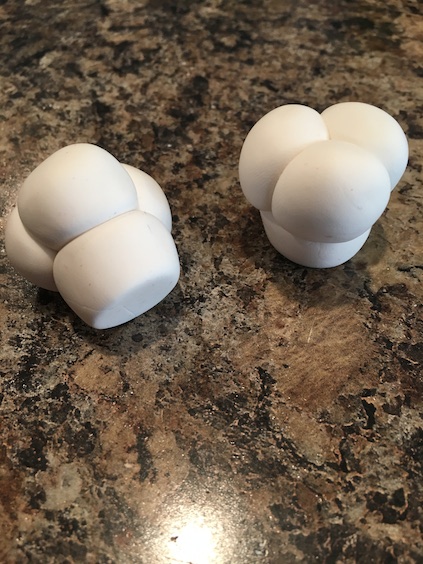
Roll three little balls. Stick them together.
Roll two more little balls. Stick them to the bottom of the first three balls.
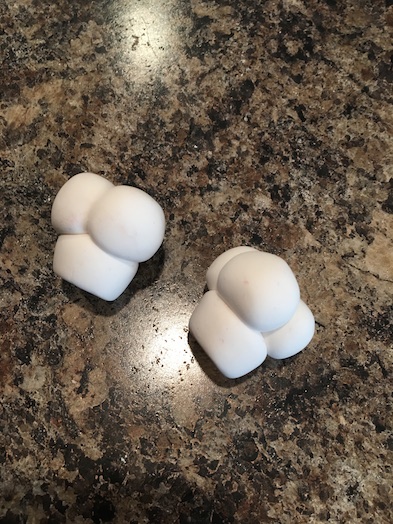
Flatten the bottom of the dinner roll. And you’re done!
BROCCOLI
Roll a ball and pinch the bottom like so.
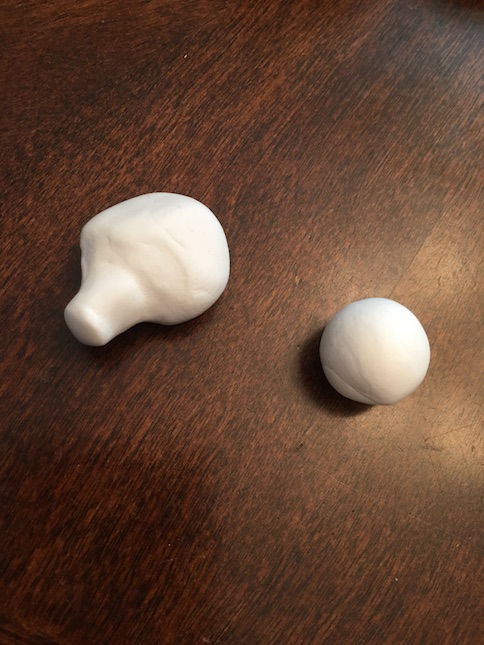
Roll another ball and pinch the bottom in the same way.
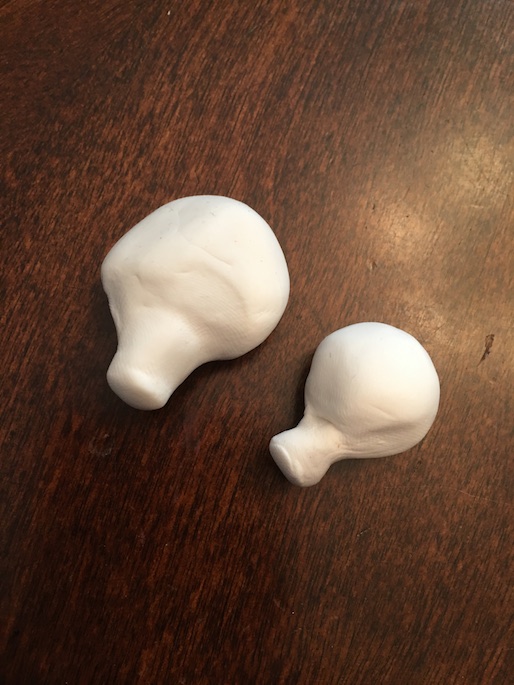
Stick the smaller broccoli onto the larger one.
Smooth the crease a little gently.
Next, take an old toothbrush, and add some texture. (Be sure that it is not a toothbrush that someone is currently using 😛 ).
And you’re done!
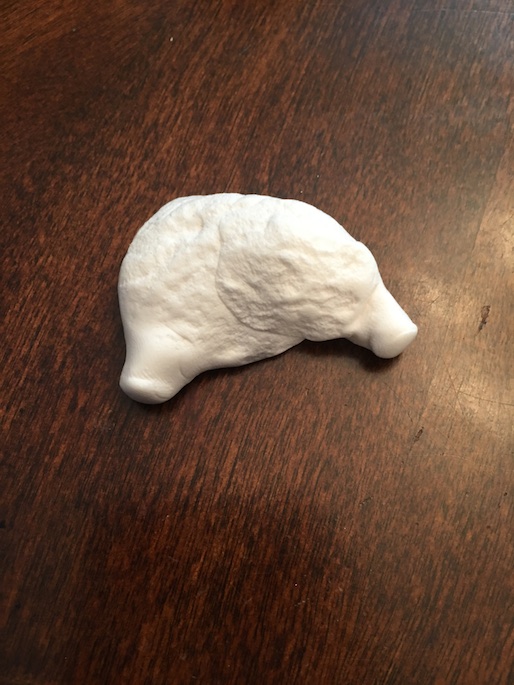
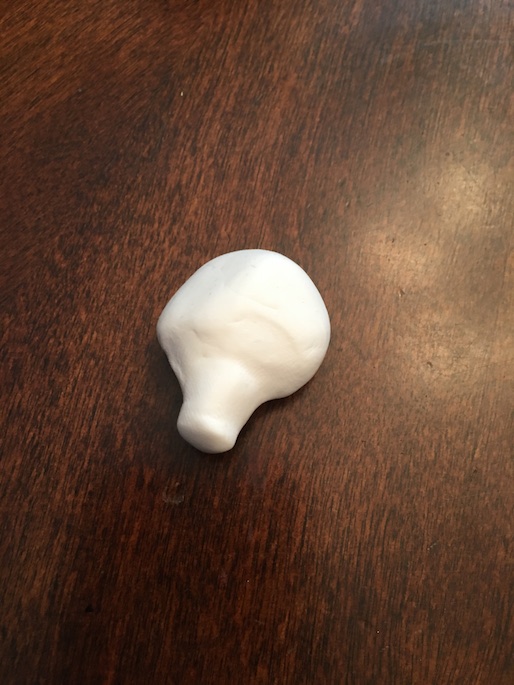
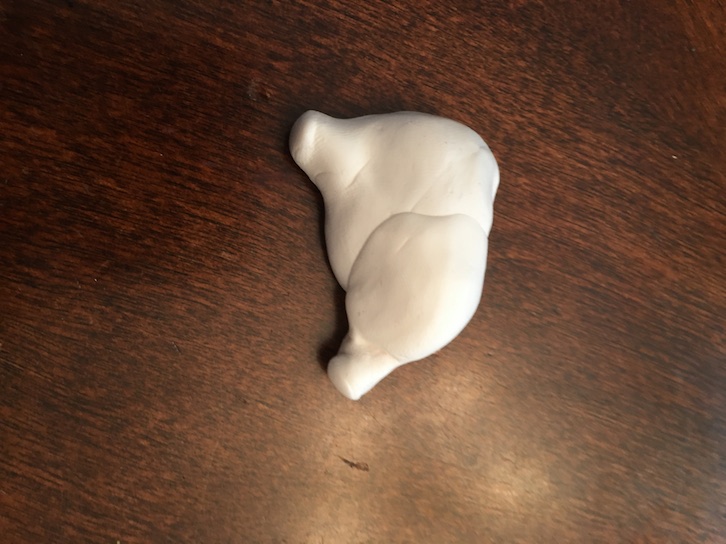
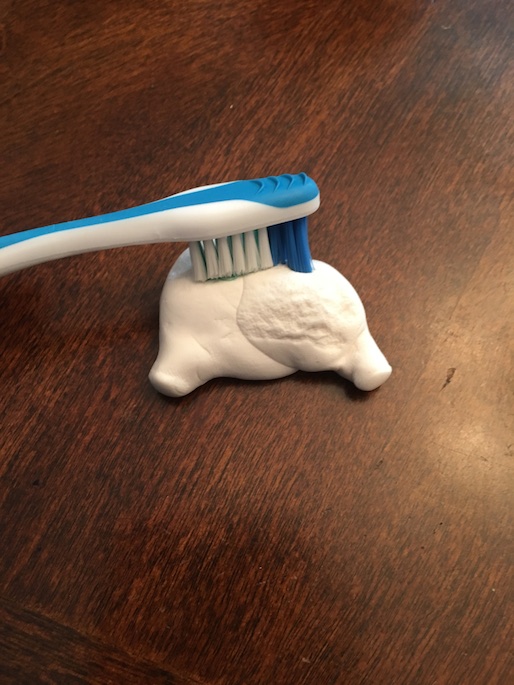
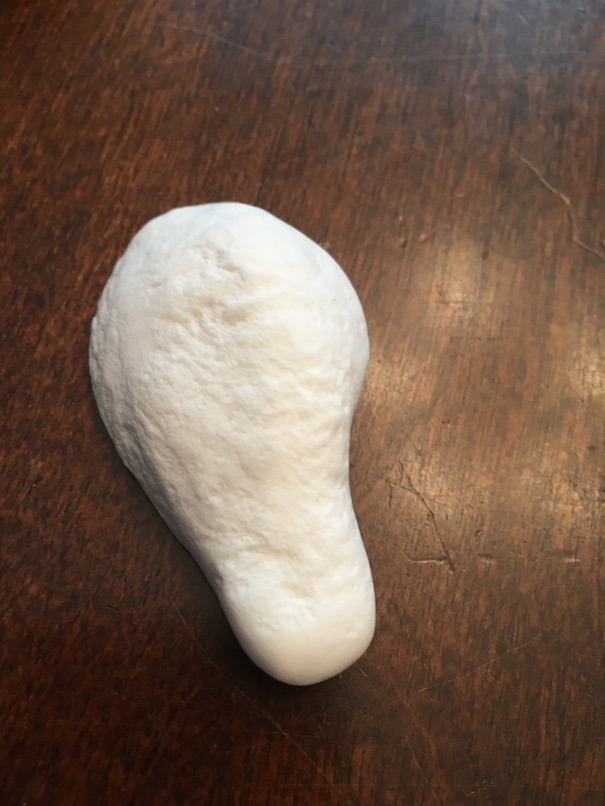
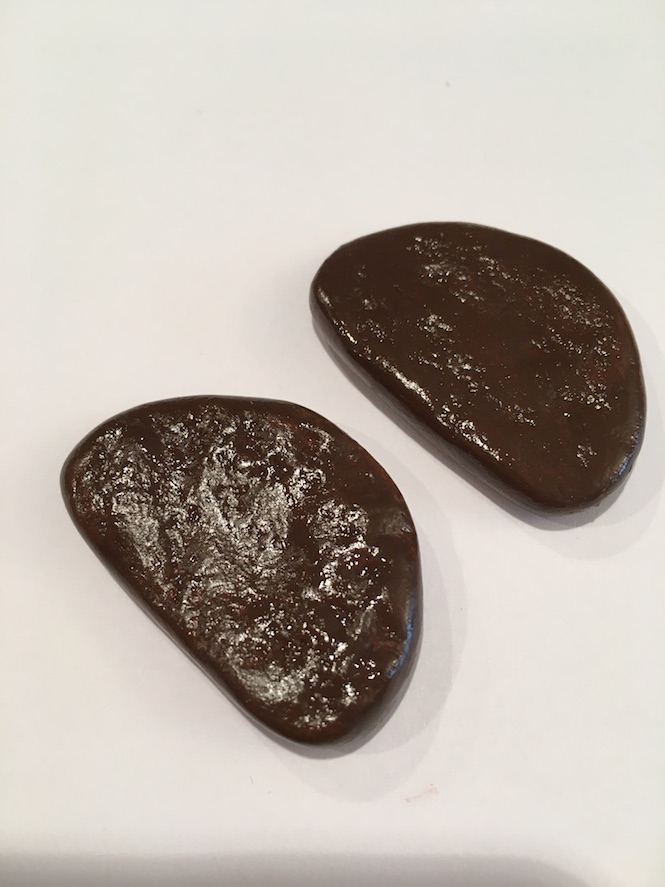
CHICKEN
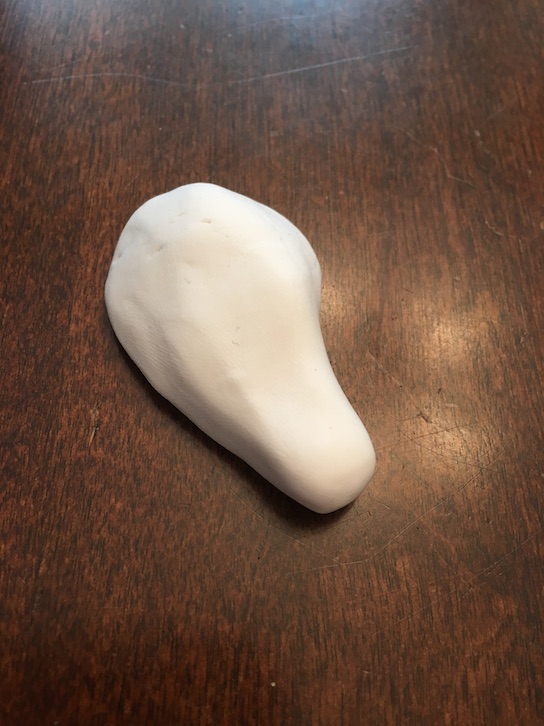
Mold the shape of a chicken breast. As you use the clay more, you will get used to how it handles, and it will get easier to mold shapes with it.
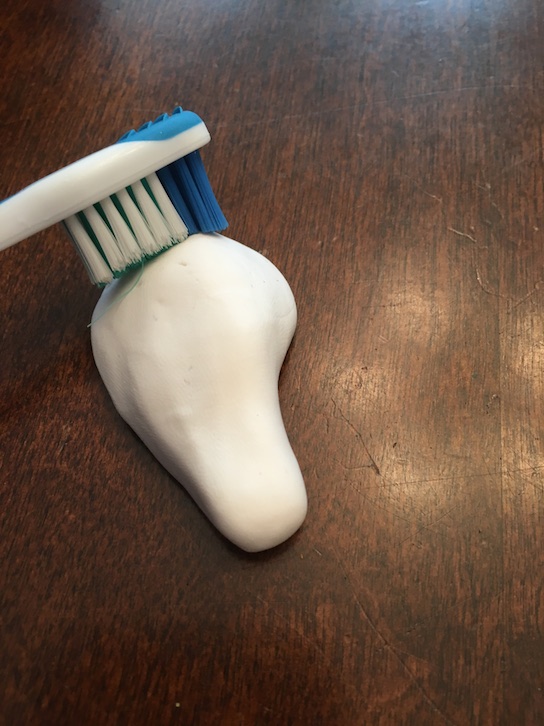
Use a toothbrush to add texture. And you’re done!
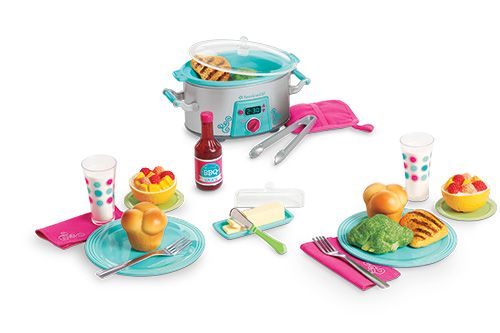
Is this starting to look familiar?
We were using the American Girl Crockpot Set as inspiration for this, but you can find inspiration anywhere!
Alright, so I know what you are thinking. The clay is all white. What are we supposed to do with all white doll food? Why, we paint it of course! Model magic takes to regular acrylic craft paint very well! And after you paint it, go ahead and seal it with a good craft varnish. I like the end result once you seal Model Magic projects, because they become less foamy in texture. The varnish hardens the clay a little, which is nice.
Enjoy!
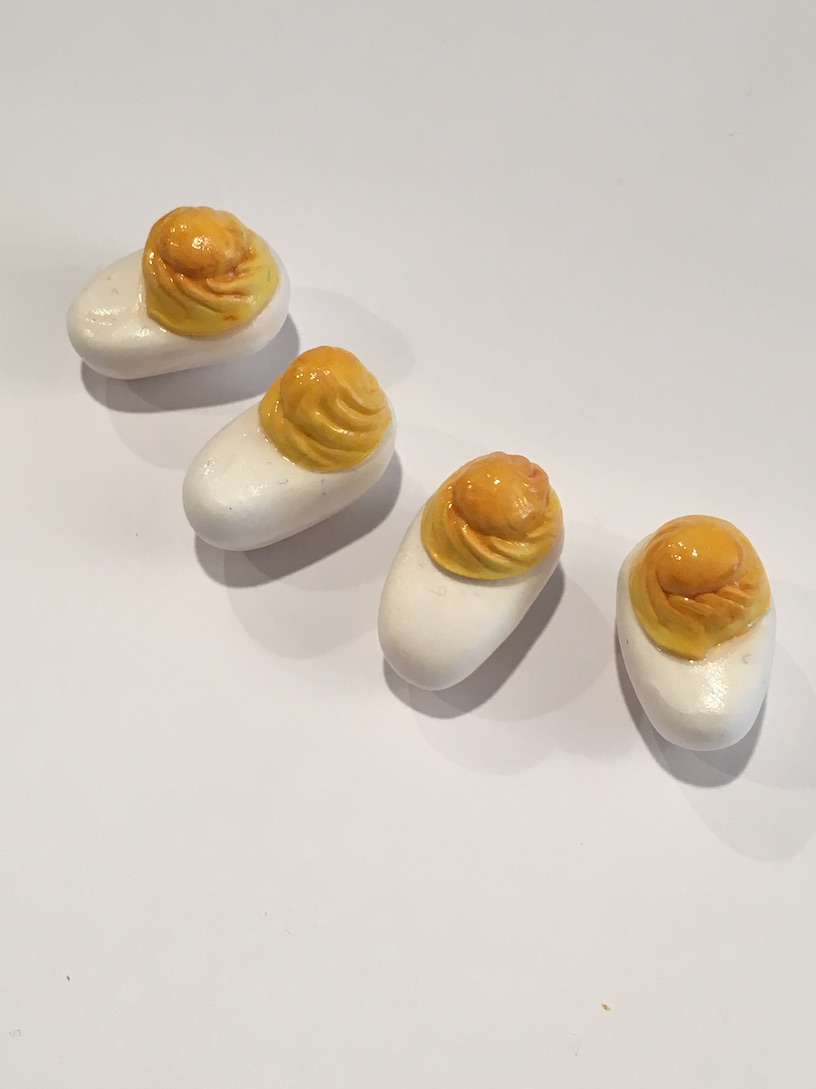
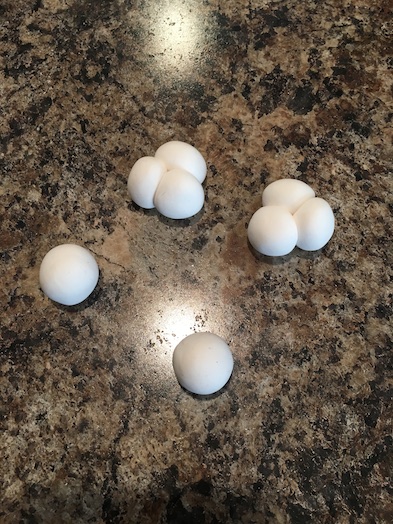
Deviled Eggs – We have a whipped cream mold that we always use for our polymer clay. It works wonders for Model Magic too. It was perfect to make the yolks of our deviled eggs. Once these were dry, we just painted the yolks yellow, and brushed a bit of brownish red chalk on top.

Peas – These are so easy. Just roll a bunch of uniform sized balls, and stick them in a pile. Once dry, paint the pile green.
Meatloaf – Roll clay into a ball. Flatten the ball into a circle. Cut the circle in half. Round the centre edges of both half circles. Use your toothbrush to add texture to the top of the meat. Paint brown.
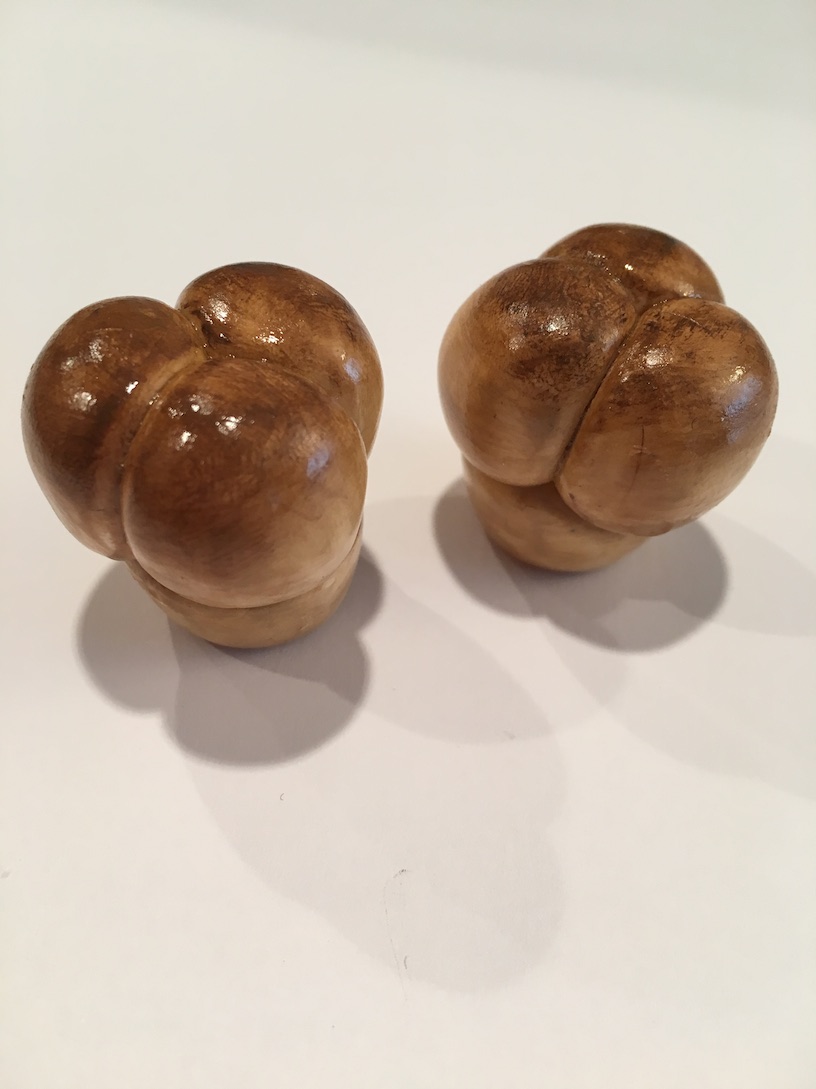
Dinner Rolls – See the tutorial above. Once dry, paint a tan colour. Brush a tiny bit of brown and yellow chalk on top for a browned look. Matte brown eyeshadow would also work if you don’t have chalk. Just be sure there isn’t any glitter in it. 🙂
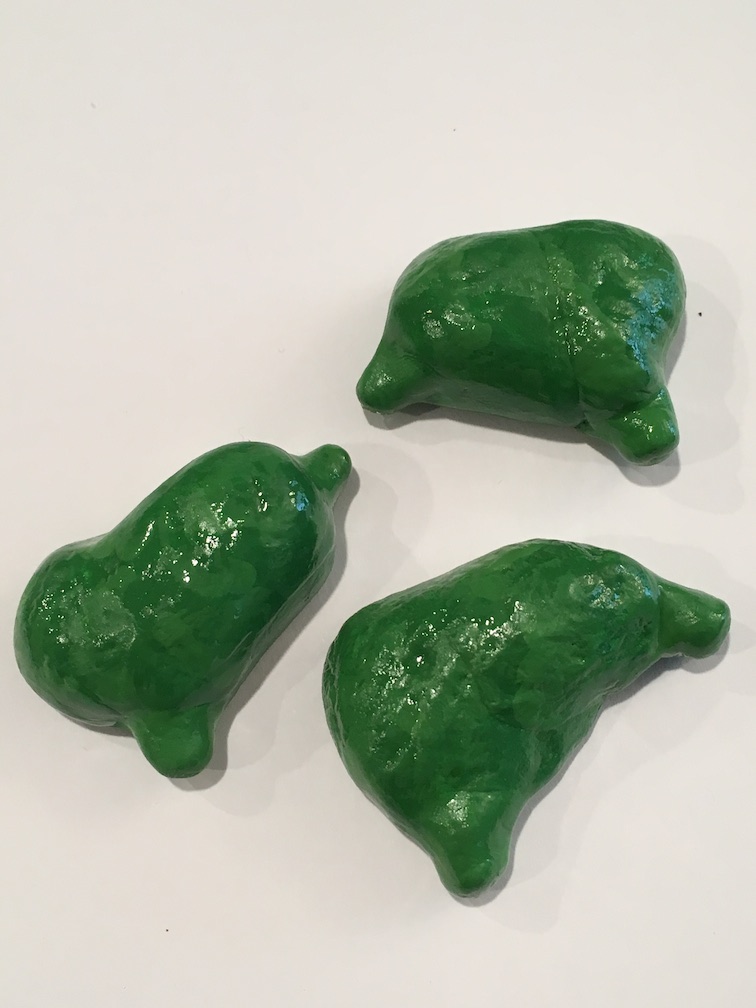
Broccoli – See tutorial above. Once dry, paint green. If you like, add a bit of contrast to your broccoli by sponging a tiny bit of a lighter green paint on the top leaves.
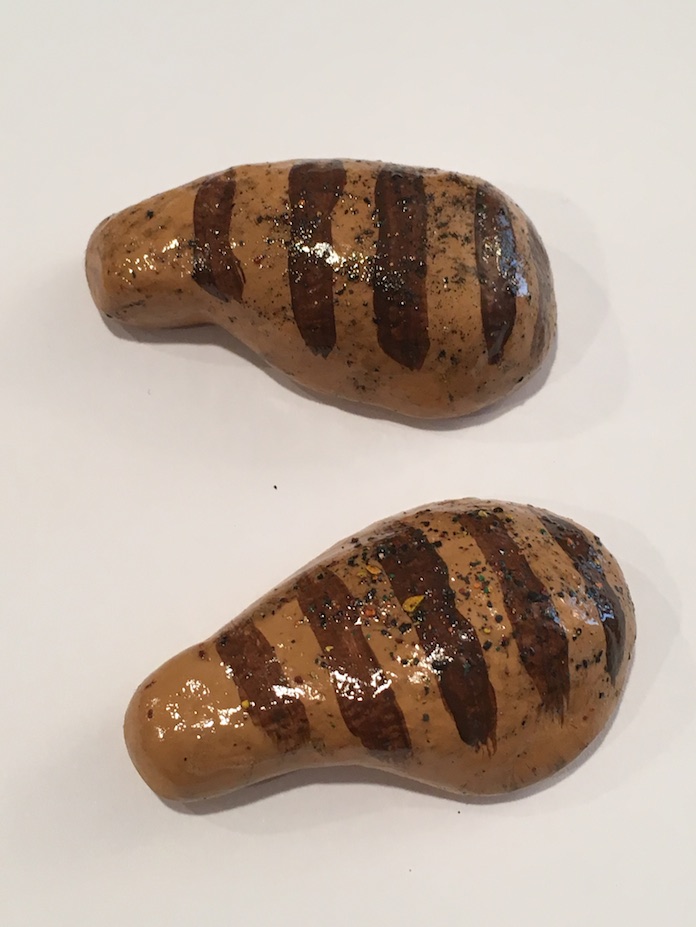
Chicken – Shape your clay into a chicken breast. Use a toothbrush on top for texture. Once dry, paint a tan colour. Use brown to paint grill marks on top. Varnish. Before the varnish dries, scrape flecks of brown and yellow chalk on top. Once it dries again, dab some varnish on the flecks. DON’T brush the flecks as they will streak. Only dab it on there to seal the chalk sprinkles. If you don’t have chalk, pepper or actual spices would work just as well, and it won’t streak. 🙂
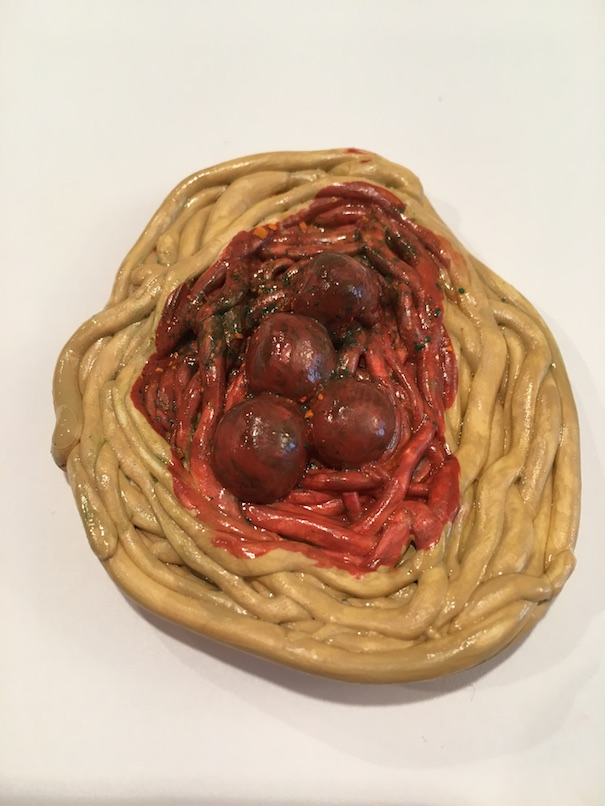
Spaghetti – Roll strips of noodles. Spiral the noodles into a pile. Once you have enough noodles, roll out four meatballs, and stick them in the middle of your pile. Once dry, paint your noodles a tan colour. Paint the meatballs brown. Cover the meatballs in orange-red paint for sauce. Scrape green and orange chalk flecks on top for parsley and parmesan. Dab varnish on top. DON’T brush the varnish on as it will streak the chalk. If you don’t have chalk, check your actual spice cupboard. 🙂
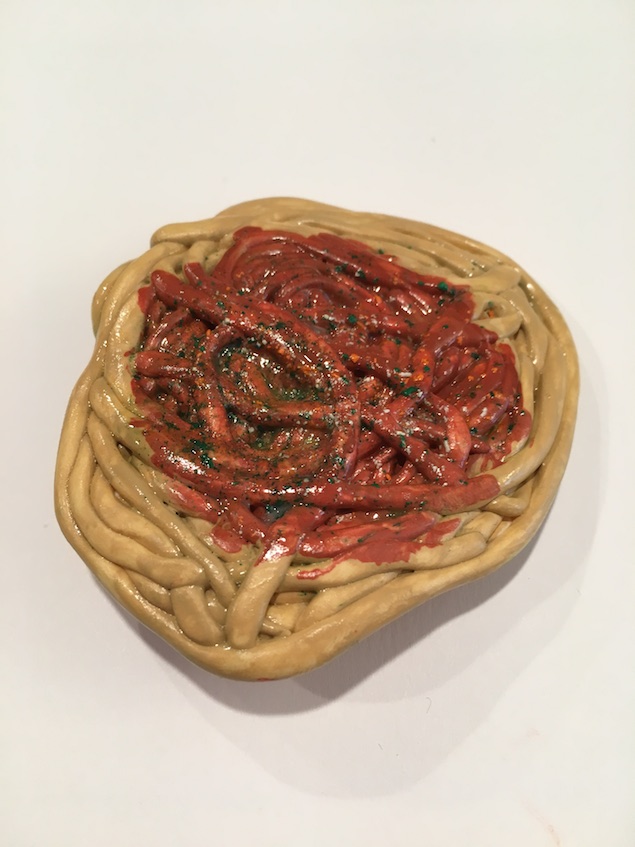
If your dolls are vegetarian and prefer no meatballs, flip your spaghetti over, and paint some sauce on the bottom using the same method as above.
There you have it! A whole menu of supper items for your dolls to choose from!
Get creative with your Model Magic, and make whatever you like!
I hope you enjoyed! Stay tuned for more Model Magic fun in Part Two – BRUNCH!
Leave a comment below!
❤ ❤ ❤

So cool, it all looks great. Another plus to Model Magic is it’s gluten free, so it’s safe for kids with allergies! (and big kids with allergies too 😉 )
LikeLike
I didn’t know that! We don’t have any allergies here. We are lucky. I know a lot of kids with allergies, and some allergies are a nightmare. 😦
LikeLike
This is the best food I’ve seen you create! It looks so good.
LikeLike
Aw thank you! I really like the results too! 🙂
LikeLiked by 1 person
You’re making me want to get some Model Magic clay now! LOL! I’ve crafted a ton of doll food with playdoh, but now I really want to try Model Magic. 😛 You created some amazing doll food! All the items look spectacular! And they’re making me hungry. 😉 Especially those deviled eggs, they look so real!
•Madison•
LikeLike
Aw, thank you! I’m really liking Model Magic! I don’t know why I never tried it before! 🙂 It comes in other colours too, but I prefer painting it myself. The colours are brighter that way. 🙂
LikeLiked by 1 person
You’re welcome! I’m going to be on the lookout for model Magic and acrylic paints now… 😀
LikeLike
You can buy Model Magic at Michael’s and we get our acrylic paints at the dollar store. 🙂 I hope that helps!
LikeLiked by 1 person
Thank you SO much! 😀
LikeLike
You’re welcome! 🙂
LikeLiked by 1 person
LOVE IT!!!!😍😍😍😜looks sooo real
LikeLiked by 1 person
Thank you!! 🙂
LikeLike