
Hello everybody! We are back with our Model Magic series. Today we are talking about brunch! I was going to call it breakfast, but I thought that it looked a lot more like what you would see on the brunch line. I didn’t make any of the typical breakfast foods, because I’ve done fried eggs and pancakes/waffles before in the past.
You can find our more traditional breakfast foods Here and Here.
Of course, feel free to use your imagination to make whatever you like!
Again, I won’t tutorial every single item on the list, but here are a couple examples.
CINNAMON BUNS

Roll out a snake.

Wind the snake into a spiral.
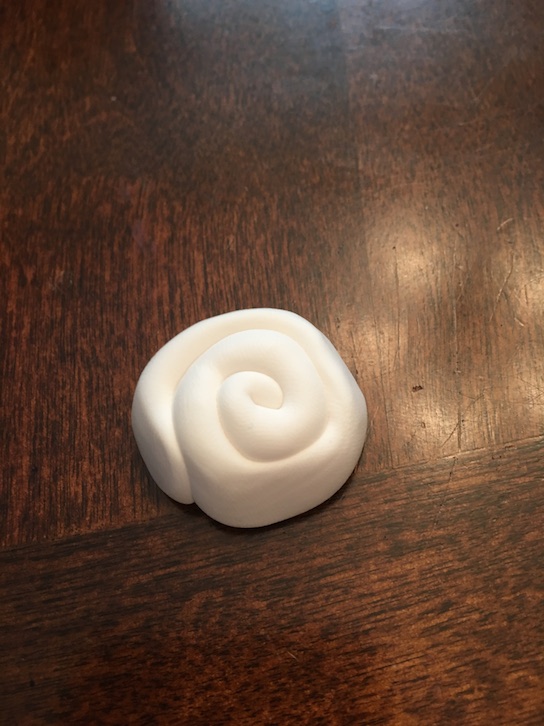
Now form the top of your bun so that it is a bit narrower than the bottom. This makes it look more realistic.
(I used to work at a diner where they made the most enormous cinnamon buns. They were to die for. 🙂 )

Use an old toothbrush to create texture on the top of your cinnamon bun. And you’re done!
CROISSANTS
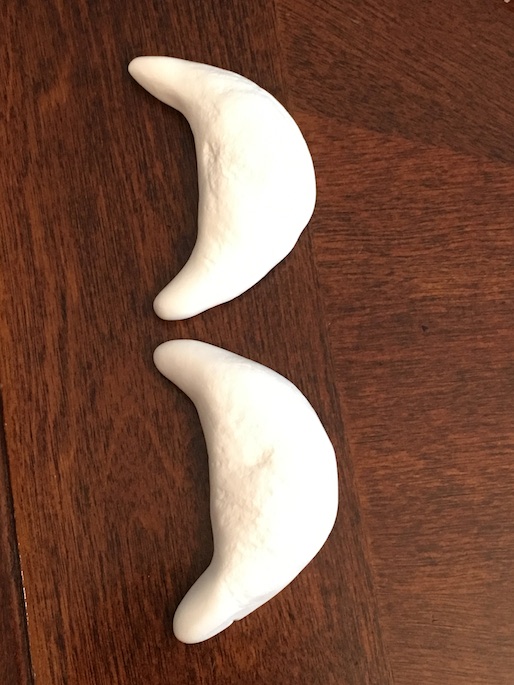
Form the clay into half moon shapes. Use your toothbrush to add texture to the tops. And you’re done!
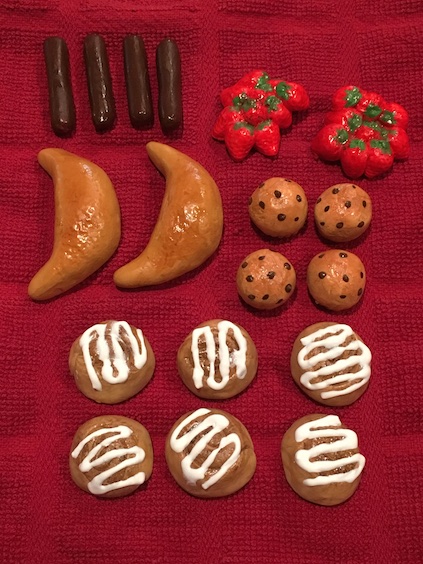
We used the American Girl Delicious Breakfast set as inspiration for our brunch menu, but you can find inspiration anywhere. Like I said, we already had pancakes, waffles, and lots of eggs/bacon. We even made the yogurt cups as part of our breakfast food special in one of the links above.
Okay, it’s time to take a closer look at everything!
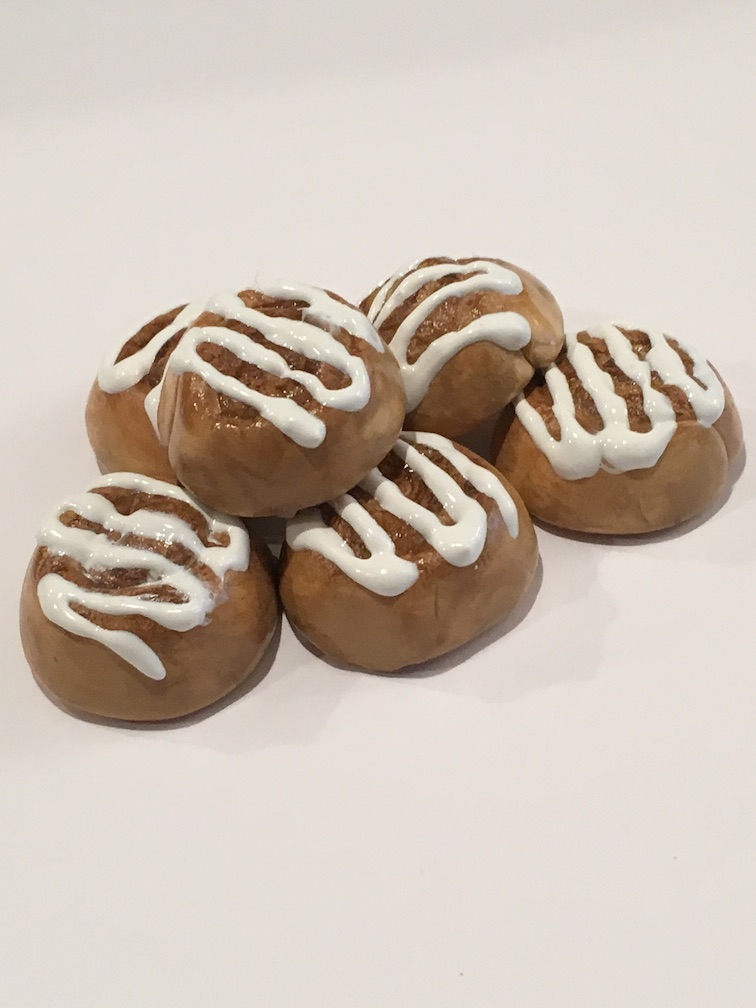
Cinnamon Buns – See the tutorial above. Once they are dry, paint them a tan colour. Next, brush on some dark brown chalk to add browning on top. If you don’t have chalk, matte brown eyeshadow will work too. Just make sure it doesn’t have any shimmer in it. Varnish the cinnamon buns. Once the varnish is dry, use white puffy paint to add icing to the tops.

Croissants – See the tutorial above. Once dry, paint the croissants a golden tan colour. (Tan doesn’t necessarily mean the same colour every time. I mixed some yellow in with my tan to get a more golden colour for these.) Brush a tiny bit of brown and orange chalk on top for browning. Seal the paint and chalk with varnish.
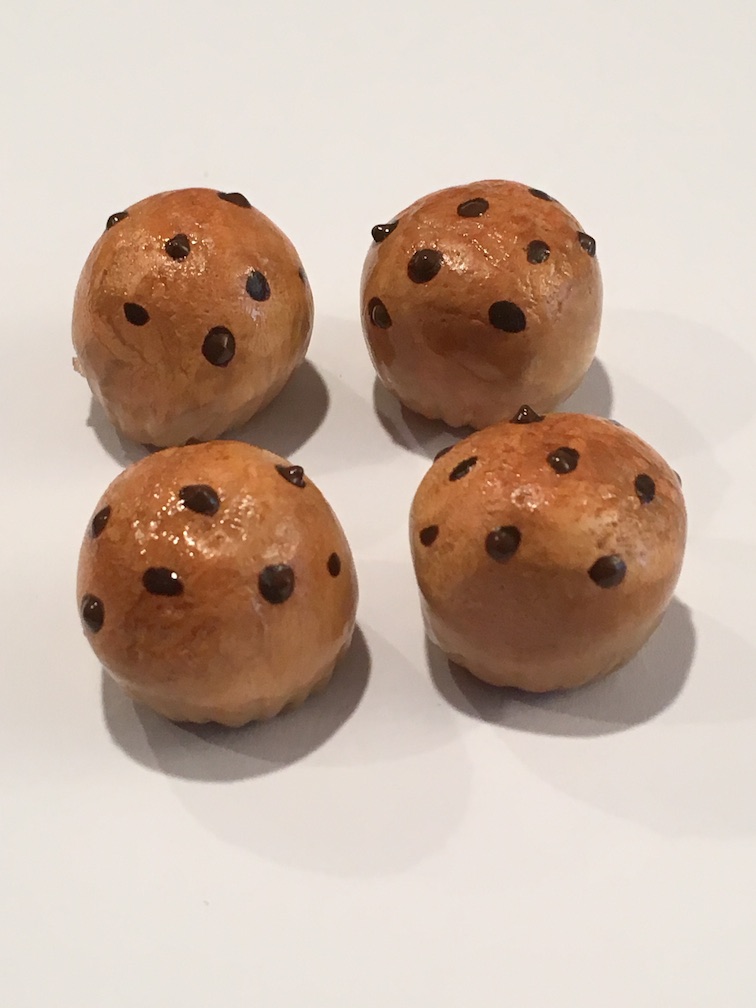
Chocolate Chip Muffins – Roll out a small ball. Flatten the bottom of the ball. Using a straightedged tool, press wrapper lines all the way around the bottom edge of the ball. This represents where the muffin liner was. Use a toothbrush to add texture to the top. Once dry, paint a golden tan colour. Brush with brown and orange chalk to add browning to the top. Add brown dots for chocolate chips. I used brown puffy paint for some of the chocolate chips to make them more 3D. Seal with varnish.
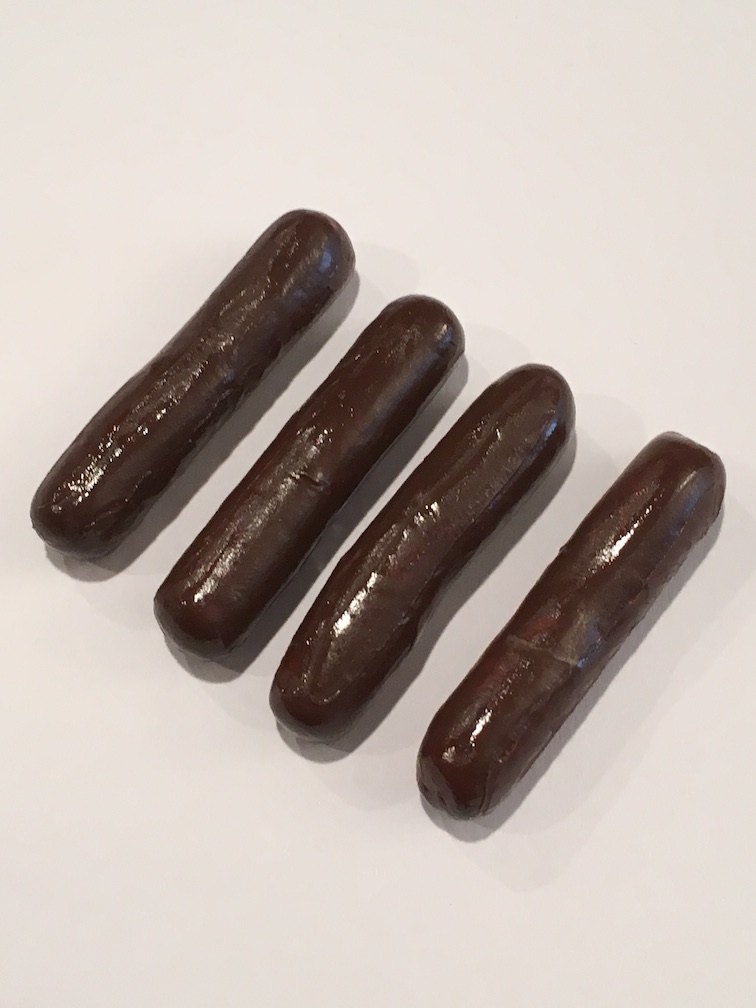
Sausages – Roll a snake. Cut the snake into four. Round the ends of each piece. Use your toothbrush to add texture. Once dry, paint with a brownish red colour. Seal with varnish.
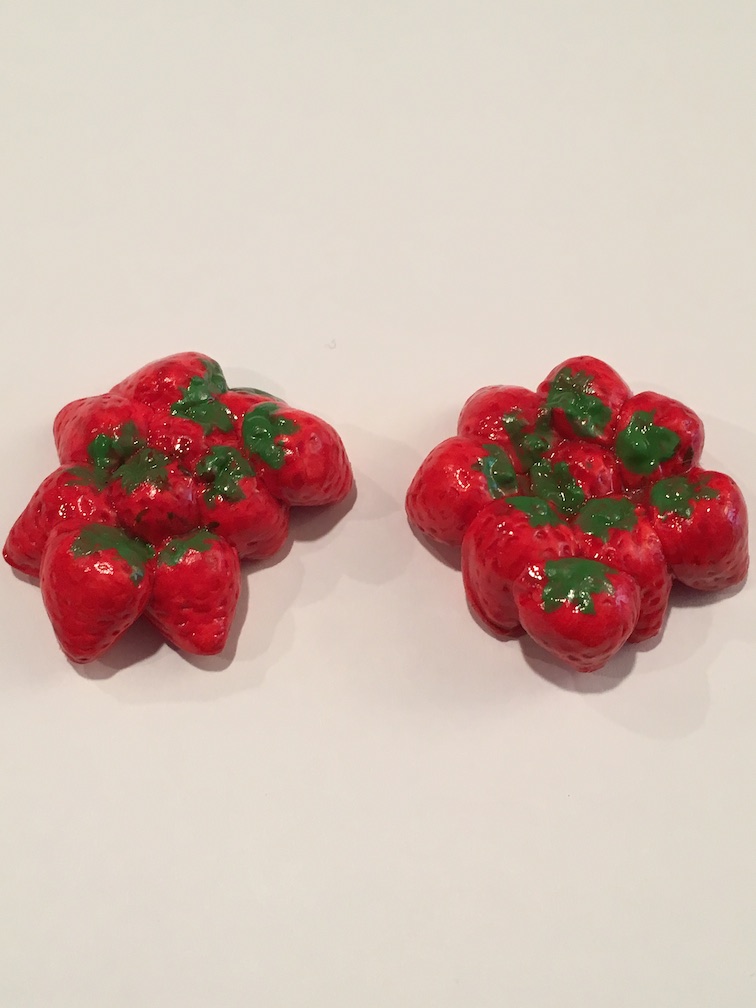
Strawberry Clusters – We have a strawberry mold that we use for our polymer clay. It works well with Model Magic. If you don’t have a mold, you can make a strawberry by rolling out a ball. Then roll the ball into a teardrop shape. Roll several strawberries. Stick them together in a pile. Use a toothpick to add seeds to your strawberries. Once dry, paint your strawberries red. Paint the stems green. Seal with varnish.
There you have it! Our brunch menu is complete! I am definitely loving working with the Model Magic, and I hope that this inspires you to get creative too!
Stay tuned for the last segment of our three part doll food special – DESSERTS!
(my favourite! 🙂 )
Leave a comment below!
❤ ❤ ❤

Agghhhh it looks so good!
LikeLike
I know! I was getting so hungry making these!! 🙂 I want cinnamon buns!!! LOL!
LikeLiked by 1 person
me too!
LikeLike
Once again, the food you made looks spectacular! And very convincing. 😄 The chocolate chip muffins look delicious! My dolls wants me to make some now… 😄
•Madison•
LikeLike
Aw thanks! You better go make some muffins! 🙂 LOL!
LikeLiked by 1 person
You’re welcome! And haha, yes, I better! Or I have a hungry and angry mob of dolls on my hands! 😄😄
LikeLike