

Hi guys!! Long time! Let’s just say, baby puppy, a bunch of doctor’s appointments, an MRI, homeschool reports, homeschool visits, and more kind of cascaded over my life, and took up all of my time. Lol! 😂 More on all of that later. All good news, so never fear! We are always here!
That’s not what I want to focus on today. Today, I want to introduce you to three new faces that have come to live with us.
When we saw the new AG Caring for Baby set, we knew immediately that we had to have a baby for our dolls.
Fast forward the $60 CAD price tag for it, and we were at a loss. Okay, yes I have paid ridiculous $$$ for other doll related items, mini CareBears, ahem. But I really wasn’t 100% on board with paying that for a baby doll that frankly, wasn’t Carebears, and that I might not use all that much.
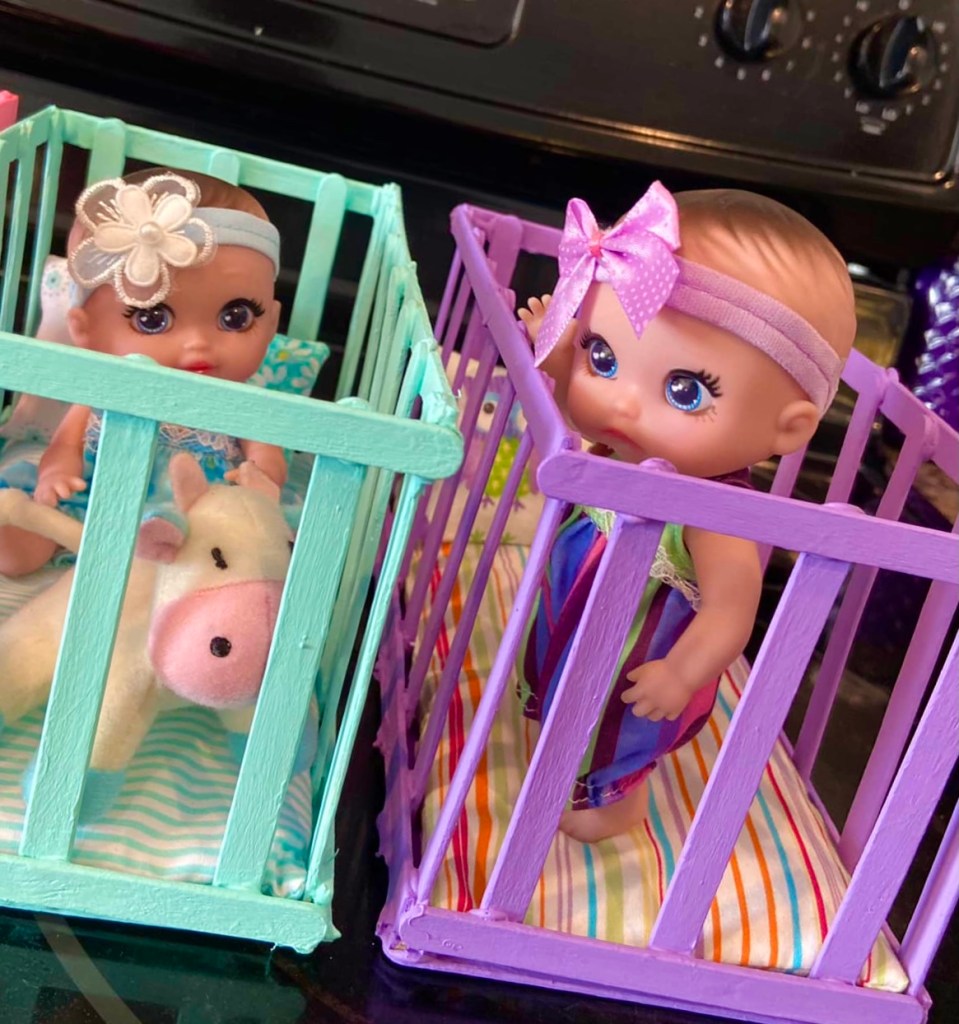
Fast forward again, and I had exhausted the search for a baby doll on Amazon. I hadn’t really found what I was looking for, so I headed to Aliexpress where immediately these three cute faces popped up.
OMG you guys I was instantly smitten. Even if I didn’t need babies for my dolls, at $6 a piece, all three of these cuties just had to come home to my house.

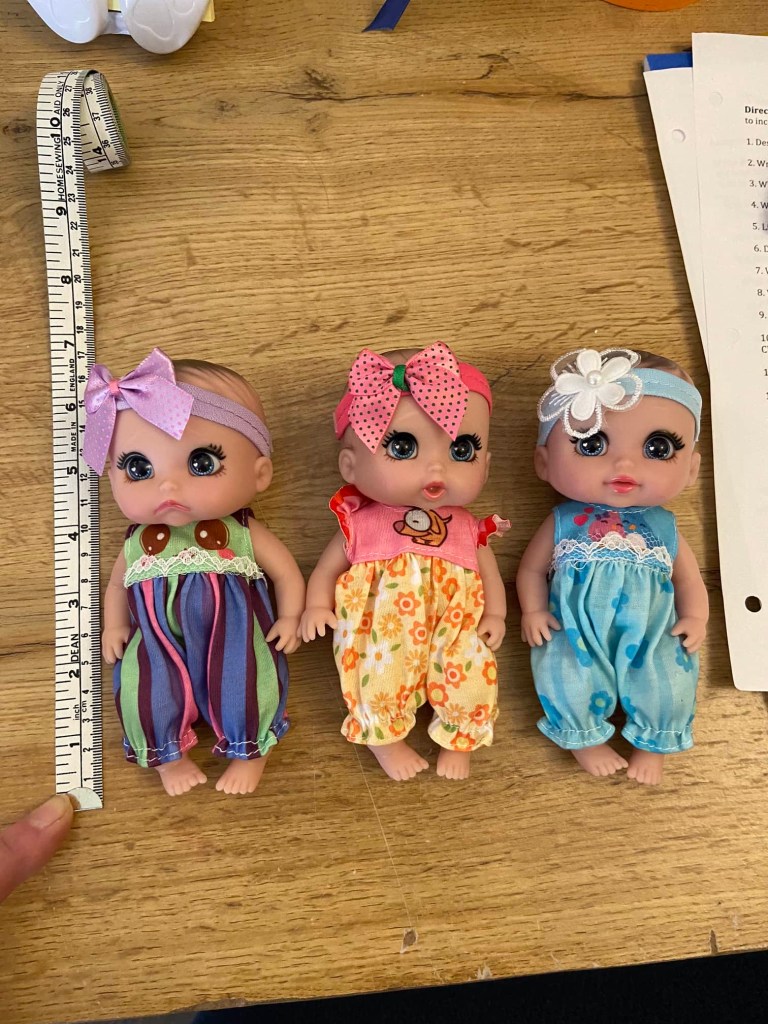
I was a bit hesitant and worried that they wouldn’t be the right size for my dolls, but despite being a bit shorter than the AG Baby, 6.5inches rather than 7.75inches, these are a really cute substitute in my opinion.


And they were under $20 for all three with free shipping, so how could I go wrong?

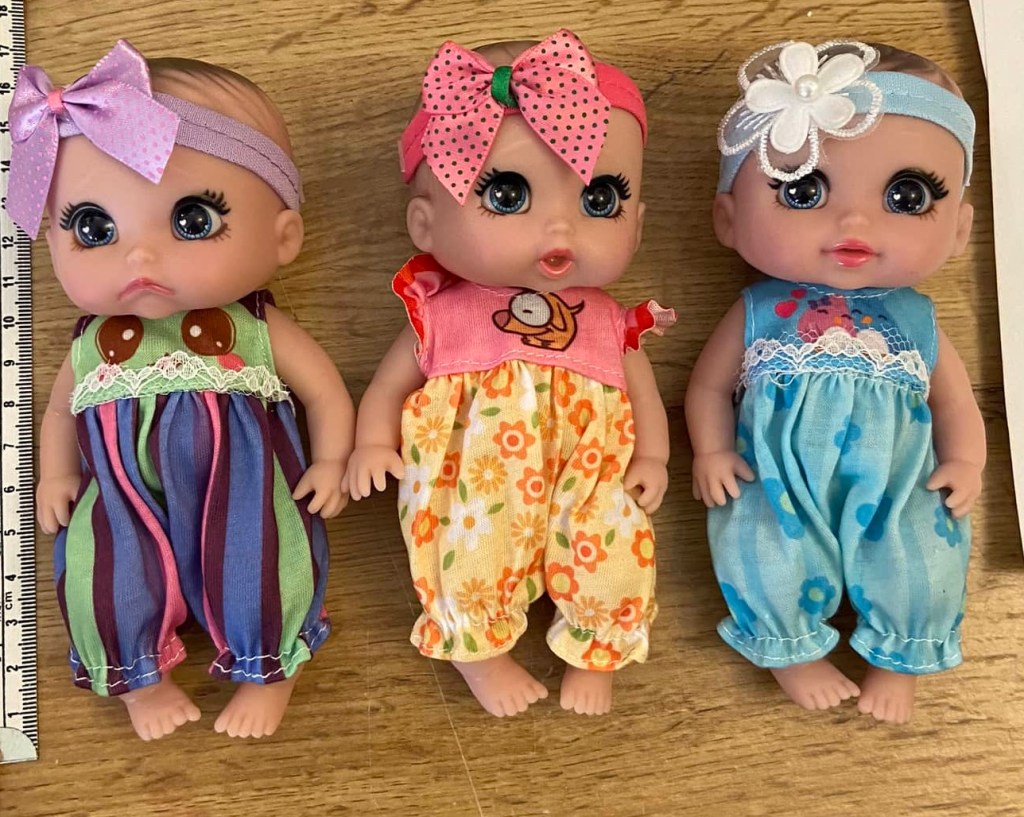
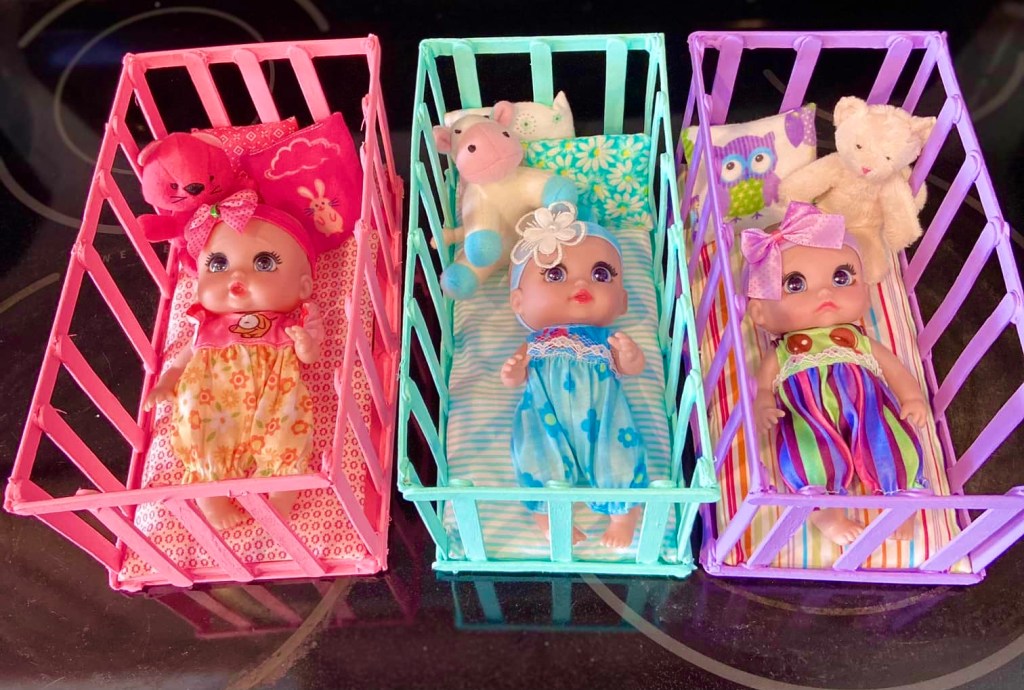
TRIPLETS!!! I have named them Lola, Lulu, and Lily.
I immediately set about trying to come up with a way to craft their cribs. Babies need a place to sleep after all!
WHAT YOU NEED:
Popsicle sticks
Scissors
Hot glue
Paint
Fabric
Toilet tissue
Bubble wrap
Tape
Sewing machine or needle and thread
Okay, to begin you need to use scissors and cut the round ends from 12 popsicle sticks.

Next, hot glue together six sets of two popsicle sticks.

I used my silicone hot glue mat and my finger to flatten the hot glue at the joint. Just don’t burn your finger. I have a low temp hot glue gun so it was no problem.
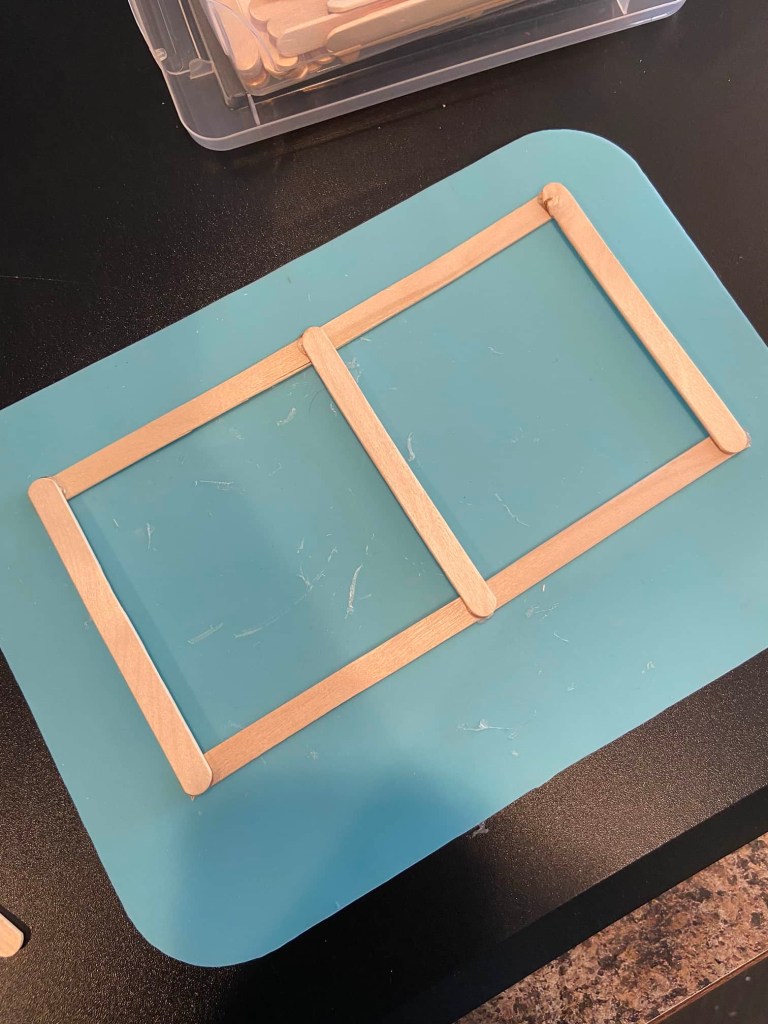
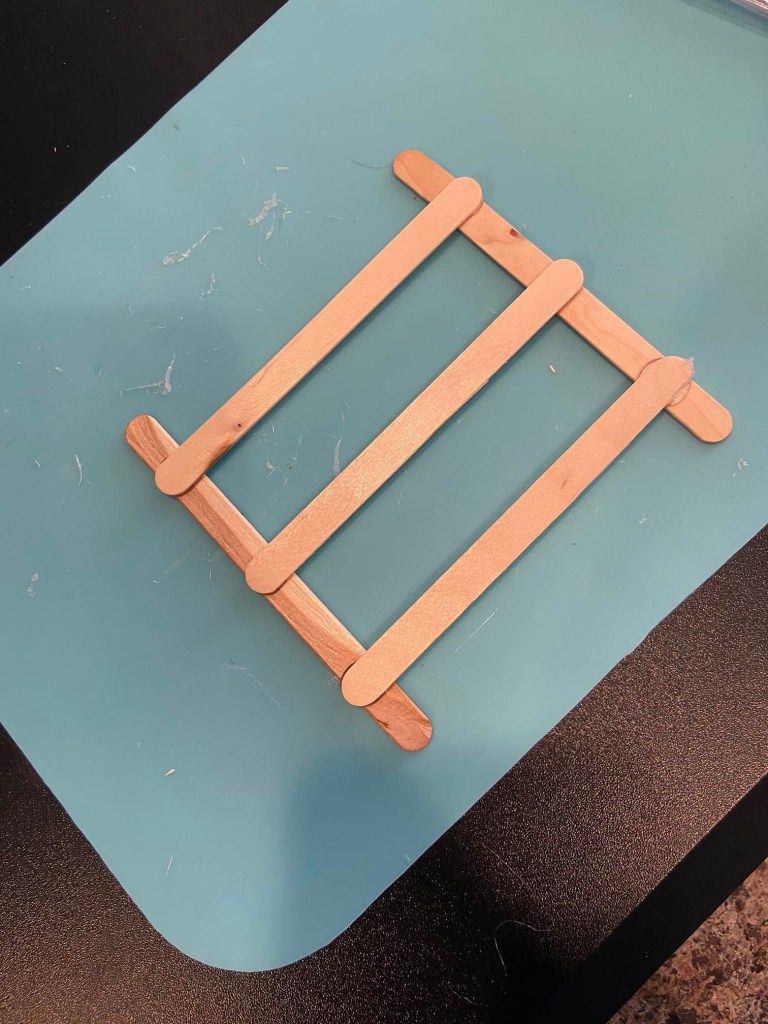
Time to add the crib rails!
Take two of the long pieces you have made and hot glue a popsicle stick to either end making a rectangle.

Then add another popsicle stick at the middle.
Add two more popsicle sticks to either side to fill in the gaps. Try to make the spaces as even as possible.
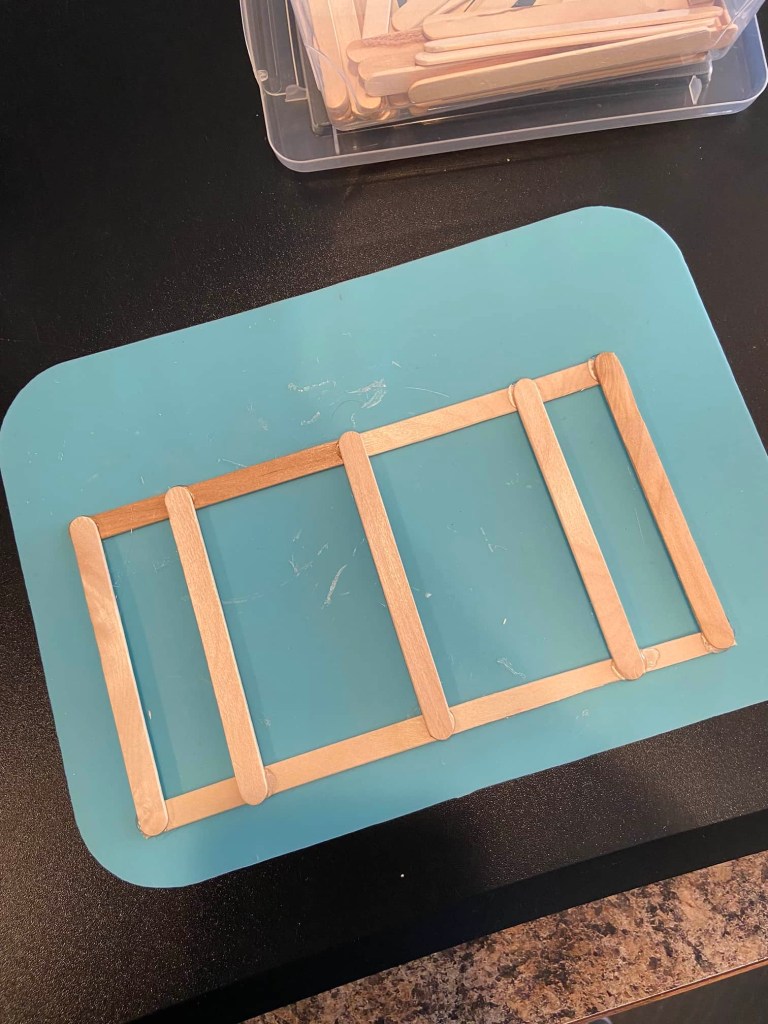

Your crib rail is complete!
Make three using the remaining long pieces. One will be the bottom of the crib slats and the other two are the sides.

Assembly: Make sure the bottom of the crib has the rounded ends of the popsicle sticks facing down. Hot glue one side rail of the crib on top of the crib bottom.

The round ends of the popsicle sticks should face inward so we can hide them with the mattress later.

Hot glue the other side rail to the opposite side. Set aside.

Closing the ends: Take two popsicle sticks and connect them by hot gluing three popsicle sticks like a ladder. Leave about one inch from the top and bottom.
Make two.

Now flip the crib on its end and hot glue the first one on top and the other on the bottom.
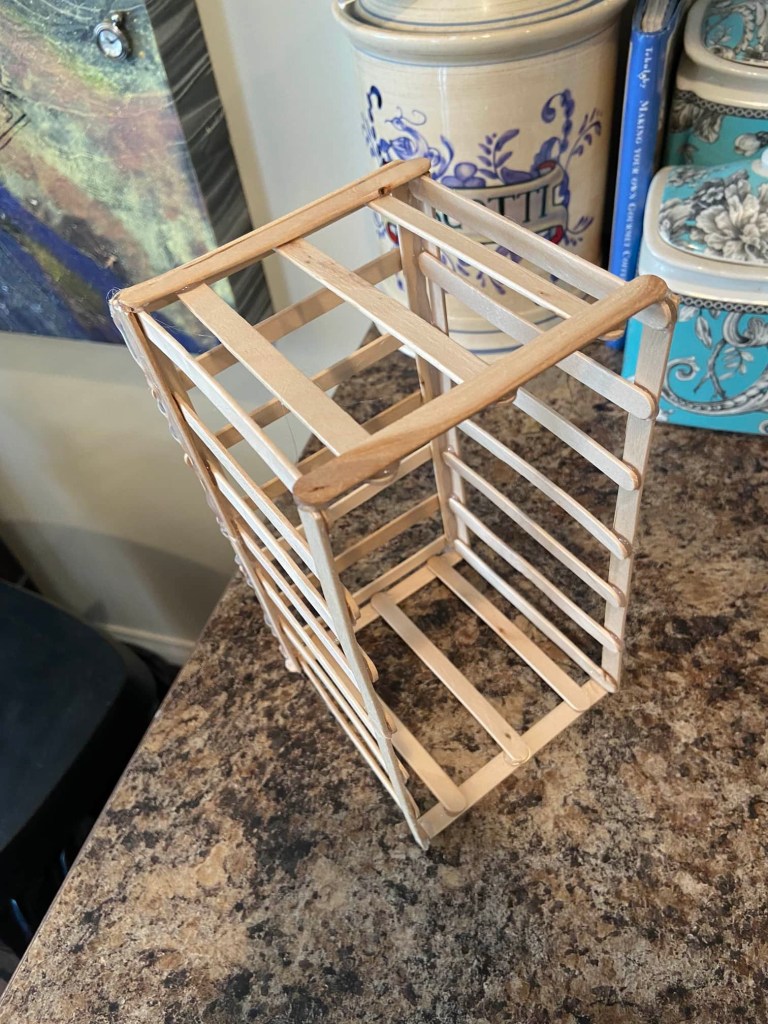
Be sure that you glue the popsicle sticks as straight and even as possible.
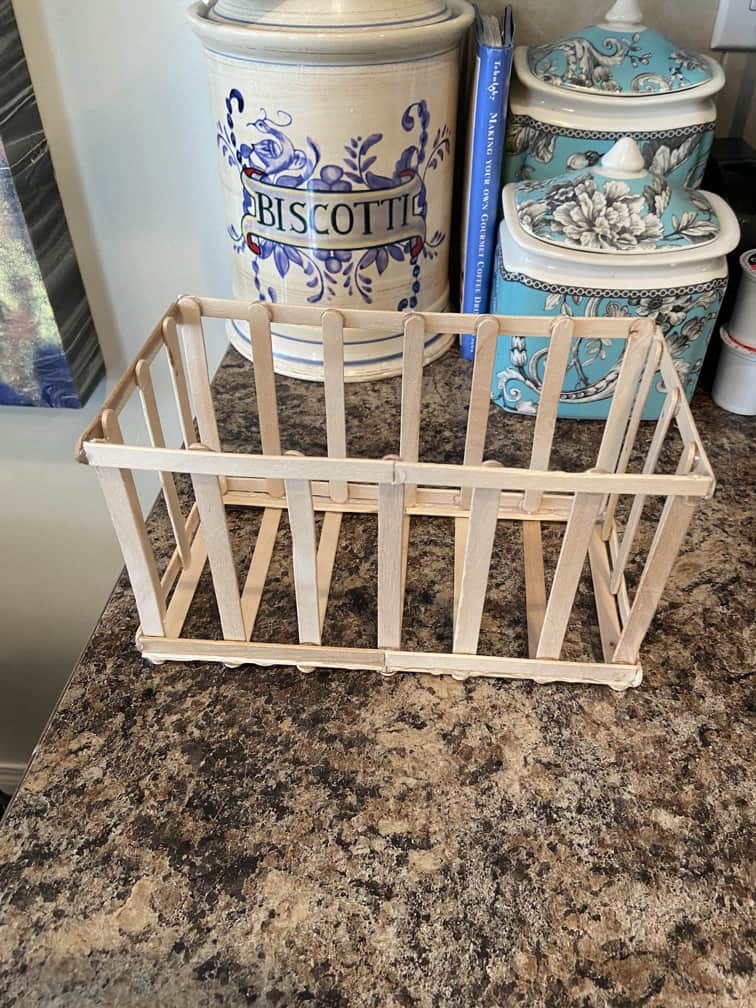
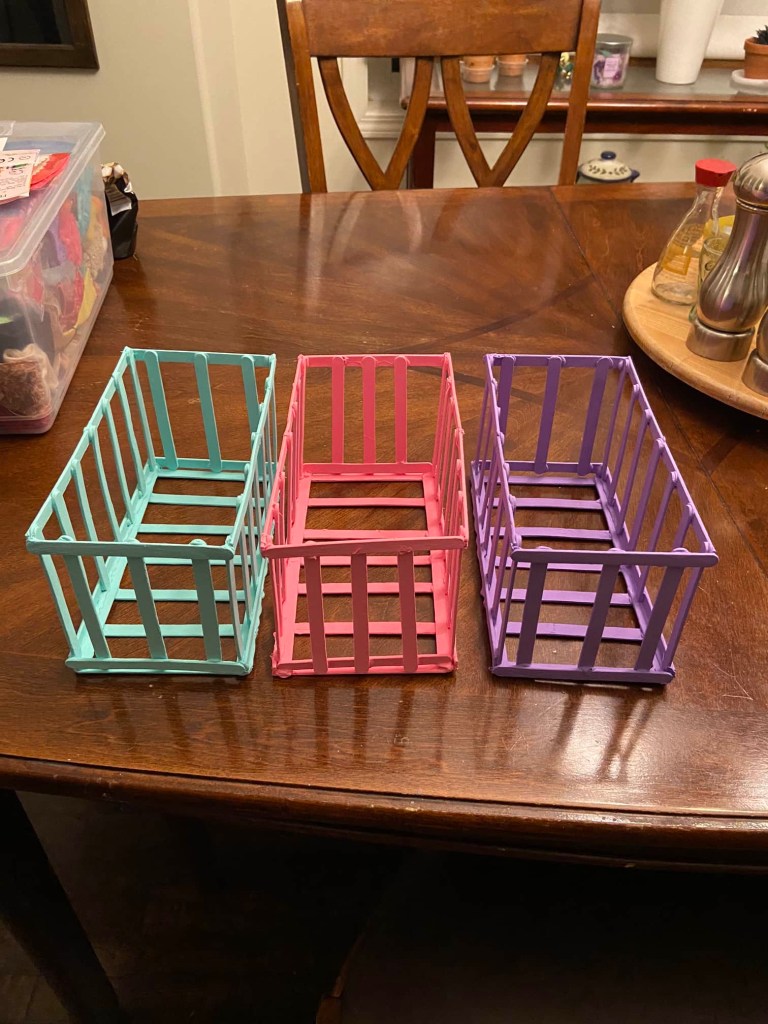
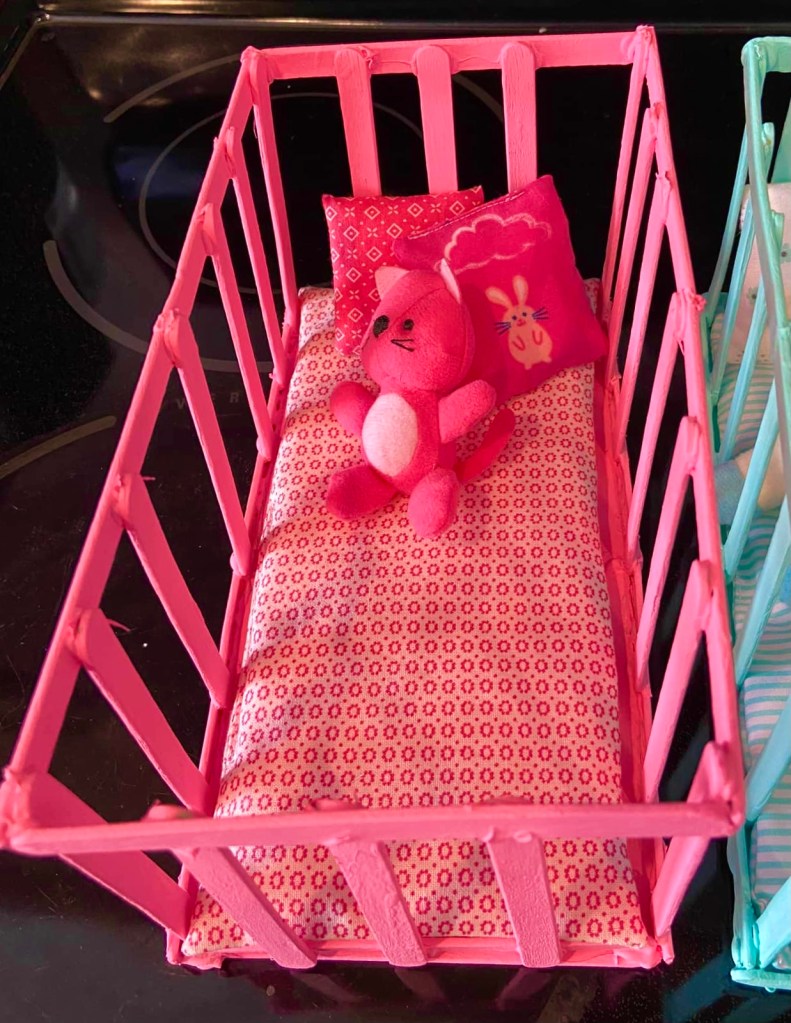
Your crib frame is done!! Now it is time to paint! We made three cribs for our triplet babies so we painted their cribs to match their hairbands.
I don’t know if these cribs would fit the AG Caring for Baby. I was just measuring for the babies I have, and I don’t have the AG baby to compare.
Next, we made mattresses. I just measured the bottom of the crib and drew a rectangle pattern piece adding 1/4” seam all the way around.
Cut two rectangles of fabric of your choice. Stitch right sides together leaving a gap for turning. Clip the corners and turn right side out. Use a pencil to poke out the corners.
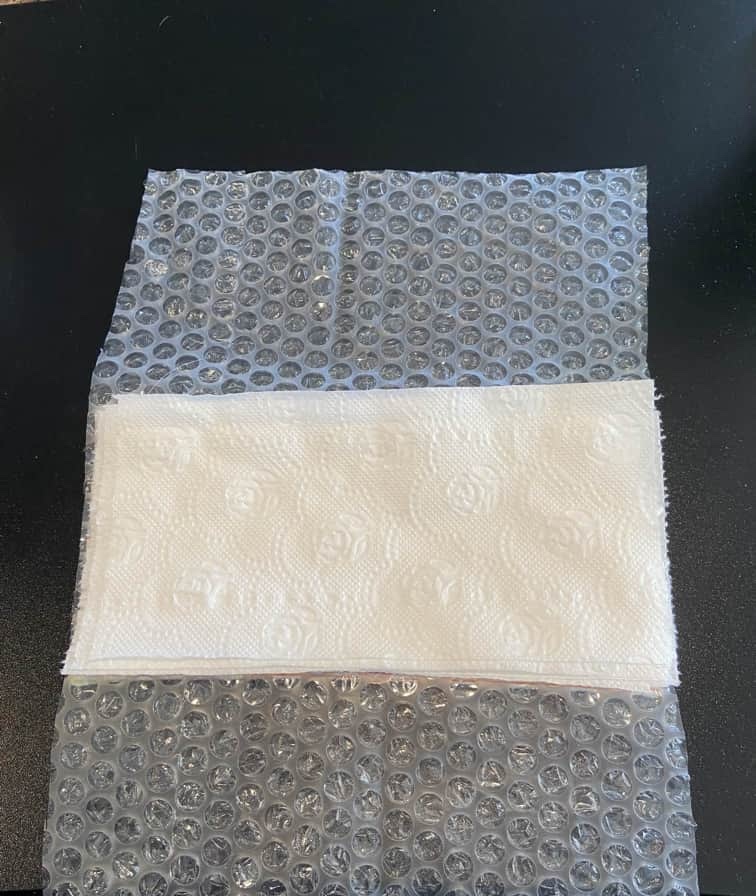
To stuff the mattress, we used ten layers of toilet tissue wrapped in bubble wrap. I wanted that crunchy crib mattress sound, and also it’s cheaper than polyfil or cotton batting. It also lies flatter and more uniform with less bulk.
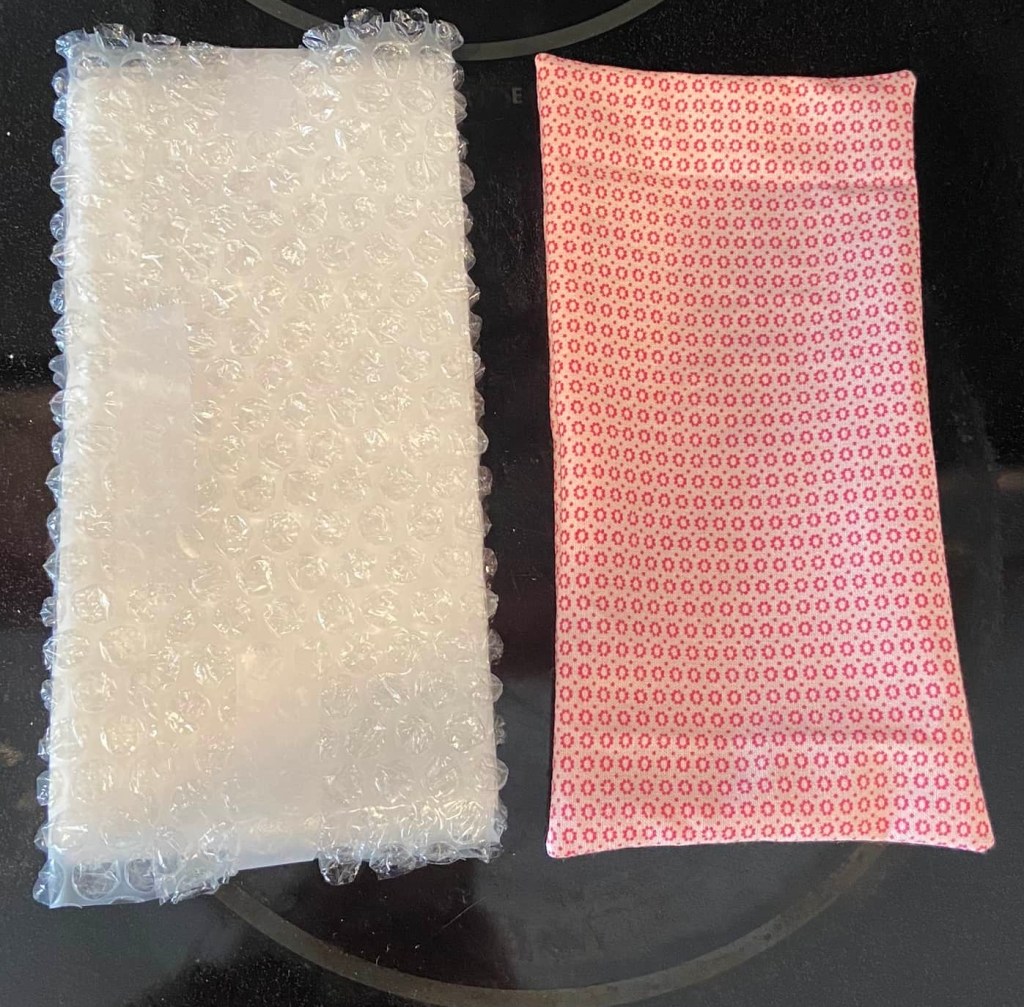
Fold the bubble wrapped tissue and stuff it in the mattress casing, flattening it back out as you go. Sew up the gap.
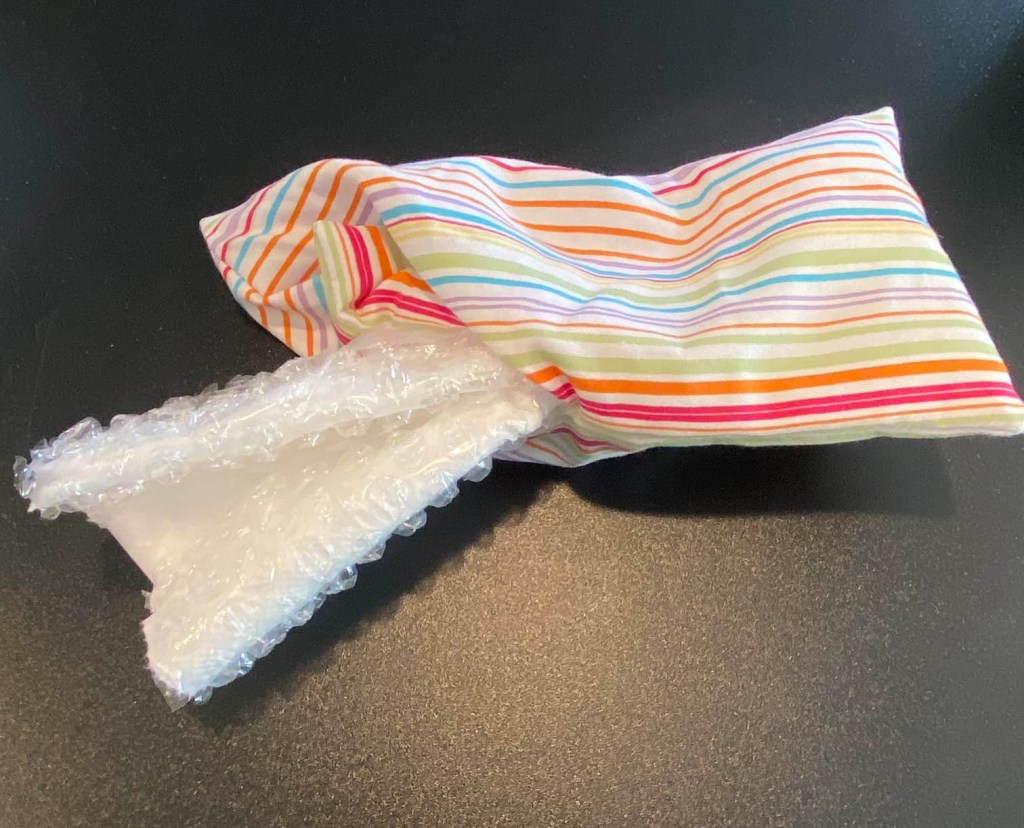
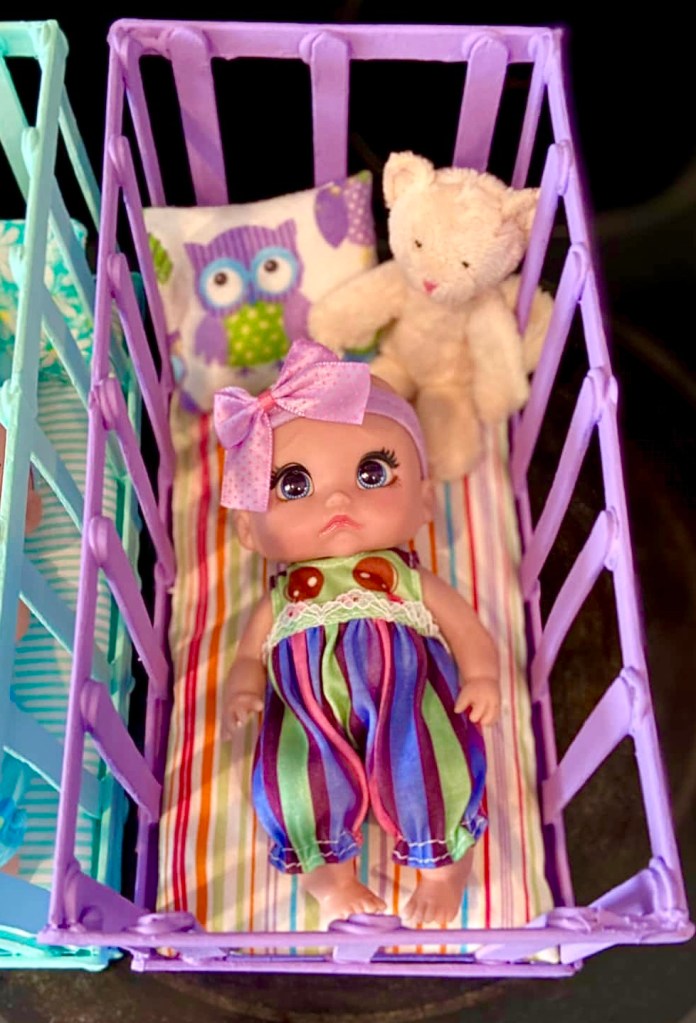
Done!!
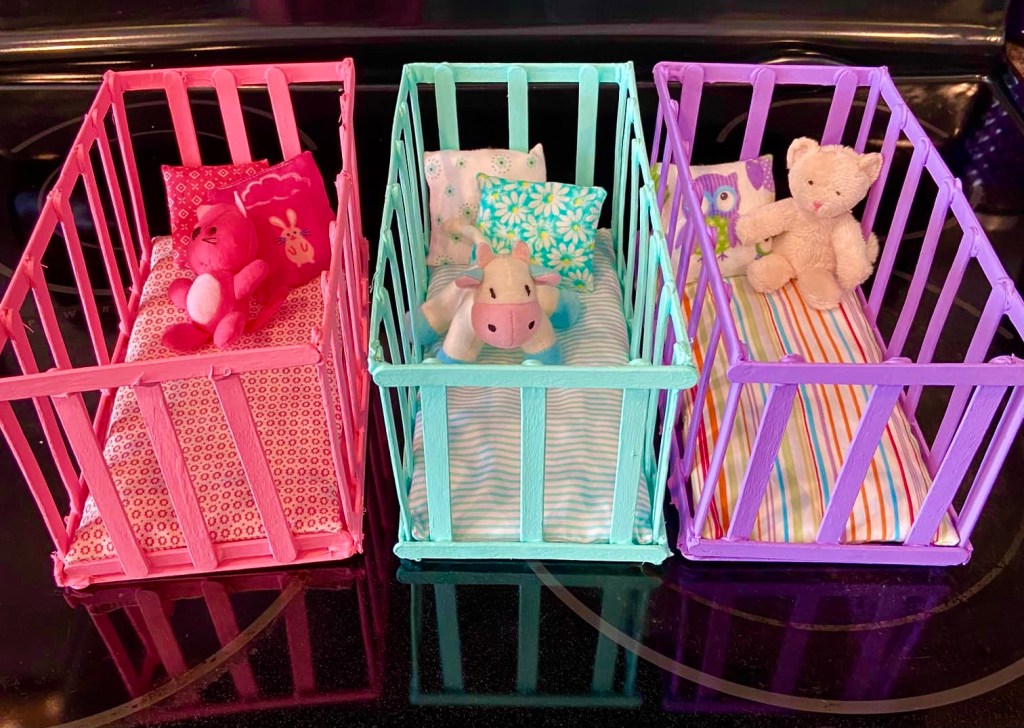
We also made some small coordinating pillows and added some stuffed animals. Too cute!
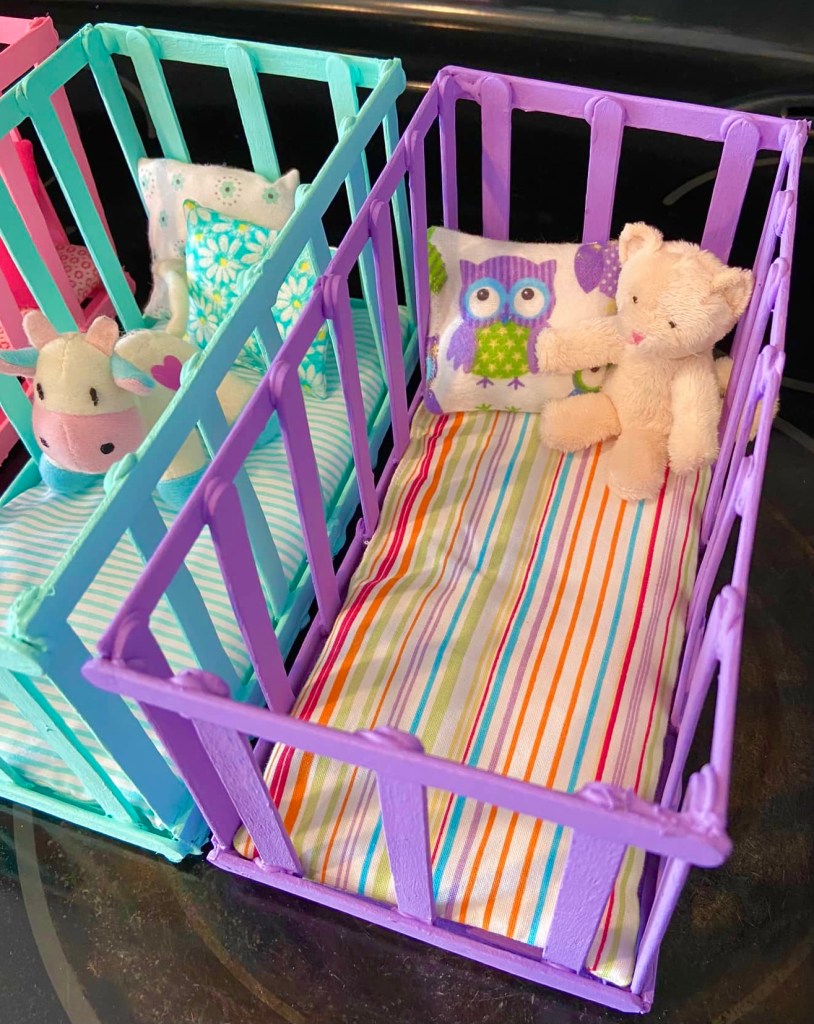

I still have to make baby blankets and I haven’t decided if I will put legs on the cribs. I have some suitable dowel I can cut to size. For now the babies are happy in their new beds.


Okay, so I might be a tiny bit obsessed. 🥰 We hope to make more crafts for our babies in the future, so stay tuned for that. 💖
Thank you so much for joining us today!
I hope you all are well, and I hope you have a crafty kind of day!
Leave a comment below!
❤️❤️❤️

Adorable and the crib turned out great! I love Lola’s little pouty face.
LikeLike
They’re adorable! I would love to add a baby to my doll collection! But I don’t know when I would use it. Though if I ever will I will have to come back and use this tutorial! Adorable!
LikeLiked by 1 person
Thank you!! I am so happy how they turned out! I just have to decide what I want to do to make a base for them or legs to boost them up a bit but for now they are super cute as they are! 😊❤️
LikeLiked by 1 person
Just too cute!
LikeLiked by 1 person
Thank you!! 😊💖💖💖
LikeLike