

Hi guys! I don’t know about you, but fall is my very favourite season of all. I am busy busy busy, even as we speak, sewing up some fall outfits for the dolls. You can catch all of that over on our Instagram @fim_studios 😊❤️
Today however, we are coming at you with adorable DIY doll tote bags, perfect for hauling a laptop and books, and for keeping those dolly hands free to carry that morning pumpkin spice latte.
I just love this craft because not only is it earth friendly, it is also super cute!! Like seriously, over the top cute! 😊❤️
Here’s what you need:
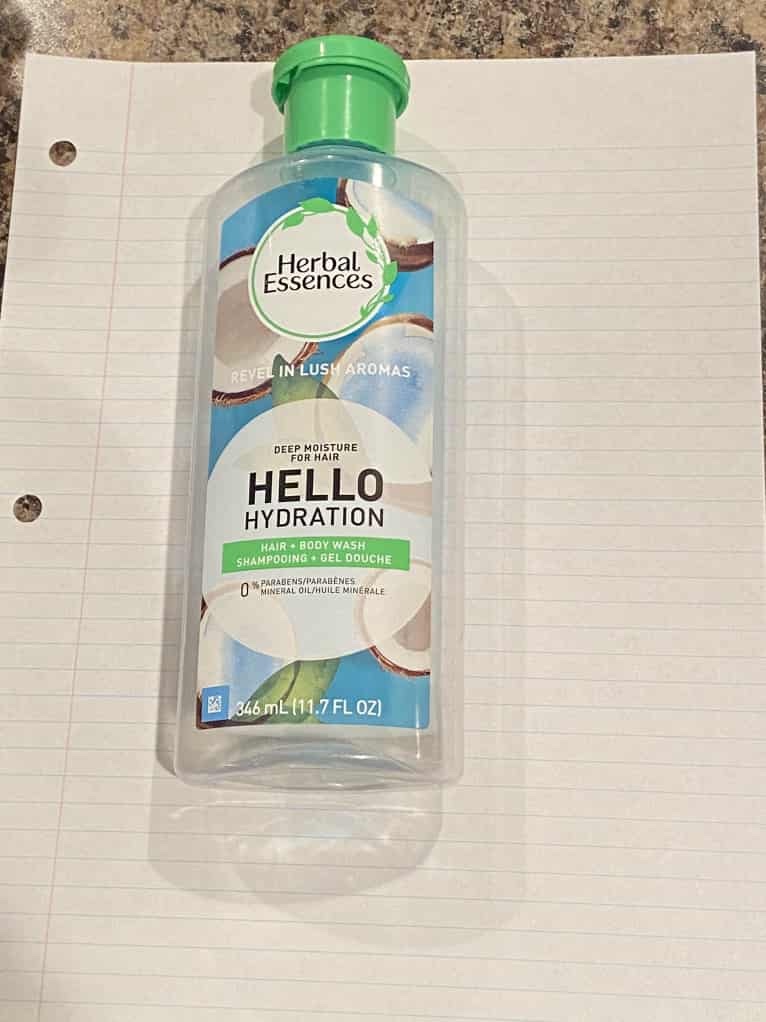
Plastic bottle
(shampoo, lotion, salad dressing, any plastic bottle works)
Hot glue
Scissors
Lined paper, pencil, round washi tape
Permanent marker
Exacto knife (Stay safe! Parental supervision!!)
Twine
Yarn
Felt (optional)
Embellishments, bows, lace, ribbons and trims
Let’s get started! First thing to do is rinse out your bottle. Then lay it on your paper. Measure the width.
I just sort of traced around the sides and bottom with my pencil as best I could. I used lined paper because then I didn’t need to worry about it being straight. I just lined it up on the lines.
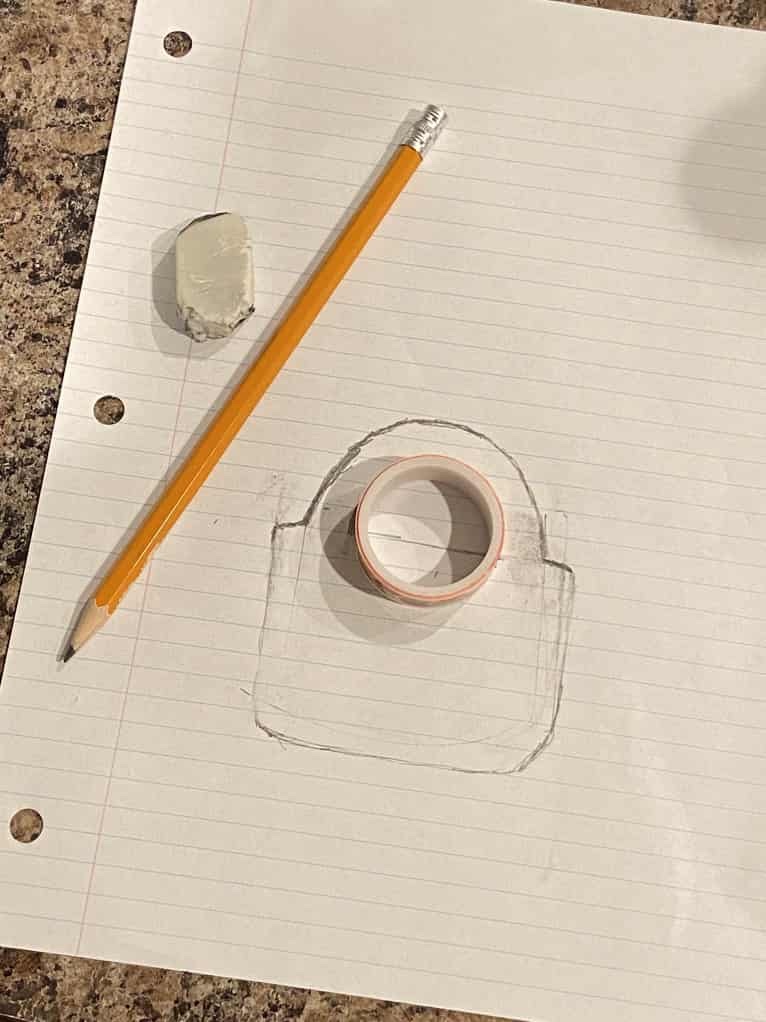
I traced a washi tape roll for the inner part of the handle, and then I drew the rest of the handle around it.
I freehanded this part, but you can use a ruler if you need to. The top and bottom of the purse are the only bits that need to be straight. As long as the width is right it should be fine.
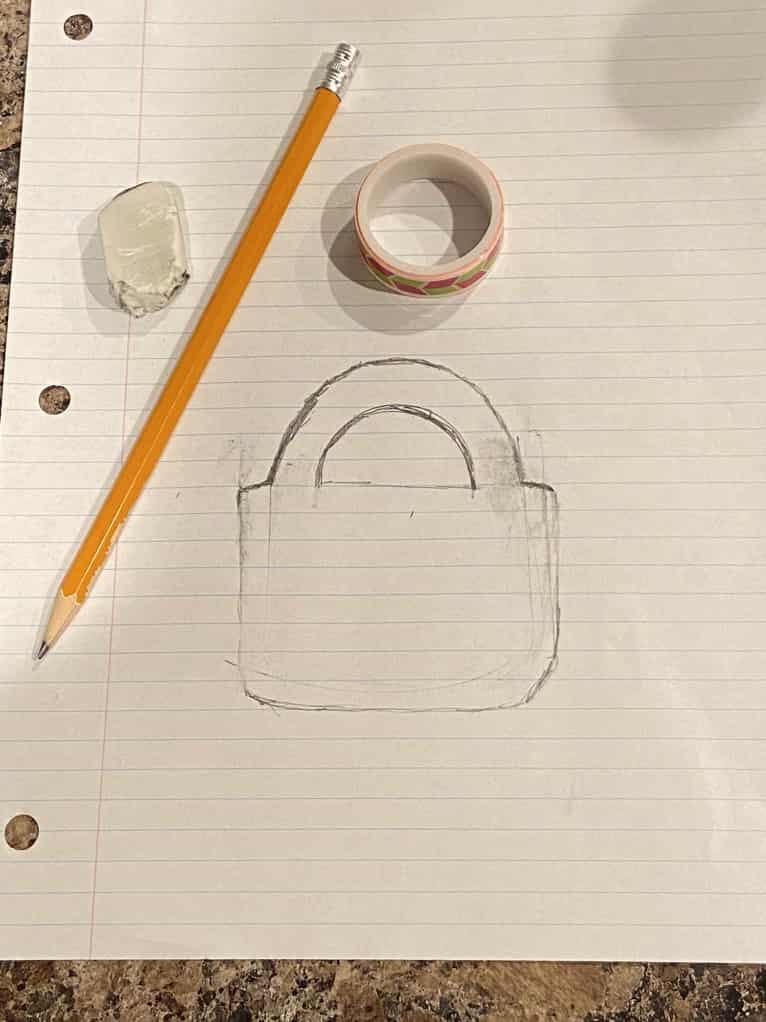
This is what you should end up with. Cut out the template and tape it around the front of your bottle. Be sure the bottom of the template lines up with the bottom of the bottle, and that it is centered.
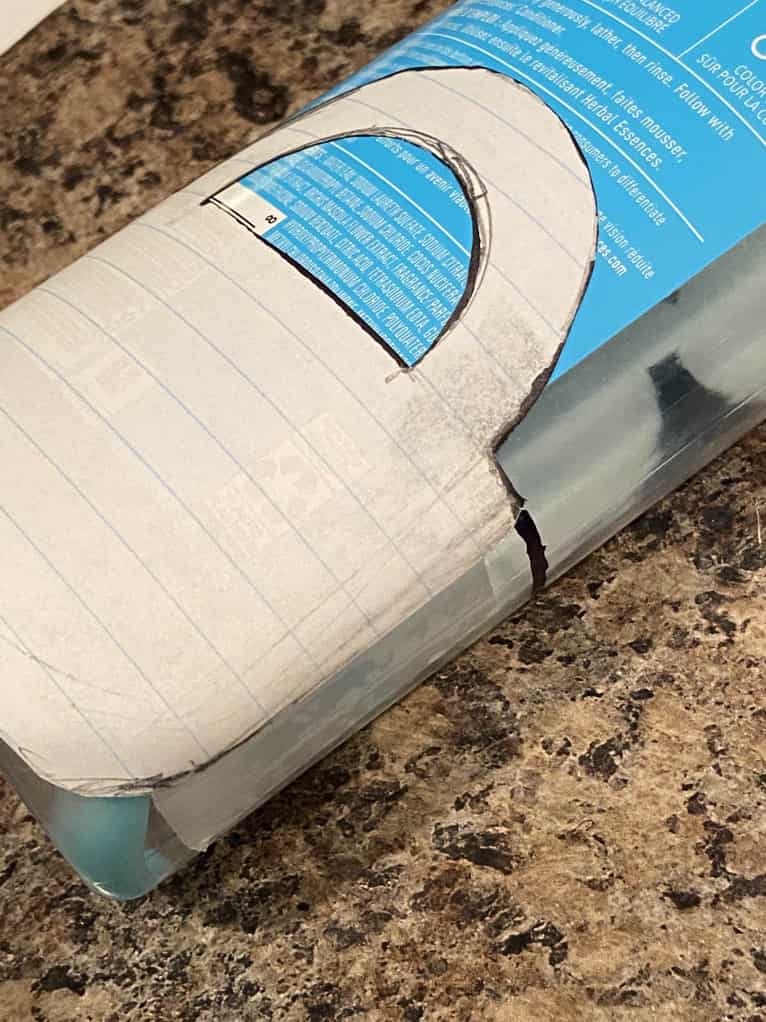
Trace the handle of the template onto the bottle with a permanent marker. Repeat on the other side connecting the lines on the sides.

Cut your bottle in half.

Now use your scissors and Exacto blade to carefully cut out your handle.
When cutting out the inside of the handle, be very careful. Make small cuts with the Exacto knife, and then finish with the scissors. Cut it out in parts.

Make a starting cut by gently moving the Exacto blade up and down against the line rather than putting a lot of pressure that can cause sudden cuts and injuries.
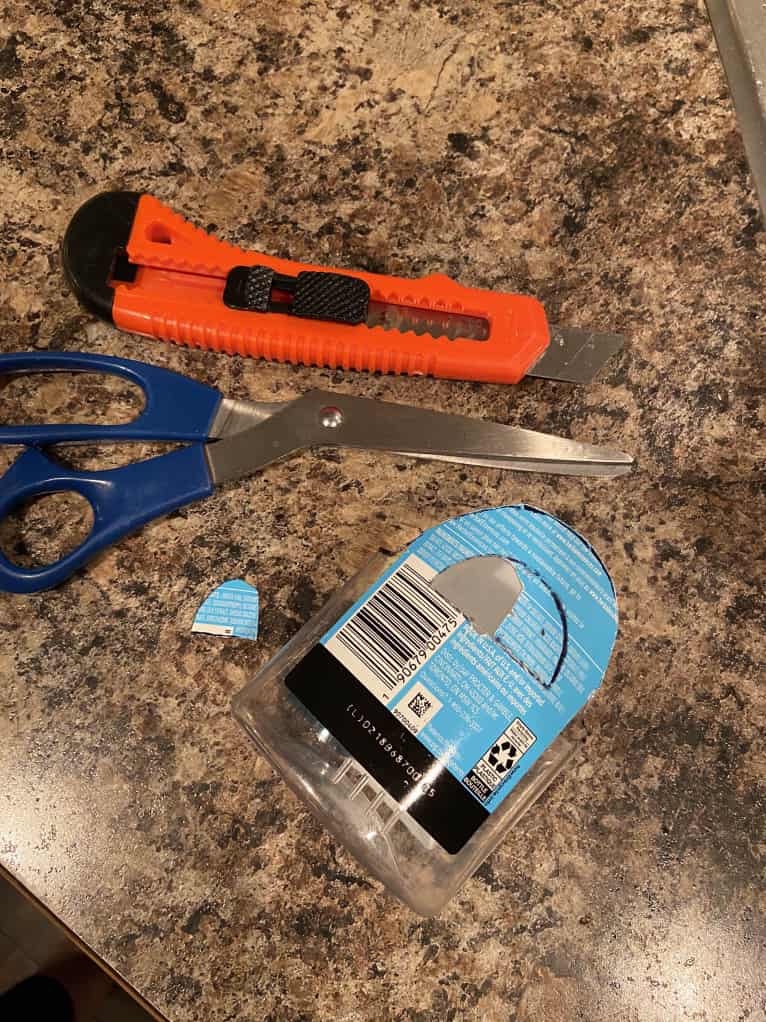
Use the scissors to cut where you can as with scissors there is always more precision and control. Work slowly and patiently.
Once both handles are cut out, begin wrapping with twine. Hot glue the end of the twine to the inside of the tote.

Once the twine is secure, start by wrapping the handle.
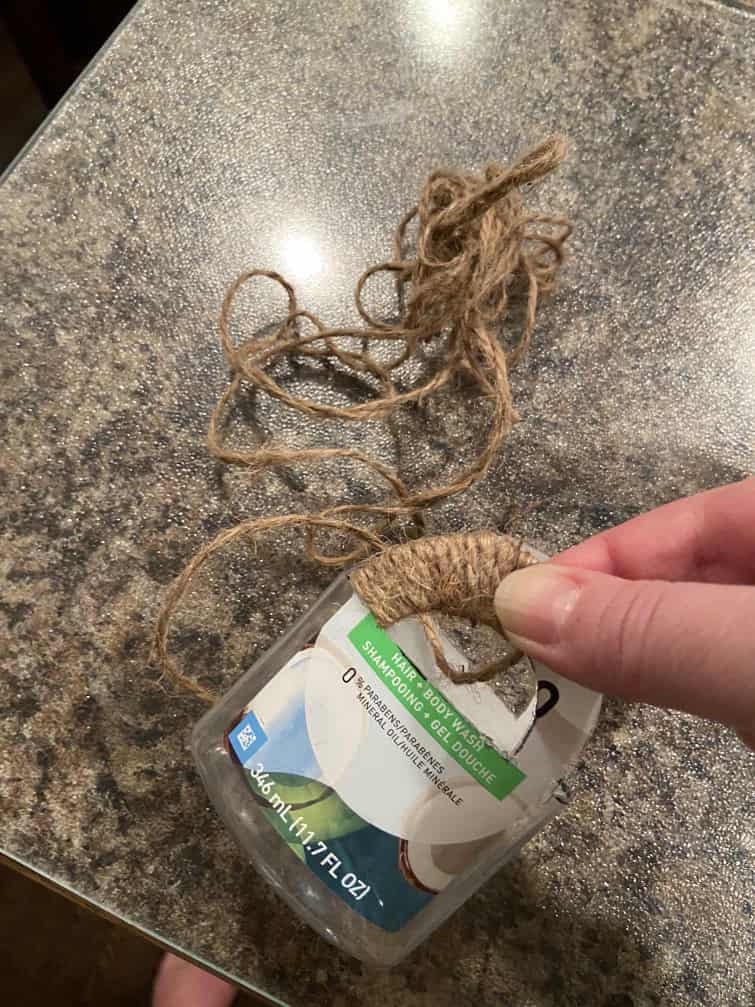
The easiest way to do this is to gather a small ball of twine that fits through, and keep pushing it in and out of the handle opening.

It doesn’t have to be a perfect ball. Mine was mostly a clump that I wadded up each time to jam through.
Be sure after every couple of wraps, to add a dab of hot glue on the inside of the handle to secure. Continue wrapping over one handle, and then the next.
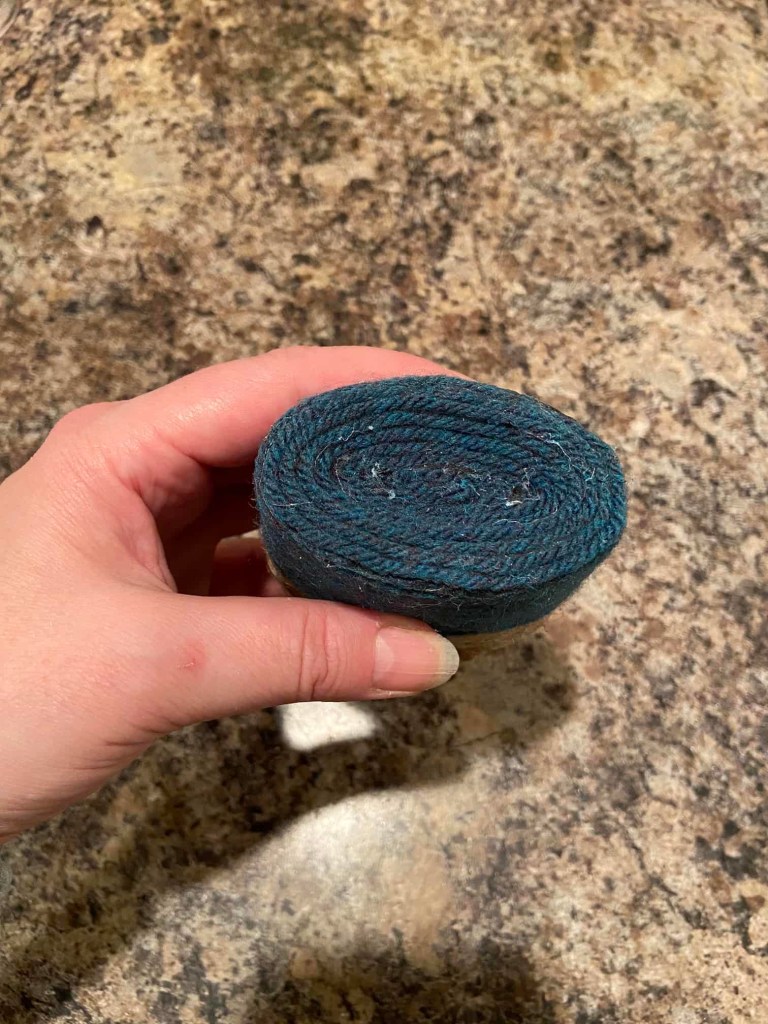
Once both handles are covered, start wrapping the body of the tote, adding a line of hot glue now and then to secure. Continue wrapping until the tote is fully covered, or…
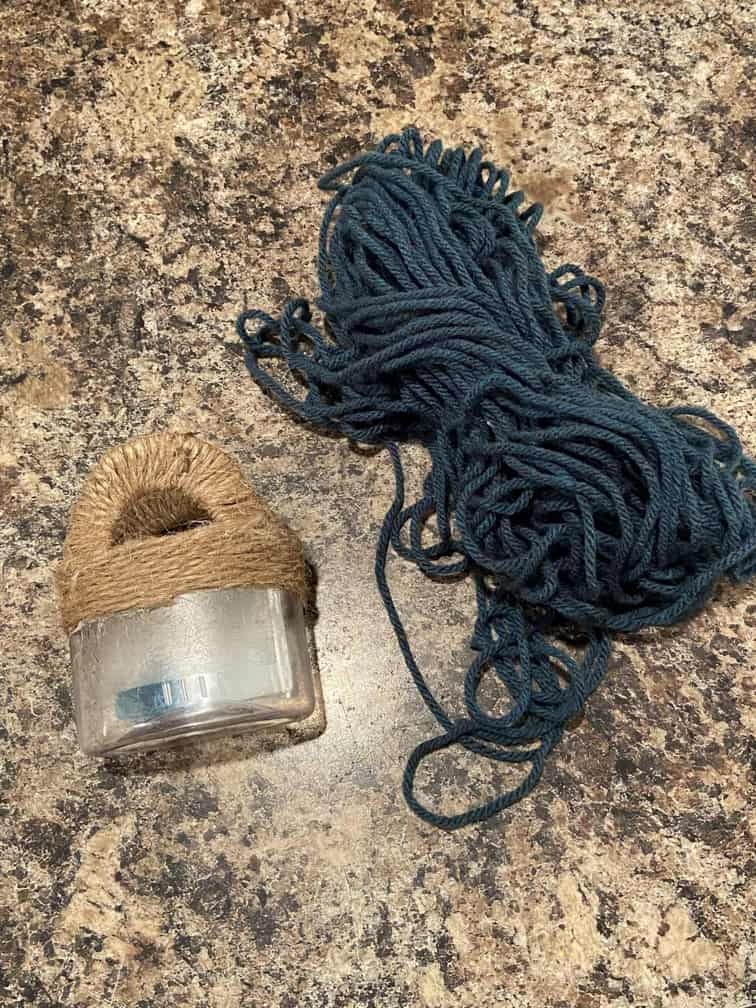
…stop to change colours. Here is where you can go crazy. Use whatever colours you want. We chose this pretty teal blue yarn, but you can do whatever you like, whatever you have on hand. I mean, really the sky is the limit.
You can use twine or yarn or string or ribbon or lace. You could do multiple colours, or even stripes, however you want your doll tote to look. It’s up to you.
And it doesn’t have to be a fall tote, either. You could even make your dolls a nautical tote for the beach. Just change out the colours, and it becomes something completely new.
Start wrapping the yarn, making sure to secure in place with hot glue as necessary.
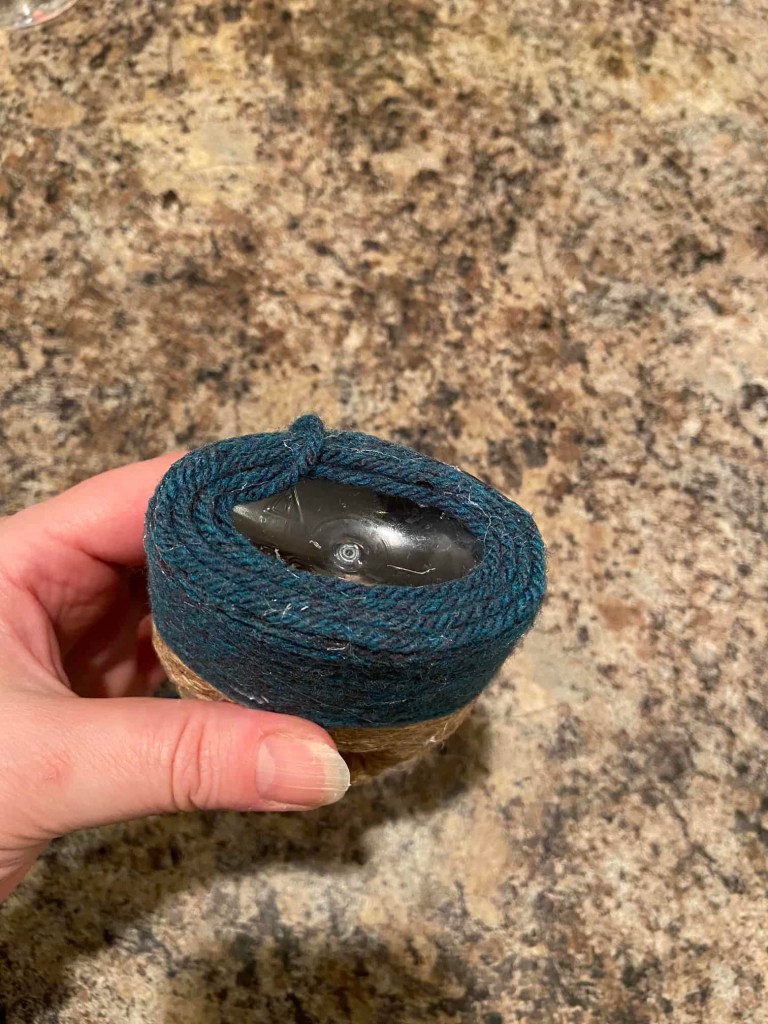
When we reached the bottom, we just kept wrapping, but if you want to cut an oval of felt to hot glue on there to cover it, you can.
Tada!

So cute!! But don’t stop there! Time to embellish. Add bows, buttons, ribbons, lace or pom pom trim. Anything goes!

Okay, so that’s so cute, lady, but we are kids here, we aren’t allowed sharp Exacto knives to play with, and mum and dad are busy. Can we still make a doll tote, too?
Yes!
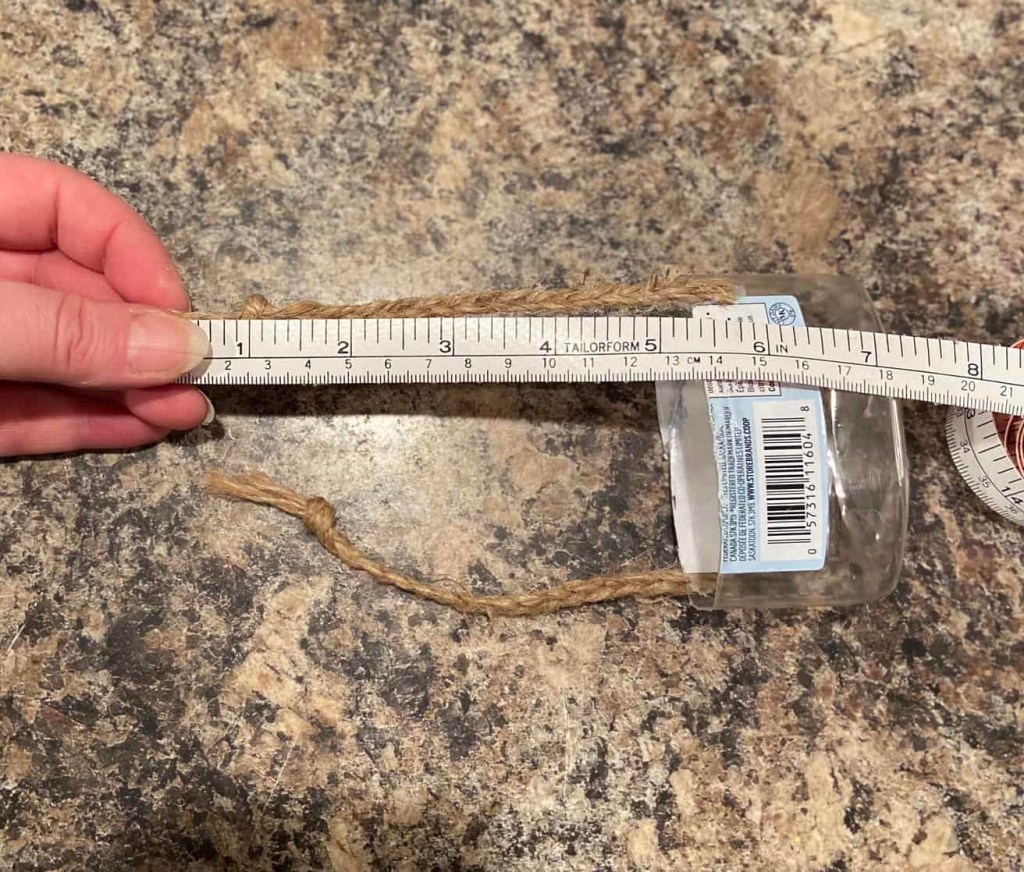
All you need to do is measure, and cut the bottom off any old plastic bottle with scissors. Doesn’t have to be perfect.

Next take three lengths of twine, ours were about 12 inches long. Knot them together at the top, and tape the knot to a surface like a table or counter. Braid the twine all the way down. Knot the other end. Fold your braid in half, and cut it in the center. Be careful not to let it unravel.
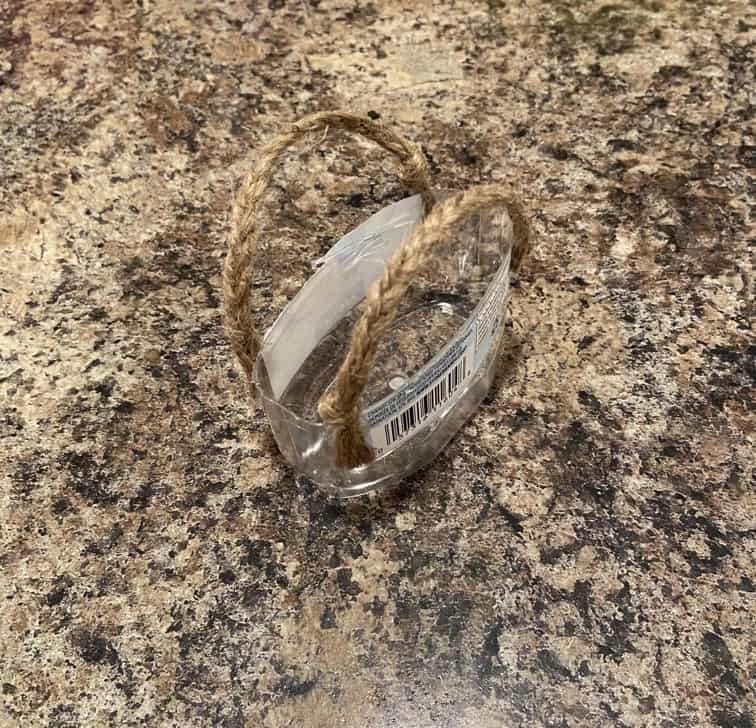
Next, hot glue the loose end of each braid along the top rim of the plastic bottle. The other end of each braid has the knot. Hot glue the other end of the braids to the bottle to form two handles.
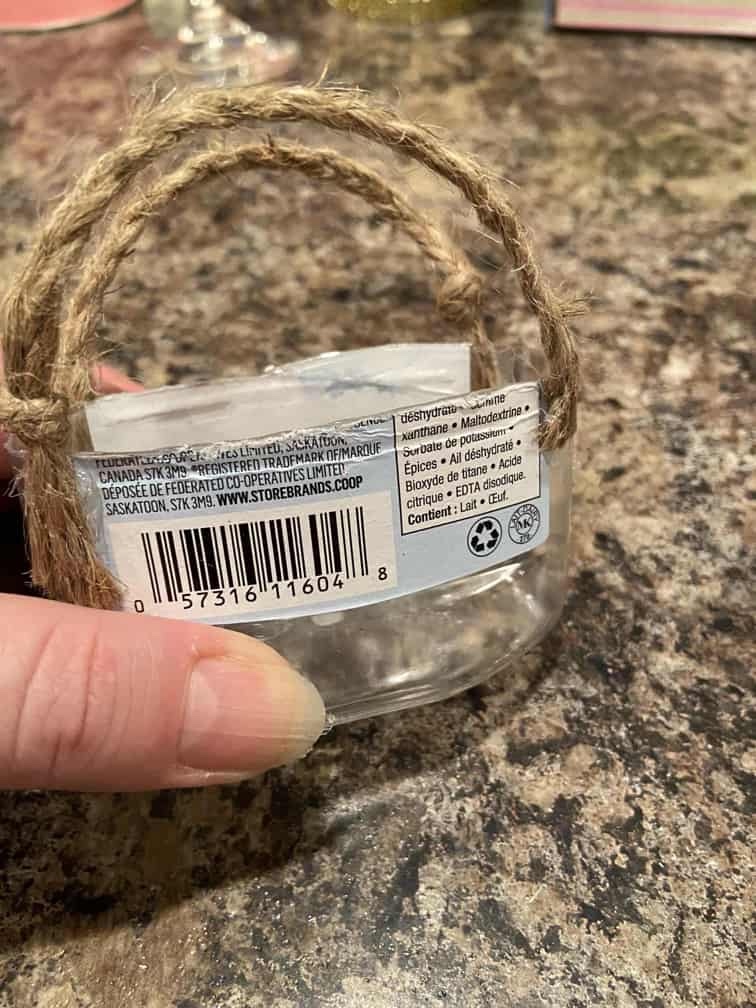
I didn’t glue the knot. Instead, I just glued down the ends below the knot. This reduces bulk when you are wrapping the twine.
Begin wrapping the twine, covering the parts where you secured the handles.

At this point, I had to add the pom-pom trim, because it was just too cute.

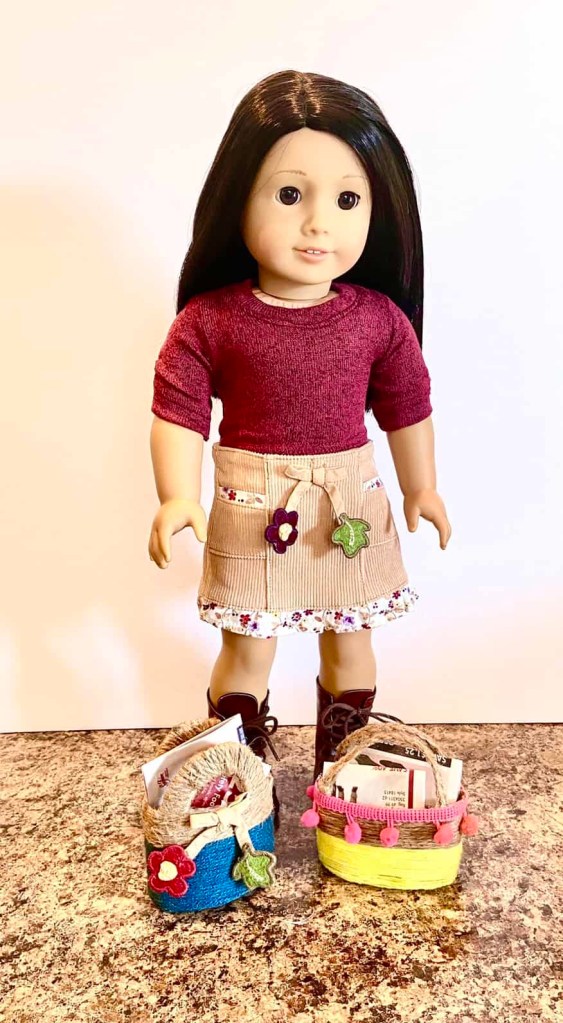
Now continue wrapping as before in the colour of your choice. We did yellow. The ribbon bow on the blue tote is an embellishment from one of my daughter’s old skirts. Below, our new doll, Jade Evelyn Taylor is wearing a doll skirt that I upcycled from the same skirt. 😊❤️

Tada! Ooh, bonus craft!

Make a simple dolly junk mail flyer so that your doll will always be able to clip her coupons wherever she goes! Shout out to my sister! 😉

All we did was cut the corner from our junk mail flyer. Or you can strategically fold and cut, if you want a different image for your front page. It’s just a matter of folding twice, and clipping a square off the corner.
I’m convinced you could make a newspaper this way too, but it would have to be folded and tied with string as the lettering wouldn’t look right to be an open paper. Also, who even has an actual newspaper in their house anymore? We don’t, or else we would have tried it! Times have changed.

Anyway, now your dolls are ready for the market, or the campus coffee shop, or even the beach!
I hope you enjoyed our little DIY this week! Now I’m never going to be able to part with any of our plastic bottles!!! 😂
Have a super fantastic, crafty kind of day! 😊
Leave a comment below!
❤️❤️❤️

These are just plain FUN! In addition to using them as beach (or somewhere else) totes, put in some very small homemade knitting needles with a small ball of yarn and a picture of a sweater that you like. Now you’ll have a knitting tote to sit beside a chair for Winter evenings complete with supplies and sweater making “instructions” all ready to use. Of course, your dolls could also use it to take to the library for carrying home new books to read. Thank you so much for these ideas and another creative boost for all of us!
LikeLiked by 1 person
Those are AMAZING ideas!!! So cute! Thank you so much! And I’m so glad to be able to fuel that creative spark! 😊❤️❤️❤️
LikeLike
Cutishy
LikeLiked by 1 person
Thank you!!! 😊❤️❤️❤️
LikeLike