
 Hi guys! We are back with another fun tutorial for your dolls! This one has been in the archives for a very long time. We love our DIY Maryellen’s Fridge as well as our other DIY Doll TV Dinners, but ever since we’ve been playing around with a new idea.
What we came up with was a doll TV dinner tutorial that is an all in one project, and the best thing is that it only requires two things:
Model Magic air dry clay and paint!
Okay to be perfectly honest, you will also need a couple of tools:
Toothpicks
Straw
Toothbrush
Clay rolling pin
Kitchen knife
TV Dinner Paper Template (see below)
 Let’s get started!
Using your clay roller, flatten out a ball of clay to about a half inch thickness. Be sure your Paper Template fits on top.
 Lightly press your template into the clay to make a impression.
 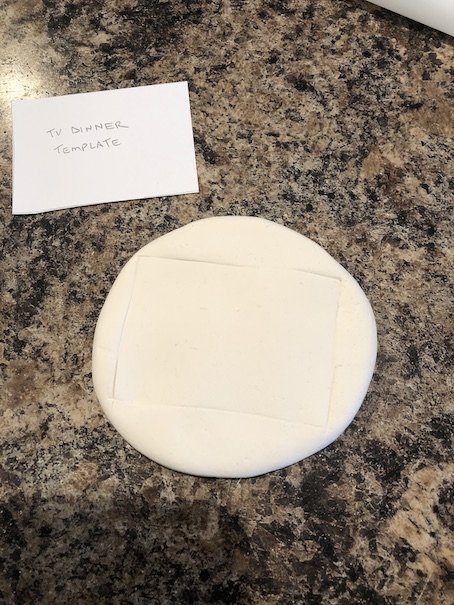 Cut along the lines of the rectangle with a kitchen knife.
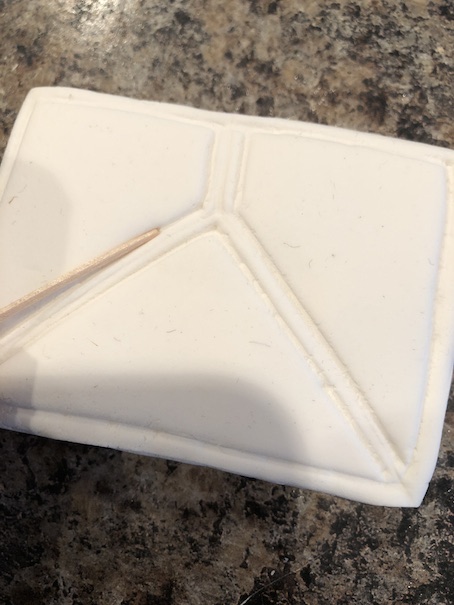
 Next, lay two toothpicks in a triangle pattern on top of the rectangle as shown. Gently press them into the clay to make the impression.
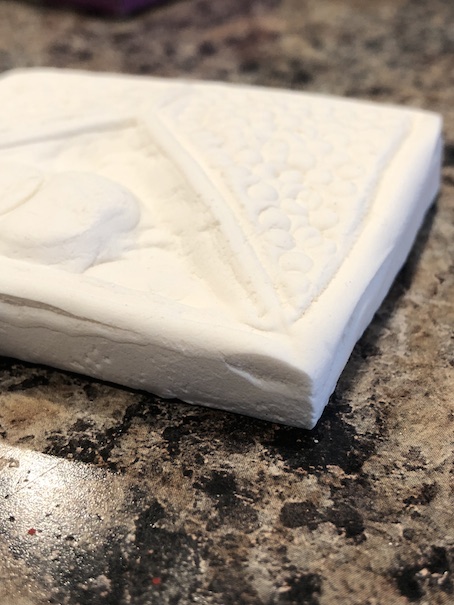
 Remove the toothpicks and using the end of one, make another line to create the three sections of the TV dinner tray.
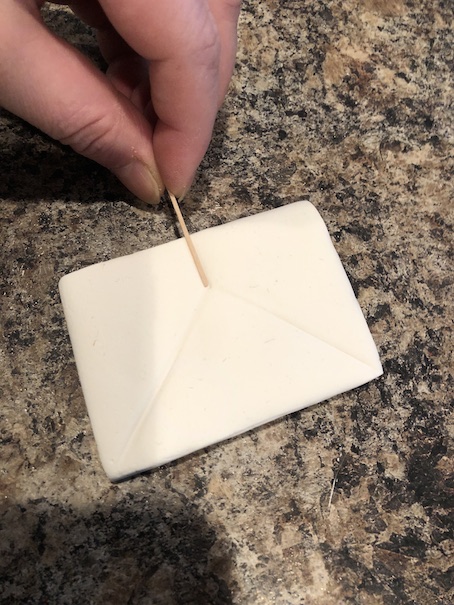 Next, use the toothpick to draw a line all the way around the rectangle.
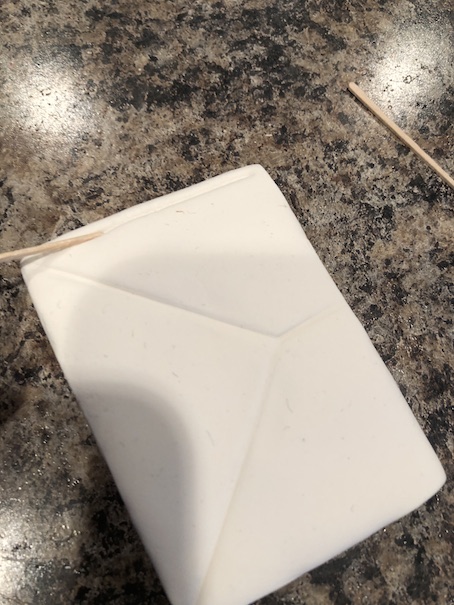 It should now look like this.
 Finally, using your toothpick once more, draw double lines to emphasize the sections.
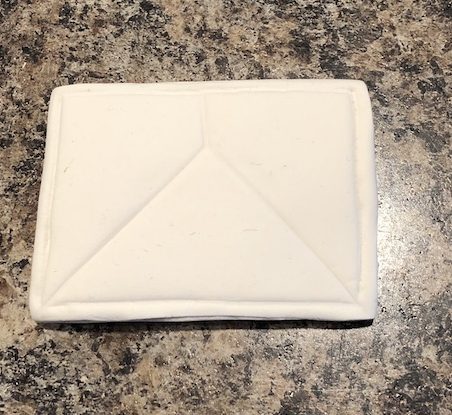
 Time to add the details.
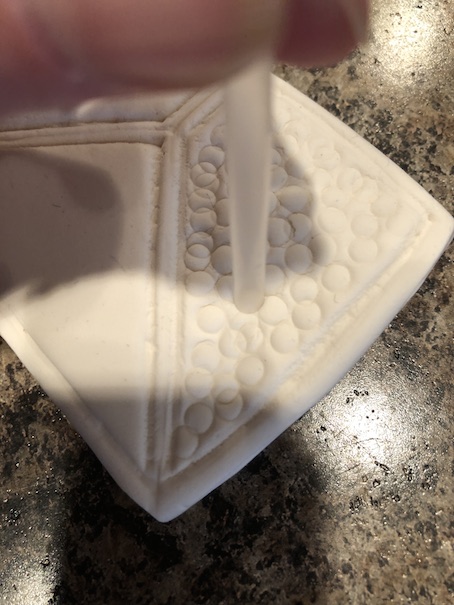 Use the straw to create round circles to look like peas.
 Use a toothbrush to texture the mashed potatoes.
 I used my clay rolling pin to mark two circles in the meat section. You could use a large straw or a circle cutter for this.
 I then used the end of my clay cutting tool, to flatten out the area around the two circles to raise them a little. You could also use the end of a toothbrush handle or a paintbrush handle for this.
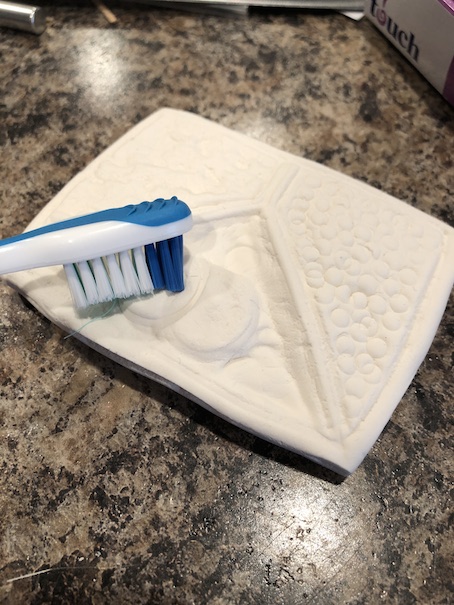 Use the toothbrush bristles to texture the gravy around the meat circles.
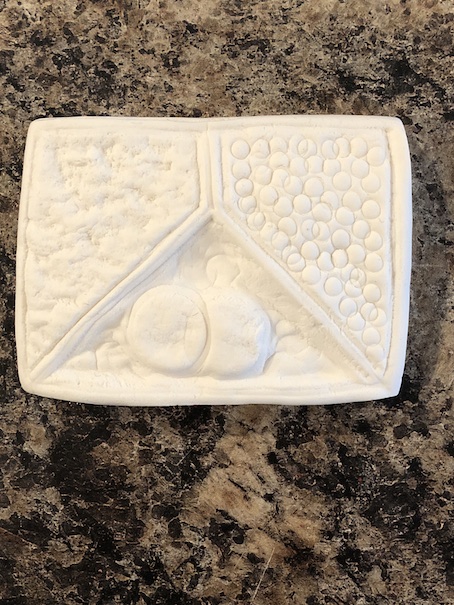 And you’re done! Let it dry overnight or even for a couple of days.
 Now all that’s left to do is paint it!
 Green for the peas.
 Brown and tan for the meat and gravy.
 And white with a little blob of yellow for the mashed potatoes and butter.
 Don’t forget to paint the dinner tray silver. I just used a tiny paintbrush for this.
  It looks perfect! Just like the real thing! 🙂
 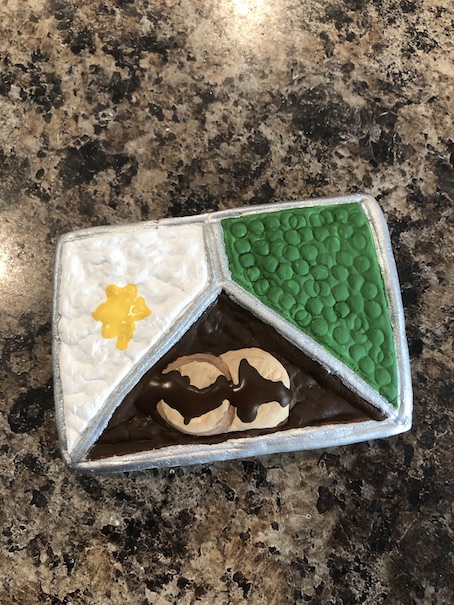 You could add a touch of shiny varnish if you want to seal it. And of course, if you wanted to, you could make whatever food you like. Yellow for corn, orange for carrots, and so on. Honestly, I’ve never actually seen a TV dinner in real life before, so I’m not entirely sure what you can get in them. LOL!
 I hope that you enjoyed today’s craft! Now Tahlia is going to sit down and enjoy watching a movie with her dinner. 🙂
We don’t have any TV dinner tables. Maybe that will have to be something to think about making in the future.  Thanks for joining us! Have a crafty kind of day and we will see you soon as we continue to go through the blog archives to do some blog catch up and much needed clean up.
Leave a comment below!
❤ ❤ ❤

How perfect for Maryellen!!!
❤ ,
IrishAG
LikeLike
Absolutely! They are perfect for her!! 🙂
LikeLiked by 1 person
Very cute!
LikeLiked by 1 person
Thank you! 🙂
LikeLike