

Hi guys! Sorry we’ve been absent, we’ve just been busy building, building, and building some more! First I have to show you the awesome-ness that we found at the thrift store!

The dust rings on the top indicate to me that it was once used as a plant stand. Of course that’s not what we are going to use it for! For us, it’s a doll banquet table!! 🙂
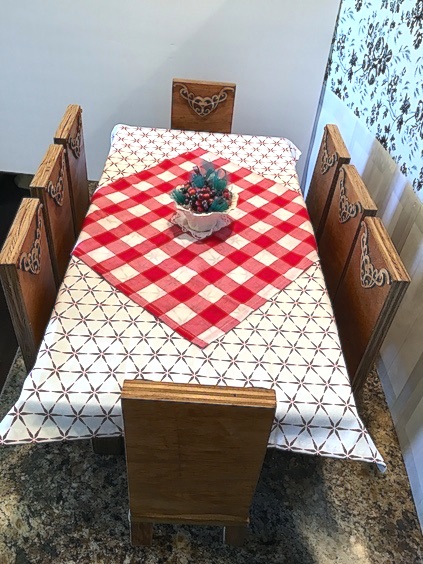
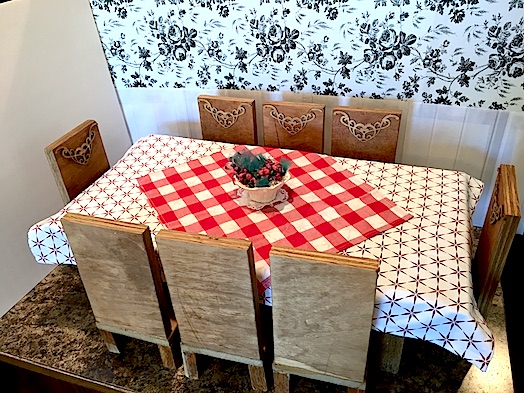
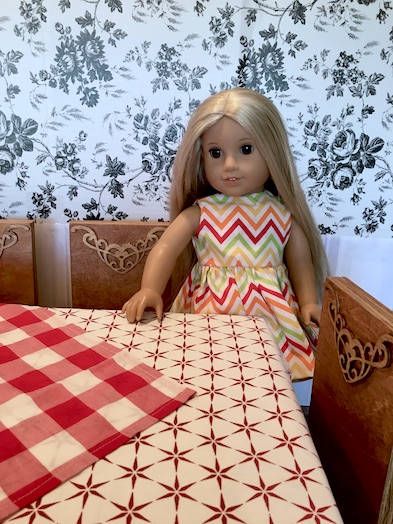
We found a cute table cloth at the thrift store to go on top. Here is Kit standing beside the table to show size.

When we brought the table home however, we instantly faced a dilemma. This table seats 8 dolls. Alas, we did not have 8 doll chairs. I thought that maybe I could build a couple of benches, but when I went to do the measurements, it turned out that the apron under the table, the part underneath that holds the table legs in place, actually hangs pretty low.

That meant that our benches would have to have 2 inch legs. I thought that they would look pretty silly at that height. Instead, I decided that I would have to build 8 dining chairs. What??!! LOL! 🙂
Now the first conundrum that I encountered when building these chairs was that there are virtually no simple DIY plans for doll chairs out there. I mean, there are complicated chairs with fancy spindles, and other things that I didn’t want to fuss around with, but nothing just simple, because if I was about to make 8 of them, they had to be pretty darn simple.
The second conundrum lay in that low hanging table apron as I mentioned before. If my chair legs were too high, our doll’s legs would not fit under the table while seated. I finally managed to work out a simple plan for chairs with 2.5 inch legs. I know, still pretty short, but the shorter legs wouldn’t look as silly on a chair as they would have on a bench.
Okay, so the proper way to build a chair, if you were to build one for humans would be to attach everything with sturdy screws and wood glue. I, however, not wanting to have to purchase anything, decided that I would use a scrap of MDF board that I had lying around for the seats of the chairs, and a scrap of plywood for the chair back.
Now, anyone who has ever worked with MDF knows that it is very difficult to attach it to anything without it splitting or cracking. We had this problem with my niece’s dollhouse. We ended up having to use a high powered brad nailer to assemble it.
Anyway, not wanting to get too technical, I decided that I would assemble these chairs with wood glue alone.

I knew that it would be enough to keep each chair together, and since the dolls are pretty lightweight there wouldn’t be much of a risk of the chairs breaking apart under the load.
(Also, it’s not quite the same disaster when a doll chair falls apart as it would be if you or I were sitting on a chair, and it suddenly came to pieces. 😛 )
Note: If I had another piece of plywood on hand, then I would have just built the chairs entirely out of plywood, and used finishing nails along with the wood glue to keep it together.
Here is my cut list.
(Thanks goes out to my dad for coming by, and helping me cut my wood.) ❤
Chair Seat 0.5″ MDF: 6″ X 5″
Chair Back 1.75″ plywood: 5″ X 8″
Chair legs 1X1 plywood: cut at 2.5″ lengths; make 4
(The chair legs as well as the chair back can be made longer or shorter as needed. I had to have an 8 inch tall chair back, so that it would sit up above the top of our table as well as the 2.5 inch chair legs to avoid that apron, but you can adjust the measurements for whatever you might need the chair for. The seat of the chair has pretty universal measurements for an 18″ doll chair seat.)
First, glue each of your chair legs to each corner of the bottom of the chair base, forming what looks like a little table. Now, if you were using plywood only, you can apply the glue, and position each leg. Then hammer a 1 1/4″ finishing nail into each corner of the chair base top, and through into the legs on the bottom to hold in place. (You can also make a dolly coffee table this way if you needed one. 😉 )
Next, use wood glue to attach the chair back to the base of the chair at a 90 degree angle. Again, if using plywood only, you can hammer a few finishing nails in from the underside of the chair base through into the back of the chair to keep it in place.

That’s pretty much it. Simple as that.

Little dolly chairs all in a row. ❤
Once your chairs are done, and the glue is dry, be sure to sand all rough edges. You don’t want your dollies getting splinters in their butt. 🙂 Then you can go ahead, and paint, or stain the chairs however you like.
If you have a jigsaw, you can even round off the top edge of the chair back for a more detailed look, or glue a decorative wooden knob on either side, whatever you like.
We bought some wooden decals from Michael’s for the backs of our chairs. These were $2 for four decals, so we bought two packages. We just used wood glue to attach them, but you could also stencil a pretty design at the top of the chair back to add detail if you wanted.
 And there you have it! Easy DIY doll chairs!
We decided to stain ours with a dark oak similar to the stain on the table. We might still change our minds, and paint the chairs white, and the table a different colour. We haven’t fully decided yet, but that’s the beauty of DIY. You can do whatever you want and if you don’t like it, you can just change it. 🙂
If you wanted to go a step further, you could upholster the seat of the chair too. Just take a piece of cardboard or foam board, and cut it to fit the seat. Glue a piece of cotton batting to it, and wrap it tightly in fabric. Then glue it down to the seat of the chair. We might still do this to ours because we don’t really like the look of plain MDF.
The chairs do look so cute with our new thrifty table though! 🙂

Here are some more pics!


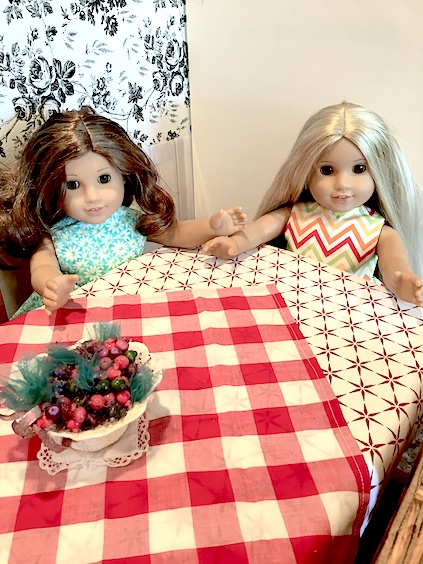
Rebecca and Julie are waiting for their dinner.
I hope that you enjoyed today’s DIY! Stay tuned as we have been busy building, building, building! 🙂
Leave a comment below!
❤ ❤ ❤

WOW! These chairs look amazing! You did such an incredible job! 😀
★Madison
LikeLike
Thank you so much for saying! 🙂 ❤
LikeLike
Looks great! I’ve made a couple of doll chairs before, with some scrap wood, paint, and (of all things) hot glue! XD So far they’ve held up great!
~Gracie
LikeLiked by 1 person
That’s a great idea too. Hot glue is pretty sturdy when building with wood. Good job! 🙂
LikeLiked by 1 person
so. very. cute.
LikeLiked by 1 person
Thank you! 🙂
LikeLike
Very cool! I love how they can work as a fancy set and a regular table and chair set! Great work!
LikeLiked by 1 person
Thank you! I was worried that they might look a bit plain, but there are so many different options to pretty them up. 🙂
LikeLiked by 1 person
This turned out terrific!! I love how the chairs look with the scrollwork on the back, very elegant.
LikeLiked by 1 person
Thank you! I am very pleased with how they turned out! 🙂
LikeLike
Your chairs look great! Mine are pretty much, mix and match.
LikeLiked by 1 person
Ooh I love the mix and match look too! My sister was going to do that for her own dining room, but then she decided just the head and foot of the table should be different from the rest of the chairs. 🙂
LikeLike
Nice job! I like the challenge of making something using what you have on hand to go along with a thrift store find. I can picture the holiday dinners in the doll’s future 🙂
LikeLiked by 1 person
We’ve been needing a holiday table. We have been using the underside of a pair of plastic Ikea drawers as a table for quite some time now. LOL! Good for photos, not very practical for doll play. 🙂
LikeLike