

Hi guys! We are back after a bit of extremely cold weather! Here in southern Canada, it was -40C which to me is crazy cold, but we have seen the temps dip even lower.
One year it was -55C and I know that our friends further north were getting pretty close to those temps at the height of this past extreme cold spell. Nonetheless, the temps are now back to normal, and therefore our doll crafty journey must continue!
We were having so much fun with our Christmas decor challenge in December! We never wanted it to end, so I figured why stop there? We can deck out our dollhouses all year-round!
We adore home decor, so I propose a new regular series on the blog-DIY doll home decor! Of course, we will still run all of our other doll programming as well, but I think this is going to be a really fun and creative series to explore.
It’s no secret that I am fairly obsessed about home decor. Being an artist, anything to make my space more lively and inviting, interests me. I am forever DIY’ing pieces for my home, and changing up my decor. I enjoy creating fan merchandise, as well as items that look high-end, yet cost next to nothing. It should be a no-brainer then for me to create the same items, but in doll size!
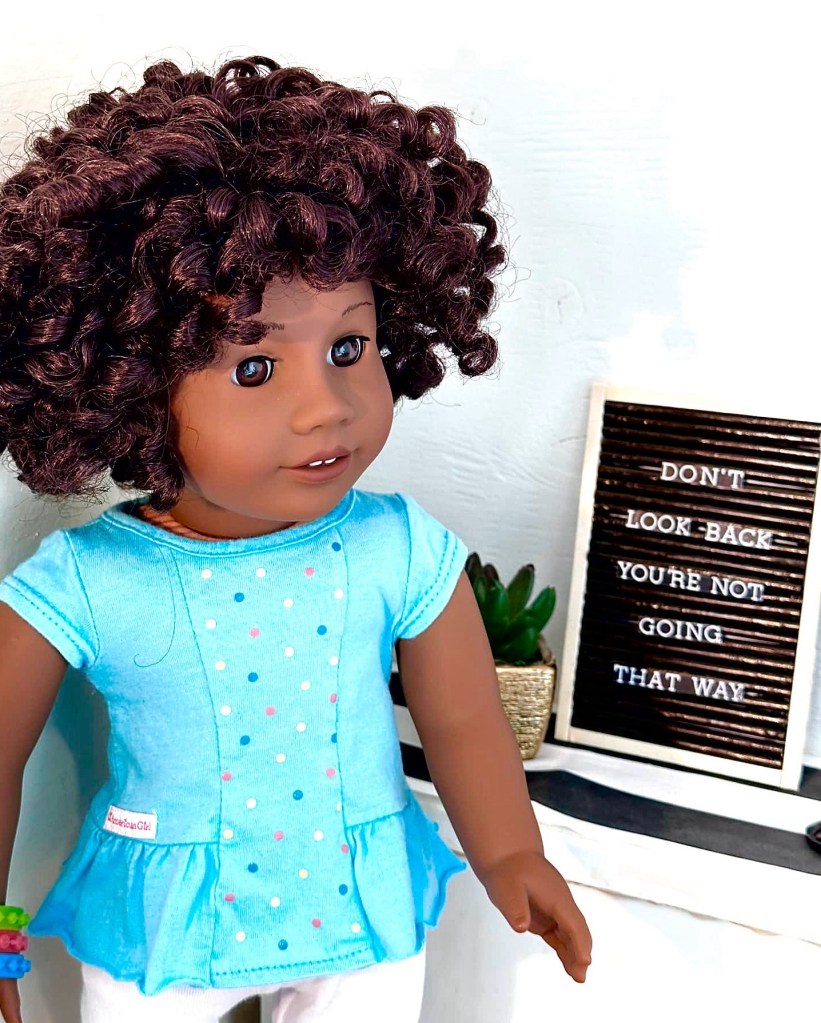
Okay with all that being said, let’s dive in! Our first order of business has to be a letter board. I love my letter board, and I am constantly changing up the sayings for the season, as well as just in general depending on my mood.
Here’s what mine reads right now:

Fitting for the season, I think. The weather outside, as well as the season of life I am in. 😊
Now a full-sized letter board comes with a ton of letters and numbers, but of course this is not practical for doll size. If you would like to print out a billion tiny little letters and numbers, and cut them all out, then feel free. I’m not saying you can’t. I however, am not that motivated. 😂
Instead, a doll letter board where full words can be changed out is much more doable.
WHAT YOU NEED
Coffee Stir Sticks
Scissors
Straws
Hot Glue
Black Paint
Card stock paper
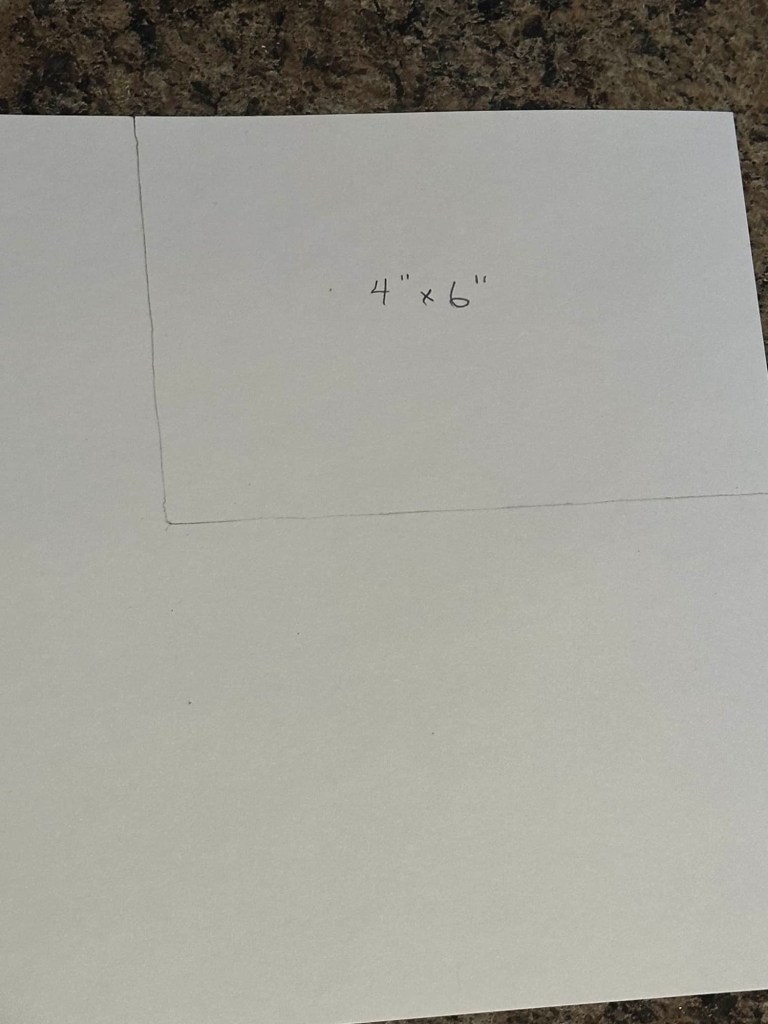
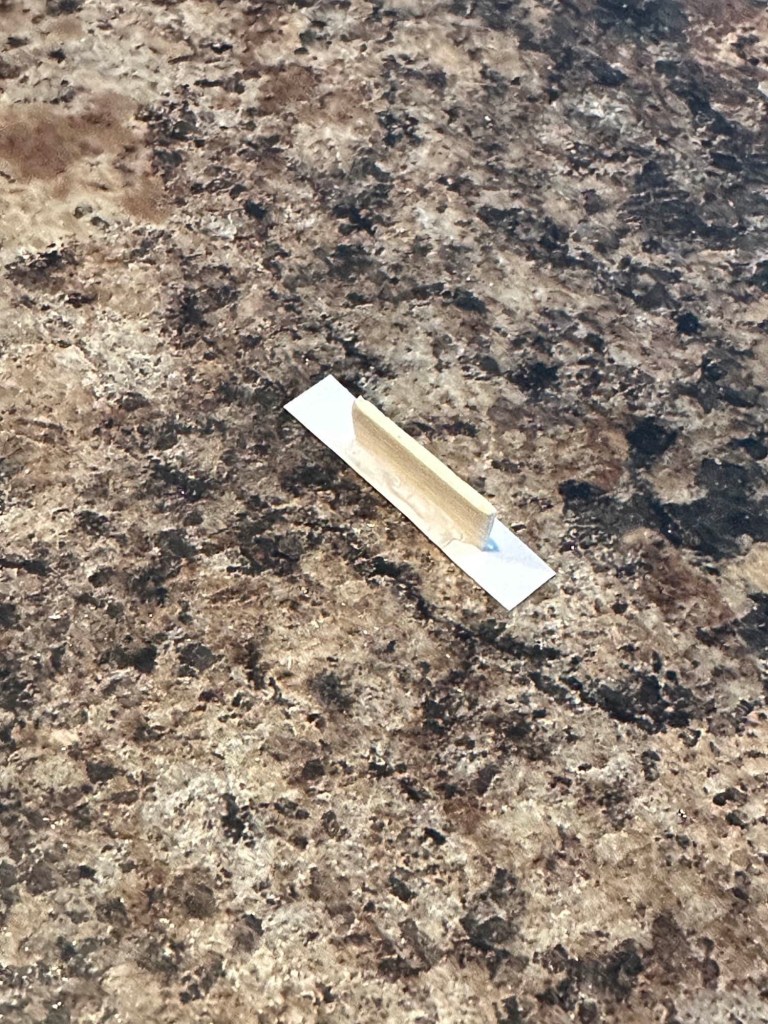
First, cut a 4”x6” rectangle from card stock paper. This will be the base of the letterboard.
Now, measure and cut the coffee stir sticks to create a frame for the board. Cut two for the long sides and hot glue in place. Then cut two for the shorter sides and glue them in place.

Next, measure and cut straws to fit in the space between the frame.

Cut as many straws to fill the board. We used 26 straw pieces.
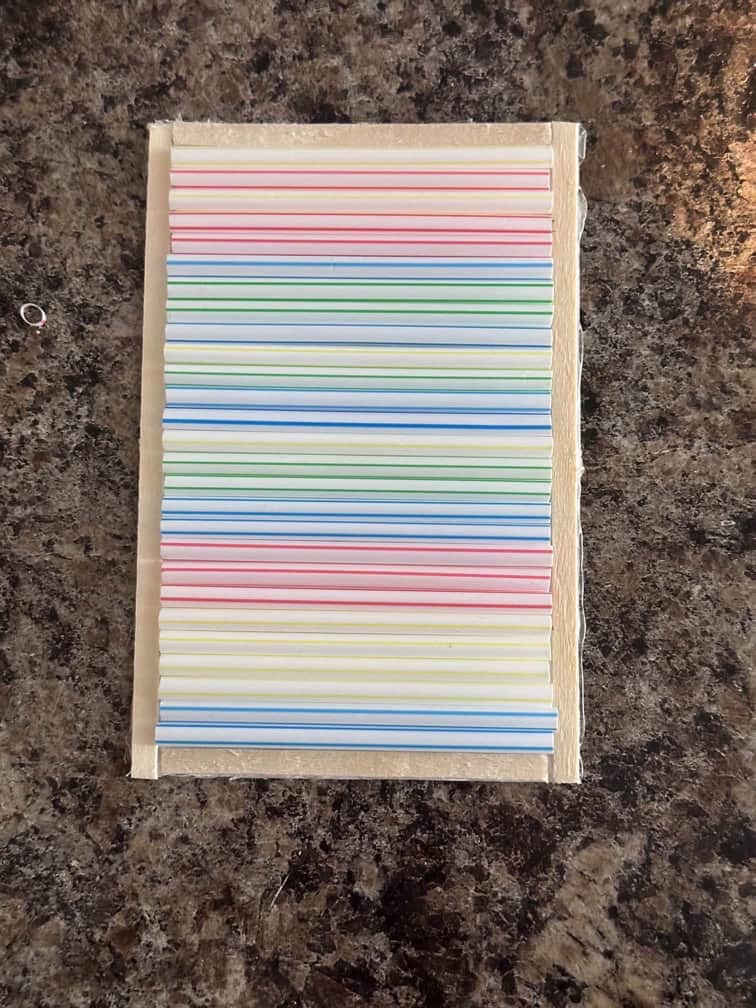
Paint all the straws black. You can paint them before cutting them as well, as long as you do not secure the straws to the board until after they are painted.

Hot glue each straw to the letter board with a dot of glue at each end. This is important. Do not run glue along the length of the straws. Make sure they are snugly in place.

Now bulk up the frame of the letter board to cover the straw ends. I glued two extra coffee stir sticks to each side.
Now it is time to make the saying. Search online for an image of a letterboard saying that your dolls like.

I simply screen shot the image. Then I inserted the picture into my Word document and sized it to 4×6” in there. Print the image onto card stock paper.

Next, cut out the words. I cut very closely to the edge of the letters. I also cut out two words together if they were on the same line, but you can do whatever you like.
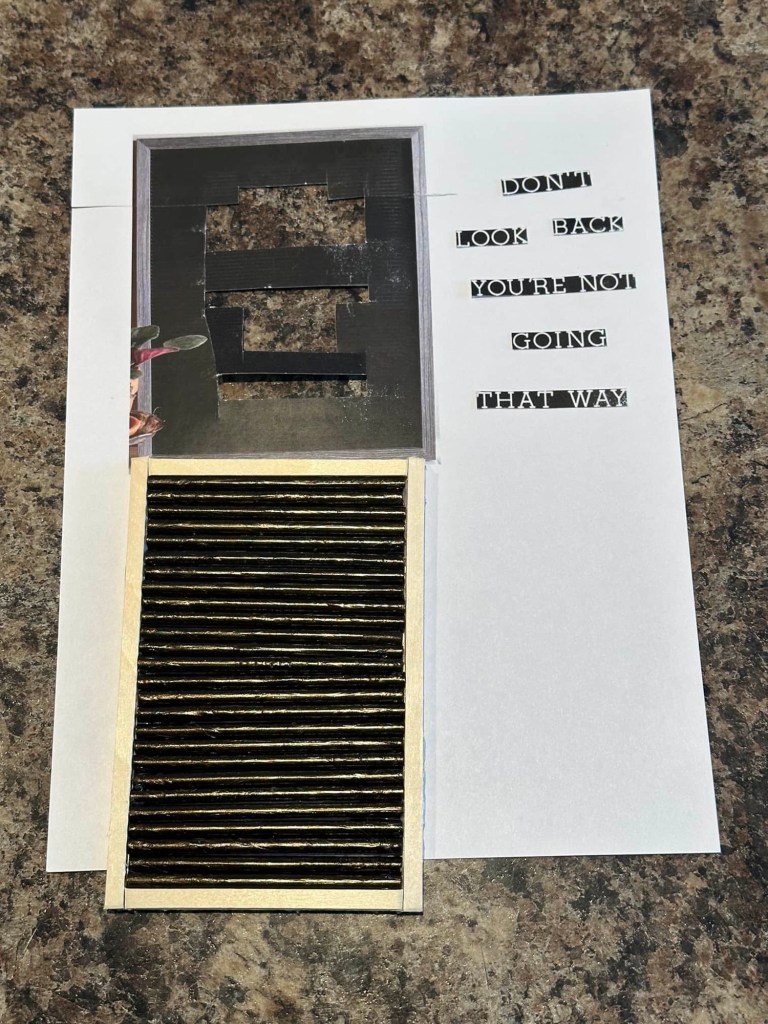
Now measure and cut stir sticks to create tabs for the backs of the words. Cut longer tabs for long words and shorter tabs for short words.
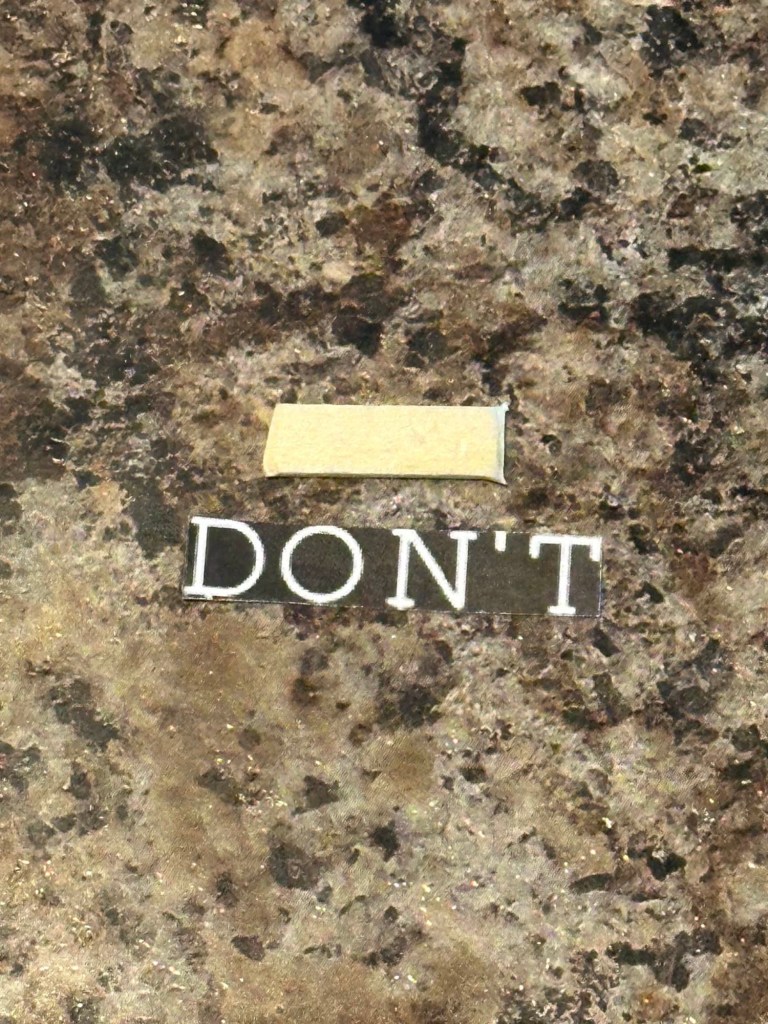
Hot glue the tabs in place.
Insert the words onto your letterboard. You may have to coax them a little, but the tabs will slide nicely right in the slots between the straws on your board.

The straws will hold the tabs keeping the words snugly in place.

And you’re done!!

How cute is this?!!

This turned out so much better than I thought it would! 😊
You can create any saying you like!
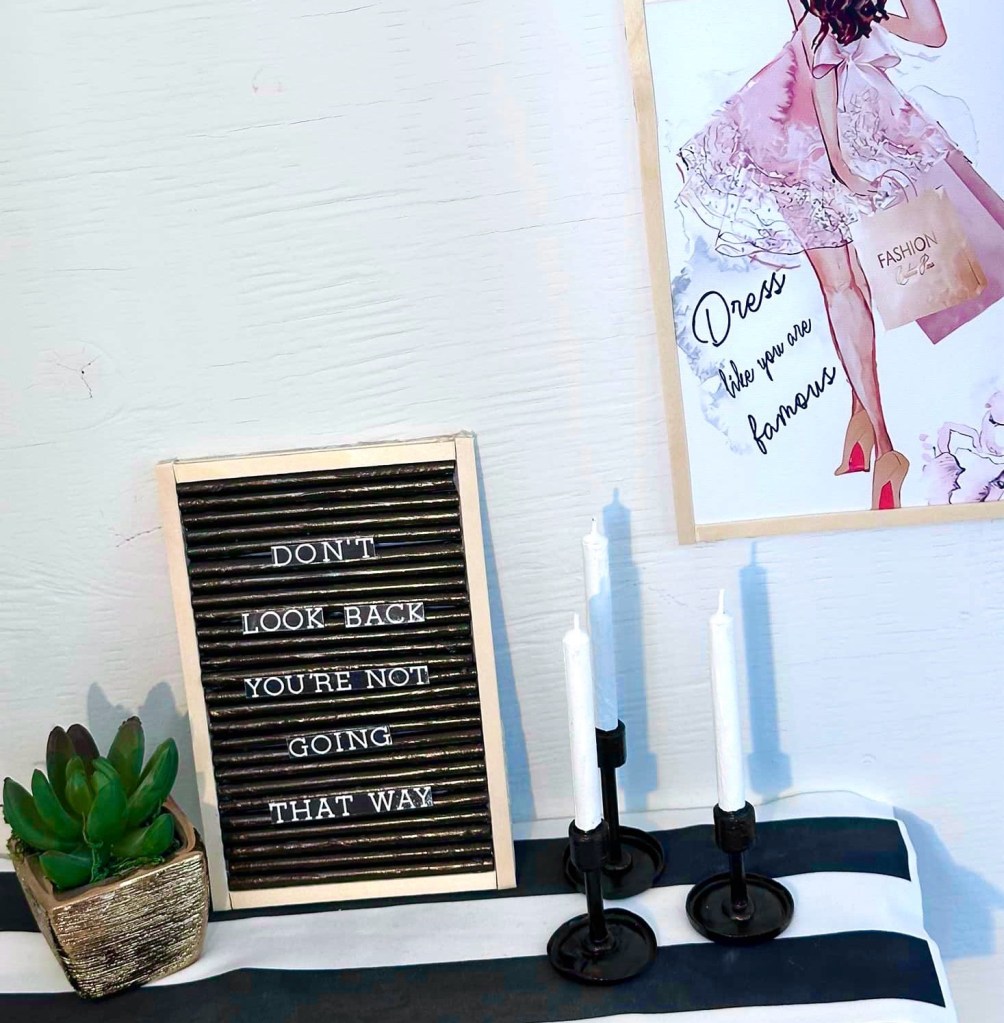
Change it up as often as you wish!

So cute! 🥰

❤️❤️❤️
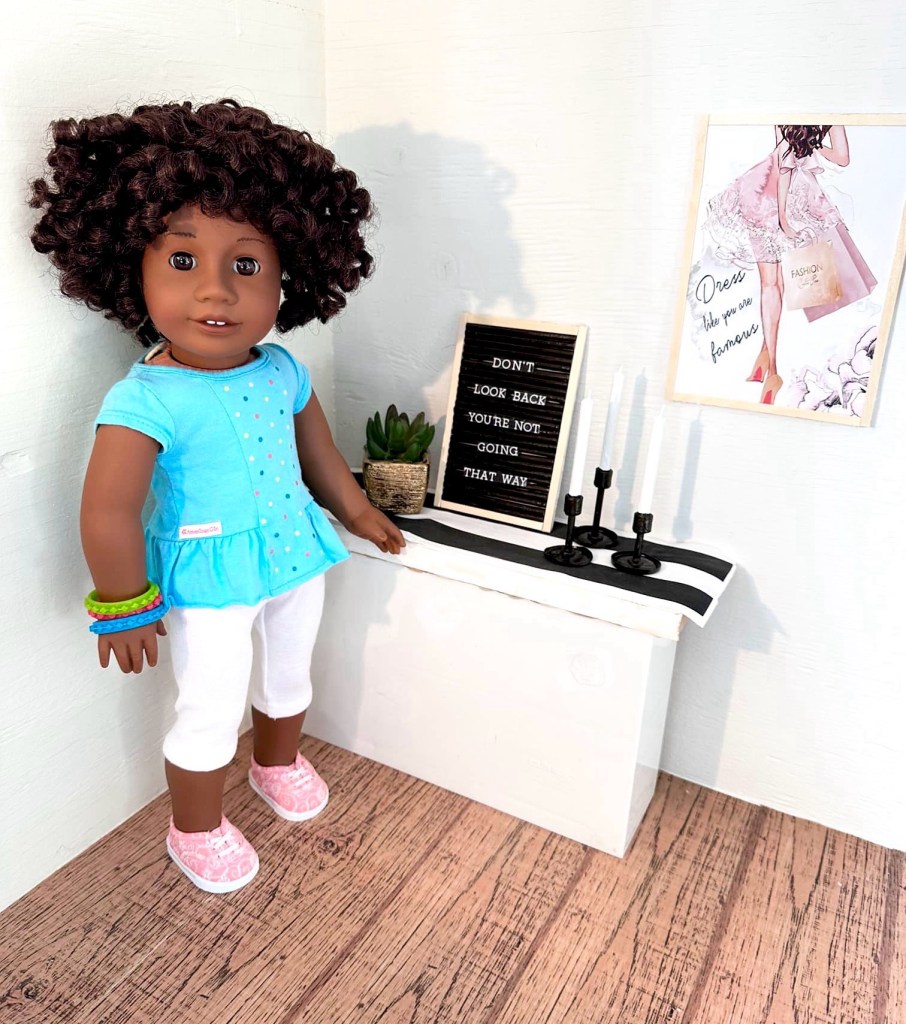
Ohmygoodness!! I am obsessed! 🤩 I just know that I am going to have so much fun printing different sayings for this doll letterboard! Just as much fun as I have changing out my human sized one!!
I hope you enjoyed crafting with us today, and I hope you are staying warm! Stay tuned as the weather is soon to turn warmer. We sure can’t wait!
I am also so excited for this new doll home decor series as well as other fun things to come! 😊
Keep smiling everybody, and as always I hope you have a doll crafty kind of day!
Leave a comment below!
❤️❤️❤️

Love it! You think outside the box!!
LikeLiked by 1 person
Thank you! I try to come up with easy but cute ideas from items around the home that cost next to nothing. 😊
LikeLike
I am always pleasantly surprised by your ideas.
Thank you very much, once again 🙂
LikeLiked by 1 person
Aw thank you so much! I just love coming up with ideas. ❤️
LikeLike
Absolutely adorable! Thank you for the idea!
LikeLiked by 1 person
You’re welcome!! Thank you so much! 😊
LikeLike