

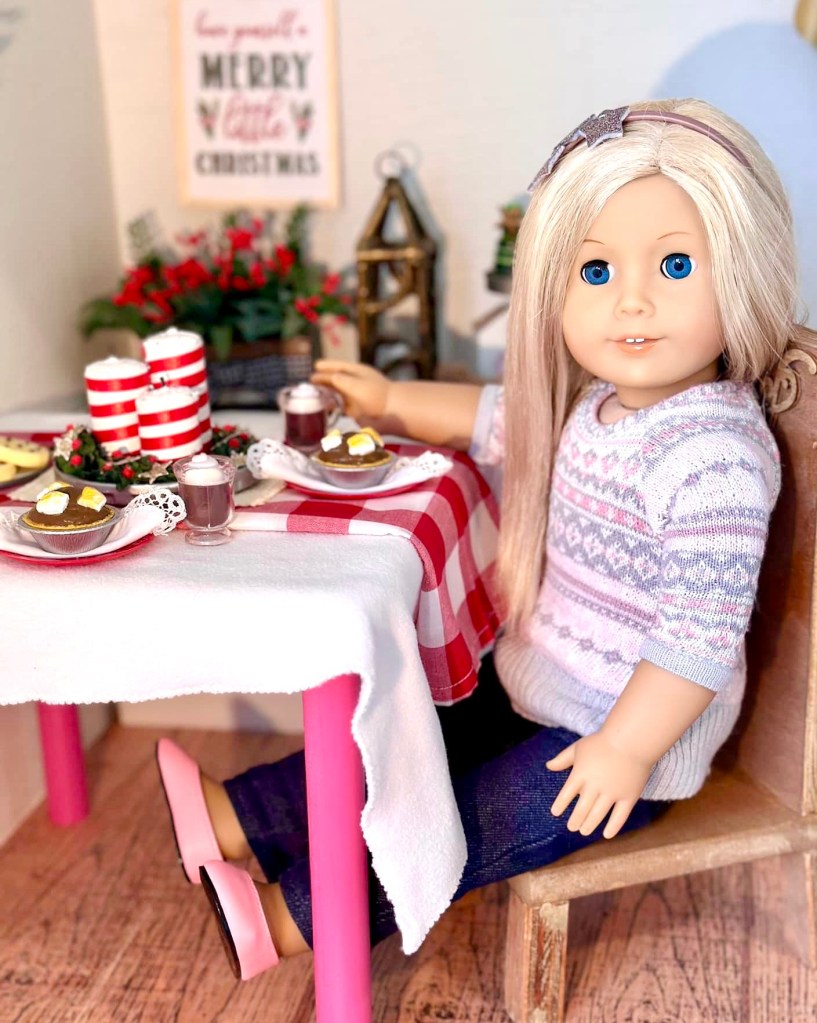
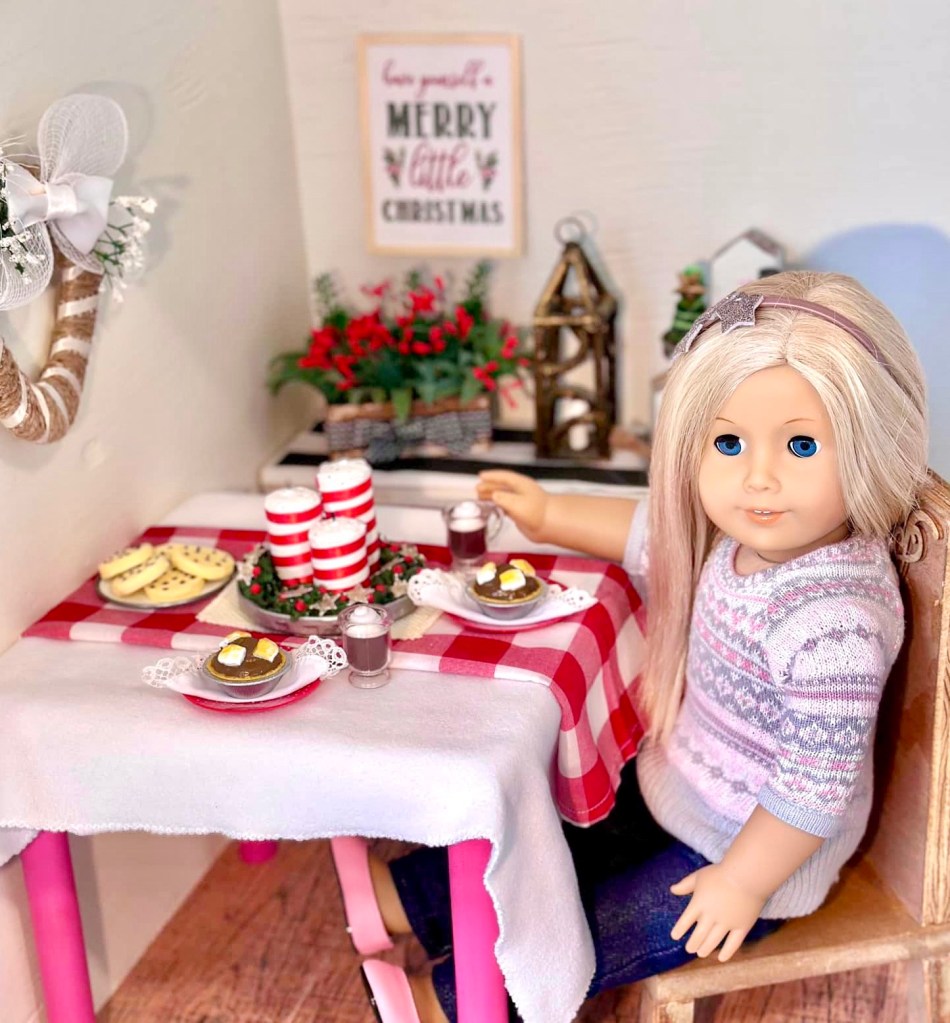
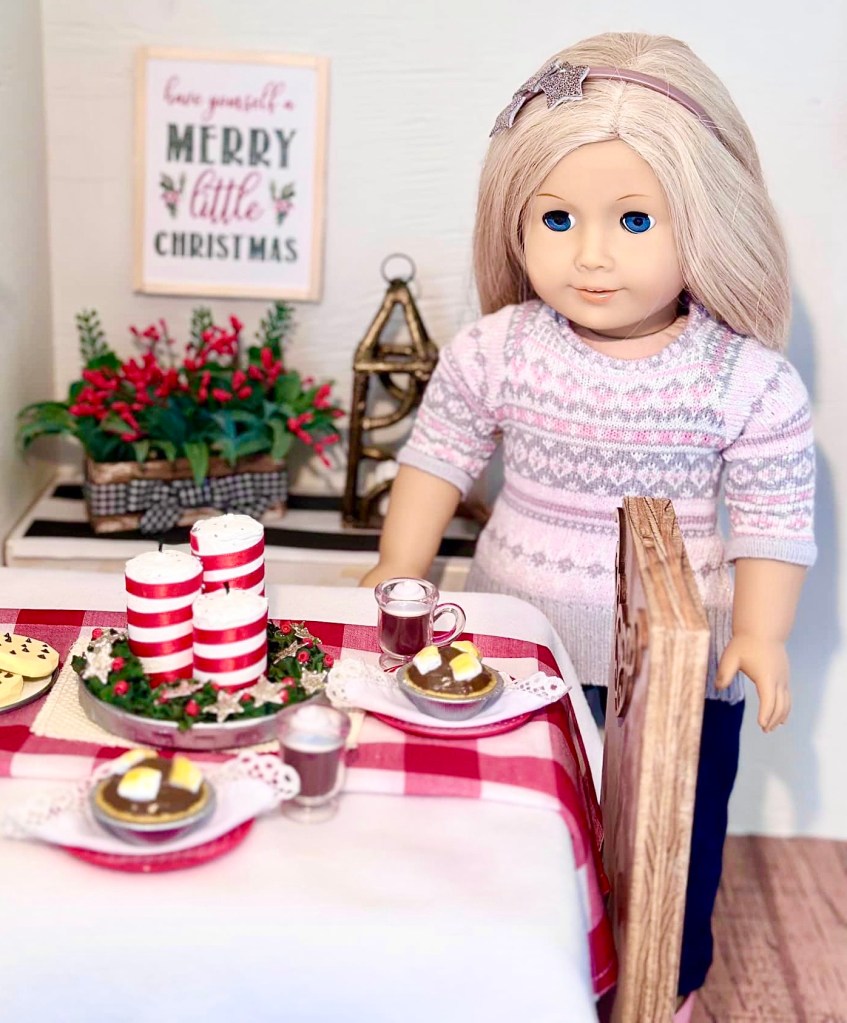
Hi guys! I am obsessed right now with these adorable candy cane candles, so you guessed it, our dolls want some too! Lol!
What You Need
Foil tube
Exacto blade
White/silver/red paint
Buttons
Red Ribbon
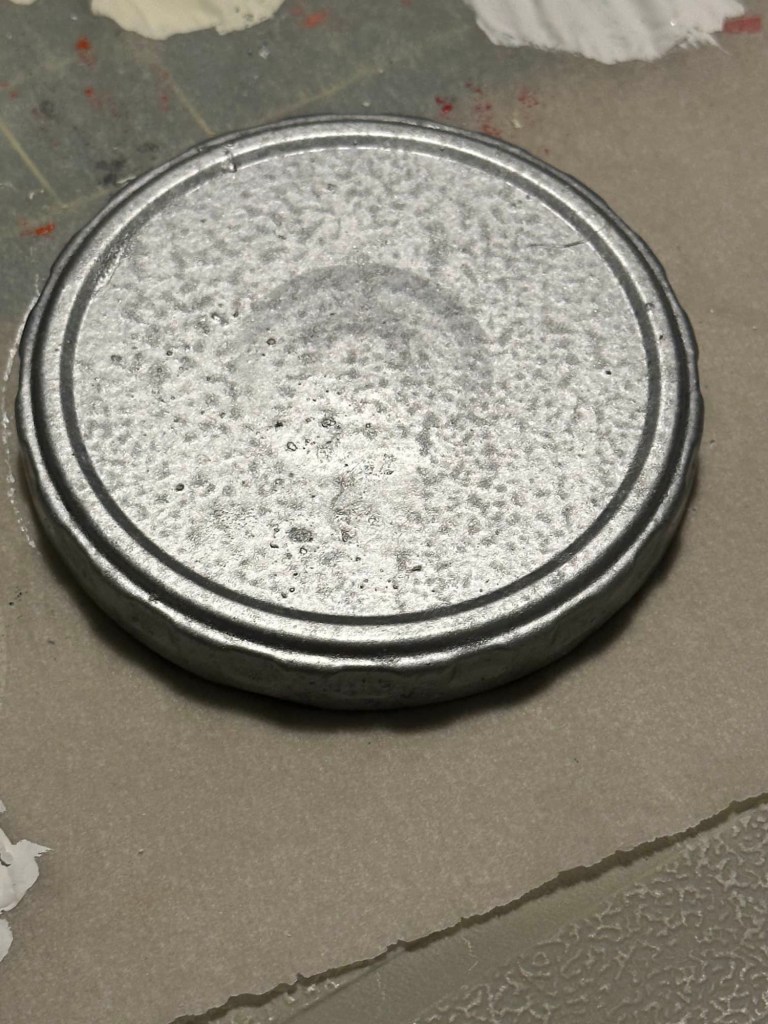
Pickle jar lid
Faux greenery
White cardstock paper
Glitter
Seed beads
Star punch
Hot glue/white glue
Black String
To start, use the exacto blade to cut your foil tube into pieces.
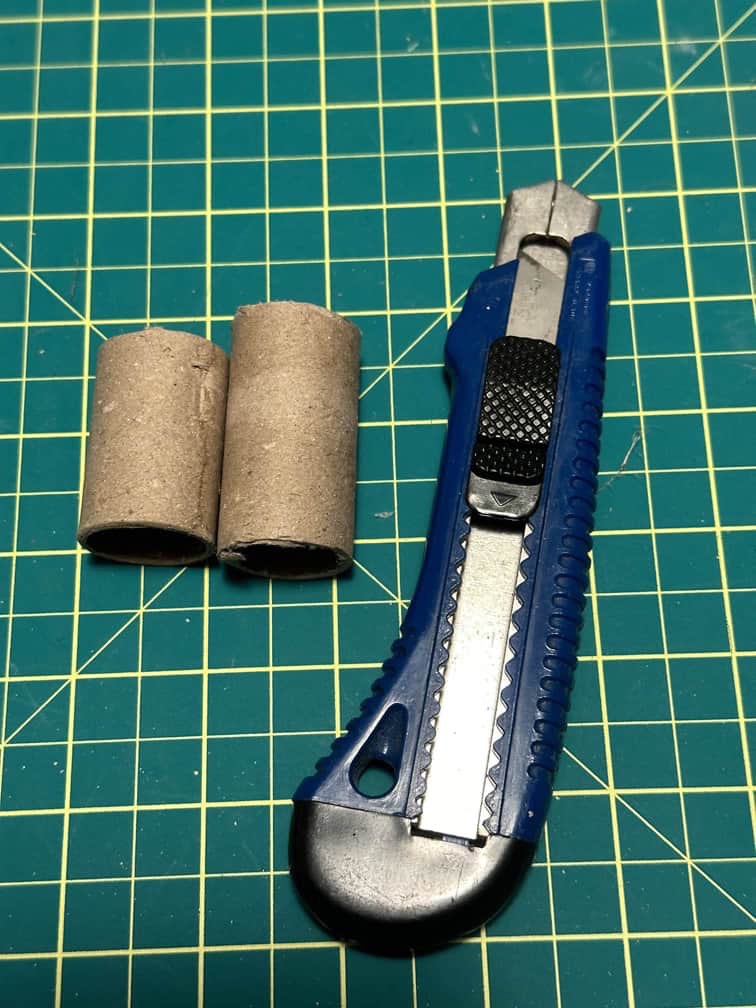
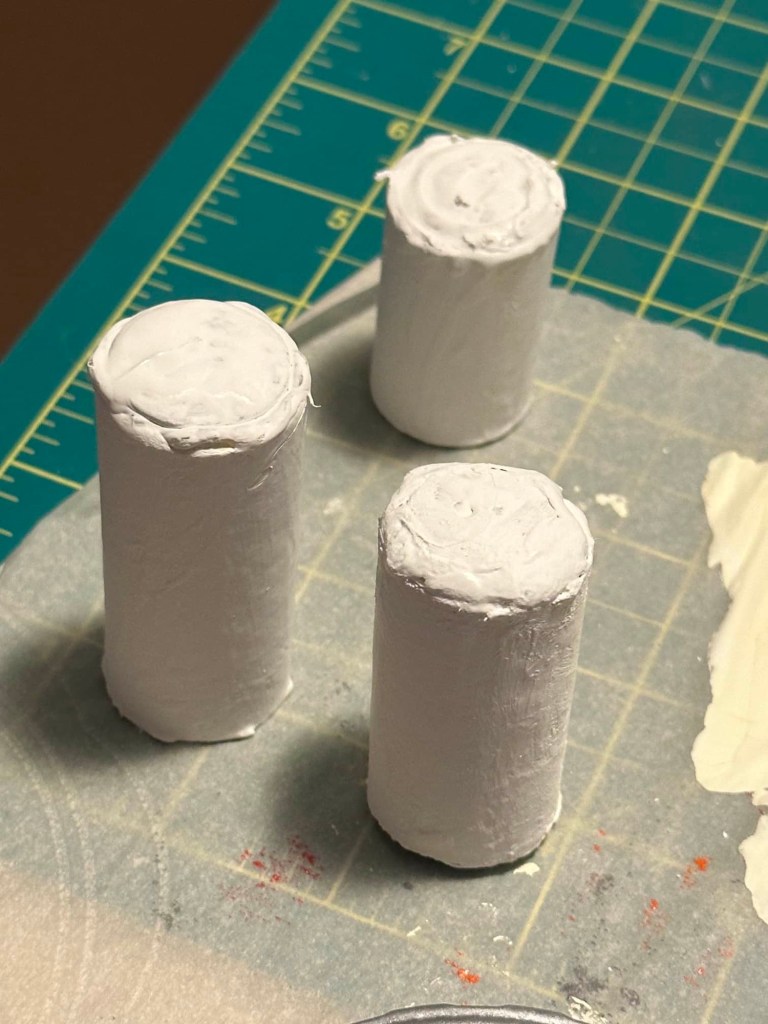
I made three candles of different sizes.
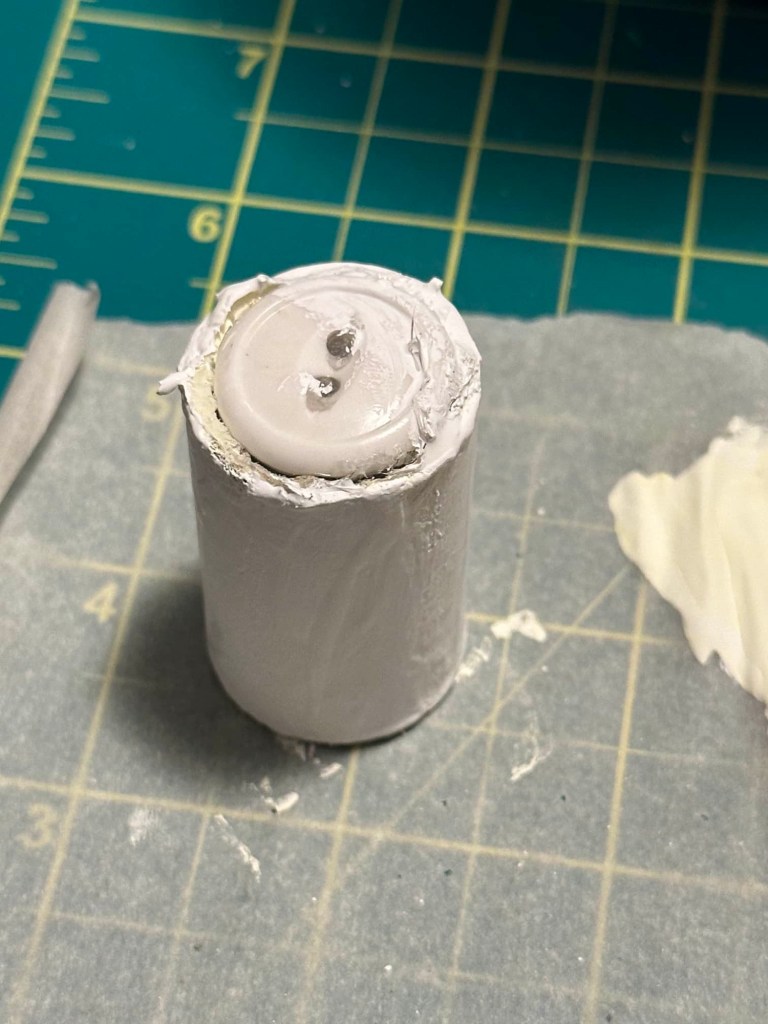
Hot glue buttons to the open tops of the foil tubes. I know the glue looks messy, but once it is painted it will look like melted candle wax.
If you don’t have buttons that fit, you can use the hot glue method to seal the tops of your candles. Put a blob of hot glue on your silicone mat, or parchment paper works too. Place the tube on top. Wait until it is dry. Then peel it from the mat. Remove the excess glue around the edges.
You can add some extra hot glue on top if you don’t like the perfectly flat look this method gives, but brand new candles are flat on top anyway so it’s up to you.

Paint the candles white.
Now hot glue a thin red ribbon around the candles.

Hot glue a small piece of black string to the tops of your candles for a wick.

They kinda look like sticks of dynamite. Lol! 😂
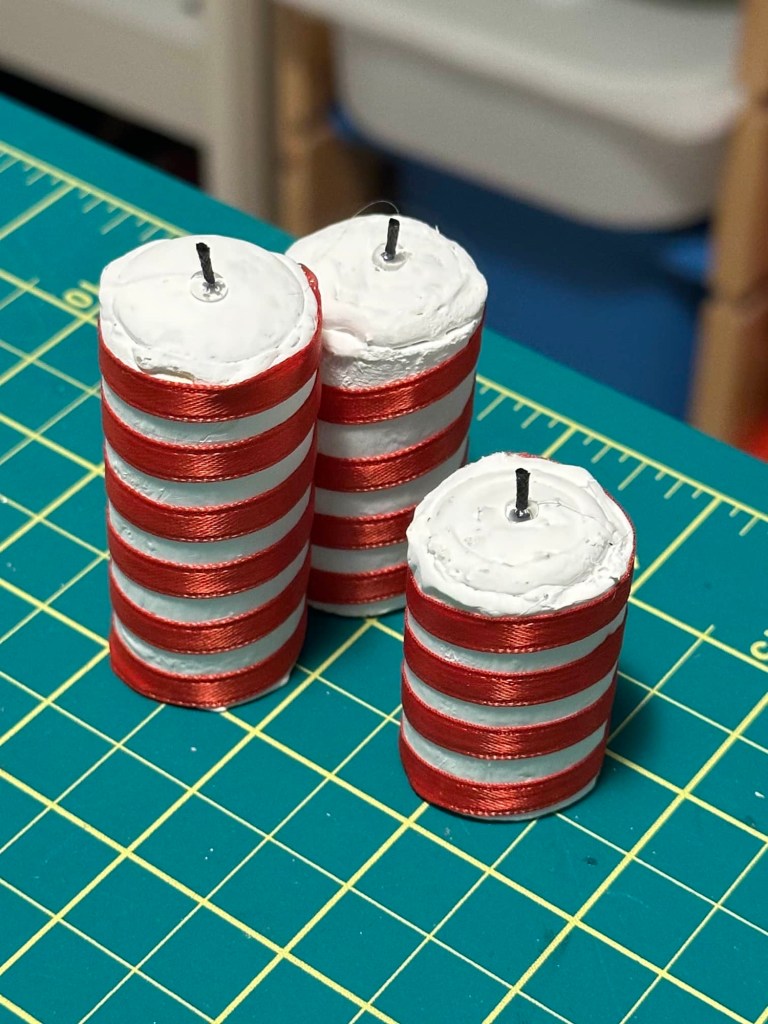
Trim the wicks and paint the glue holding the wicks in place, white to match the rest of the candle.
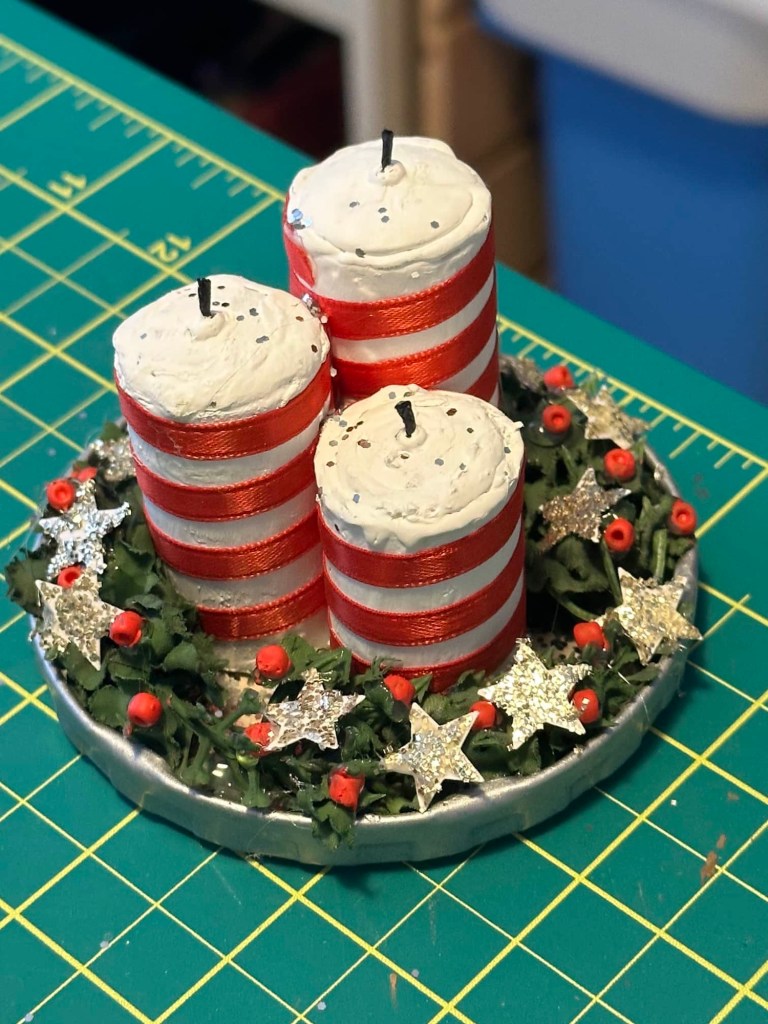
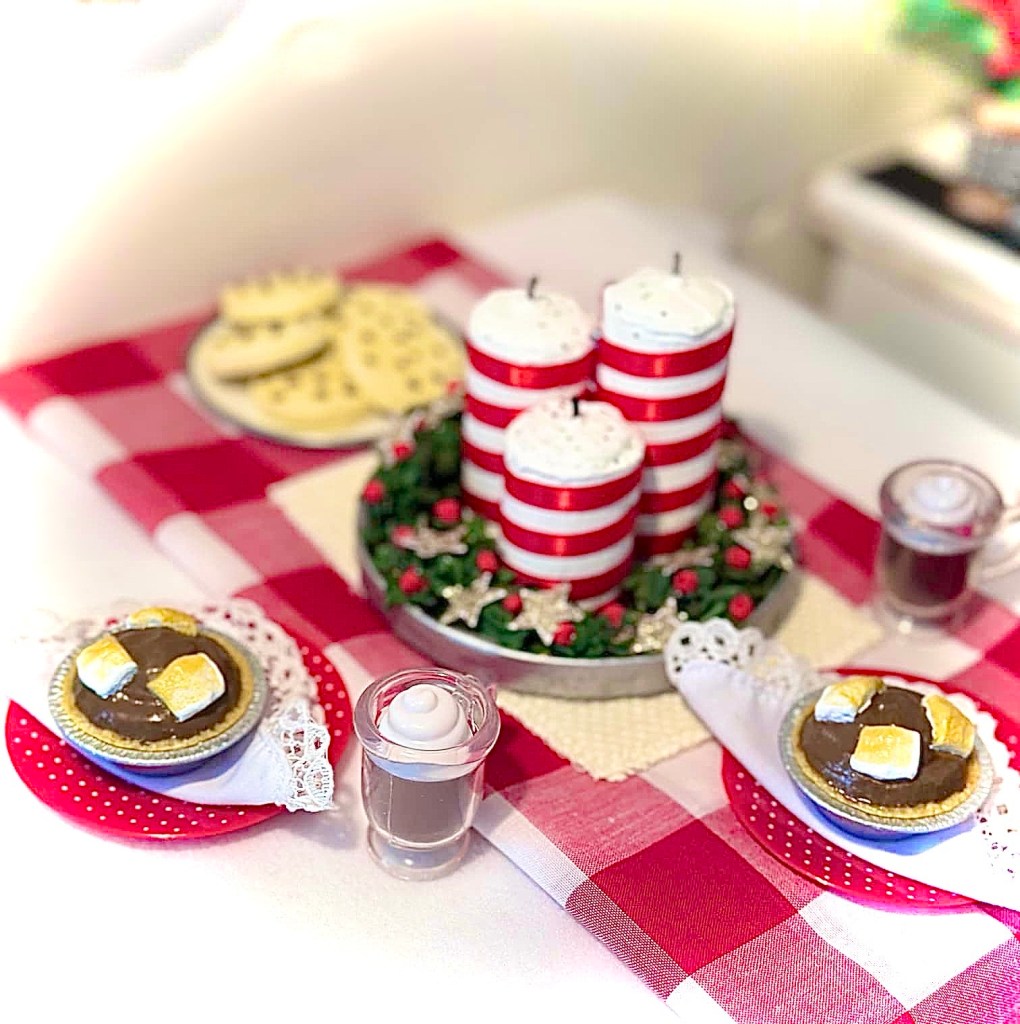
Now take your pickle jar lid and paint it silver. This will be the tray.
Hot glue your candles together in a grouping of smallest in front and the other two in the back.
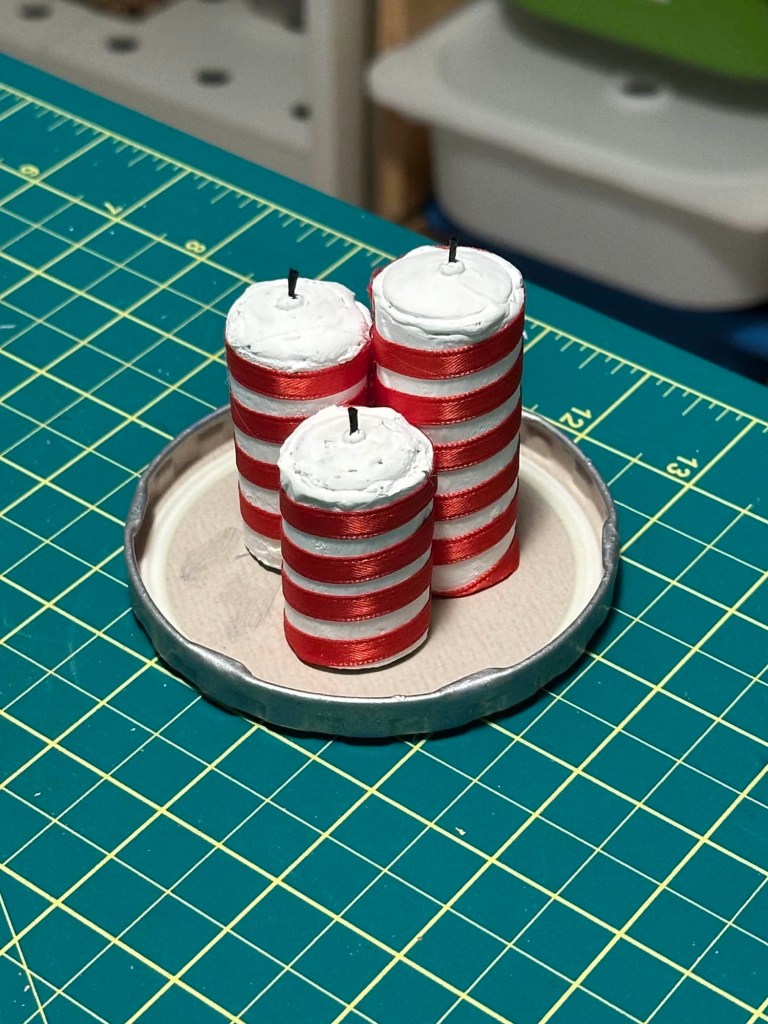
Hot glue your candle grouping to the center of the tray.
Now we will add the faux greenery.
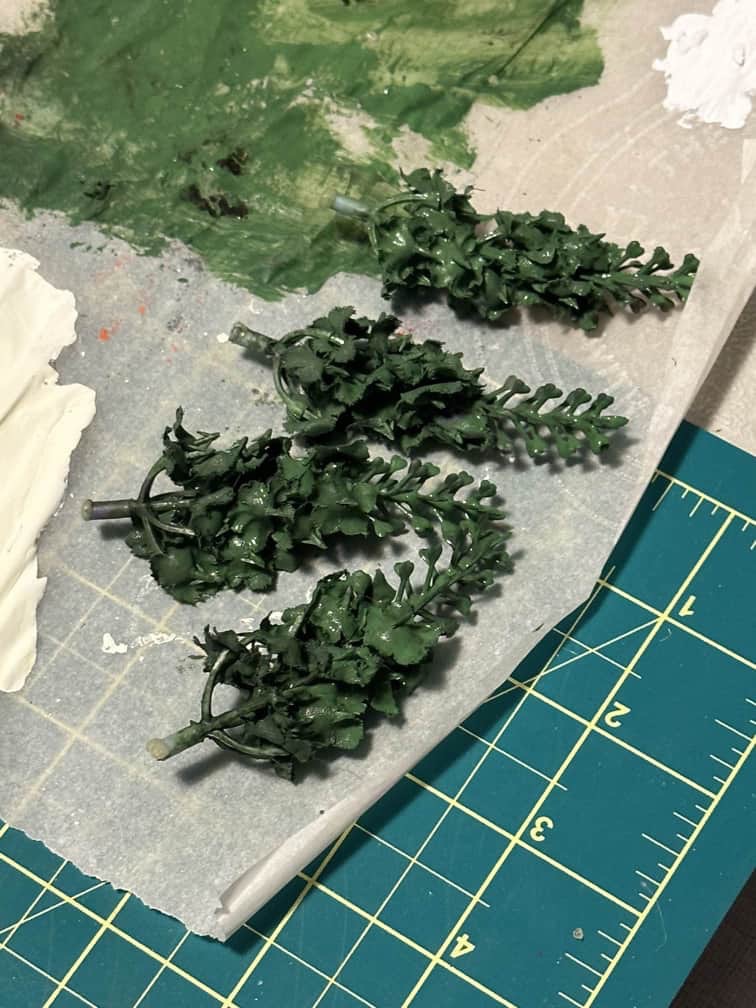
I decided to paint some purple lavender green to make a wreath. I just used a sponge to distribute the colour thoroughly.
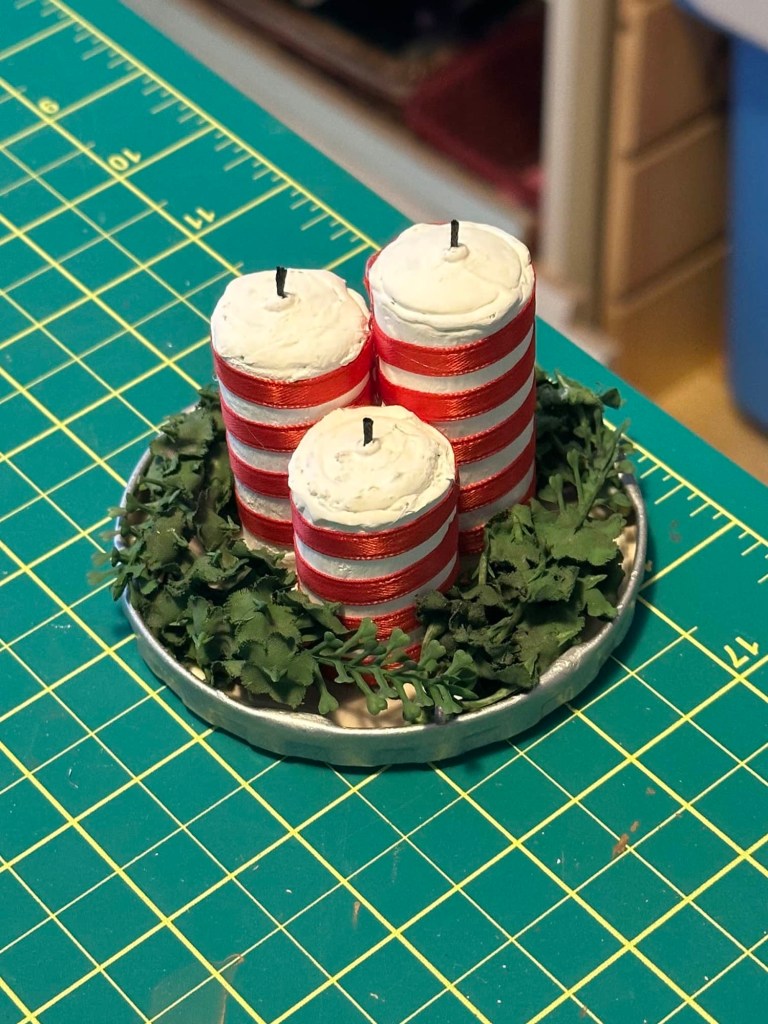
Arrange your greenery around the candles.
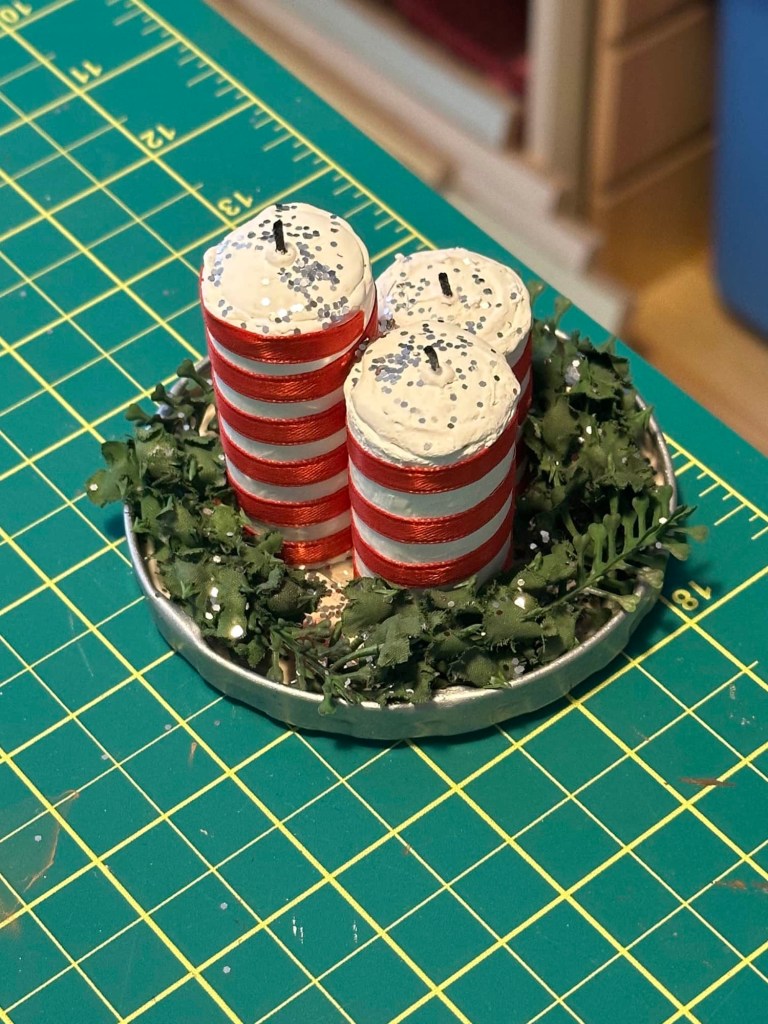
We sprinkled some silver glitter on ours, but this is optional.
Next, we added the seed beads.
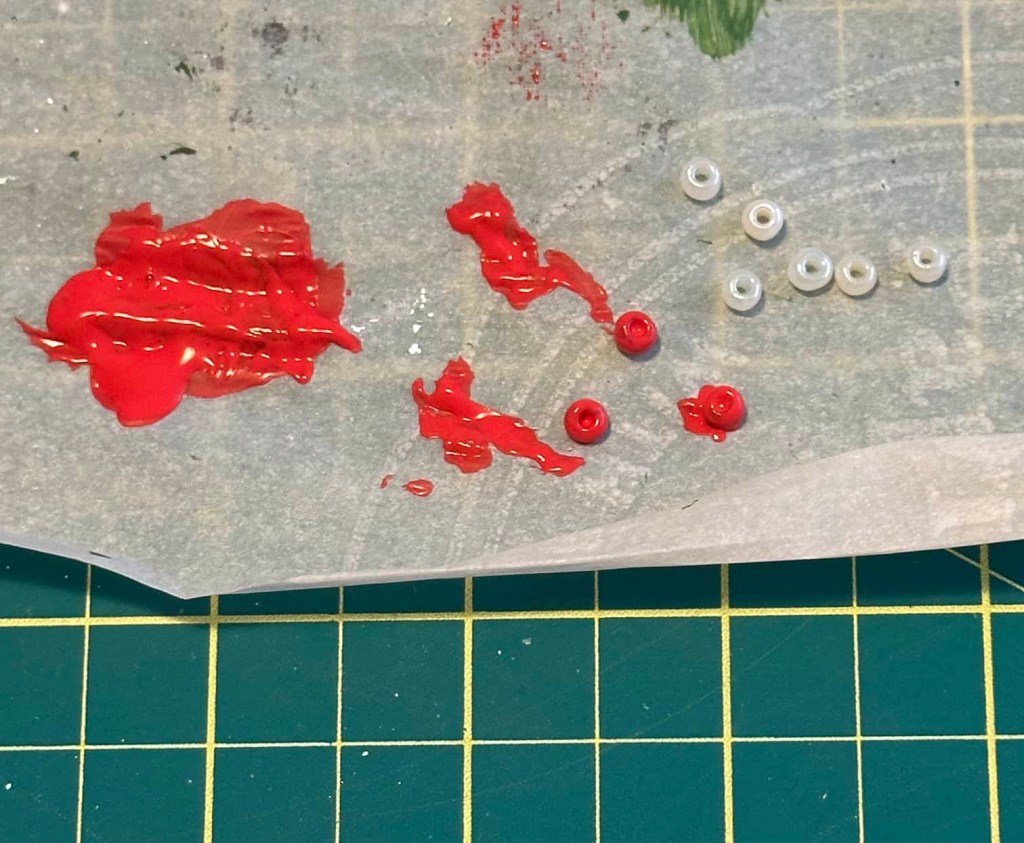
We didn’t have red beads, so we painted them. Then we hot glued them on.
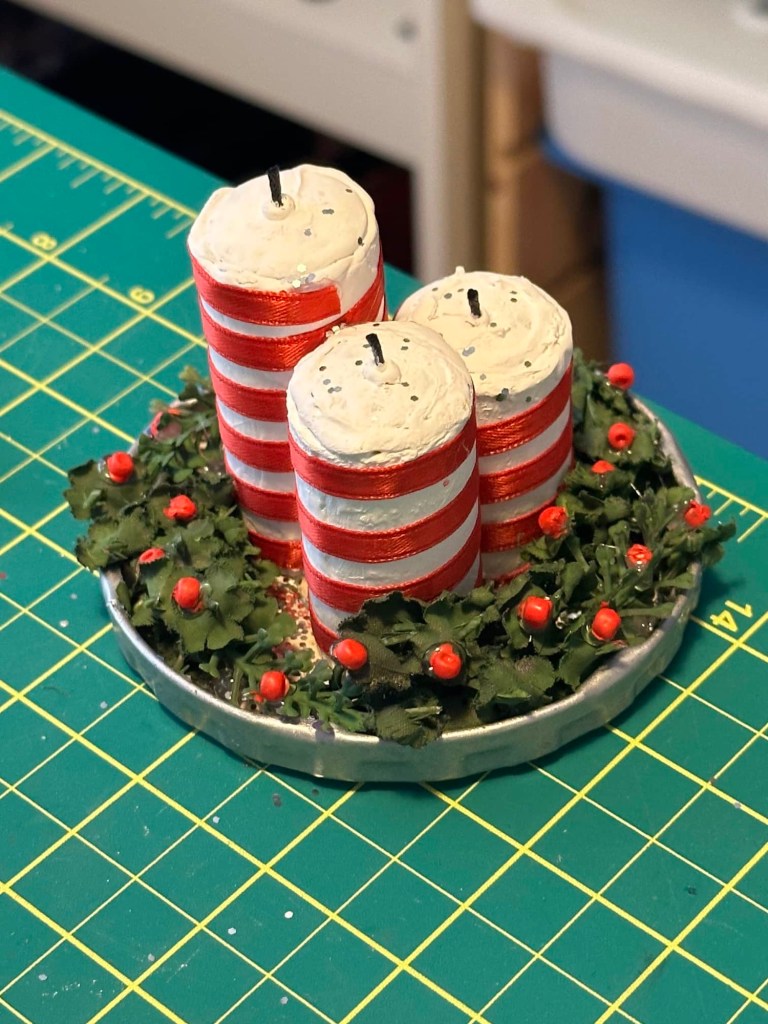
All of these steps are optional since it all depends on how you want to decorate your candles. We were just using what we had on hand.
Next, we punched some stars from cardstock paper.
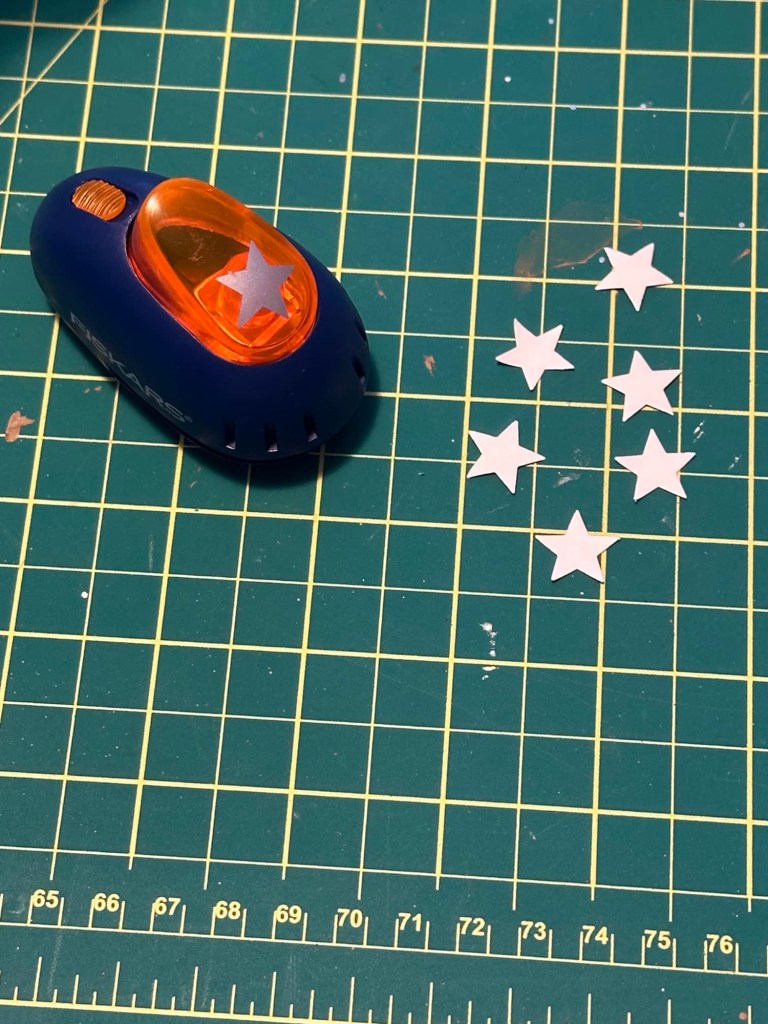
Using white glue and a paintbrush, we added gold glitter to the stars.
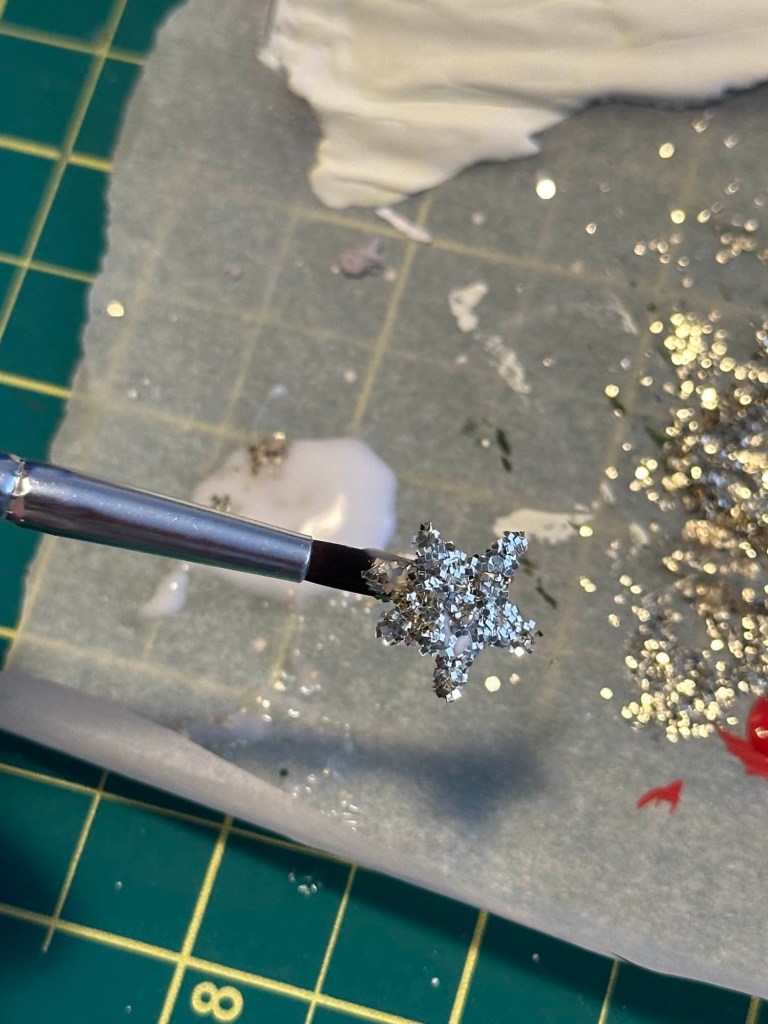
Then we hot glued them to our candle arrangement.
And you’re done!
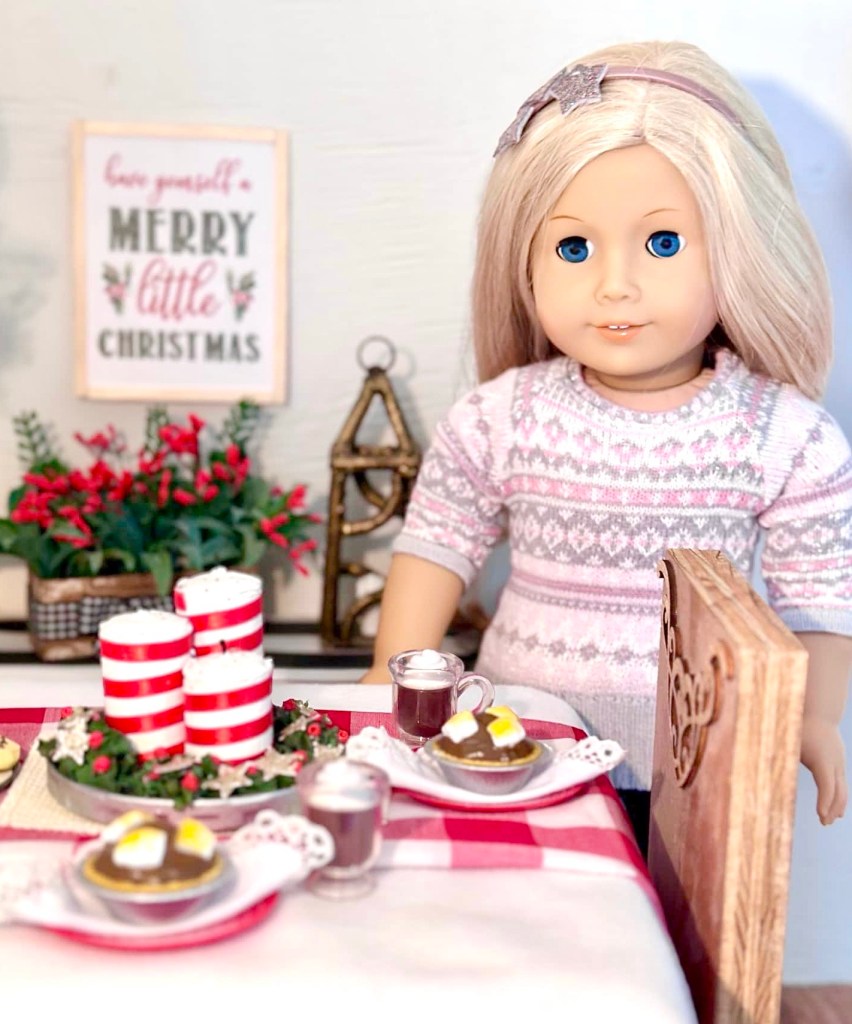
So cute!! 😍

I just love how these turned out!
I think I am going to make some more of these, but in a more natural, woodland theme for every day.
Also, how cute would these be on a pedestal tray, or inside a sweet cloche. Too many ideas! Lol!
These are so festive for Christmas, but with a few changes, they could work for any season!
❤️
We are still up to our elbows in Christmas decor crafts for the dolls, and we are having so much fun!
We are getting close to the big day too, so all of the last minute rush around is in high gear.
I hope you are ready for Christmas and I hope this series inspires you to make some Christmas magic for your dolls!
Stay tuned! We love having you here!
Leave a comment below!
🎄🎄🎄

I don’t know how I missed this in December, but I sure did! Thank you for linking back to it from your Hurricane lamp post. 🙂 I used dowels cut into much shorter pieces and painted to look like fireworks about 20 years ago, but they were “people sized” so I used dowels that were about 2 inches wide. I guess 1/2 inch wide or so would work much better for dolls although painting them would be more of a challenge, and they’d be heavier than your foil tubes are. I just love how your pretty project turned out with the candles in their tray and surrounded by greenery, berries and stars. What a perfect touch for any doll’s Christmas house! I think making them to look more woodland like would be great for their houses for much of the rest of the year too! As usual, thank you Ginnie for sharing your clever and creative ideas with all of us. 🙂
Terry in Colorado
LikeLiked by 1 person
You are so welcome! We had so much fun with our doll Christmas decor challenge series! I am definitely going to do it again next year! 😊
LikeLike