

Hi guys!! How is your weekend going? It’s been pouring rain here, so we decided to get to work on a doll craft that we have been putting off for awhile.
First, I want to briefly explain our reasoning for wanting to make doll shopping bags in the first place.
Mainly, we wanted to display them in the newly renovated dollhouse rooms. Now, however, we have completely emptied out the mega dollhouse in order to get it ready to sell.
So, why doll shopping bags? For aesthetic in our doll scenes of course!
Here is just a tiny look at our Pinterest inspiration for this project. As you can see, shopping bags make cute decor.

I also really love those ladder shelves. I have them on my rainy day DIY list too.
Okay, let’s get started!
Here is what you need:
Shopping bag, although plain paper will work too
Pencil, ruler, scissors
Ribbon or bag handles
Glue stick and tape
Hot glue
Template
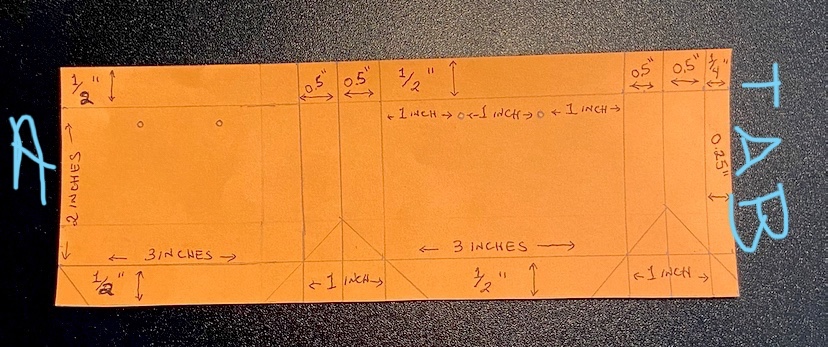
I hope the measurements are clear on this. Basically, it is a 3” x 8.25” rectangle. All of the lines marked are where to fold.
Open your shopping bag flat.

Draw the template on the wrong side of the bag. You don’t want any lines to show on the outside of your finished product. For ours, it didn’t really matter as both sides were white, but some bags have a clear inside and outside.
Cut the template out.

This next part is optional depending what type of handles you decide to use. At first, we were going to use ribbon, so we poked holes in the bag at the circle marks. If you don’t want to use ribbon and instead have cord or thin rope for your handles, then just disregard this step.

Begin folding along the top line. I like to make my creases the wrong way first, so I can actually see and fold along my pencil lines. Then, once the fold is creased, I fold it over the other way.
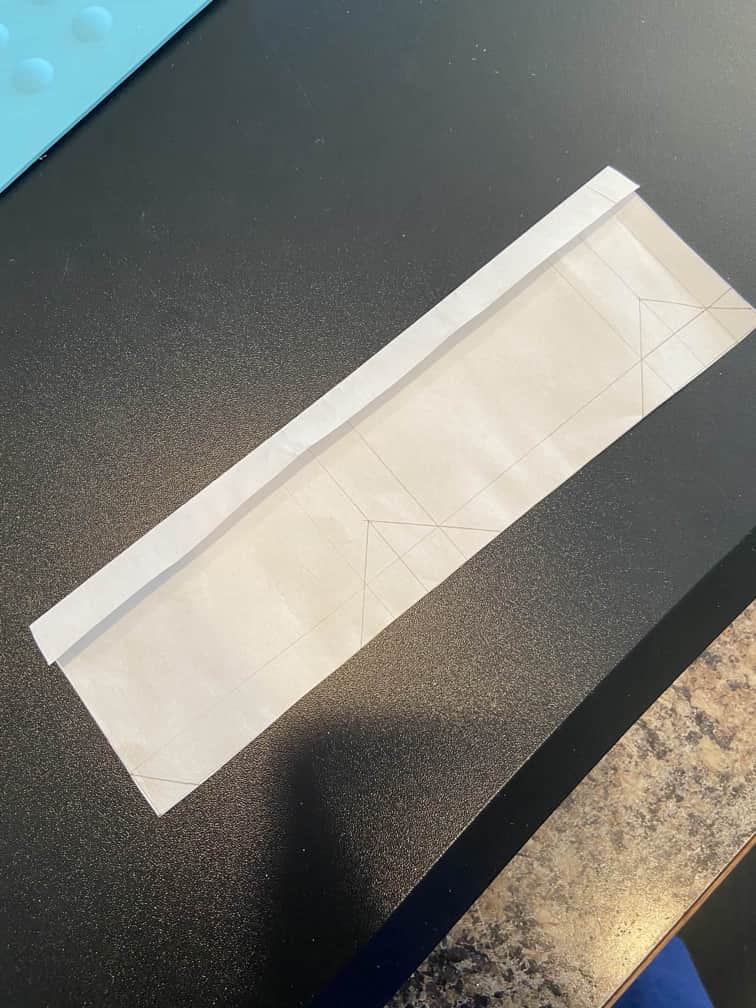
Next, fold what will become the sides of the bag. You will have two mountains as shown.

Fold along the lines on either side of your mountains accordion style.

Next, fold the bottom of the bag up. Crease well and then unfold to do the next step.

Fold and crease inward following along the pencil line of the triangles.

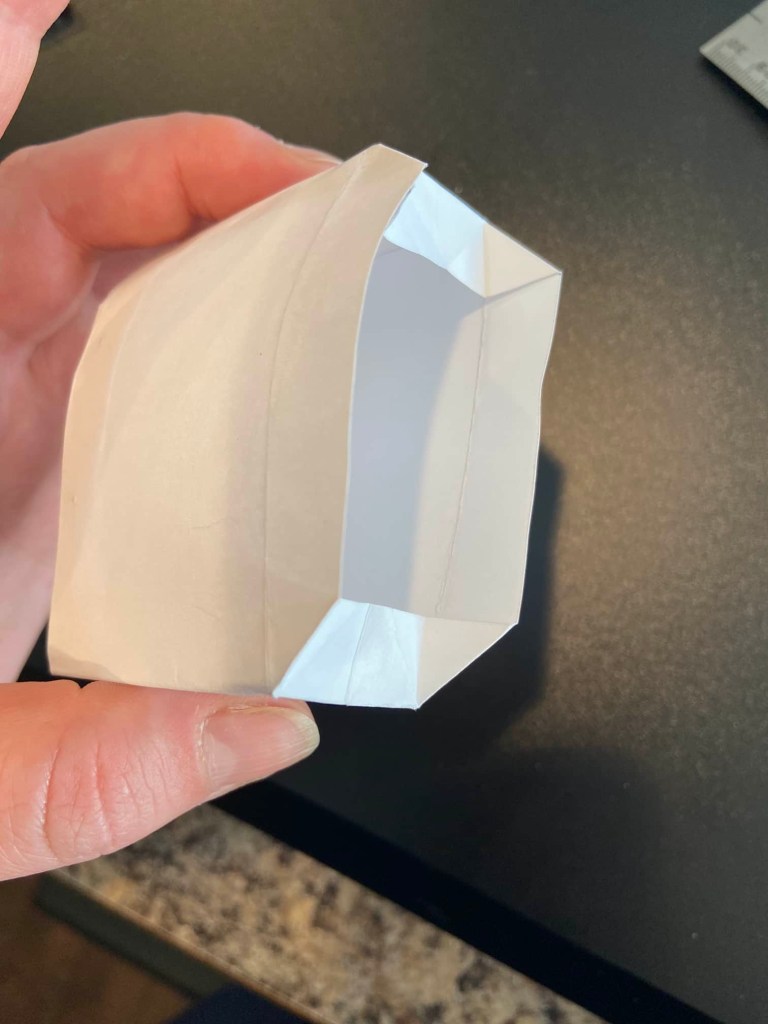
Okay, now to assemble the bag. Along the side of the template is a TAB.
That TAB is pulled around and tucks under the top flap of Side A forming the bag. Use a glue stick to adhere the TAB to Side A

The blue arrow shows where the tab is tucked under the top flap of Side A

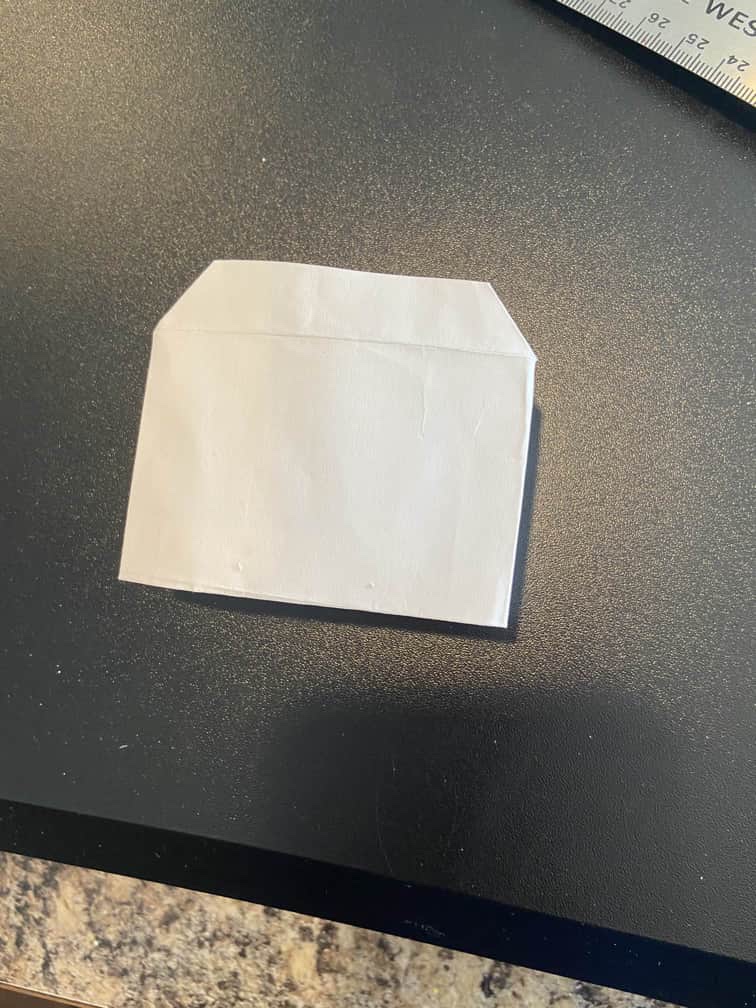
To close the bottom of the bag, first fold in the corners like a present as shown.
You should have something resembling a house from the front.
Now fold the remaining flaps down and secure with tape.
I used a piece of tape to secure the inside of the bottom of the bag first. Then I folded the bag flat and secured with more tape on the outside of the bottom of the bag.

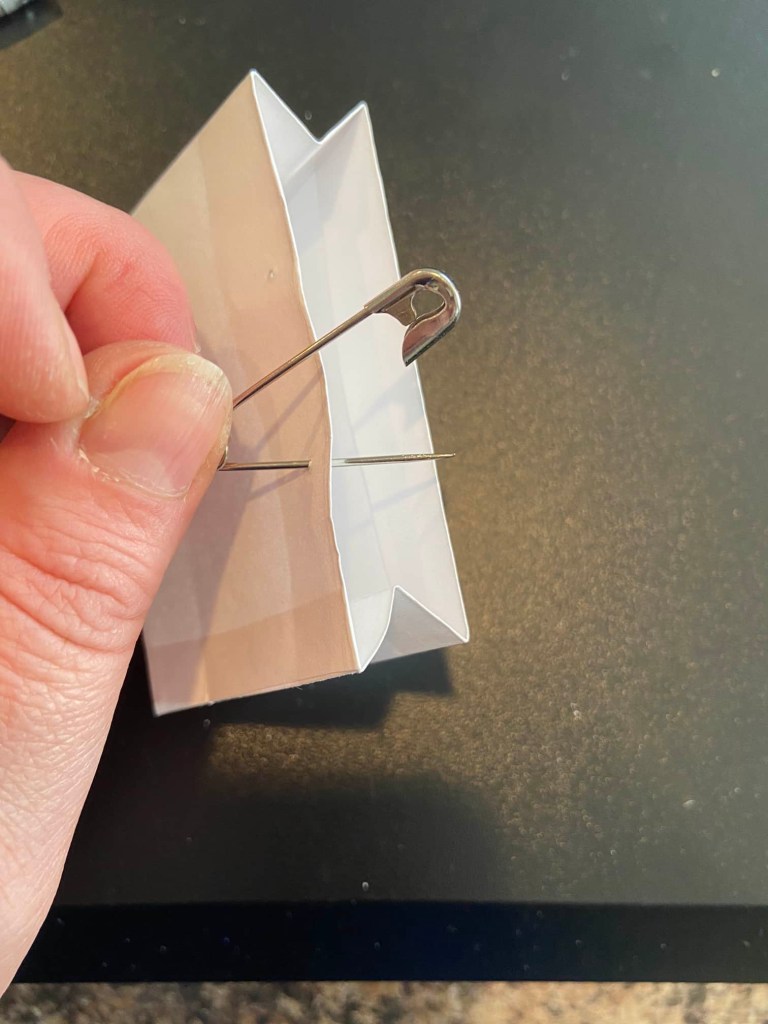
Now to add the handles! At first, we were going to add ribbon handles, so we used a pin to re-poke our holes. This way we would thread the ribbon through, tie a knot on either side and be done.
But then we changed our minds. Instead, we decided to make handles with the existing cord handles that were attached to the human sized shopping bag.
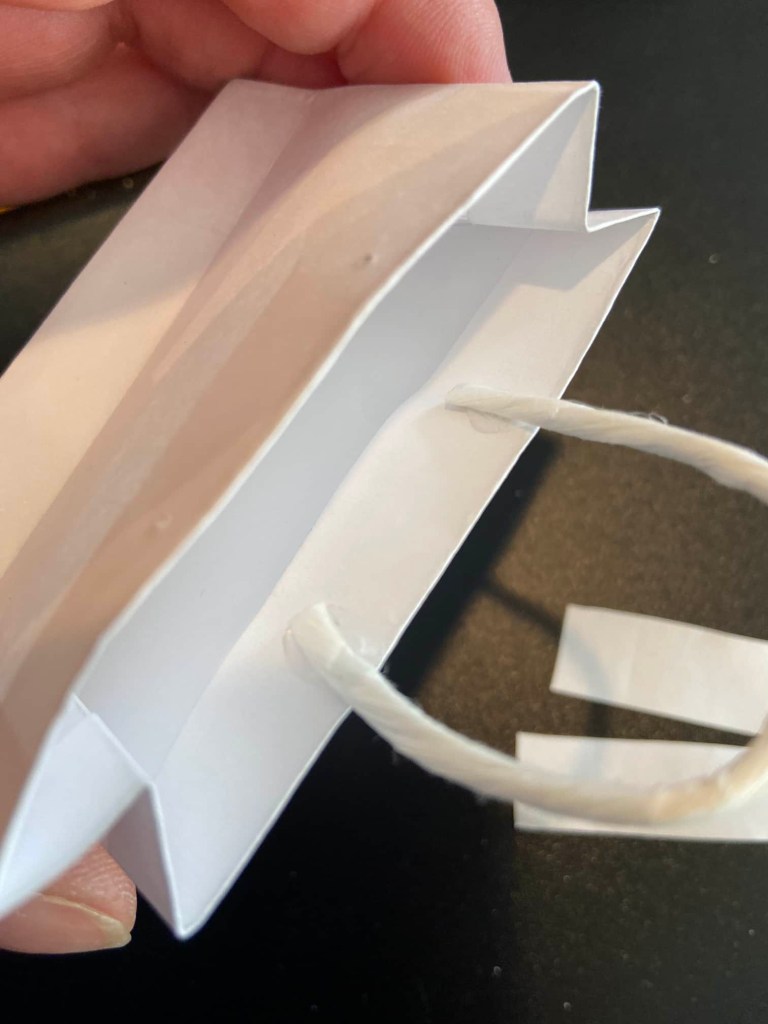
Measure and cut to size. Then dab a small amount of hot glue to secure the handle to the bag on either side.
Now cut a small rectangle of paper, and using a glue stick, glue the paper over the ends of the handle.
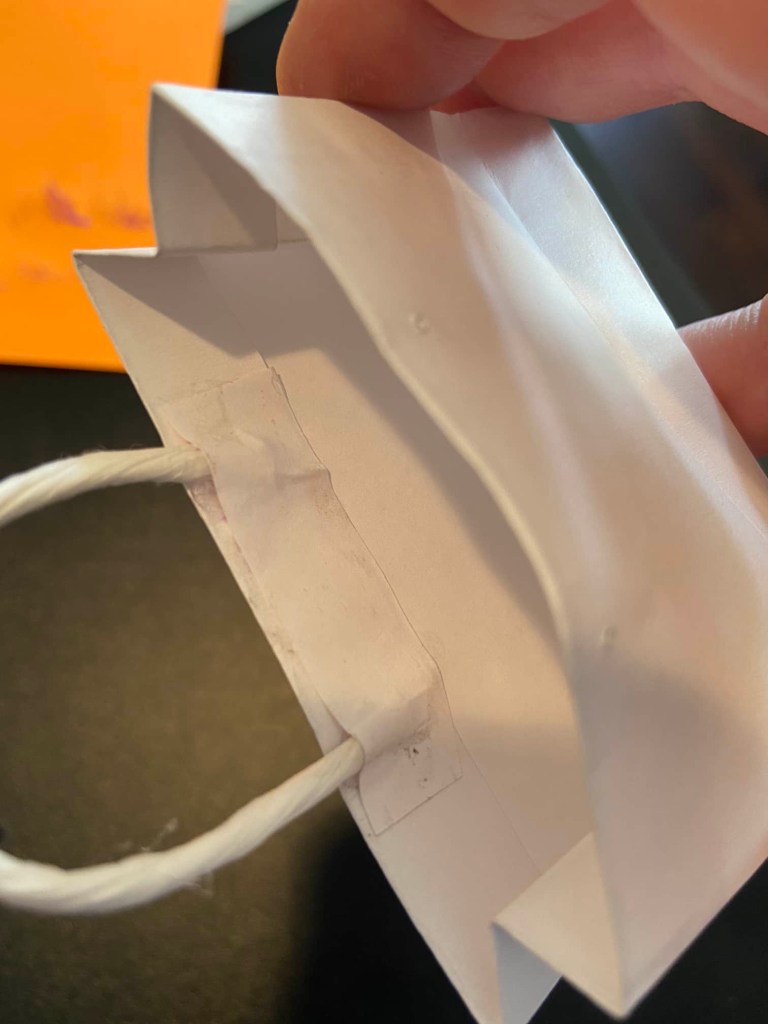
Repeat for the second handle.
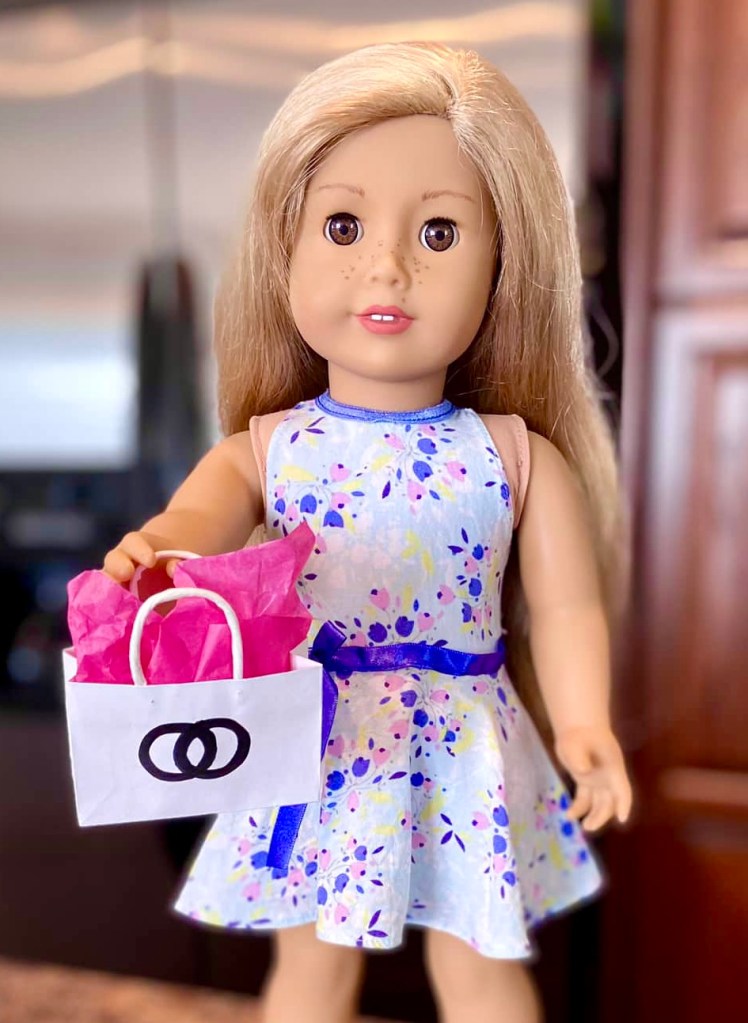
Your shopping bag is complete! Be sure to add a logo, and cut a square of tissue paper to tuck inside!

Tenney wonders what’s inside the bag.

She hopes it’s something for her.
I hope you enjoyed our tutorial!

Look at that, it even stopped raining outside! 😊 Time to take the doggos out, but thanks for joining us today!
Leave a comment below!
❤️❤️❤️

This is such a cute idea!! I cant wait to see your dollhouse when its completed!
LikeLiked by 1 person
Aw thank you! Unfortunately we have to sell the actual dollhouse, but if you look in the blog menu at the top all the mega dollhouse posts are pinned there. We are sad to see it go, but we are happy to keep one of the rooms that we will be decorating and changing up all year long. ❤️❤️❤️
LikeLiked by 1 person
That’s so sad! At least, you will have a room to still decorate and take photos in! 💗
LikeLiked by 1 person
Yes!! We are keeping most of our doll furniture and accessories and we plan to go ahead with our initial reno plans just in one room as the background instead of the 8 doll rooms. We had so many plans that we still want to create! 😊
LikeLiked by 1 person