

Hi guys! Where to begin, okay first some news! I am finally in a place where I feel confident about doctors taking a look at me. It took a long time because I was in a lot of pain and I didn’t want anyone near me.
So I went to the doctor and I was able to get a referral for an MRI. I don’t have an appointment yet, but at least I’m on the list. It could take up to a year to get in, but I’m in a place now where I’m more comfortable, and I am able to do most of the things that I used to do, so I don’t mind waiting. I’m still slow but I’m taking it day by day. (Here is what happened to me if you don’t already know)
Meanwhile, and to keep me busy, I have decided to continue the renovations in our doll house. It’s been over two years, and my poor doll rooms have been so neglected. I feel that it is time to get back to it.
My initial goal for the dollhouse was to create a better aesthetic as well as a more teenage vibe in the rooms. That is still my goal with one exception. We are now hoping that once we renovate them, we can sell each of the individual doll rooms separately as we would like to also begin thinking about possibly moving soon. Unfortunately, we won’t be able to take the giant doll house with us if we move.
But that is all well in the future. For now I just need a project to keep me busy while I wait for my MRI.
The first room on our renovation list is already well under way. It got a makeover paint job from lavender to white, and I painted the beds white as well. I also made over the desk and began making bedding. You can check out our progress from two years ago here.
Not much has changed in this room. I was able to finish the beds though.
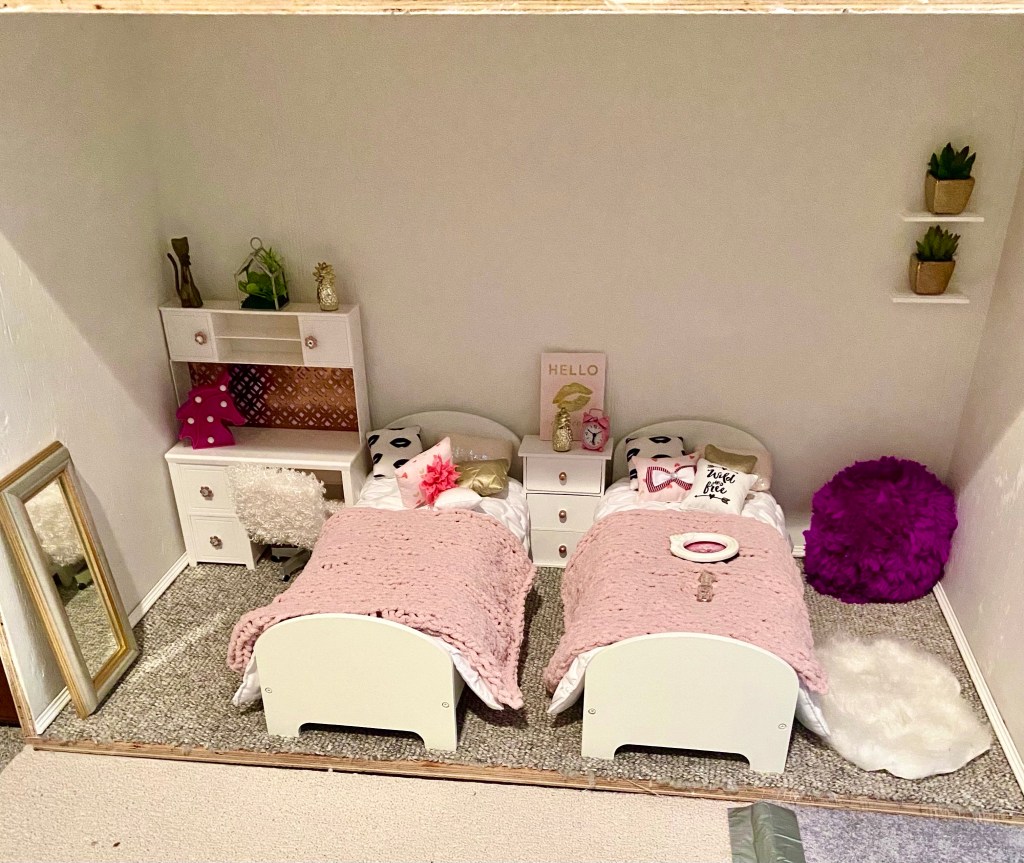
It’s so bare, I know! But all that is going to change! We have such big plans, and the Little Miss is very excited to be the dollhouse interior designer!
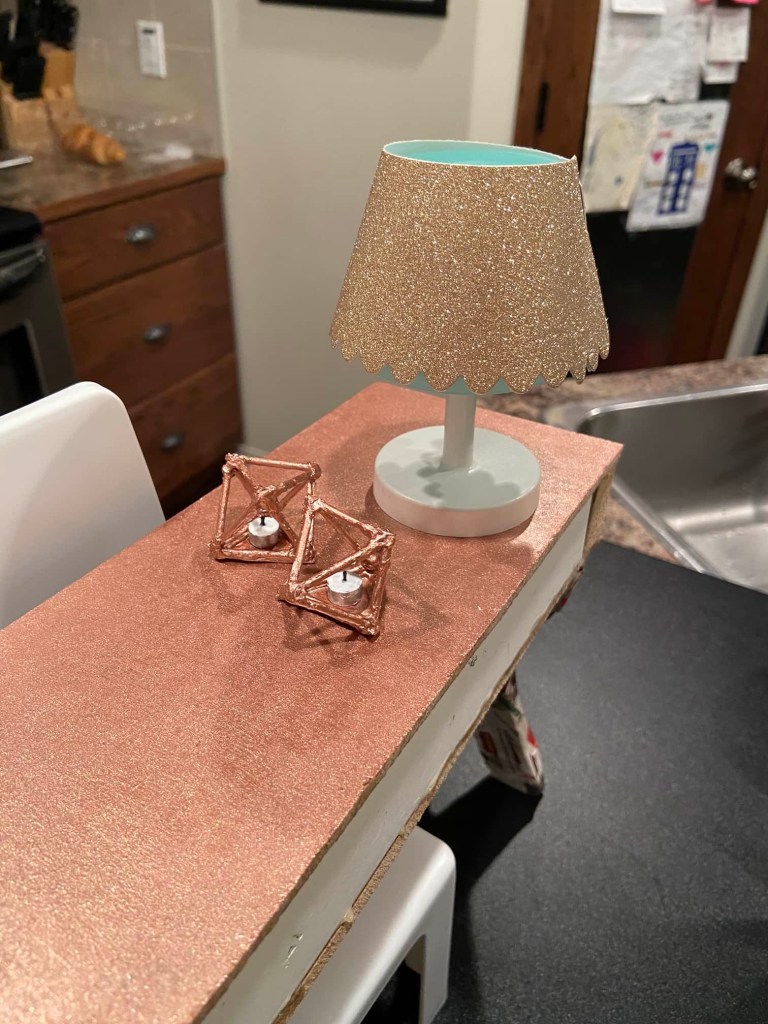
Today, we have a really cute fun craft that you can make for your own doll rooms. I’ve been wanting some geometric candle holders for the dolls for some time now, and this room definitely needs them! So let’s make some!
What You Need:
6 Round Toothpicks
Scissors
Hot Glue
Paint
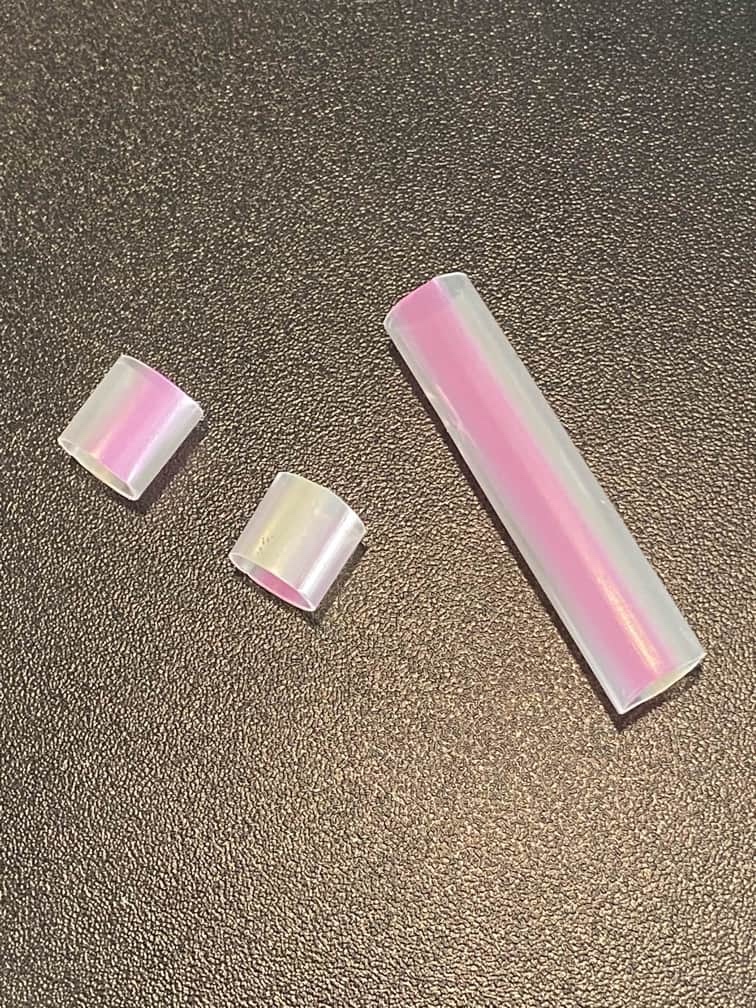
Jumbo Straw
Card Paper
Parchment Paper
Pins
Black Sharpie
First, cut off the pointed ends of your toothpicks. Keep some of the pointed ends for candle wicks.
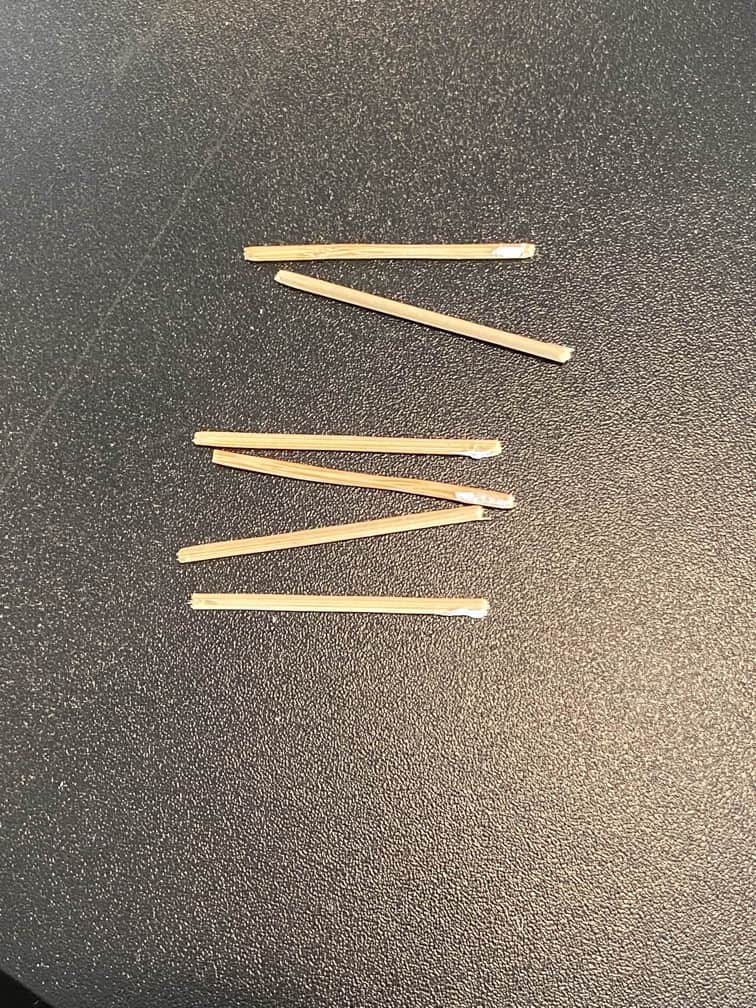
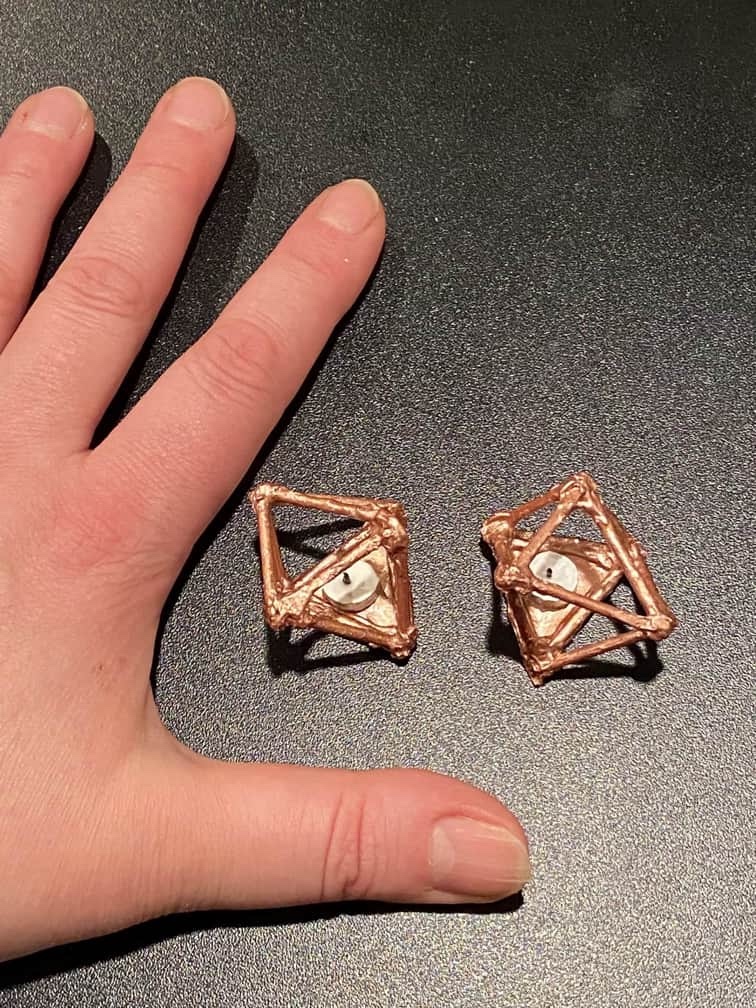
Paint the toothpicks in the colour of your choice. We chose rose gold to match our doll’s room. Next, cut all of the toothpicks in half.

Start building your geometric candle holder by laying the toothpicks on a piece of parchment paper in the shape of a triangle. Put a dot of hot glue at each triangle point.
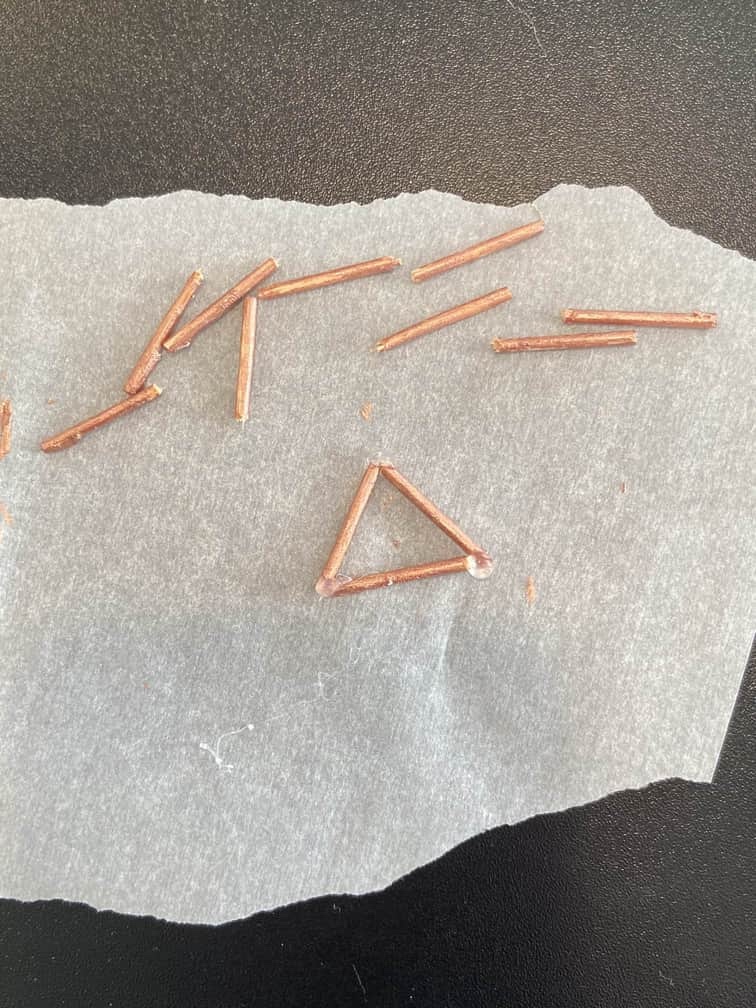
Build up your candle holder by continuing to hot glue toothpicks in the shape of triangles. We built two kind of lopsided pyramids on top of each other.

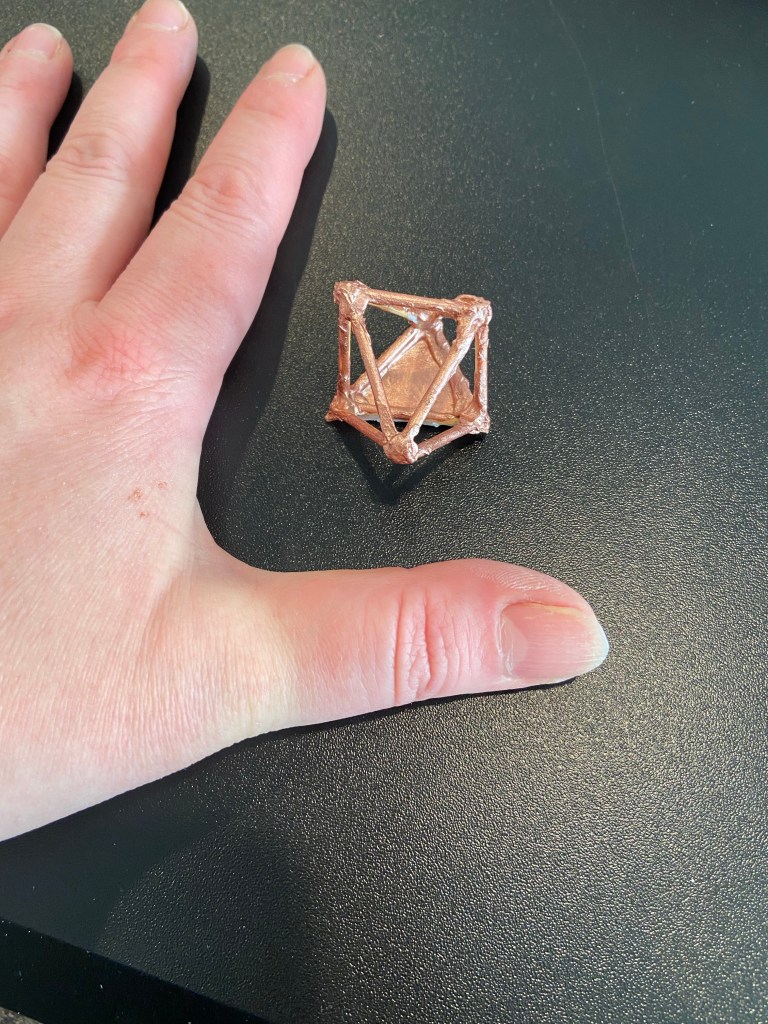
Once you have your candle holder looking the way you like, let it dry. We used the hot tip of our hot glue gun to re-melt where the toothpicks meet at the corners in order to flatten and reshape the hot glue a little as it was kind of blobby.

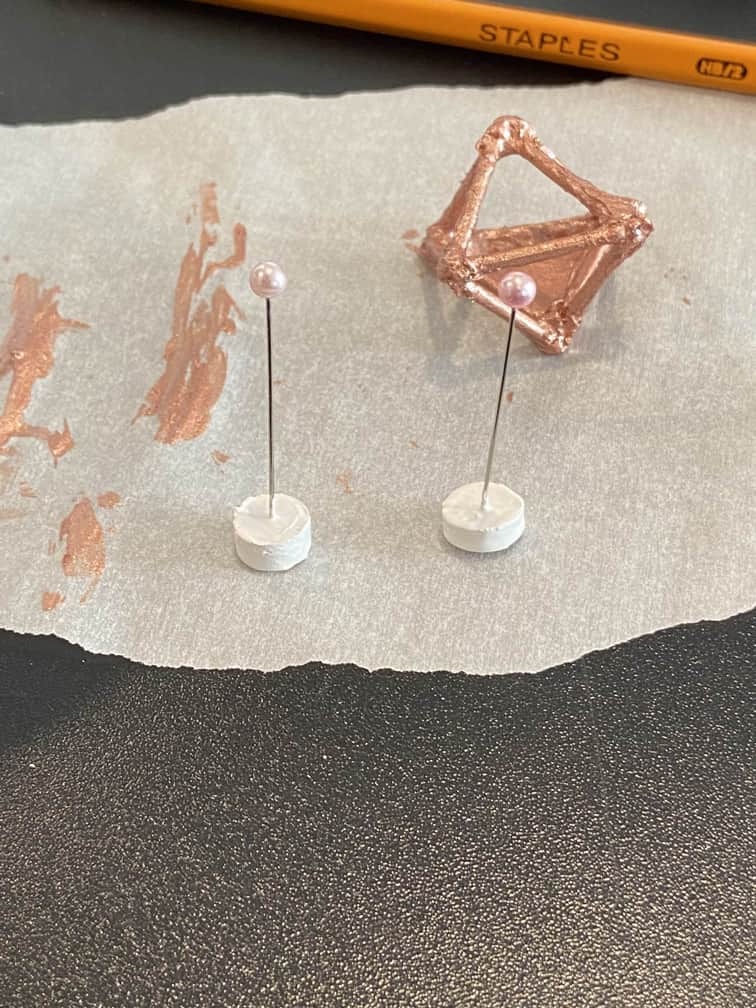
Use a pencil to trace the base of your candle holder onto some card paper. We just used the top of the packaging from the toothpicks. Cut it out and hot glue it to the base.

Next, do another layer of paint over the entire thing.
To make the candle, use a jumbo straw. Cut a small piece of the straw. We made two candles for our two holders.
Squeeze a blob of hot glue onto parchment and place the straw pieces onto it.

Let dry and peel off the excess glue.
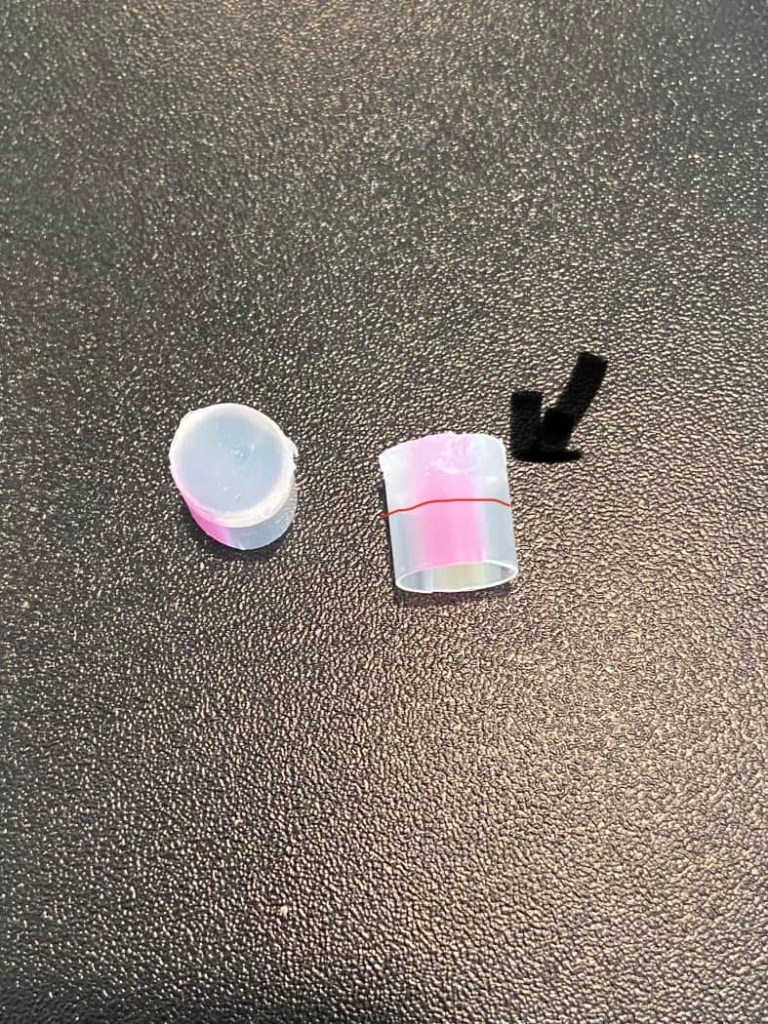
Cut off the excess straw along the red line.

Use a pin to poke a hole in the top of each candle. Paint candles white. Use silver paint to paint the sides of the tea light candle if you like.
To make the wick, just use the pointed ends of the toothpicks you cut. Colour black with a sharpie or you can paint them black as well.

Glue the toothpick ends into the tops of the candle.

And you’re done!! How cute are these??!!

Optional: If you don’t want to make a candle you can put a piece of greenery in your candle holder instead, and use it as a plant holder.

I hope you enjoyed our craft! And I hope to get more exciting DIY’s out as we renovate the dollhouse. Christmas is also coming soon so we are busy busy, but we will be taking a break from homeschool so hopefully we will have more crafty time!
Keep smiling, and have a crafty kind of day!
Leave a comment below! ❤️❤️❤️

Fun fun!
LikeLiked by 1 person
These are just so much fun and CUTE! I think that with the greenery and tiny fruits or beads on it, this looks like a decoration for a fairy’s house or a doll tree house. Very nice ideas, as usual. You just keep spoiling us with these instructions for clever doll fun! Many Thanks again, Ginny
LikeLiked by 1 person
Thank you!! I just adore making realistic doll decor items. They are probably my favourite things to make. 😊❤️❤️❤️
LikeLike