

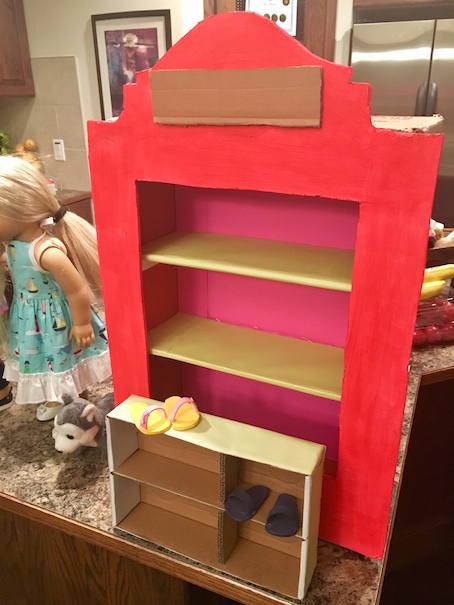
Hey guys! We have been having so much fun crafting for our DIY Nanea’s Family Market, and today we are here with a quick tutorial on how we built the main shelf so that you can make one too!
Here is what you will need:
A box (Ours measured 14″ X 6″ X 20″)
Foam board
Hot glue
Exacto knife
Scrapbook paper
Paint (I used red and green)
Okay let’s begin!
Start by cutting the top flaps off of your box. Set these aside to use for the shelves. Next, cover the inside of your box. We used pink scrapbook paper for this. (You could also use paint for this. We used paper for the back wall, and paint for the side walls.)
 If you want, you can cover the outside of your box in scrapbook paper or paint too. We didn’t do this because the overhanging front facing of the market shelf will mostly hide these areas, so they won’t really be seen straight on.
Next, use the flaps you set aside to measure and cut some shelves. We made three shelves for our market. Wrap each shelf in paper. (We used green scrapbook paper).
DO NOT GLUE THE SHELVES IN YET!!

Set the shelves aside. Next, take a piece of foam board, and trace the front of your box onto it. Add about an inch to either side. This is the overhang that I mentioned before. Then add about 4 inches to the top. This is where you will freehand the arch design like the picture below. If you want to do a simpler design you can just add the 4 inches, and draw an arched curve across the top instead.
 Use your exacto knife to cut out your design. Place on top of your box to be double sure that it fits, remember that it should overhang one inch on each side.
 Now we need to cut a hole in the front. Measure two inches in from either side and 6 inches down from the top. Then measure 4 inches up from the bottom. You should end up with a rectangle. Cut it out. If you want you can paint the front facing now. We painted ours red. Set it aside. DO NOT GLUE IT ON YET!! DON’T DO IT!! (You won’t be able to fit the shelves in if it’s glued in place! 🙂 )
 Back to the shelves. Now that you have your front facing all cut out and painted, you can use it to roughly measure where to place your shelves. You want your bottom shelf to line up exactly with the bottom of the facing opening. Your top shelf should be about 3.5 inches from the top of the facing opening. The middle shelf should be right in the middle of the two.
Trace a pencil line where your shelf will be placed, and run some hot glue along it. Then add hot glue to the tops of your foam board supports, and slide your shelf in place.
Now you can hot glue your front facing to your shelves. 🙂
 At this point I was starting to build the cash counter as well.
(See in the picture above how the bottom shelf of my market isn’t in yet? Big mistake! I glued my front facing on before placing the bottom shelf in, and I had a heck of a time trying to get the shelf in there at the end! Don’t do it!! 🙂 My mistake is your gain.)
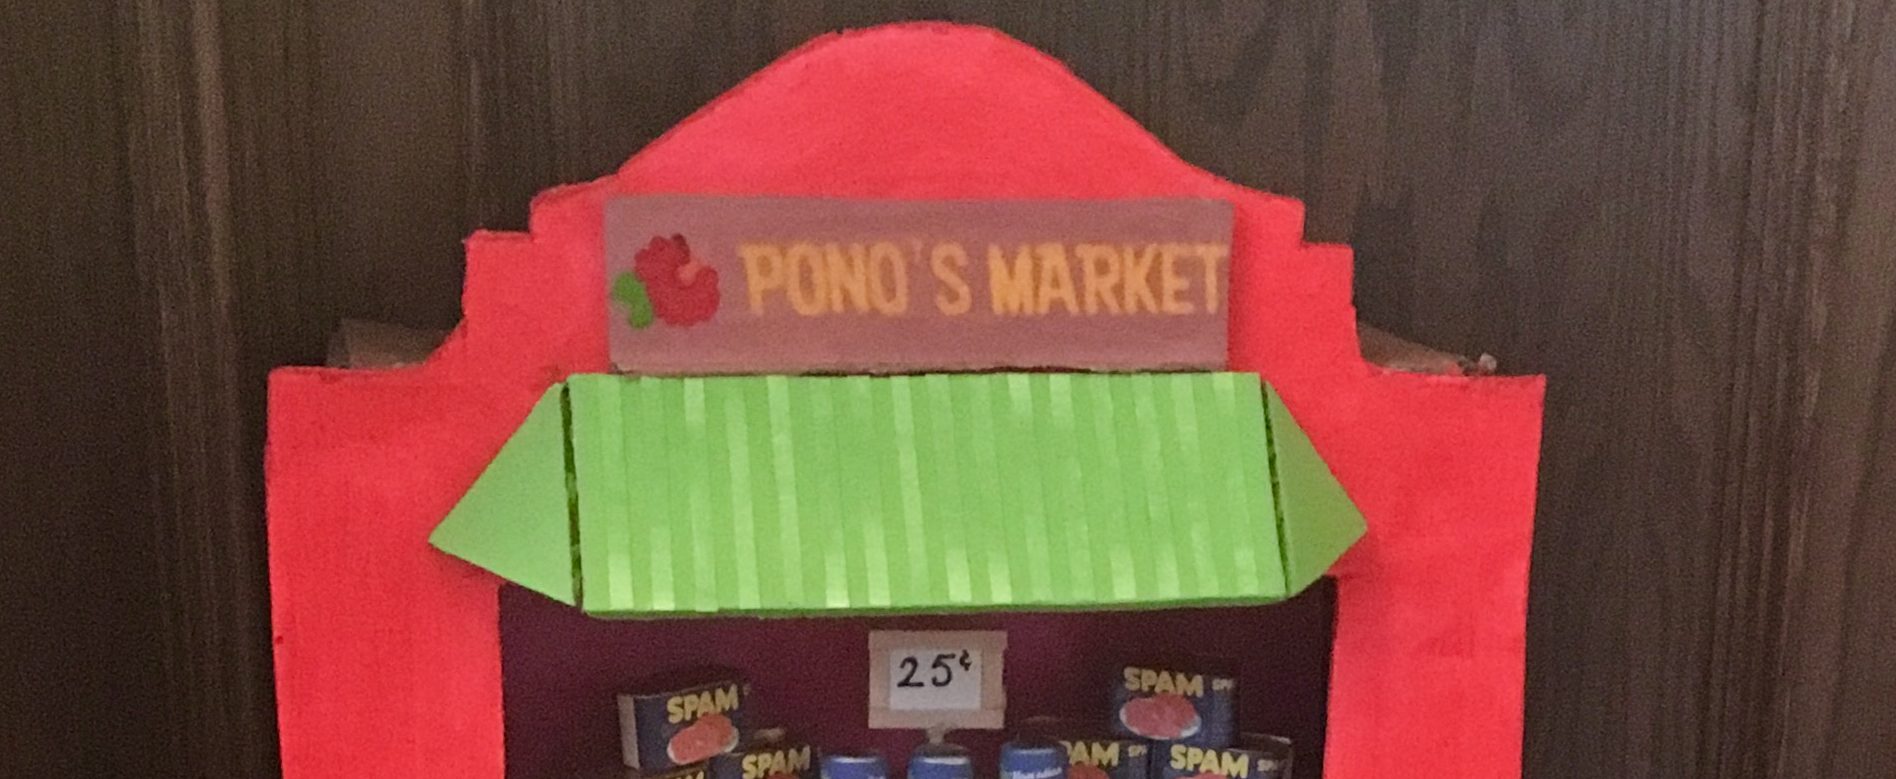
You can also see where I have placed my market sign. If you want printables for your market, I used the ones included with the video HERE. She also has a fantastic video tutorial to make the market completely out of foam board. I prefer the sturdiness of the box that I found.
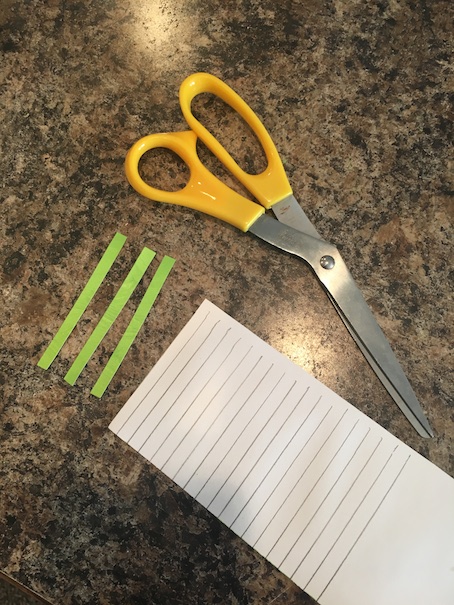
To add the awning to the market, I used a piece of foam board. Cut a rectangle 14 inches long by 3 inches wide. Paint both sides of your awning green.

On either end of your rectangle, measure in 2 inches and draw a line. Draw and cut a triangle on either end as shown in the picture below. Score along the bottom line of your triangles. Fold the triangles in, and hot glue your awning to the front of your market right below your Pono’s Market sign.
 Next cut green strips and glue them to the front of your awning for texture.
 The final step is to add the extended shelf to the bottom of the market.
 This part is also made from foam board. Cut a rectangle 4 inches by 15 inches. Paint it to match your front facing. On either side, measure in 3 inches and draw a line. Score along these lines. Now fold the ends of the rectangle in, and hot glue it to the front of your facing. It should create a half hexagonal shape. It should line up exactly with the bottom shelf. It will overhang about 1/2 an inch on either side of the facing. Just be sure that it is on there straight.
Next take another piece of foam board, and trace the top of the shelf onto it. Cut it out, and paint it brown. Hot glue it on top. Cut some small rectangles to hot glue onto the front of your extended shelf. Paint them red too.
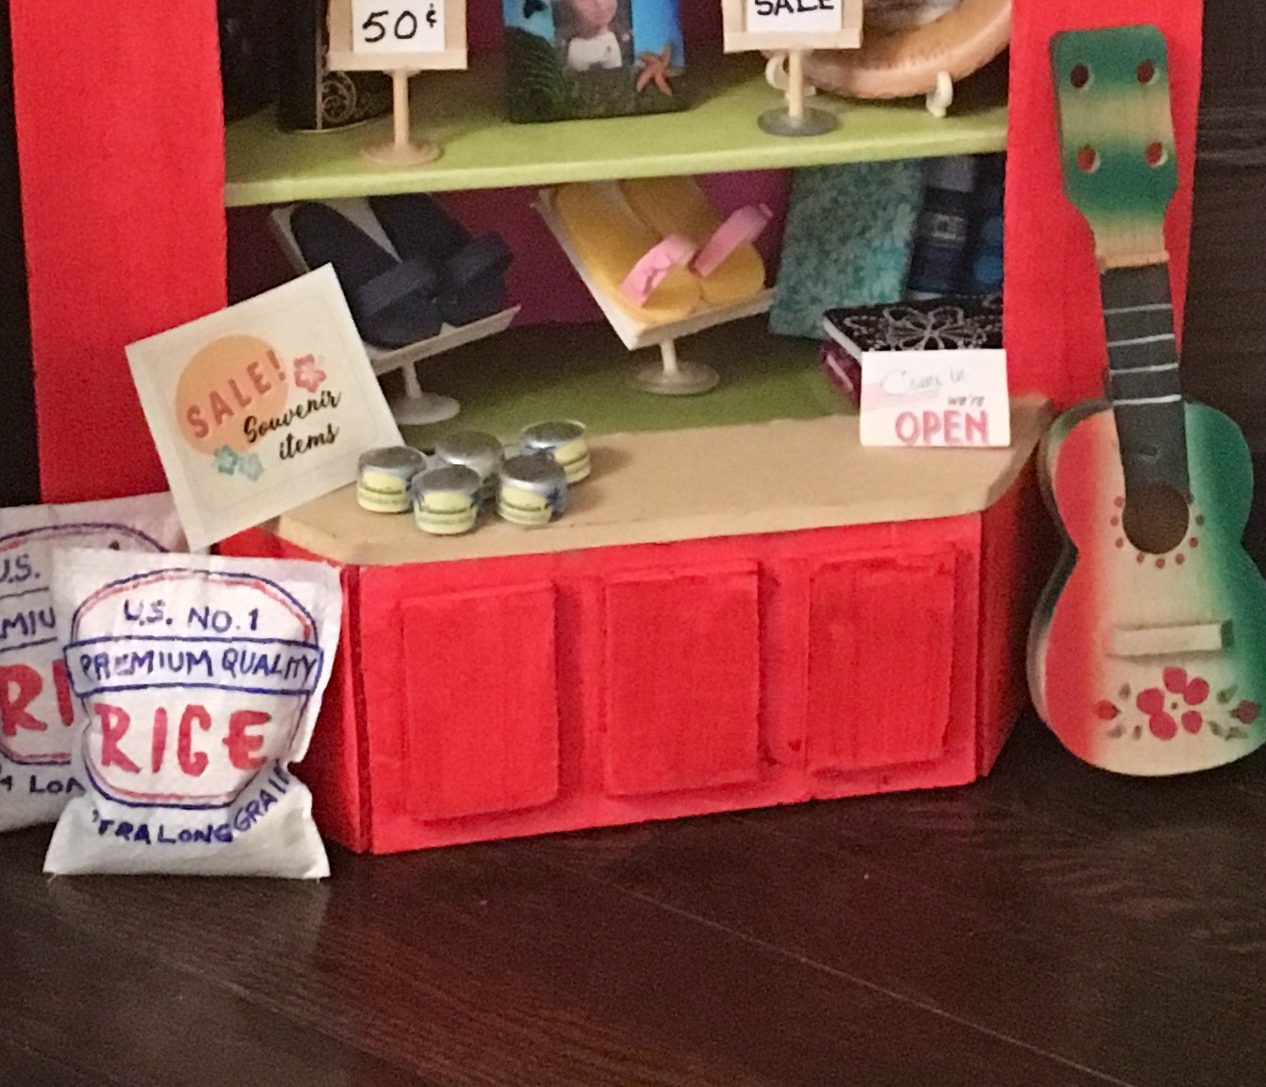 For a cleaner finish, I added a strip of card stock to the front edge of the brown shelf, and painted it to match. You’re done!
 Now it’s time to add all the fun details! Stay tuned as we will be posting more tutorials for everything you need to stock your family market!! 🙂
Have a crafty kind of day!
Leave a comment below!
❤ ❤ ❤

This is so cute!!
LikeLiked by 1 person
Thank you!! 🙂
LikeLike
Sooo impressive!! Wow!!!
LikeLiked by 1 person
Aww thanks!! ❤
LikeLike
Awesome!! I love it!! 😀😀😀
Jesus loves you!!
-Hope
LikeLiked by 1 person
Thank you so much! 🙂
LikeLiked by 1 person
Wonderful job! Love your creations!
LikeLiked by 1 person
Thank you so much! 🙂 ❤
LikeLike