

Hi guys! We owe you a doll tart tutorial! Awhile back, we made some cute tarts for our dolls out of Model Magic. Then summer got away from us as it tends to do, and we never got a chance to show you how to make them too! Now we are back, so the first thing that I knew I had to do was to get this tutorial up and running on the blog!
I hope you had a fantastic summer! Ours isn’t quite over yet, but the craziness is, so things should be a lot quieter around here. I will be sure to post all about our summer news, but that’s for later. For now, let’s get started baking some tarts!!
What you need:
Model Magic air dry clay
Wavy round cookie cutter (this is optional, any cutter will do or you can shape your tarts by hand)
Round tablespoon or any small round cutter
Paint
Toothpicks
Plastic wrap or parchment paper
Step One: Roll a piece of clay into a ball, and squish it flat. This doesn’t have to be perfect but my tarts are about 0.75 of an inch thick.

Step Two: Using a wavy cookie cutter, cut out your tart. Again you don’t necessarily need a cookie cutter, any round cutter will work or you can shape them by hand. My cutter makes tarts that are 1.75 inches in diameter.
Note: If you do not have a wavy cutter, or any cutter for that matter, you can shape your clay similarly as you would if you were making a large doll cookie. Then use a toothpick to create tart indented lines all the way around the sides of the cookie.


Step Three: Try not to touch your tart too much from here on in. Otherwise it ruins the shape and the size. Using a rounded tablespoon, lightly press into the centre of the tart as shown (You can use any circle cutter really, this was just the smallest circle that I had on hand) Lightly press. This doesn’t have to cut into the tart too much, it is just a guide for the next step. My first couple of tries, I think I pressed a bit too hard, so you guys get to learn from my mistakes. 🙂 
At this point, I moved my tart onto a plastic baggie, because that’s where I wanted it to spend the day drying out. You can also use parchment paper, or plastic wrap.
Step Four: Using a toothpick gently pull and poke at the circle that you created with the tablespoon. This will add the texture. 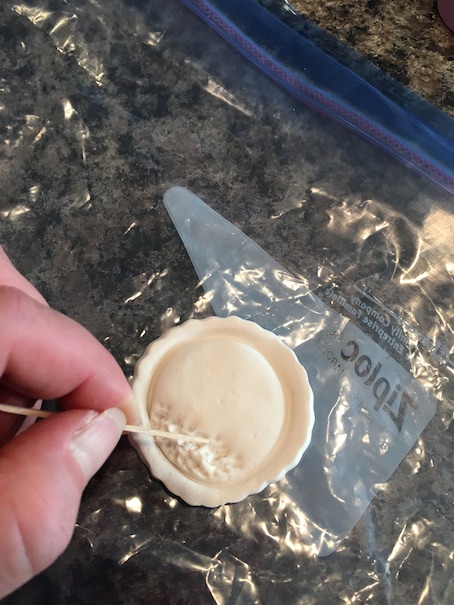 Step Five: Time to add the garnish! I have some little molds that I bought on Etsy a long time ago that I often use for my doll food, but you can make anything you want to go on top. Teardrop shapes make good strawberries. Round balls for blueberries. An orange slice would be cute too. 🙂
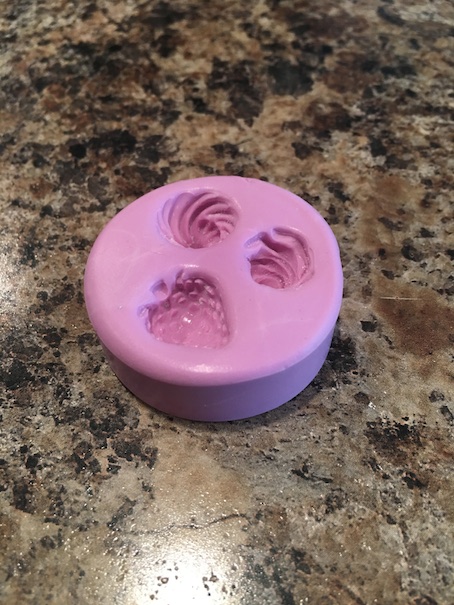 This tiny mold is made of silicone and is very flexible which makes getting the clay pieces out easy. 🙂
 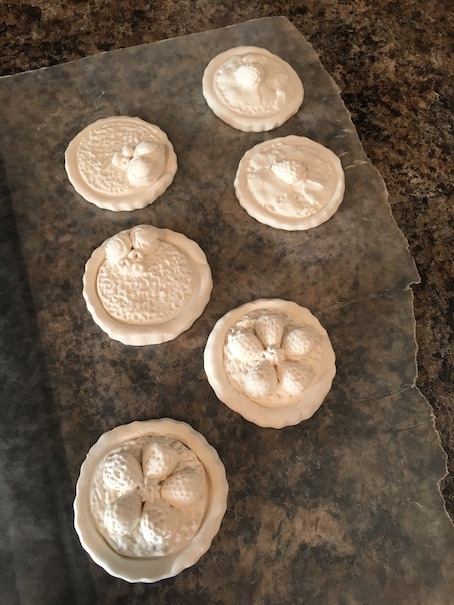 Here are the first batch of tarts ready for paint! Make sure you let your tarts dry completely before painting. I often leave my air dry clay projects to dry for at least two days or so. Looking at these now, I have to laugh a little though. They are kind of rough. 😛 Oh well, the dolls don’t mind at all! Since then, I have made many more of these tarts just learning as I go. I can’t emphasize enough how important it is not to touch the clay with your fingers as you work. That makes all the difference in the world.
Step Six: Paint! I used a very light yellow for the tart crust. Then I used red for the strawberries, dark blue for blueberries, white for whip cream, light green for the key lime tart, and dark brown for the chocolate. You can paint however you like though. It is a good idea, although not necessary, to invest in the tiniest paintbrush for doll food projects.

And here is Saige to do the taste test! 🙂 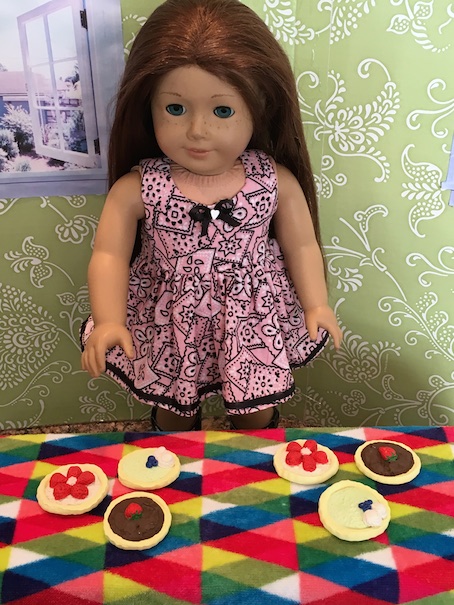
❤
I hope you enjoyed making tarts with us today!
Leave a comment below!
❤ ❤ ❤
