
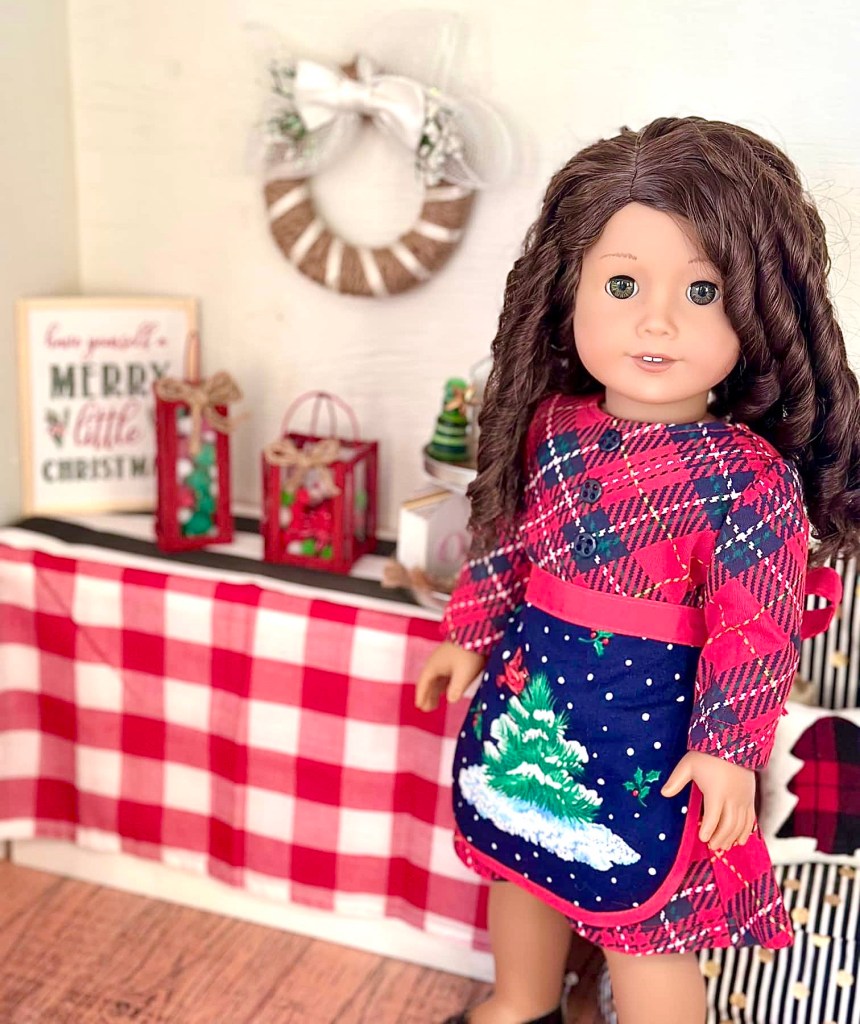
Hi guys! I hope you aren’t sick of this series yet! We are still in the thick of our doll creative Christmas decor vibe!
Today we are making Christmas lanterns. Of course, like most of our decor series, these can be repurposed for any time of the year.
We are having so much fun brainstorming and creating these adorable items! I hope this gives you a bit of inspiration to bring your doll scenes to the next level!
Let’s start making!
What You Need
Coffee stir sticks
Hot glue
Paint
Plastic packaging
Cardstock
Paper clips
Twine
Pom poms (optional)
First, paint all of your stir sticks whatever colour you like. I chose a dark red. Be sure to paint both sides and the edges.
Measurements:
To make a short lantern
2 sticks @ 2.5”
2 sticks @ 1.75”
To make a tall lantern
2 sticks @ 3.5”
2 sticks @ 1.25”
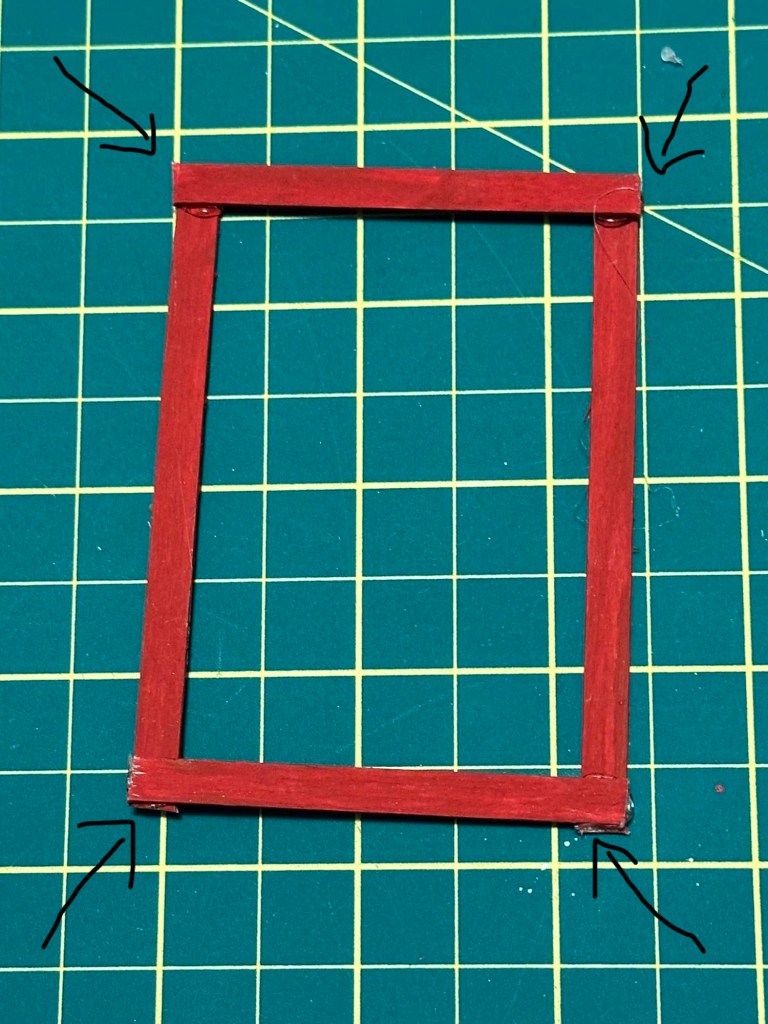
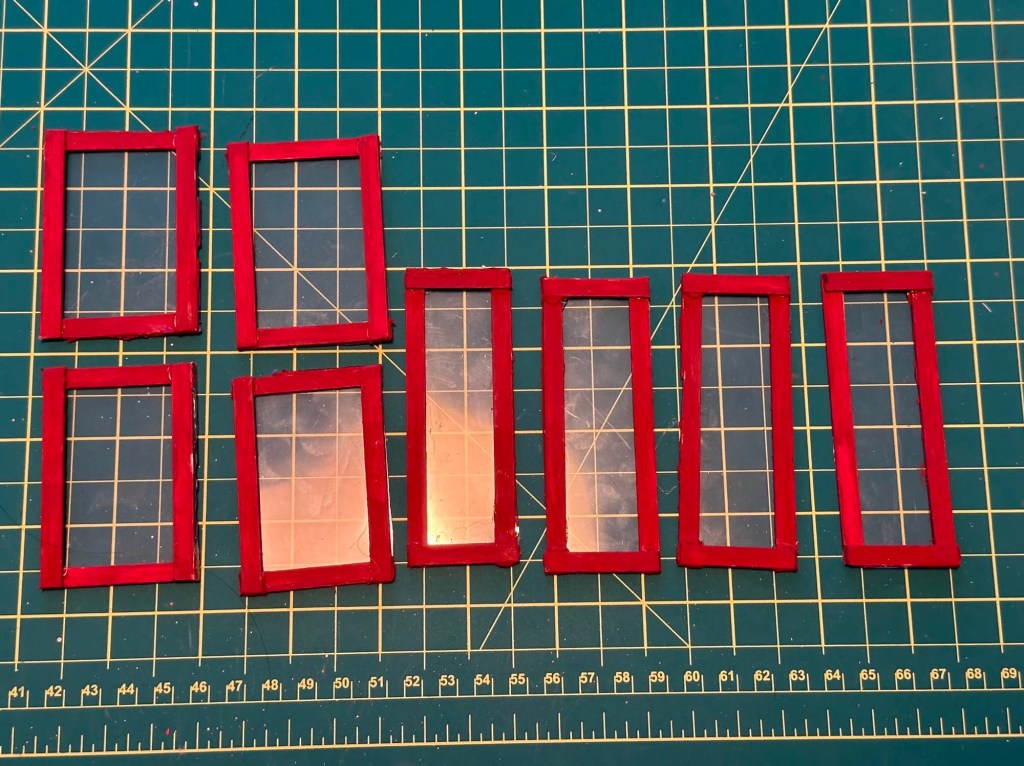
Cut and assemble your stir sticks into boxes.

The only thing to pay attention to when assembling is that the top and bottom should both be connected to the sides in the same way. So either on top or underneath.
Don’t assemble the boxes top, side, bottom, side. Instead, place your two side pieces and glue the top and bottom on. The corners at the arrows should be assembled the same way.
Next get out your plastic packaging. Measure and cut pieces to fit on the back of each box you assembled. Hot glue the plastic to the boxes to create little windows.
Now we will assemble the lanterns.

Using hot glue, attach all the sides to make a box.

Now take your cardstock and hot glue it to the bottom of your lantern.
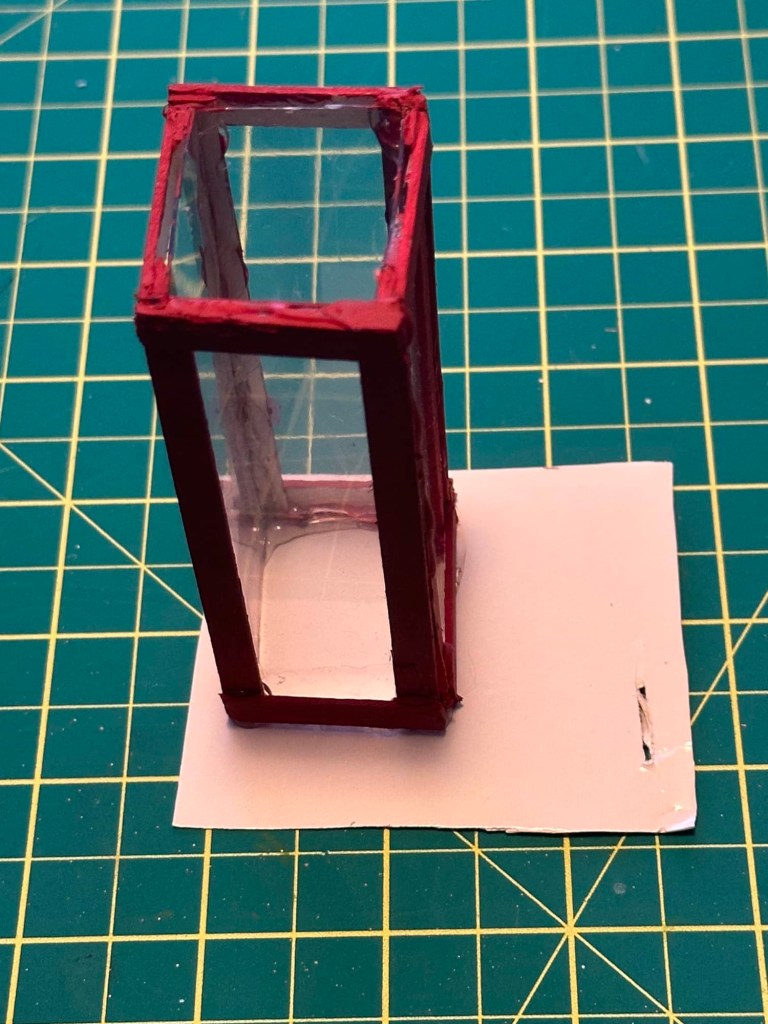
Trim the edges and paint the bottoms to match the rest of the lantern.

To make a handle on top take a paperclip and bend it open. It helps to bend it around something like a paint bottle to get a nice curve.
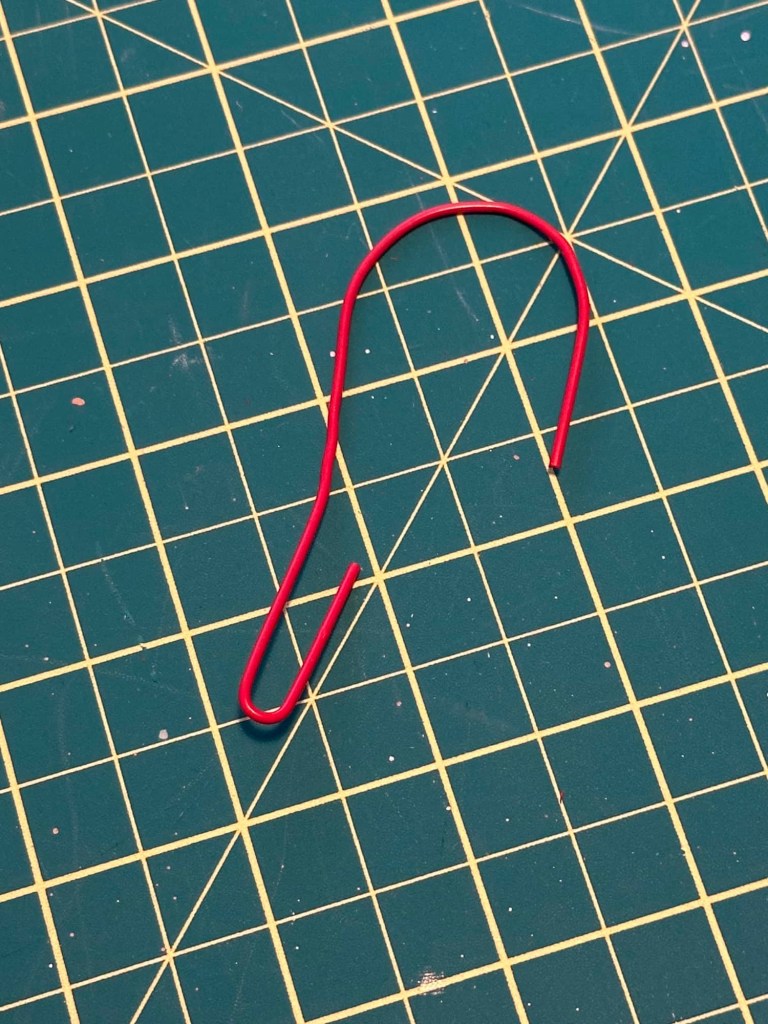
I actually had red paperclips in my stash, but you can use whatever colour you like. You could even paint them to match if you want.
Cut the paper clip to size and hot glue to the top of your lantern.

There was a little gap between the plastic windows in my lantern, so I just glued the paperclip in between.
Next, I made a bow from twine and hot glued it on the front.

And you’re done!
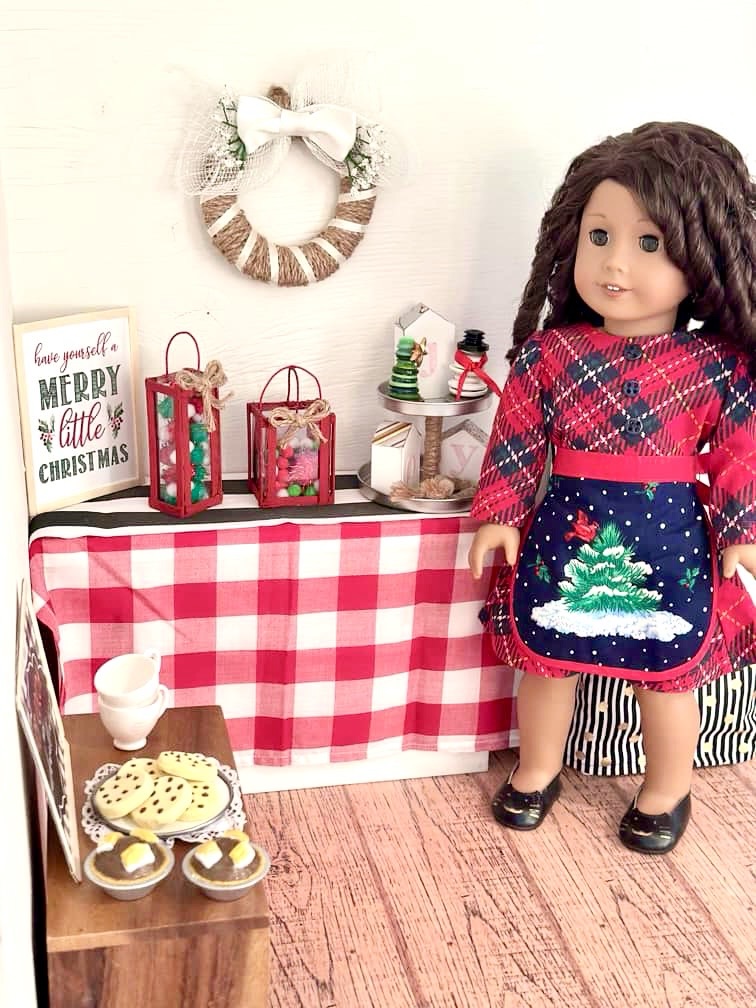
Fill your lantern with whatever you like. We had some sparkly pom poms. I also chose to put two handles crossed at the top of my shorter lantern.
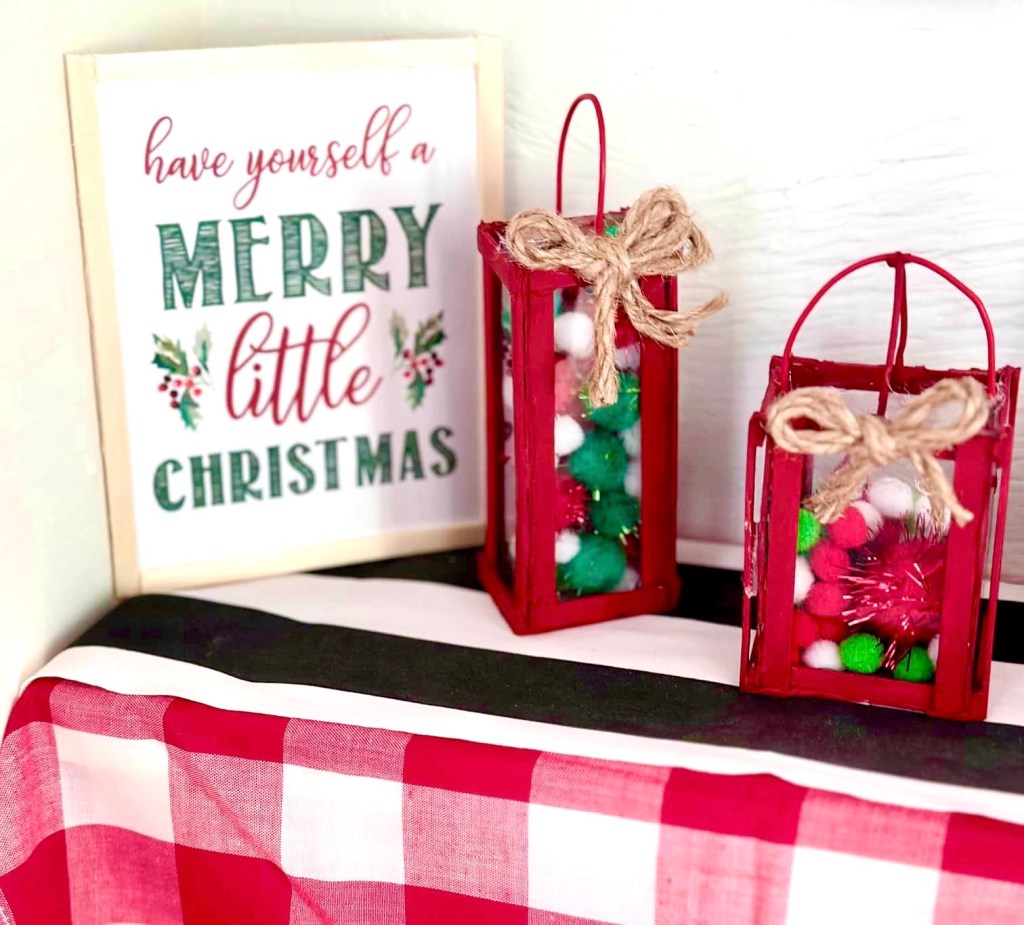
How sweet are these!? I just love them!

And you can put whatever you like in them. Faux greenery, candles, potpourri.
Ooh a pair of nautical themed ones would be so adorable!

I think I might make some black ones next and just switch them out for all the different seasons.

The ideas are endless!

Isn’t it amazing what you can make with just some sticks and hot glue? 😊

❤️
I hope you enjoyed our Christmas decor craft today! Only two more days left before Christmas! How exciting! We just can’t wait! ☺️
I hope you have some amazing plans for your holidays, and I hope you get some time to sit down and get crafty. ❤️
Have a wonderful Christmas!
Leave a comment below!
🎄🎄🎄

Thank you for this series of very well done tutorials, with beautiful pictures.
Merry Christmas to you and everyone you love 🙂
LikeLiked by 1 person
Merry Christmas to you and yours! 😊🎄
LikeLike