
Hi guys! We are coming at you with a new free pattern! Okay, so we didn’t get around to dolly Christmas crafts this year, but to make up for it, I have been busy this Christmas break putting together this pattern for you guys!
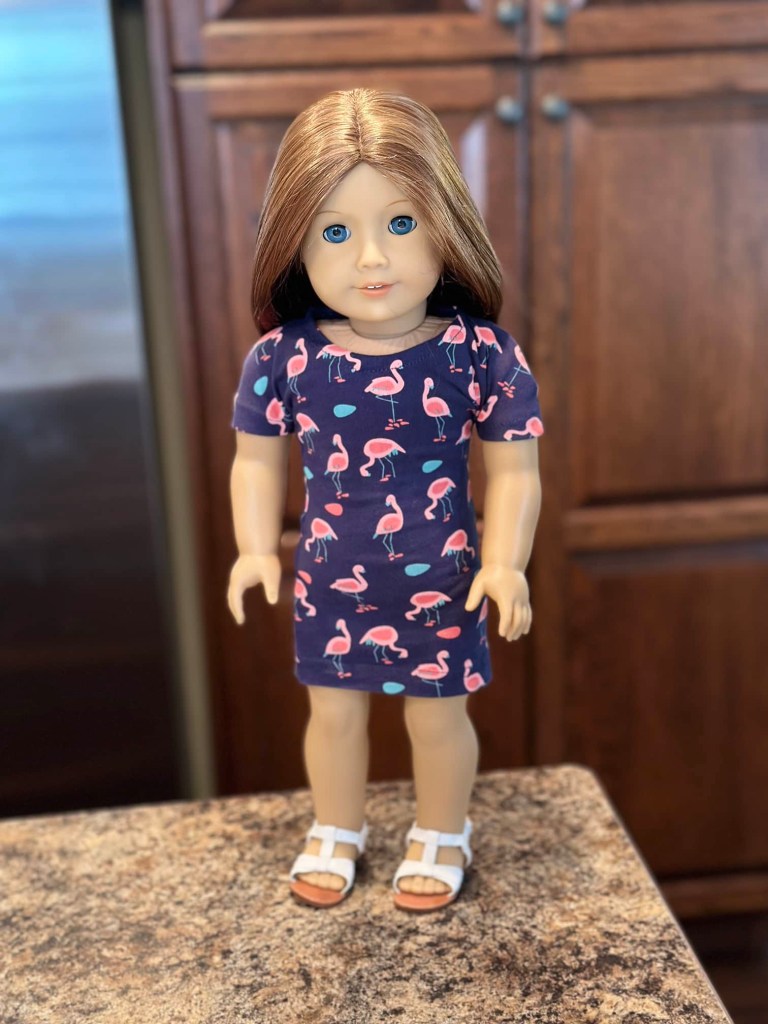
This dress is inspired by the new Truly Me dolls meet dress outfits.
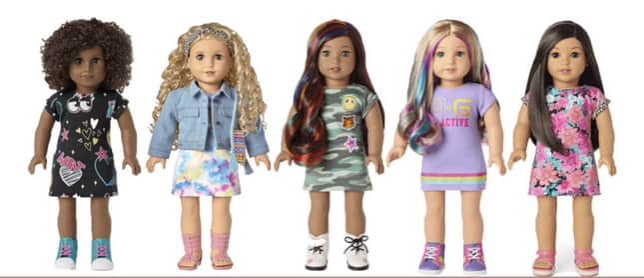
I saw these dresses and thought, that seems like a very simple, yet versatile pattern.
And now here we are!
What you need:
Pattern
Jersey knit fabric (Not too thick or thin, but average would be best)
Ballpoint needle (Depending on the fabric, I use an 80/12 size. However, some knit fabrics are better off with a universal needle 90/14, or 80/12 size)
Thread to match your fabric
Fabric scissors (Do not use these to cut anything but fabric)
Sewing machine (You could probably sew this dress by hand too, if you prefer)
Measuring tape
Pins/sewing clips
Iron
Velcro
Regular scissors
Graphing paper (4 squares per inch)
Pencil/pen/eraser/ruler
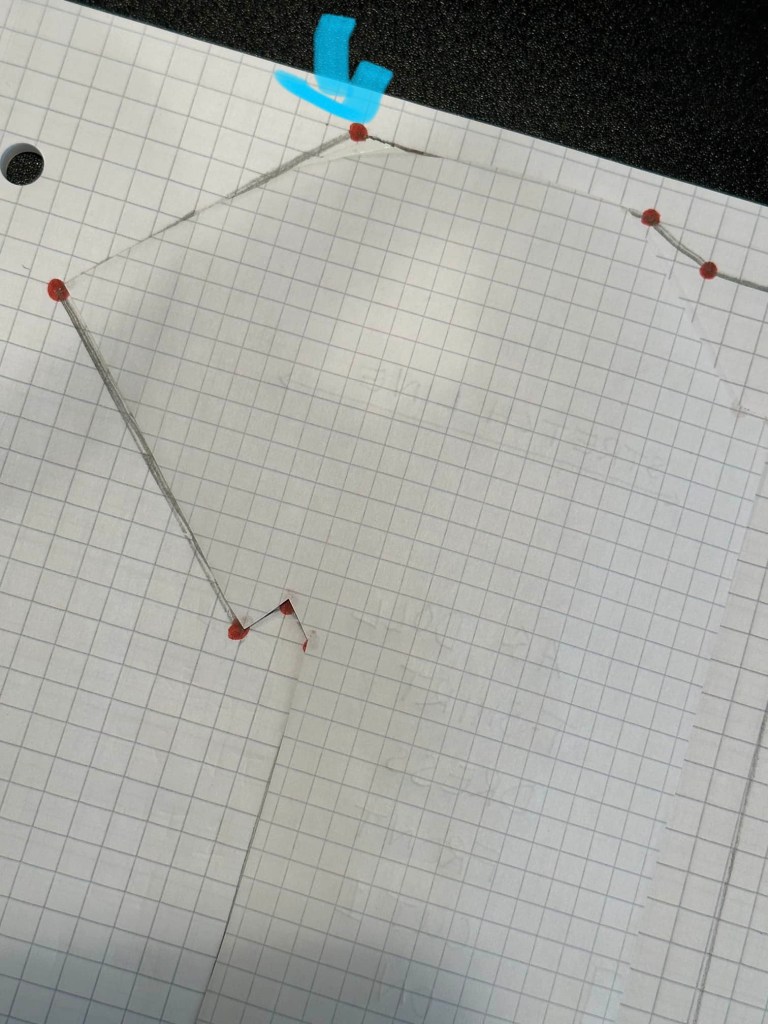
Okay, first things first, let’s make our pattern!
Using graph paper, we can connect the red dots of the pattern for the front and back of the dress as shown below. Just follow the dots, using your ruler and counting the grid squares as you go. In this way, you can build your pattern.
Disclaimer: This pattern is for a doll with about 10.5” waist. If your jersey knit fabric has minimal stretch, add about 1/4” to the back flap of the Back pattern piece. If your doll has a wider body like those of the older AG dolls, then you must also add inches to the pattern. To do this, measure your dolls waist. Subtract 10.5” Whatever you have left, divide in half and add that amount to the back piece of the pattern. Simply add on to the back flap. When in doubt, add 1/4”. Better to be a bit bigger than too small.


Label your pattern pieces as shown. Be sure to add in the stretch line. This is very important.
There is one more step to complete your pattern and that is to round your dress shoulders. Otherwise your tshirt dress will be very boxy with sharp corners.
You can free hand or trace the edge of a drinking cup to round the shoulders as shown.

Cut out the Front pattern piece and trace the rounded shoulder you created onto the Back pattern piece. This makes them identical.
Cut out the Back piece.

Your pattern is ready to use! Start by pinning your pattern to your fabric. Observe where the stretch lines are and match them to your fabric stretch. You want the dress to have the most give in the width, so it will stretch around your doll’s body. Be sure to place the front piece on the FOLD.

Cut out your pieces. You will have one front piece and two mirror image back pieces. This is achieved by folding the fabric in half and cutting both pieces together.
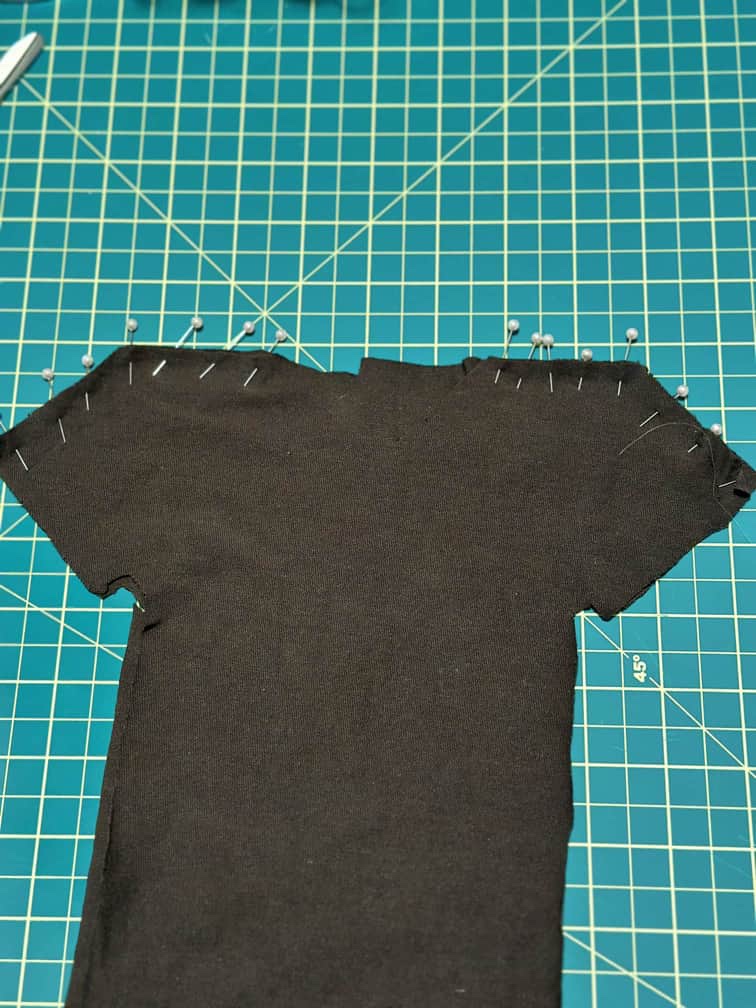
Now pin together the shoulders of each back piece to the shoulders of the front piece, right sides together, and starting at the corner edge of the sleeve.
Always place your pins hanging off the seam edge as shown. This way, they are easy to remove as you sew.
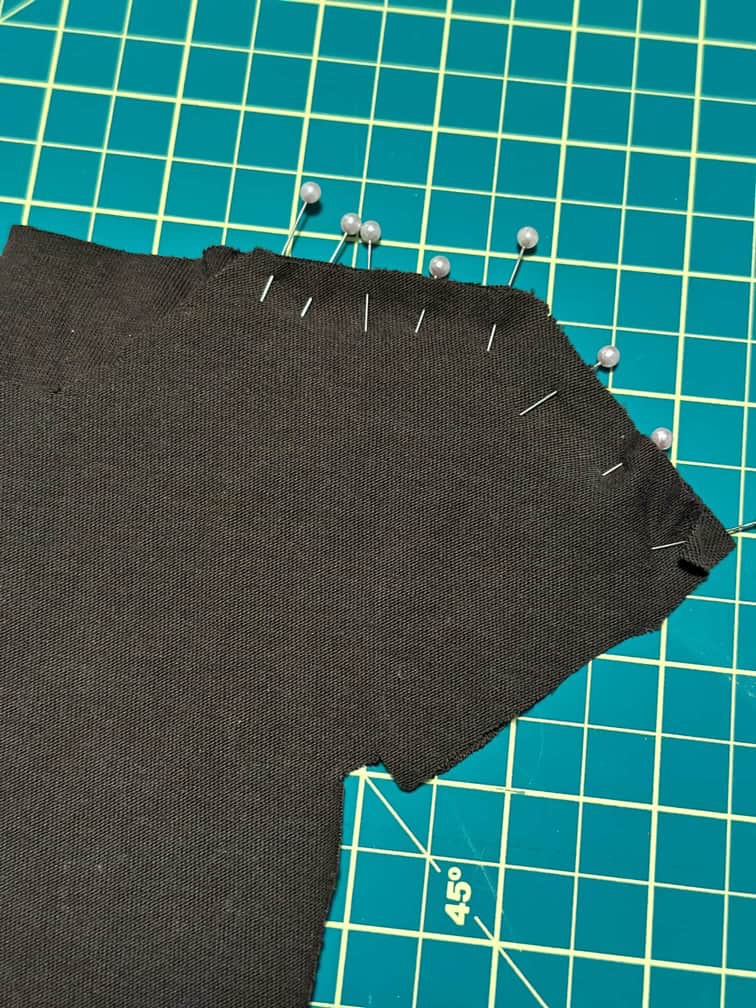
Stitch using a 1/4” seam. I am using light coloured thread so you can see my stitch lines, but you should find thread that matches your fabric.

Next, trim the seam in half to 1/8”. Zig zag or serge the edge.
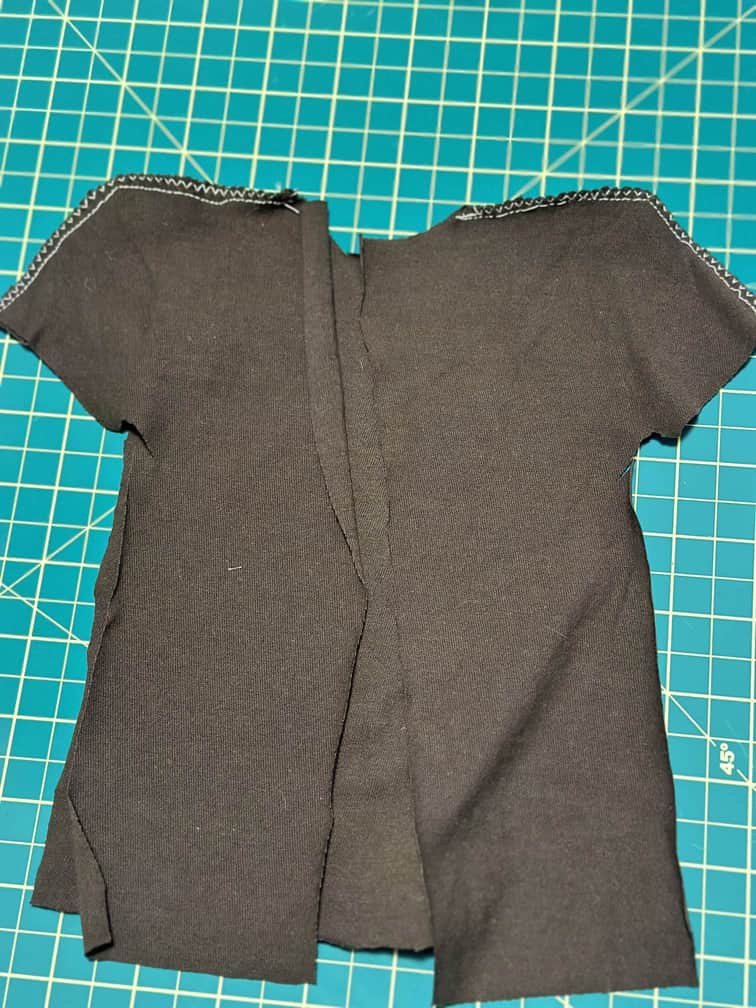
Now, since jersey knit fabric does not fray, you can omit finishing the seams if you want. I just think it looks cleaner, but it is not crucial, which is why I believe this dress can be sewn by hand.

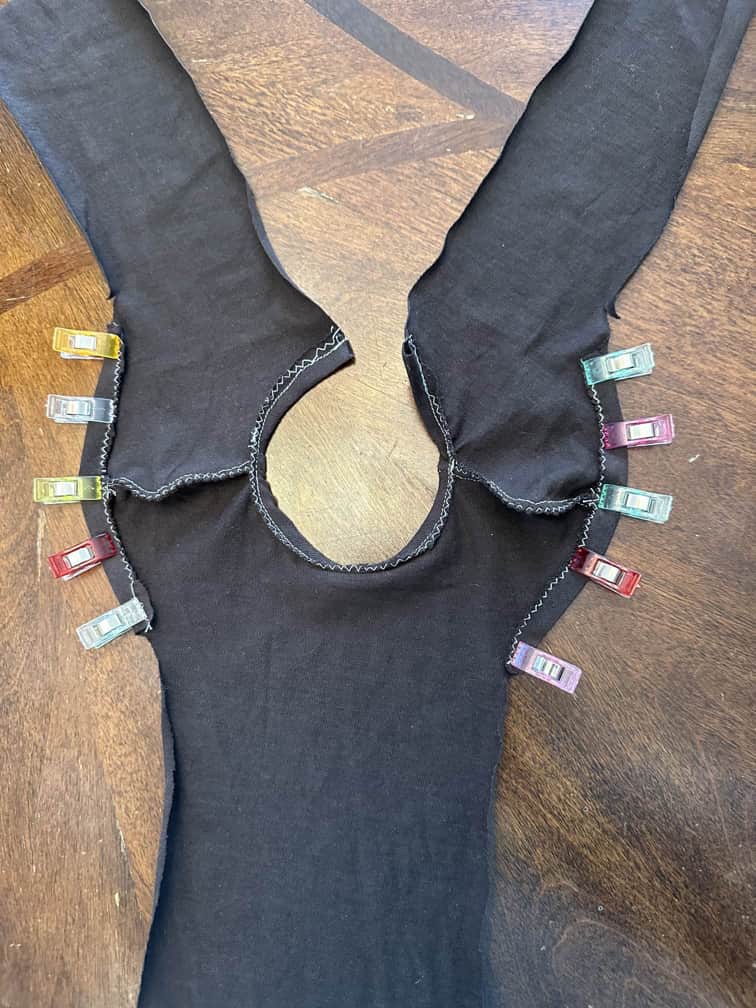
Zig zag or serge the neck line. Now using your iron and either pins or sewing clips, turn the neckline under 1/4”
This can be tricky, so take your time to get it to lay flat.

Stitch. Now zig zag or serge the sleeve edges.
Using the iron, fold the sleeve edge under 1/4” and either pin or clip. Stitch.

Pin the sides of the dress right sides together. Stitch using a 1/4” seam. Trim to a 1/8” seam. Zig zag or serge the edge.

Now zig zag or serge the bottom edge of the dress. Use an iron to turn the bottom edge under.
I like a wider hem with jersey knit fabrics, but you can do whatever you like depending on how long you want your dress.

Stitch to hem the dress.

I often do two rows of stitching on jersey knit hems.

Zig zag or serge the back of the dress.
As you can see, my needle skipped a few stitches here. It’s not a big deal as this was a tutorial dress, but I always recommend changing your needle out before starting new projects to avoid a dull needle. I also might have been able to get away with a universal needle for this fabric. I wasn’t too worried since it was just for the tutorial. Knits are always a bit finicky anyway.
Right sides together, pin the back of the dress. Measure about 4 inches from the hem and place a pin. Stitch up the back of the dress just to the pin.

Open the seam and iron it flat. I like to tack the seam down by stitching across the seam at the pink line on the bottom hem to hold it in place.
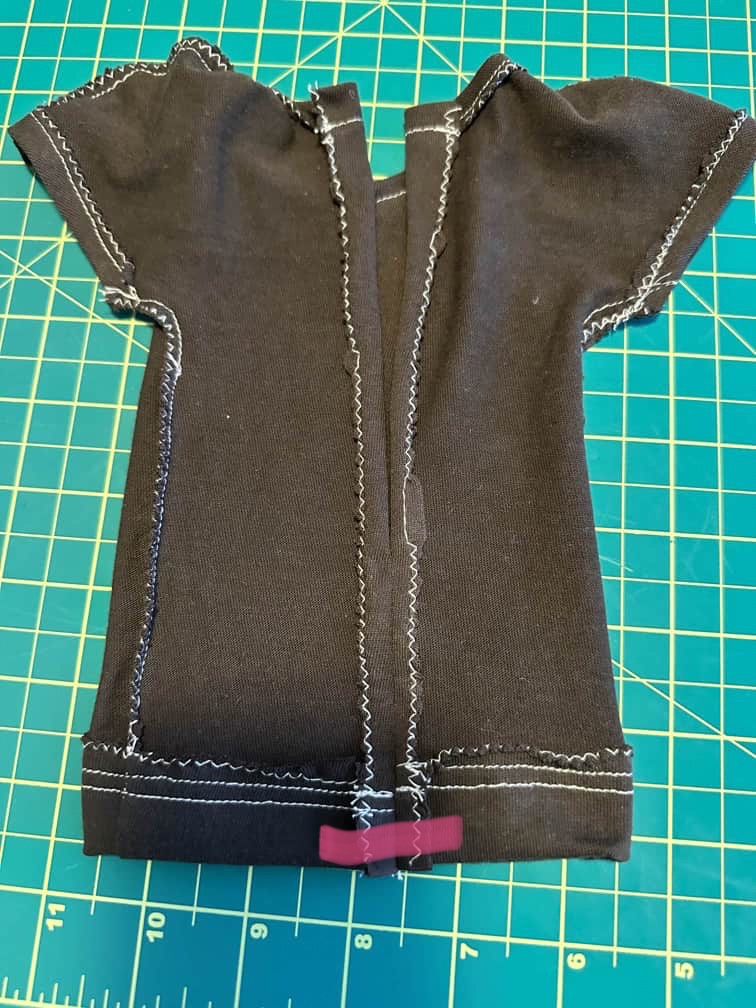
One one side of the back, attach the soft sided velcro. On the opposite side, making absolute sure it is placed properly (I’ve accidentally placed velcro on the same side of the fabric many times before), attach the rough sided velcro.

Pink is the soft velcro. Blue is the rough velcro.
And you are done!!
Okay, we can count that one as my rough draft. Lol! I was using really contrasting thread and some scrap fabric that wasn’t so great. I also had a dull needle. Sometimes, jersey knit fabric can be sewn better with a universal needle, depending on the weight and the weave.
Let’s make a few more to really put this pattern to the test!

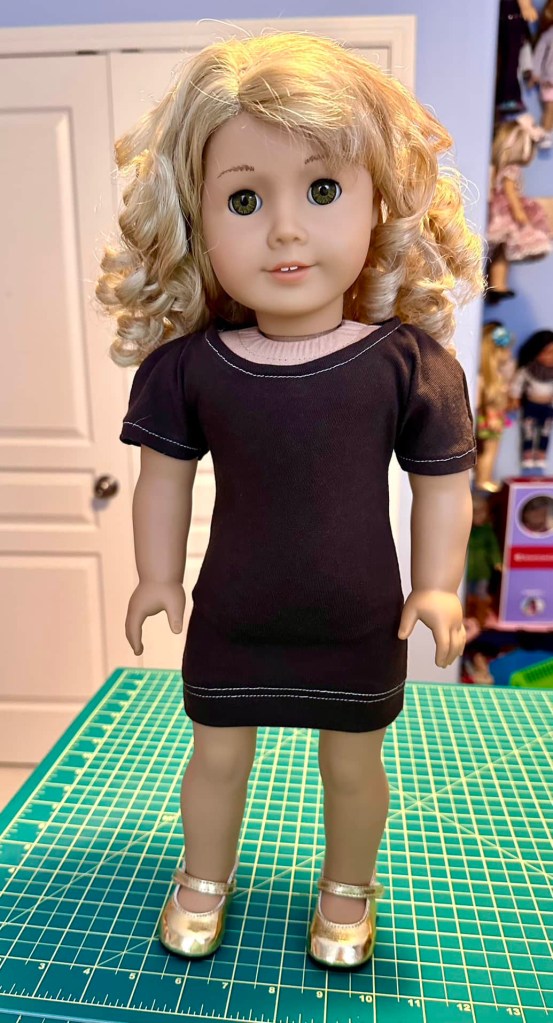
That’s better!!

This one I made by upcycling a tshirt so it had a pre-existing hem. I used a universal needle size 90/14 as the ballpoint needle was skipping stitches. The universal sewed like a dream. You just have to trial and error to find what works best. Don’t be afraid to switch needles.

You can make your dress as long, or as short as you like. I prefer shorter dress hems. I am forever shortening dresses that I find too long. It can make such a huge difference.
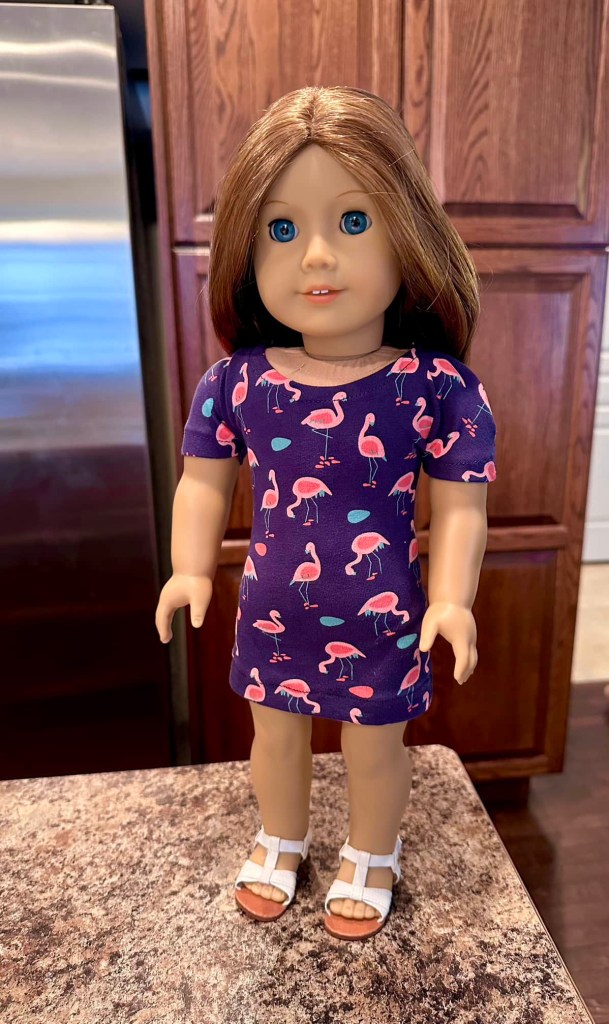
Here’s another I made to work out all the rest of the minor kinks. I love it!
This was another upcycle. The fabric is a bit thicker, and it doesn’t have as much stretch as the others, so it turned out a little more snug than the first two, which is why you have to be aware to add to the pattern if you must, but it’s definitely not a deal breaker. Caroline actually fits it perfectly with a little give even, so I really like the look.

I especially love that there are no sleeves to set in! I don’t hate sleeves. I will do the work to get them in there if I have to, but I love how simple this little dress is without having to mess with sleeves.

So cute!! 😊❤️

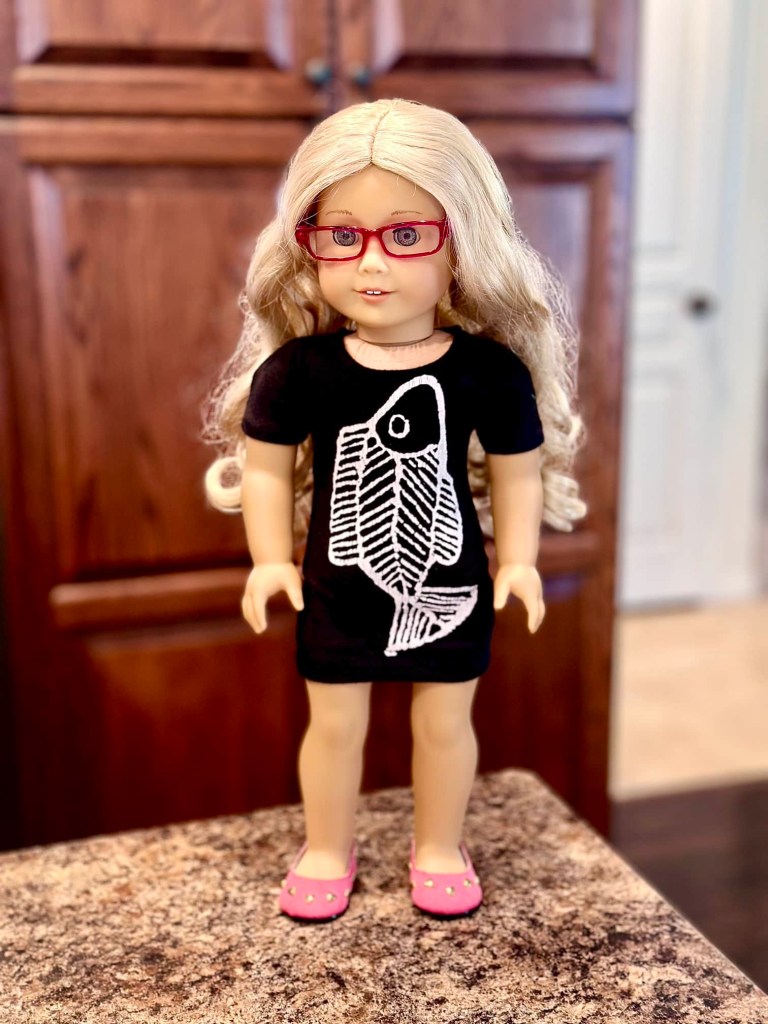
This one I used a flimsier jersey knit fabric just to see how it would turn out. It’s pretty cute!

You can accessorize these dresses however you like. I made a matching belt with a scrap piece of the same fabric. Then I attached a jump ring and an adorable scottie dog charm.

This pattern can also be easily shortened to make a simple tshirt. However, if you want a looser fitting tee, you must add some inches to the back of the pattern especially if you are using a tshirt type of knit which has less stretch.
I hope you enjoyed our free pattern and tutorial today!! I hope your Christmas went well and that Santa spoiled you and your dolls this year. 😊
For Christmas, we added two more Wellie Wishers to our collection which means we are only missing Ashlyn. We also added Zelia, one of three Hearts4Hearts dolls that we’ve been looking to find. 😊
They will probably get a close up on our Instagram soon if you want to check it out.
@fim_studios
Okay, go have a wonderful rest of your holidays and a Happy New Year!! 🎉
Leave a comment below!
❤️❤️❤️

These t-shirt dresses are so cute! I love the flamingo one the best!! Too bad I am not good at sewing, lol!
LikeLiked by 1 person
Thank you! I love that one too! I have been getting better at sewing over the years, but it definitely takes a lot of patience and practice. I really love the built in sleeve on this pattern. It makes it so easy! 😊
LikeLiked by 1 person
Love it!! So creative of you.
LikeLiked by 1 person
Thank you so much! 😊❤️
LikeLike