
Hi guys! We are here finally with the tutorial for Maryellen’s Retro Fridge! I tried to make this as simple as possible, so that anyone could realistically make one if they wanted. 🙂
Okay, this is a long one so let’s get started! 🙂
What you need:
Shoebox with attached lid (I used my husband’s size 12 Men’s shoebox. These boxes are pretty sturdy in order to hold shoes that big and heavy! LOL!)
Foam Board
Paint
One roll of salmon duct tape
Velcro or strong magnets (I used magnets found on those box flap type lids. You can also find them on the front flap of some small photo albums.)
Hot glue
Two small photo boxes or Christmas card boxes (I had a pair of small nesting boxes on hand. Just be sure the sizing on these is right to fit into the shoebox.)
Rectangular wooden box with lid (Optional. A small cardboard box with a lid will do, or whatever you have handy)
Small medication box (I used a polysporin box, but you could use an acne cream box, or a mini toothpaste tube box. I always save all the little boxes, because they are a nice size for doll crafting.)
White Model Magic or other air dry clay
Small styrofoam eggs (I got these from the Dollar store, and just painted them a tan colour.)
Styrofoam (optional) (Again, I was just using whatever I had on hand.)
Let’s begin!


This is the shoebox I used. 🙂
Start by cutting the edges from the lid of your shoe box. On the left side leave a small square flap. This will be the closure of your fridge. You can hot glue one of the magnets or some Velcro to this flap. (I didn’t do this, so I ended up having to attach a strap to mine at the end)
Magnetic strap to close fridge door.
Next, measure and cut out two V shapes from the foam board. Hot glue the V shapes to the top of the lid of the shoebox. I positioned one at the center top and one at the centre bottom. They should nearly meet in the middle with about 2 inches of space between. 
Using your duct tape begin covering the front of your fridge. You want it to be smooth without wrinkles, so do this carefully. When you come to the edge of the foam board V shape, be sure to stick the duct tape flush with the side of the V, and then move up over the top. This way the foam board shapes will pop out.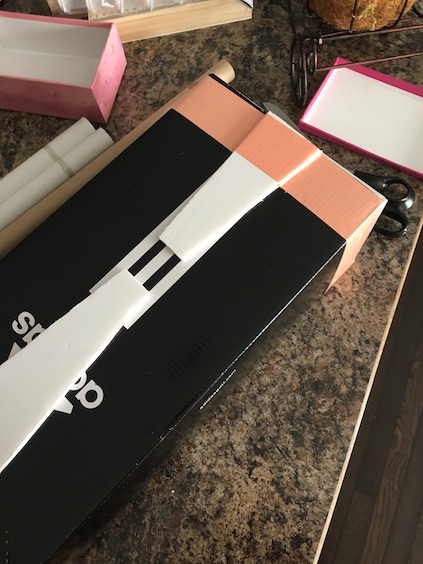
Keep covering your shoebox lid until you are done. When you come to the bottom of the foam board V shapes, you can clip the corners of the duct tape to help it lay flat. 

Once the front door of your fridge is covered, begin covering the rest of the shoe box in the same way.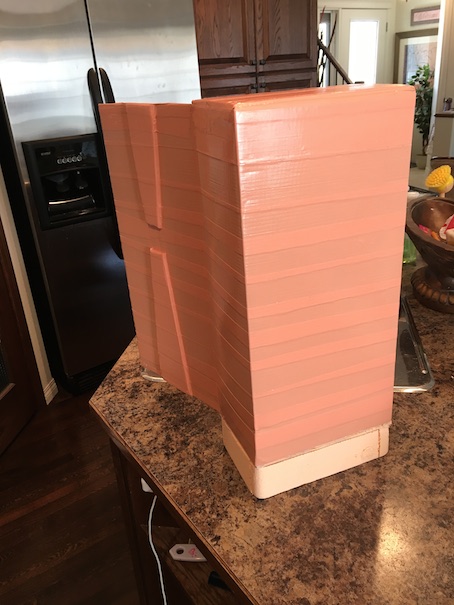 To add height to the fridge, so the door would open and close freely, I used some styrofoam blocks that I had on hand.
I just created a square, and hot glued it to the bottom of the fridge. 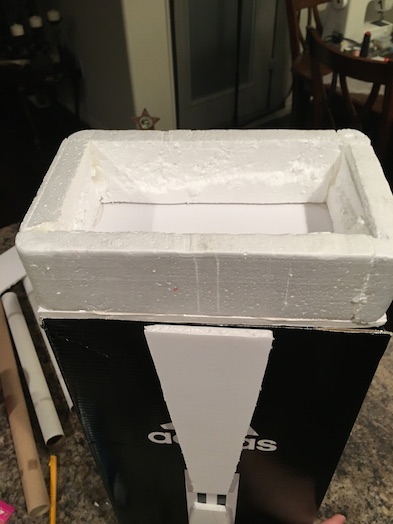
You could use peg legs, large beads, or a cardboard box, whatever you have handy. You must add a little bit of height to the fridge, or the door will drag along the ground. I painted the styrofoam in a salmon colour like the duct tape.
For the inside of your fridge door, you want to measure and cut a rectangle of foam board about 1/4 inch smaller on all sides. Hot glue this to the inside of your door. Your shoebox should still be able to close properly.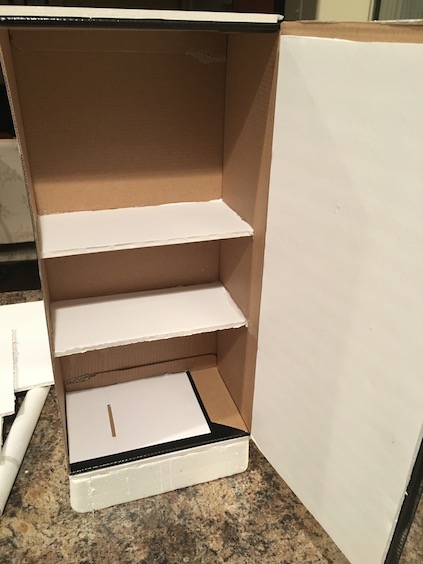
I was clearly measuring and placing my fridge shelves in this photo too, but that’s for later. 🙂 
Next, use white paint to paint the inside of your shoebox. This will be the fridge part. Leave to dry. Hot glue a piece of foam board to the bottom of your fridge as well. I did this part backwards, so my pictures don’t really match the steps. Here I had already hot glued my shelves in place. In retrospect, I would have glued my freezer in place first. 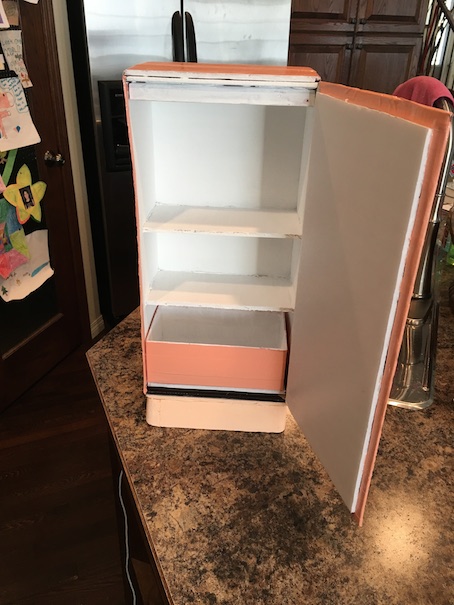
Stand your fridge up. Take your photo box and remove lid. Paint the lid white and hot glue it inside the top of the fridge where the freezer will be going. Next, be sure that your box fits, and that the fridge door can still close with it in there. The box will be your bottom drawer shown above. Cover all sides of your drawer with duct tape.
Now to make your freezer. Take your second photo box and remove the lid. Remove the top and bottom edges of your lid. Leave the left and right sides intact. This will create your freezer door hinge and closure.
Hot glue the right lid flap hinge of the lid to the side of your photo box. Test your freezer door to be sure that it opens and closes nicely.
Both sides of your photo box lid should have this hinge flap shown above. I didn’t do this initially, so I had to add a closure strap to mine in the end (below).
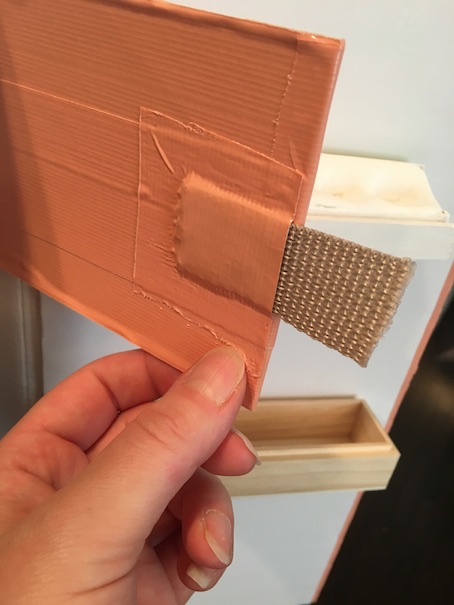
Paint your photo box white. Cover the freezer door with duct tape. Hot glue a magnet or some Velcro to the freezer door closure flap.
Note: Do not put duct tape on the inside of the freezer door closure flap. The magnet or Velcro will not stick to it very well.
Hot glue a magnet or some Velcro to the side of the freezer. Make a mark where to put it just to be sure that they both line up properly. Close your freezer door.
Hot glue your freezer to the inside of the shoebox fridge. Your freezer should not be snug inside your shoebox. There should be a gap on the left side where your freezer door closure is. If you like, you could add a handle to your freezer door too.
My freezer box was the smaller of two nesting boxes. It needs to be set back a bit from the door of the fridge to make room for the egg shelf.
I hot glued the freezer to the right side, and the back of the fridge only, with a gap on the left side. The freezer is not attached to the top of the fridge either. I had to leave enough space at the top to miss the front edge of that lid that I had glued in there.
Basically, be sure that you can still open and close the freezer door. Be sure that you can still open and close the fridge door too.
Measure and cut two shelves for your fridge from foam board. Make sure that the shelves are placed with enough height between to fit common doll foods. My top shelf below the freezer has a bit less height than the bottom one, but it still works.
Hot glue your shelves into place. To do this, I always place my shelves inside the fridge. Next, I make them level. Then I trace them all the way around with a pencil. That way your shelves will be perfectly placed. I find that when I am holding a shelf full of hot glue, it is much easier to have the lines drawn out of where to put the shelf before I place it.
Note: Your shelves should not be flush with the shoebox edge. Otherwise your fridge door will not close properly. Make sure that your shelves are a bit shorter, and that your fridge door will still close.
(In the photo above you can see the box lid that I glued at the very top of the fridge. As I said before, my photos don’t really match my steps. LOL!)
Inside the fridge door:
Now we are going to make the shelves on the inside of the fridge door. I found a rectangular wooden box at the Dollar Tree that I thought would work perfectly to make some shelves with.
It ended up being a bit too long for what I needed it for so I just cut it down to size, and added a small piece of foam board to the end.


If you don’t have a wooden box, any small rectangular cardboard box with a lid will work. You can also build little shelves out of foam board if you like. If you want to paint this shelf white you can. I just liked the contrast of the wood colour.
Hot glue the bottom shelf to your fridge door. Be sure that when you place this shelf that there is enough room for the egg shelf above. Also, and most importantly:
Be sure that when you close the fridge door, your shelf tucks in between the two shelves inside the fridge with plenty of room to spare. Otherwise you won’t be able to close the fridge door properly.
Now it’s time to make the egg shelf. Take the lid of your wooden or cardboard box. Place the small polysporin box inside your lid.
I had to cut my wooden lid down to size. Mark your Polysporin box on either side as shown and cut.
Paint your polysporin box white. Hot glue it in place inside the lid.
Take some Model Magic or other air dry clay, and fill your polysporin box. Mold it flush with the angled edge of the box. Take one of your styrofoam Easter eggs, and make several deep impressions in your clay all in a row. These will be your egg holders. Let dry completely overnight or longer. 
Paint the entire egg shelf white. Then hot glue it to the inside door of your fridge, making sure that the fridge door will still close once it is on there.
Your fridge door is complete. Paint your styrofoam eggs a tan colour and pop them in the holder.
Close the fridge door and hot glue a magnet to the side of your fridge that lines up with the closure clasp. You can also use Velcro for this if you want.
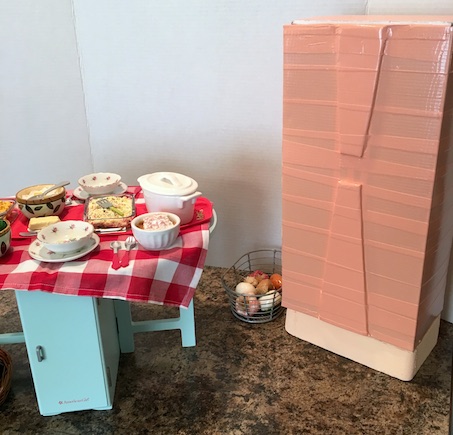
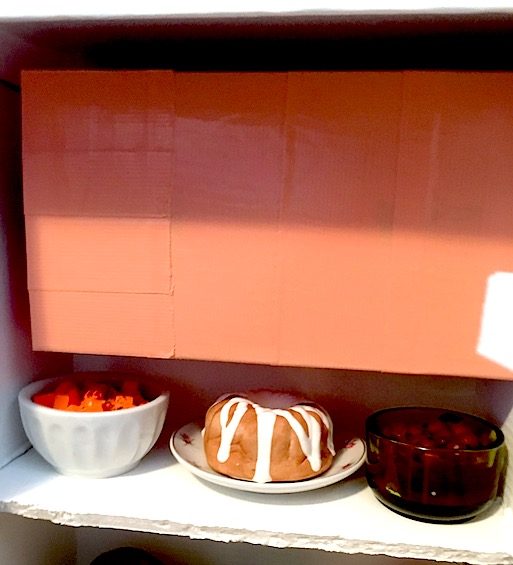
And you’re done! Time to fill your fridge with all sorts of goodies!! 
If you want to add some metallic 1950’s flair to the front of the fridge you can decorate however you like. Ours is pretty plain so far but we want to get some chrome duct tape or some metallic ribbon to add. 🙂 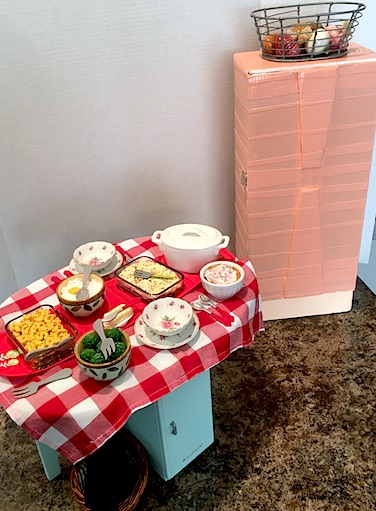
I hope that you enjoyed this tutorial!
If you have any questions or comments, please feel free to leave them below!
View more photos of Maryellen’s Retro Fridge.
Also stay tuned for some more awesome fridge tutorials, coming soon!
UPDATE: FRIDGE TUTORIALS
Have a crafty kind of day! 🙂
Leave us a comment!
❤ ❤ ❤

This is a really cute idea! I love your blog! Will you check out my blog?
~Kaylyn
kaylynsworldblog.wordpress.com
LikeLiked by 1 person
Thanks! I will go check it out now! 🙂
LikeLiked by 1 person
You’re welcome! Thank you so much!
~Kaylyn
LikeLiked by 1 person
Great fridge! I love how you used easy to get supplies. Well done!
LikeLiked by 1 person
Thank you! We always try to use supplies that are easy to find because we have a lot of little girls on our block who follow our blog who can’t always get to a store. 🙂
LikeLike
Keep an eye out in the jewelry section of your craft store, you might find a cool metal piece for the front decoration there!
LikeLiked by 1 person
That’s a great idea! I’ve been looking everywhere! LOL! 🙂
LikeLike