
Hi everybody!! I hope you all had a great break and are ready to get back at it! Our homeschool is back in session, and we are so excited for the new year!
During break, I have been so busy overhauling all of our doll stuff as well as my craft room. This means, dare I say it? We are going to be hosting some giveaways! Definitely stay tuned in the very near future for that!
We are also super excited because we just got the news that we are getting a new puppy! Our little chocolate yorkie Teo is getting a baby brother! His name will be Niko and we can’t wait the two months until he is ready to come home! He is a chocolate yorkie parti, and he is so cute, so stay tuned for new baby doggo pics too!!
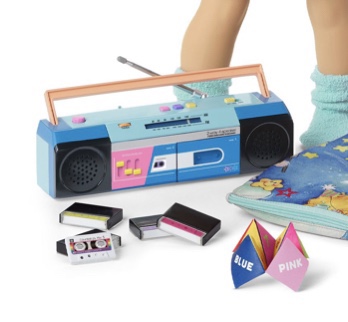
Okay, enough news, on to today’s craft! Ever since Courtney came out, we have been oohing and ahhing over her collection. 😍
From her Carebear pj’s and sleepover accessories to her arcade game and her adorable Pacman lunchbox to her sweet little Caboodle, we have had to evoke all the willpower of the gods to keep from just throwing down and buying, well pretty much everything.
Courtney’s boombox was no different!

Did you have a boombox growing up? We definitely did, but I have to say it wasn’t cute colours like Courtney’s is. Ours was simple grey and black, and besides playing cassette tapes, we would also hide it under my brother’s bed and record his conversations with his friends. LOL! We thought we were ingenious spies. 😝
Anyway, today we are going to make an adorable boombox of our very own, so that our dolls can also rock out to beats, and Get in Shape Girl as well as play spies, and hide under their siblings beds.
Right, let’s get started!
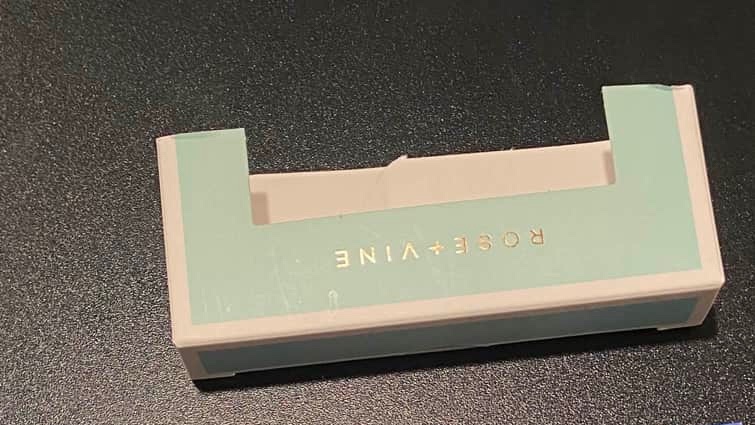
Okay, so this Christmas my husband came home from Costco with electric toothbrushes for everybody.
Why am I telling you this? Well, when he opened them up, inside were a bunch of extra toothbrush heads. They looked like this.
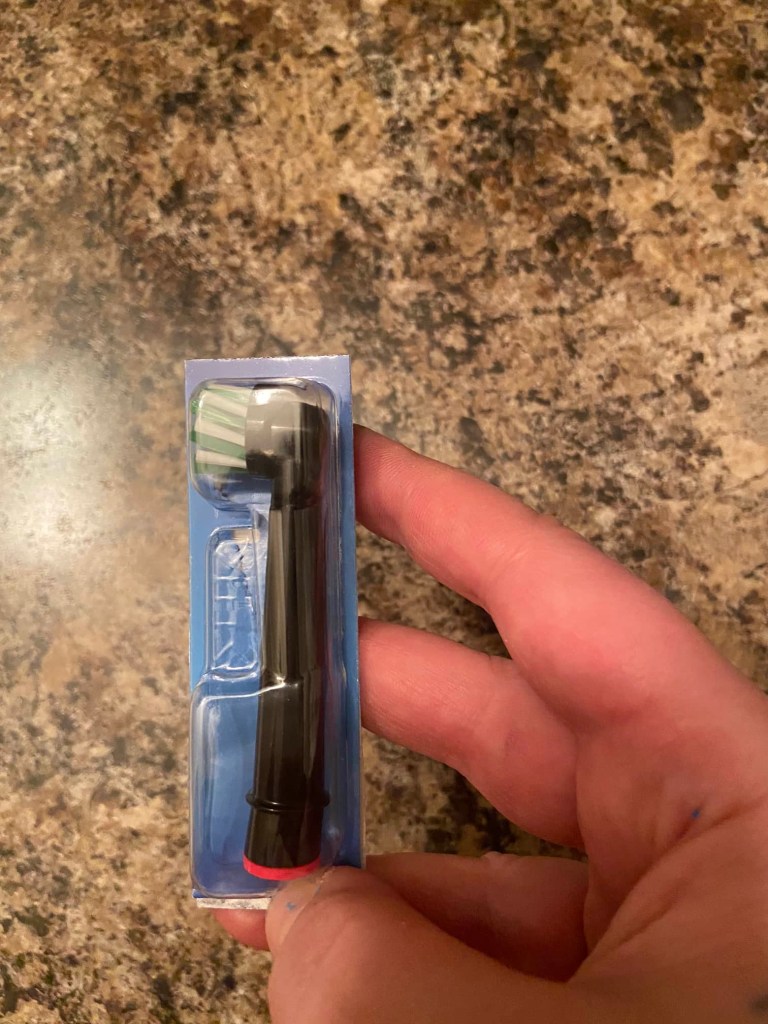
Take off the backing and remove the toothbrush and you have this.

Now most people would just toss these in the recycle bin, but not me. I saw these, and my weirdo mind immediately went, BOOMBOX!!! Yeah, I don’t know why I think this way. 🤷🏻♀️😂
So let’s begin.
What you need:
Electric toothbrush packaging. (If you don’t have this, it’s okay. A regular box would work just as well, probably. I was challenging myself, mostly. When I saw the packaging, I was like, I wonder…Is it possible?)
Craft foam sheets

Hot Glue
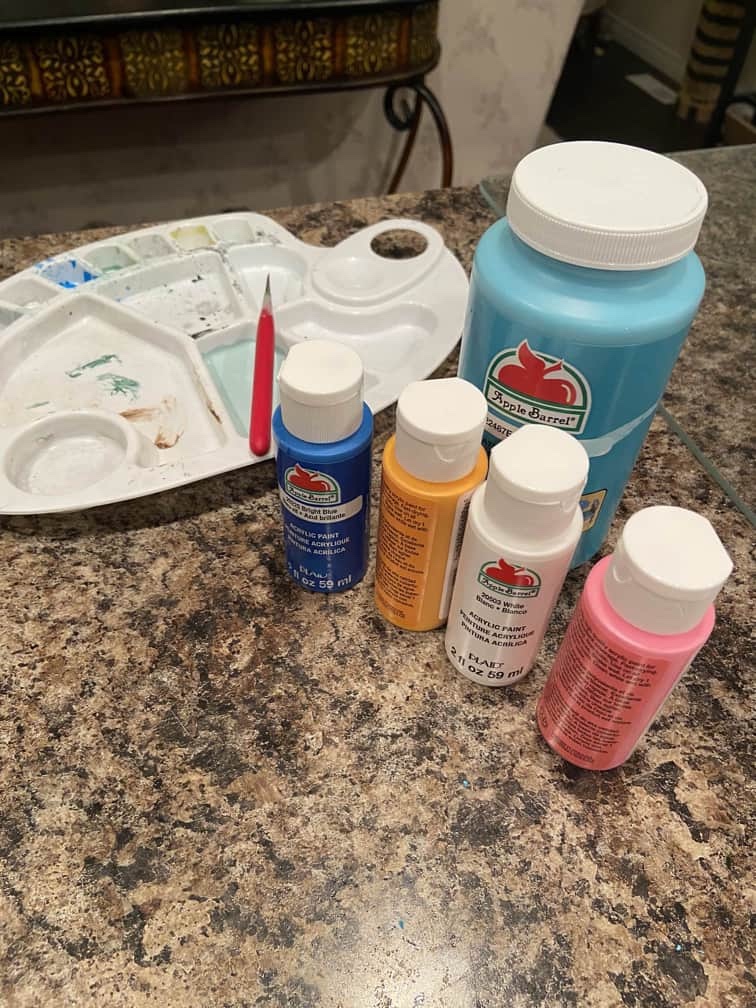
Paint
Small box
Scissors
Tissue/cotton fill
Sharpie marker
First, paint the inside of your electric toothbrush packaging. I painted the inside of the plastic, because I didn’t want the paint peeling off.
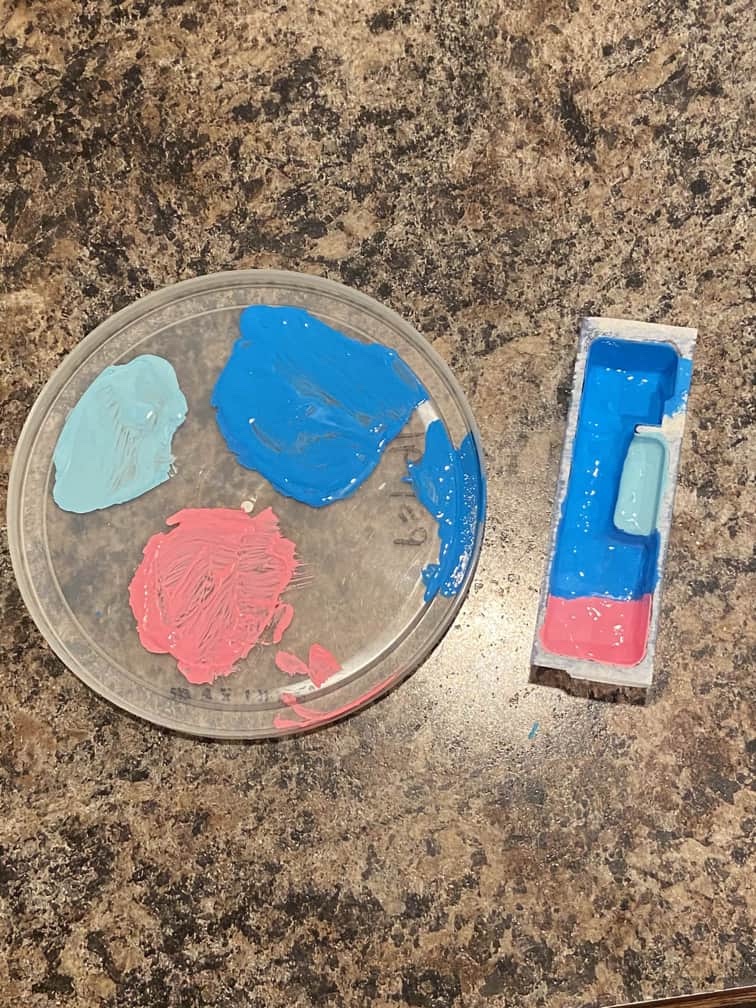
I tried to mimic the front of Courtney’s Boombox.

If you are just using a small box, you can paint it in a similar way.

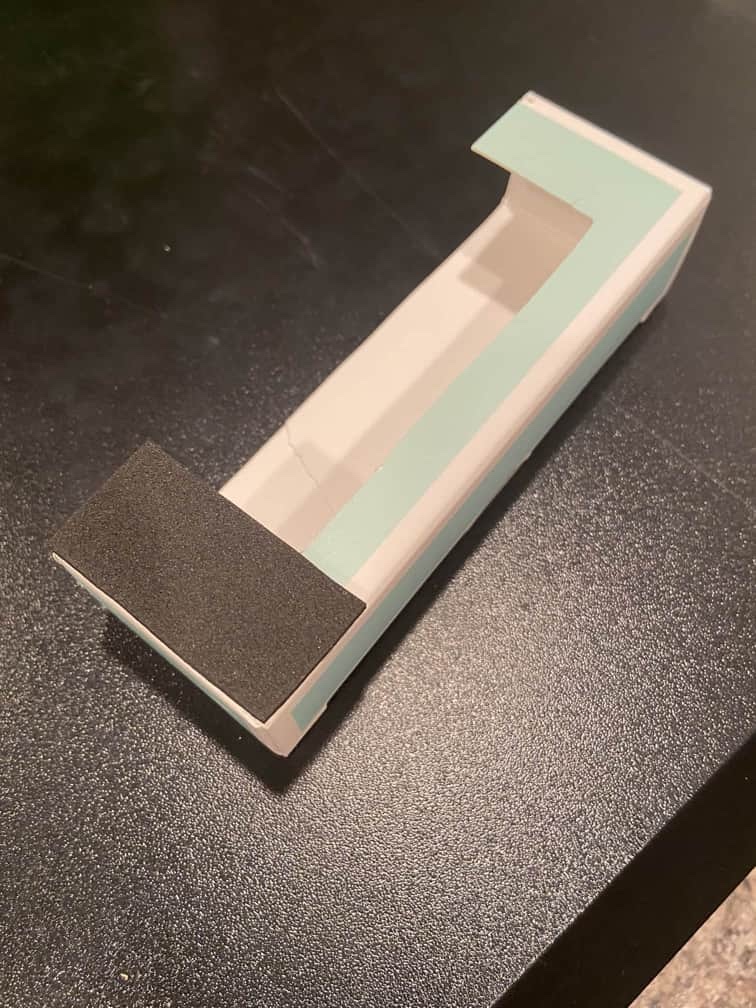
Next, I cut the box to size, making sure that my newly painted electric toothbrush packaging fit in the front.
To add details to the front of the boombox, I used craft foam.
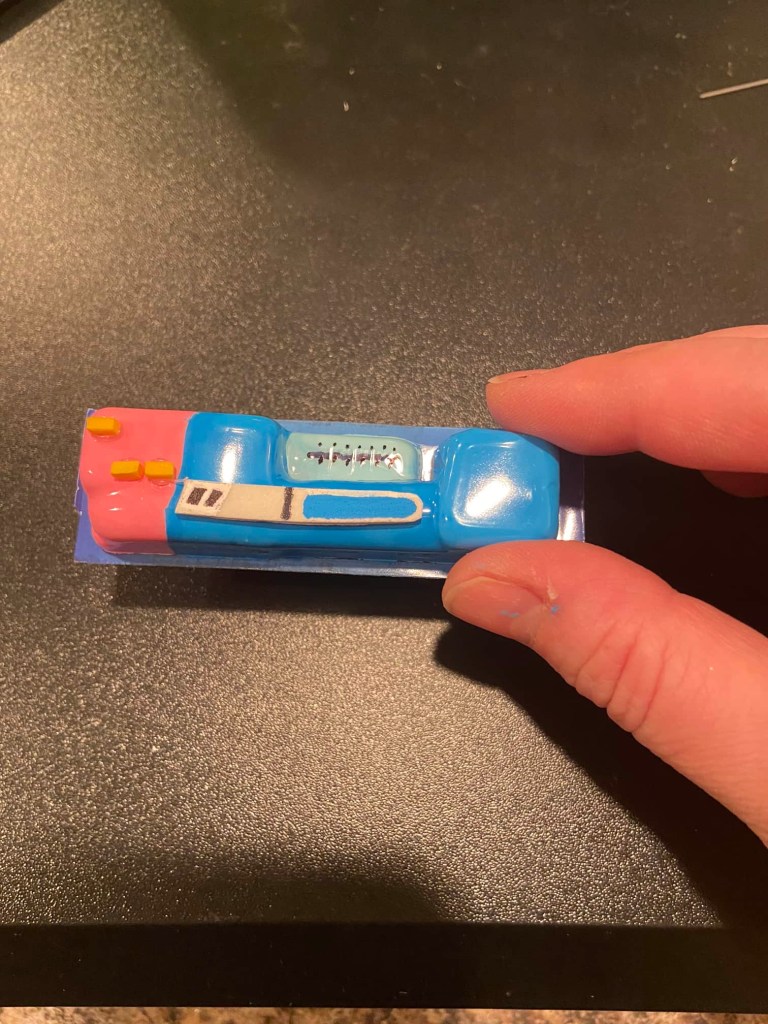
I used a strip of white foam that I painted some details on. I also used yellow foam for lever buttons. I used a Sharpie marker to add in the finer details.
On the box, I added squares of black craft foam for the speakers. I used a hot glue stick and a thread spool to create round indents in the craft foam.


Next, I used a black Sharpie marker to darken the speaker leaving the round parts lighter. You could also use black paint for this.

Add dots to the circles.

I filled the front insert part of the boom box with bathroom tissue so it would be a bit sturdier. You could also use cotton fill for this.

Then I hot glued a piece of cardboard on the back.

Paint the boombox blue.
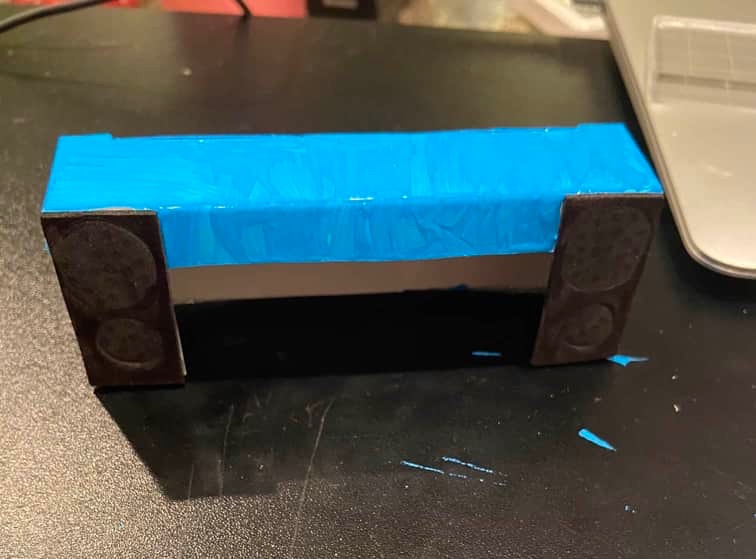
Hot glue the front insert piece of the boombox inside the box piece.

At this point, I stuffed the entire thing with tissue.

Then I cut a piece for the top of the boombox. I just used the top part of the box I had.

Hot glue the top of the box on.

Paint it blue.
Okay, at this point I glued buttons and a handle on the boombox without taking into consideration that I should have painted the green bit on the top first.
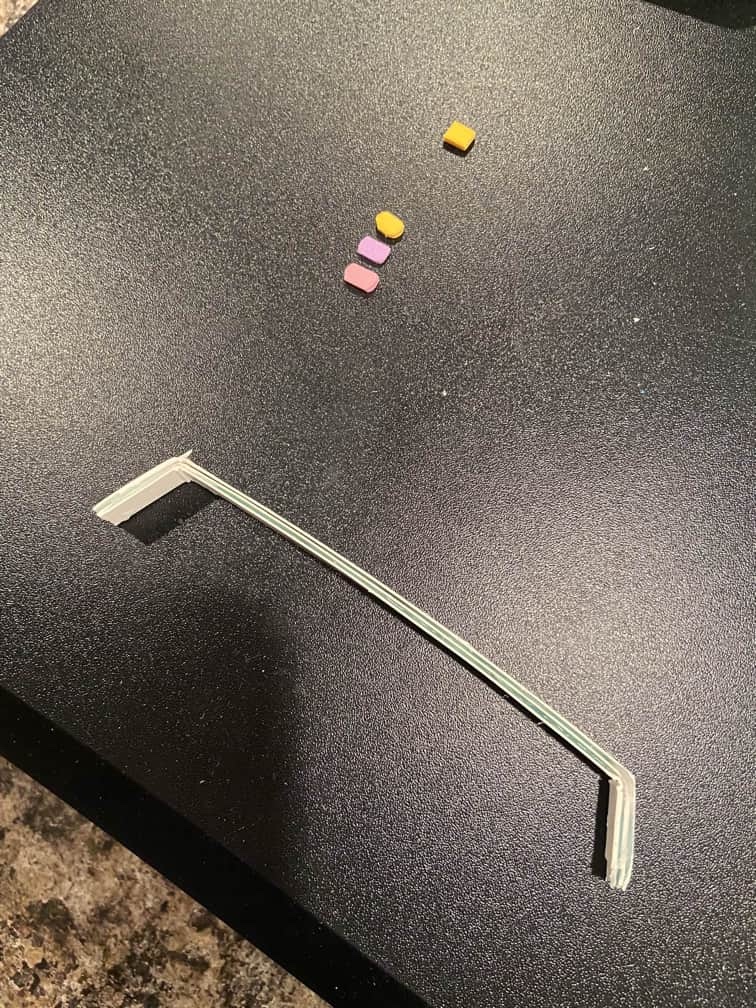
The buttons are cut from craft foam and the handle is three layers of strips cut from the leftover bits of the box I was using. Hot glue in place.

Here I started painting the handle, when it suddenly hit me. Hang on a second!
The top of the boombox is green! 🤦🏻♀️ Oops! Oh well, I used a tiny detail brush to paint around the buttons and fix my mistake. Then I finished painting the handle.
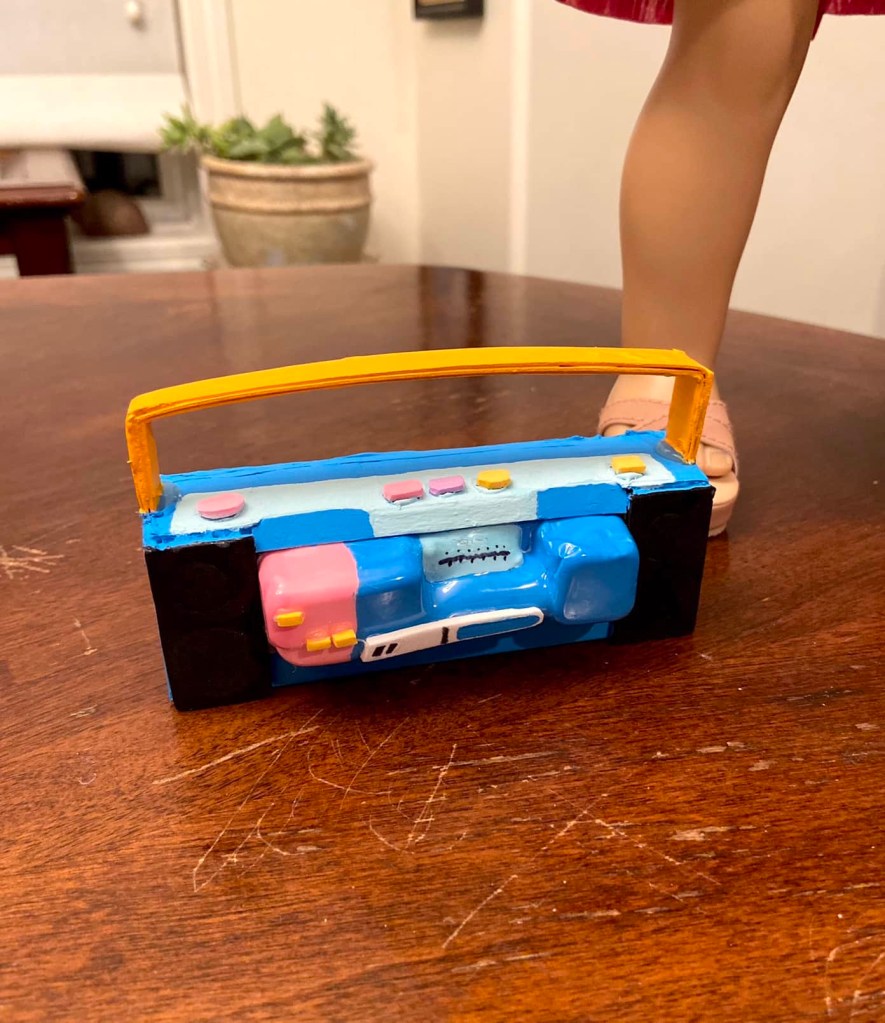
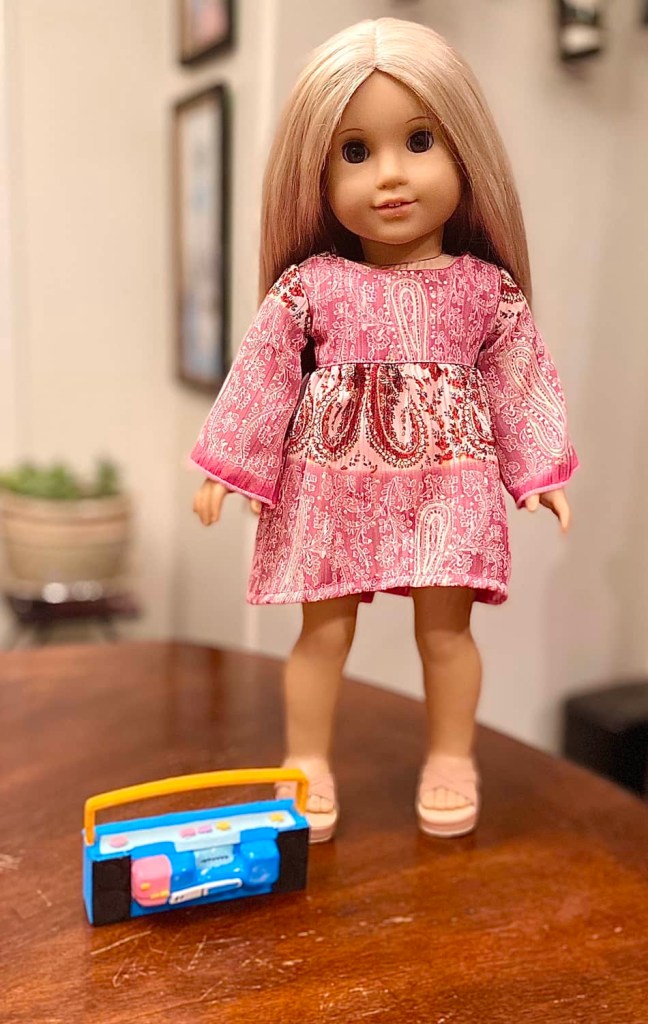
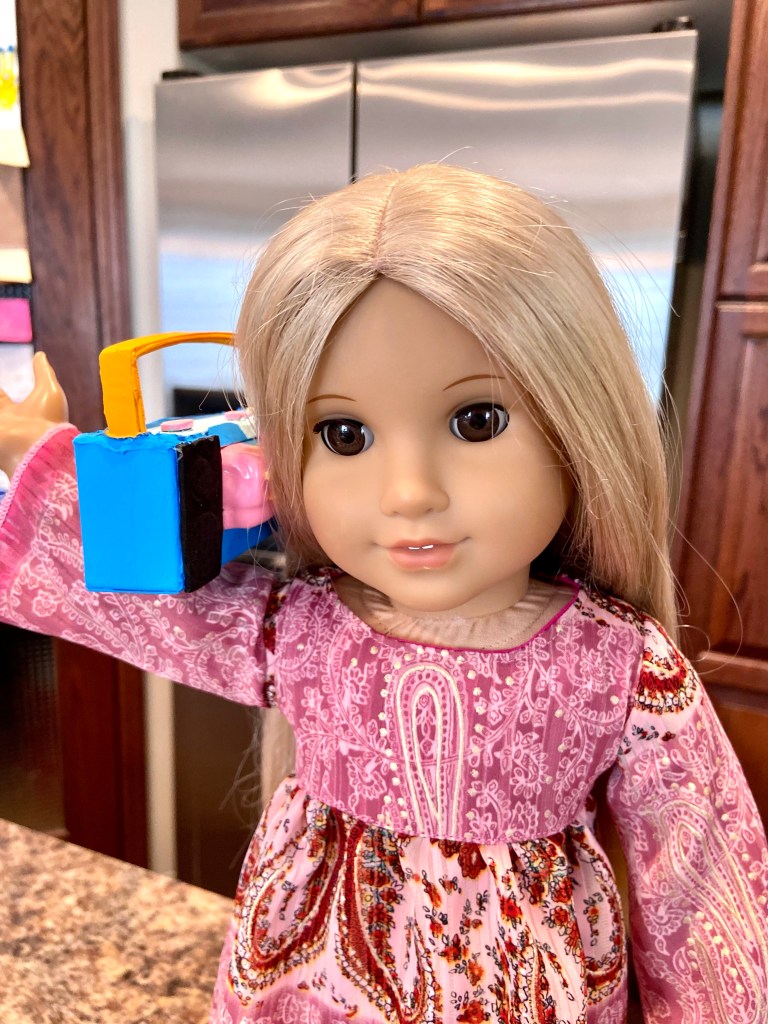
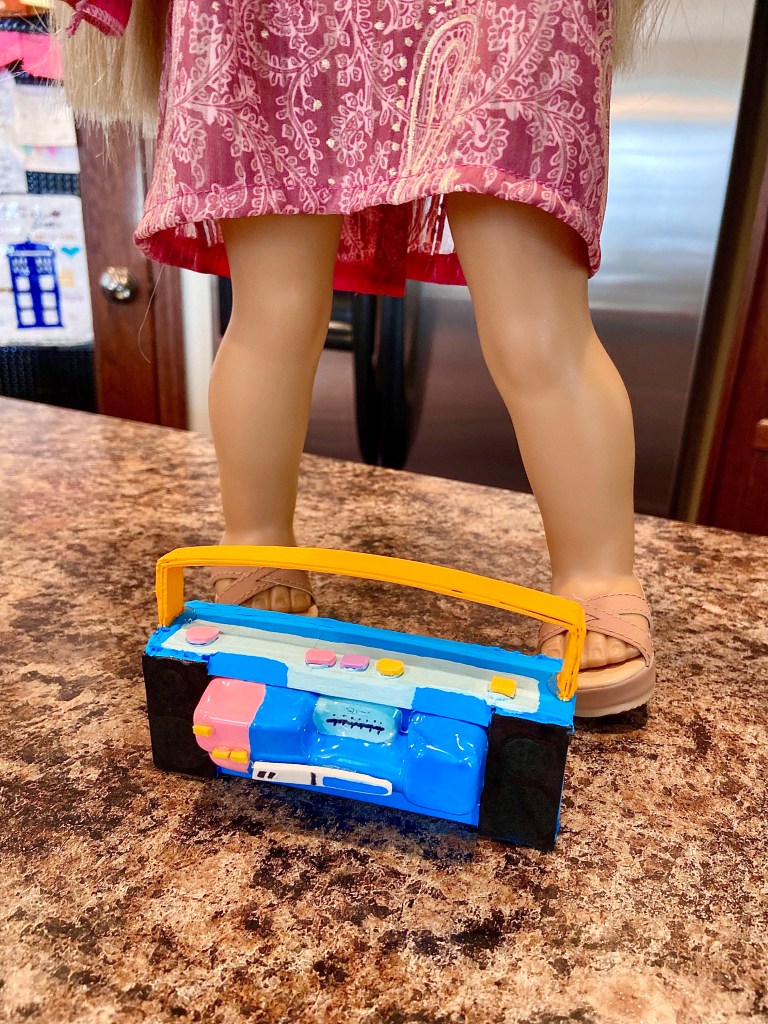
And you’re done! How cute is that!!

Now Julie and the other dolls can listen to music 80’s retro style on their new boombox!!
😍❤️❤️❤️

We love this craft! Sometimes a lightbulb goes on in my brain, and things just come together easy peasy. Other times, well, it can be an epic fail. Lol! I am so tickled pink that this was one of the easy peasy times!

I hope that you had just as much fun as we did crafting today! Stay tuned for all the fun that we have planned! I feel like it’s going to be a really good year!
Leave a comment below!
❤️❤️❤️

Your boombox is so cute! And I love how you used recycled materials ❤️
LikeLiked by 1 person
Thank you so much!! We love recycling!! 😊❤️
LikeLiked by 1 person
You did a great job on the boombox! My dolls would love it! Also I love the dress Julie is wearing! Have a great day! 😀
LikeLiked by 1 person
Thank you!! It is such a cute must have for any 80’s fan! When we saw it, we knew we had to make it! 😊
LikeLiked by 1 person
I wanted to add that her dress is so cute!
LikeLiked by 1 person
Thank you! Her dress is the Swing Dress pattern by Sodapop Street on Pixie Faire. This is one of my favourite dress patterns. I upcycled it from a women’s boho skirt! 😊❤️
LikeLike
Great job in your vision and creativity!!
LikeLiked by 1 person
Thank you so much! We try to find unique crafts to make and we love when we can make something from nothing! ❤️❤️❤️
LikeLike
Adorable! And I love the dress!
LikeLiked by 1 person
Thank you!! I made that dress last year! So pretty! ❤️
LikeLike