

Hi guys!!
So I’ve been thinking a lot about my blog lately, and the fact that I’m still injured, and I’ve decided that in order to continue to enjoy my blog world as well as the doll world, I need to set some parameters for myself.
The thing is, I’ve always prided myself on going the extra mile, creating these mega projects, Mars Habitat, Rainforest house, Grace’s bakery, etc. even the mega dollhouse. However, being injured as I am has been a huge struggle for me in that my mindset became, since I can’t go the extra mile, I might as well not do it at all.
What kind of thinking is that??!! I mean, even writing that makes me cringe at myself, but that’s exactly how I started to feel, and it was putting a damper on absolutely everything in my life! It became, well since I can’t have a spotless house, why even try? Since I can’t wear my nice clothes (I’ve been restricted since any fabric even remotely touching my leg was uncomfortable) then I will just wear this ratty old tshirt nightgown for the rest of my life.
Or my personal favourite, since I can’t write a thousand words a day, I just won’t write anything at all. That mentality was starting to seep into everything in my life. I wasn’t sewing or creating anymore. I wasn’t writing. I stopped cooking. Everything went the wayside because it wasn’t worth it if it couldn’t be perfect. Ha!
So let’s just chuck that in the garbage, shall we? Here’s what I’m going to do instead. Bite-sized pieces. No more major projects, or at least not at this time. For now, and as I continue to heal, I’m going to just create whatever little thing I fancy, and not worry about it being some grand design. I want to prove that small projects can be just as much fun as grandiose ones. Making what I can manage will allow me to heal, but also help me get back to what I love, and that’s creating for our dolls!
So what do you say? Want to make some random little doll teapots with me today? Lol! 😊
Here’s what you need:

Headache pill bottle, empty.
You will also need:
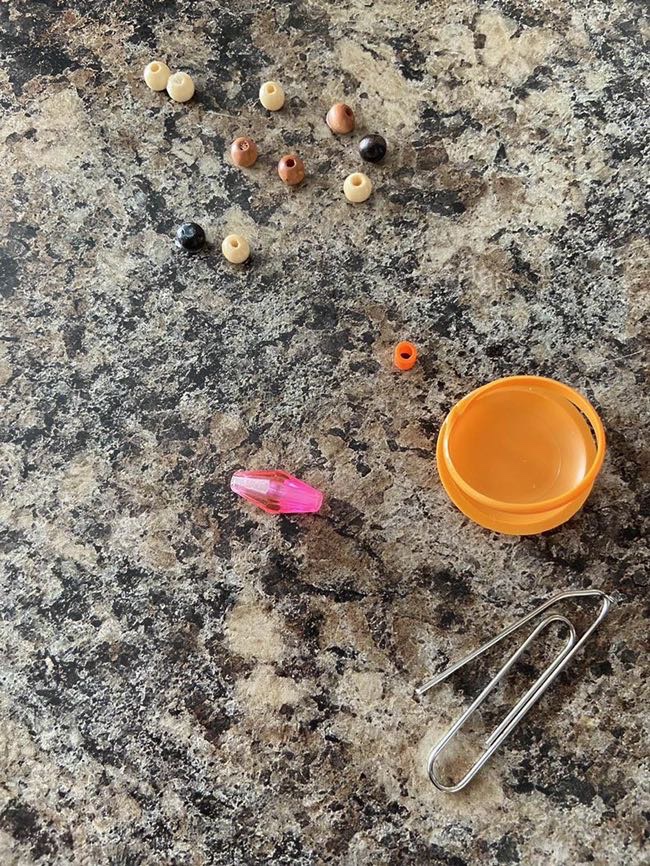
Paper clip
Small wood beads
Perler bead
Diamond shape bead
Juice pull tab
Hot glue
Exacto blade (parental supervision required)
First, you must remove the label from the pill bottle. We used goo gone for this, but hot soapy water works too. Next, you must remove the top of the pill bottle where the threads are. We used an Exacto blade. Parental supervision required. However, afterward we realized that we could just use the bottom of the pill bottle too which is why we ended up making two teapots.

Discard the piece with the threads. Then cut your pill bottle in half using the Exacto blade. I mark the halfway point all the way around, and then cut carefully. My teapots are about 2.3cm, or just under an inch high with a diameter of about 3.5cm, or nearly 1.5 inch.
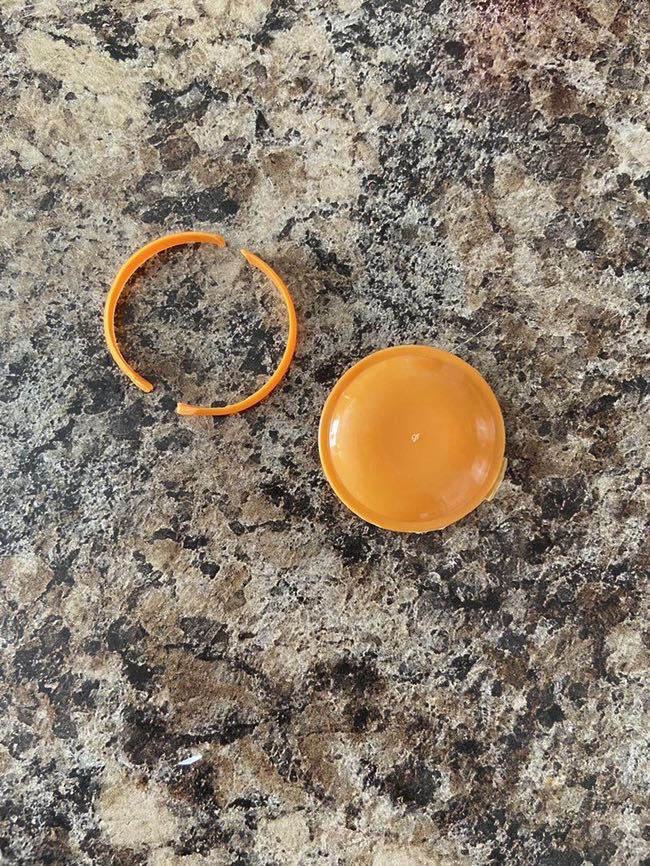
Next, snip the ring from the juice pull tab and cut it in half.

Using hot glue, fix the flat juice tab to the top of the pill bottle. Hot glue one half of the pull tab ring to either side. Adhere the perler bead on top with hot glue as well.

Trim down the handles on either side.

Next, put a large blob of hot glue where you want your teapot spout to be. Let it cool a little, then adhere the diamond bead to the side of the teapot.

I know the big blob of hot glue looks terrible now, but don’t worry! It will get better! Lol! 😅
You can now connect the handle. The first teapot we made, we used a long bead, and just hot glued it in place. If you don’t have any beads you can just use half of the pull tab ring as your full teapot handle. Anything goes here really.
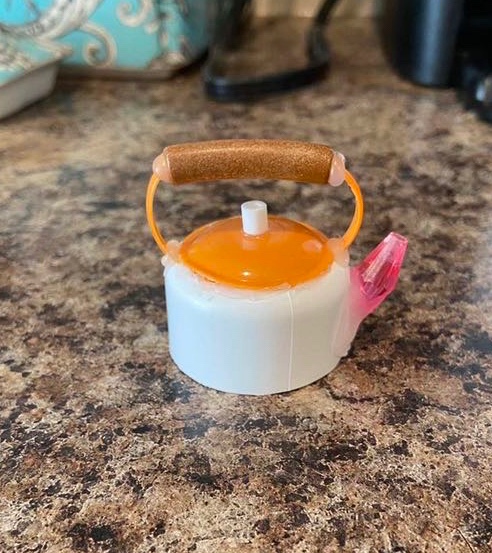
The second teapot we made, we used small wooden beads and a bit of wire paper clip.

Hot glue beads onto a piece of the paper clip.
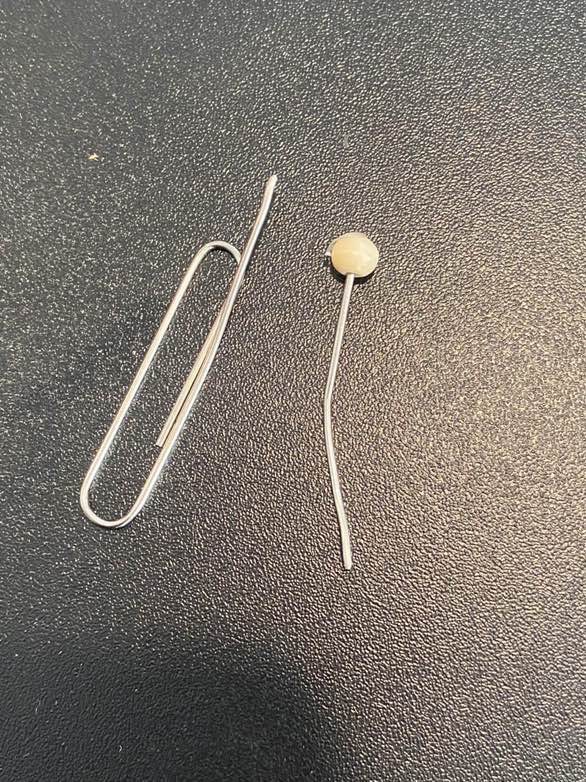
Once all the beads are on there, trim the paper clip wire and hot glue the beaded handle piece in place.

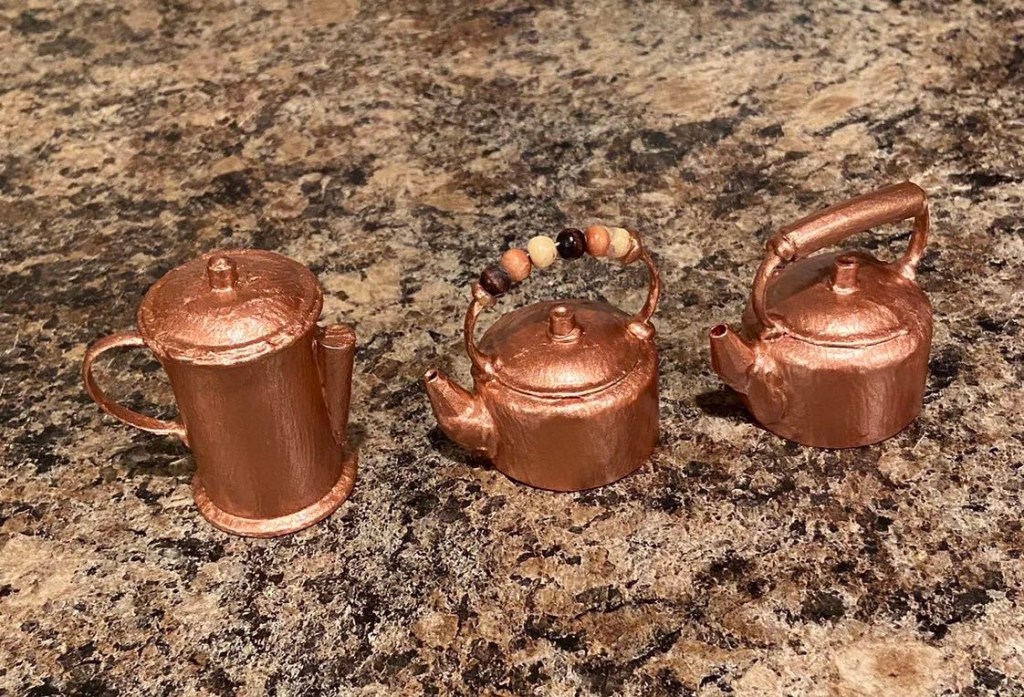
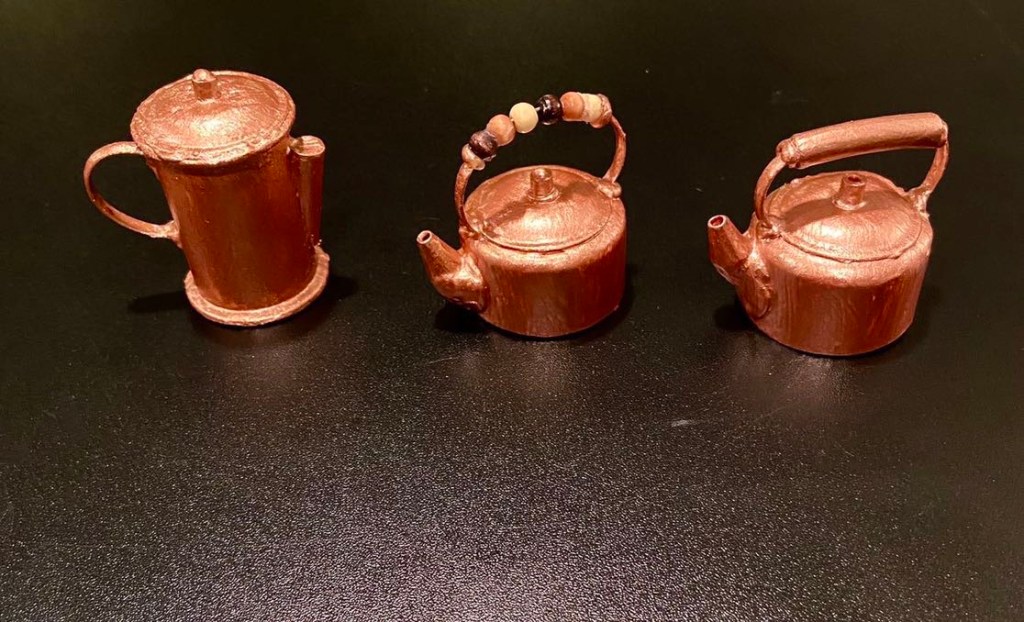
These turned out so cute, and actually pretty sturdy! All that is left is paint! We chose a rose gold colour, but you can paint them whatever colour you want. We use paint brushes, but you can use spray paint if you like. We left the round wooden beads on the second teapot in their natural colour.

BONUS CRAFT
Coffee Pot (camp style)
What you need:

Thread spool
Straw medium to jumbo slurpee
Juice pull tab
Perler bead
Hot glue
Scissors
Start by cutting the straw on a diagonal as shown.
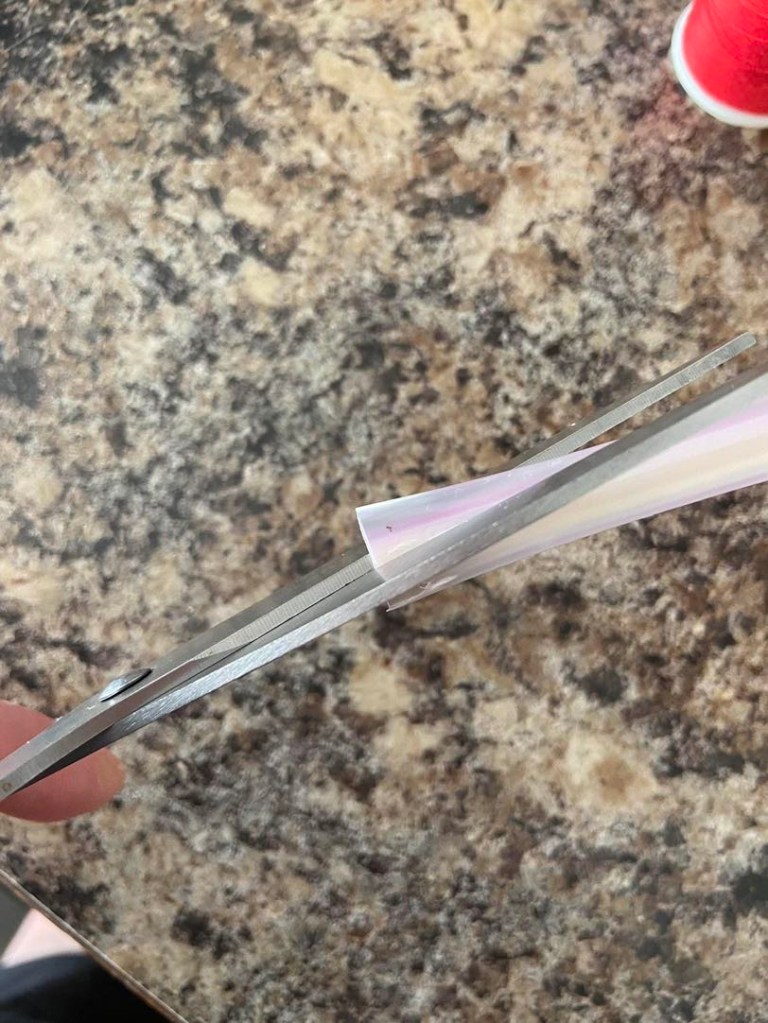
You should end up with a piece like this.
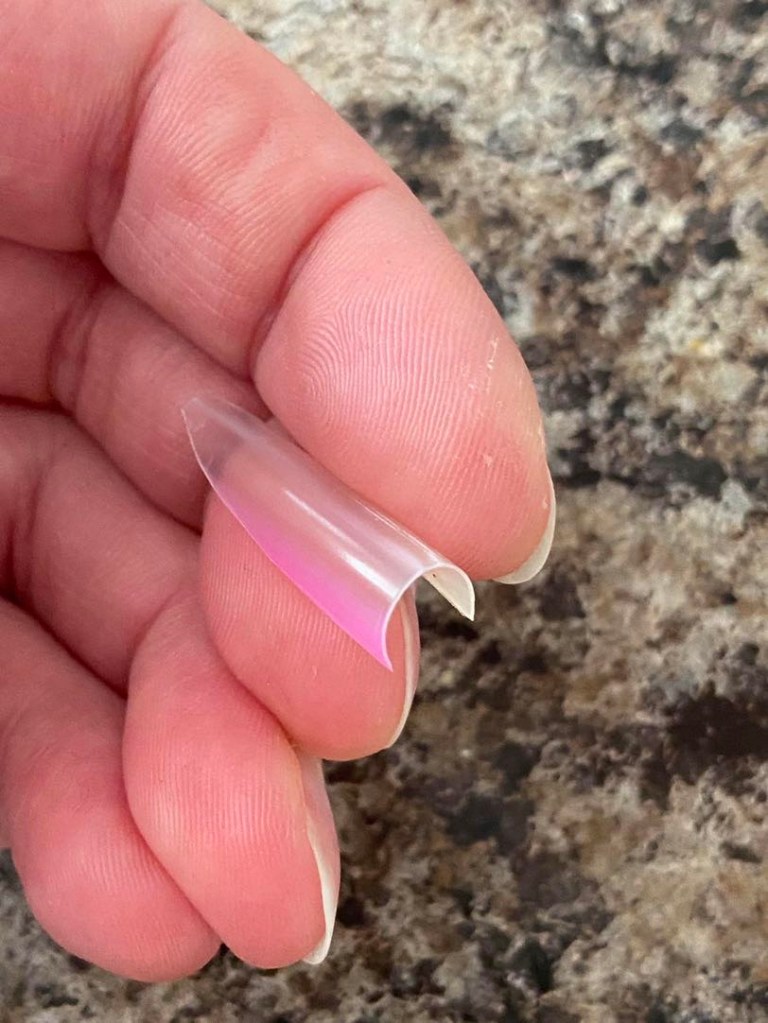
Snip the ring from the juice pull tab and cut it in half. Save half for the pot handle.
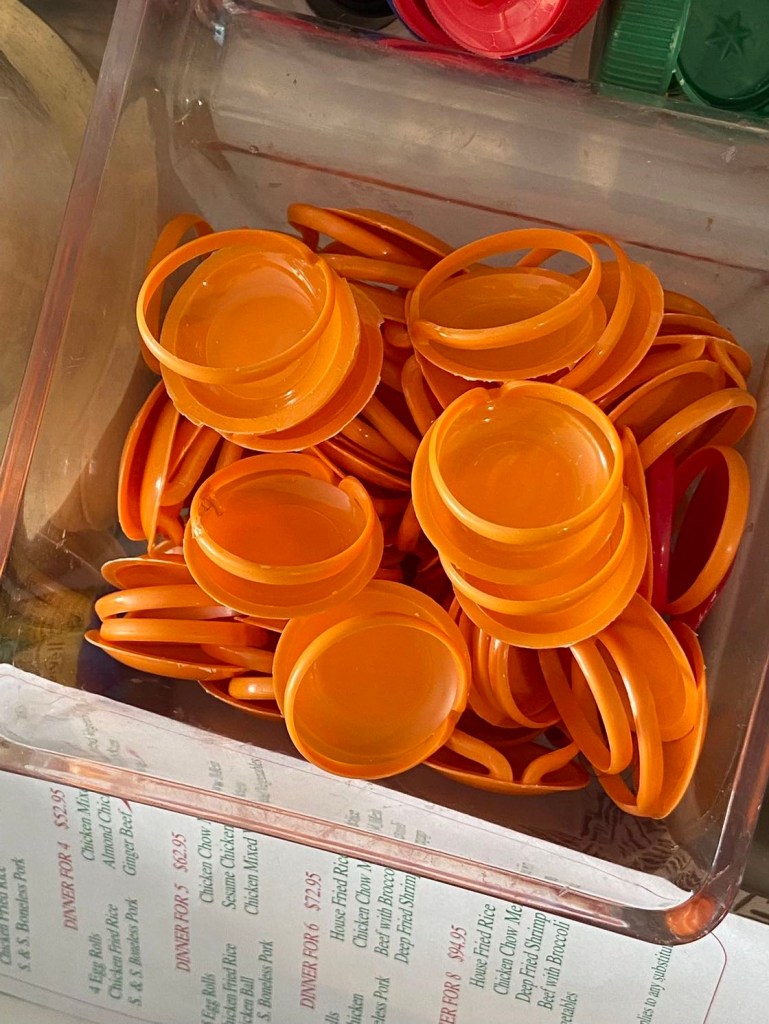
I knew I saved all these juice tabs for a reason! Lol! Little Miss also likes using them as plates for her Littlest Pet Shop pets.
Assemble your thread spool coffee pot with hot glue as shown.
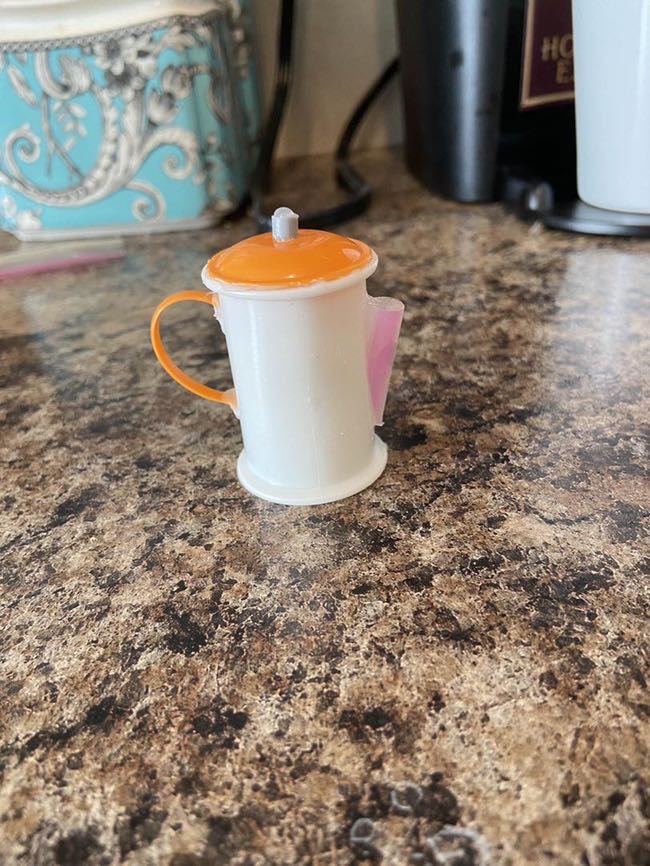
Use the flat juice tab for the lid, the angled straw for the spout, the pull tab ring for the handle and the perler bead on top.

We have this Our Generation camp coffee pot in both silver and blue, so we decided to paint ours the same rose gold as the teapots.

Be sure to give your pots two coats of paint at least. We stuck ours on a dowel to paint it easier. Let it dry, and you’re done!
Make as many as you want in any colour you want!

Let us know in the comments what you think! I love the simplicity of this little craft, and I’m looking forward to more simple crafts just like it!
I do hope everyone is staying safe, and I hope that we could bring a bit of a smile on these dark days. We love you guys! This is, and always will be our happy place, our place to unwind, and enjoy the little things. I hope it is for you too.
That’s all for now! Keep smiling, and have a crafty kind of day! 😊
Leave a comment below!
❤️❤️❤️

I’m not injured but I kind of know how you feel. My blog has taken a big hit lately in the motivation department. Those blahs really work themselves in deep! I love that you were inspired by small steps! Good things come in small packages and I love how you created your tea pots! They are great! Keep up the good work. Continued healing thoughts sent in your direction.
LikeLiked by 1 person
Thank you so much for your kind words and healing thoughts! It has been a tough couple of years for a lot of people. I was watching a lot of blogs go dark and I was injured and feeling completely useless. I began to think is this it? The end of our blogging experience? Is this where we go dark too? But then I got this tiny little spark of an idea, that maybe we can still function if I didn’t set such high goals, small things, baby steps, those I could manage and so things are getting way better now. I am so glad that we decided to stick it out and re-evaluate rather than quitting entirely. 😊❤️❤️❤️
LikeLiked by 1 person
We’re all very glad for your decision to continue on with your inspiring blog posts. They’re fun and they give all of us more fun ideas to liven and cheer up people around us. Wonderful ripple effects you are having on our world!
LikeLiked by 1 person
So glad you’re finding the ability to create. That in itself can be so healing. Plus, little projects definitely have their advantages. They can seem more bite sized and doable.
These little teapots are now on my list. You have such a creative, imaginative eye for things.
LikeLiked by 1 person
Thank you so much! I am feeling more back to my old self every day. Without my creative side, things were so bleak and I didn’t have a lot of hope that it was going to get better. Now that I can create again, everything is so much happier! I am so glad you enjoyed my tutorial! I look forward to sharing more fun ideas as I navigate this last bit of my healing journey. 😊❤️
LikeLike
Hi, I am glad you are back in the mood for crafts they can be so much fun! Personnally I really like these ideas, being a teenager I don’t have a lot of doll room so big projects are not an option for me, but these little things are so cute and take so little space that I must make them!!! I often take historical photos and these teapots can be historical or modern, how amazing!!! Have a great day, and may your recovery be quick!
LikeLiked by 1 person
Thank you so much for your reply! I am so glad that you enjoyed my craft!! These little teapots could definitely work as historical or modern. That’s what I love about DIY. You can make it however you want! 😊❤️❤️❤️
LikeLike
It’s so nice to see you back and crafting! I had the exact same mindset after last year in bad sciatica pain (due to a large watermelon size ovarian cyst) and because of Covid here in BC I couldn’t have surgery until 9 months after the discovery of the cyst! Fortunately it was benign, but it’s taken until now to get my energy and strength back, and my garden and house had become quite a sight. lol My dear hubby took very good care of me, and I’m finally doing small things like you describe, much better than the huge things I used to do, but it feels so good! I love the teapots. Thanks for the article!
LikeLiked by 1 person
I am so glad you are getting your energy back!! It feels like there is a light at the end of this tunnel after all. I am so glad that you enjoyed my article! I finally feel like I’m nearly back to my old self. I hope that everything gets better from here on in for both of us! 😊❤️❤️❤️
LikeLiked by 1 person
A very good and pretty idea.
Congratulations on having thought about it and on the achievement.
And thanks for the tutorial.
LikeLiked by 1 person
You’re welcome!! I’m so glad you enjoyed! We had a lot of fun making these little pots! ❤️❤️❤️
LikeLiked by 1 person
Oh yes, I believe few people imagine how much fun we have with this almost magical mini world! It’s sad for those who ignore it 🙂
LikeLiked by 1 person
These little pots really could not be any cuter! I’m so tickled by this idea and now have to find a source for the little juice pull tops. I use water based acrylic paints because they don’t bother my lungs at all. Do you use that type of paint also or something different? I also like both the long bead handle as well as the multiple bead handle, both ended up looking really good. Thank you so much for sharing this clever, cute craft. I’m healing up from a hand surgery and looking forward to getting back to making more fun “essentials” for my Grandaughters’ dolls. I’m really glad that you’re healing up too!
LikeLiked by 1 person
Thank you so much! I am so glad that you are healing and can do some fun crafts again! It’s been a trying year but I think we are getting there! 😊❤️ I just used regular acrylic craft paint. If you need something more durable, you could use a plastic primer spray paint, but my teapots are mostly for display rather than play. You could also seal the paint with a brush on varnish sealant, but for my purposes I just put multiple thin layers of paint with time to dry between each layer. 😊
LikeLike