
 Hi guys! I am so excited about this DIY! Those who know me, know that I am part Japanese and a tiny bit obsessed with anything Asian. Doll sized sushi? Yes please!
Now we have made sushi for our dolls in the past and you can find that HERE but when AG put out their sushi set we just knew that we had to try to replicate it.
It took a while to figure out what we wanted to make the sushi out of. Then I got injured, so it got put on the back burner even further, but now here we are with the completed tutorial and we are so happy to show you guys how to make your own sushi set!
Let’s get started!
WHAT YOU WILL NEED:
Craft foam
Styrofoam
Exacto knife
Hot glue
Paper and marker pens
Tacky glue or white glue
Small wooden board (We had a leftover piece from another craft)
Large wood beads
Craft paint
Brown puffy paint
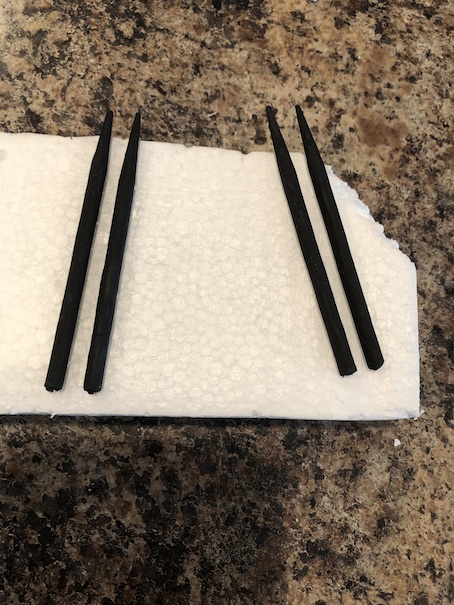
Wooden BBQ skewers
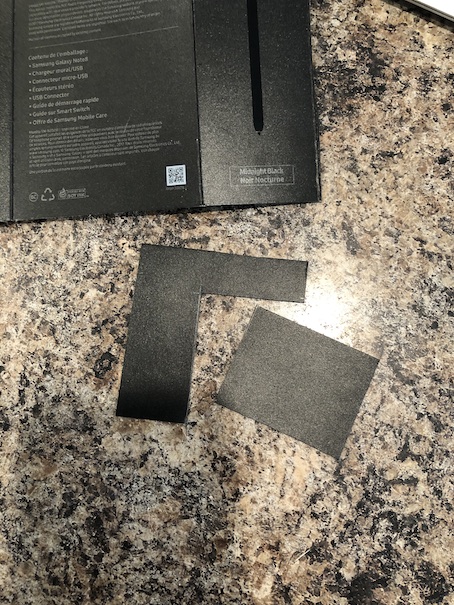
Thick card paper (We used the sleeve from cell phone packaging)
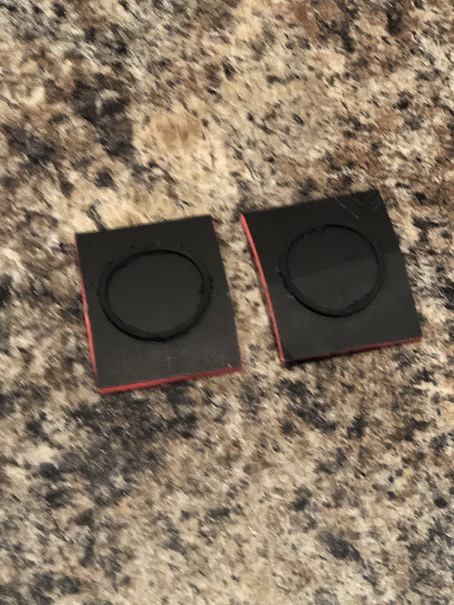
2 plastic washer rings from handsoap pump bottles
Pink playdough
2 caps from bodyspray bottles
Black hockey tape
Popeye candy box or any small box
❤ ❤ ❤
OK first we will make the Dynamite Roll and the Futomaki sushi. Yum, my favourite! You will need Styrofoam and craft foam for this. You will also need an exacto knife and hot glue.
 Using the knife cut a piece of Styrofoam.
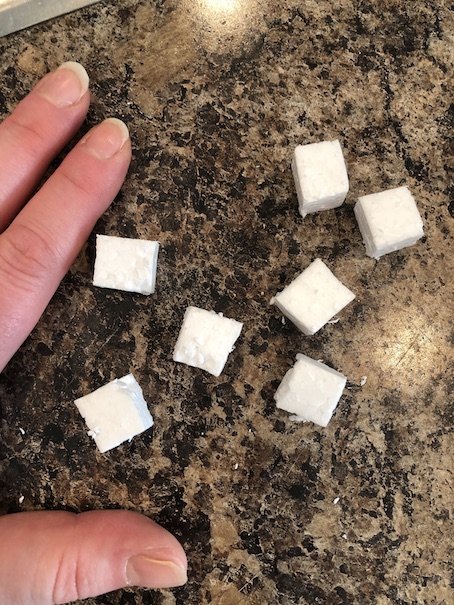
 Next, cut the Styrofoam into cubes. Cut many similar sized pieces. They should be about the size of a sugar cube.
 Cut a strip of light yellow-green craft foam long enough to wrap around three sides of the Styrofoam cube.
 Pull the craft foam strip tight so that it compresses the corners of the Styrofoam cube, rounding them out a little bit. Hot glue the strip in place, holding it tight until it dries.
 I don’t know if you can see this next bit very well, but cover all the surfaces of the Styrofoam cube that are not covered in craft foam (the front, back and bottom) with a thin layer of hot glue. This just gives the piece some more weight. It also makes it look a lot less like Styrofoam.
 You can make these in any different colours you like. We chose to make some in light green and some in red and orange.
 For this one, we used two strips of craft foam, red and orange.
To make the sashimi, we cut a small rectangle block of Styrofoam.
 Wrap in orange craft foam using hot glue to secure it.
 Again, wrap it quite tightly in order to round the edges of the Styrofoam.
 Clip the end as shown. Then make diagonal cuts to form a tail.
 Add a small dot of hot glue and pinch the end together a bit to taper it.
 Make several small clips in the tail fin.
 Wrap in a thin strip of black craft foam. Also, add a thin layer of hot glue to the visible Styrofoam.
 Now glue your sushi pieces together in pairs.
 Time to add the fillings. Draw this type of shape on paper. Use marker pens to colour them in as shown.


Make many and cut them out. Using tacky or white glue, adhere them to the centre of your sushi. Brush a light layer of tacky glue over the paper filling to seal it. Make sure to stick one filling on either side of your sushi.

Next, we will make the California Roll. You will need two strips of thick white craft foam and a thin strip of orange craft foam. (You could also use styrofoam for this.) Layer the craft foam strips as shown:


 Cut two rectangle blocks.
 Wrap in black hockey tape. I have found that hockey tape doesn’t adhere very well in general, so it will need some glue to help it hold.
 And you’re done! The sushi that is. Now let’s make the rest of the set!
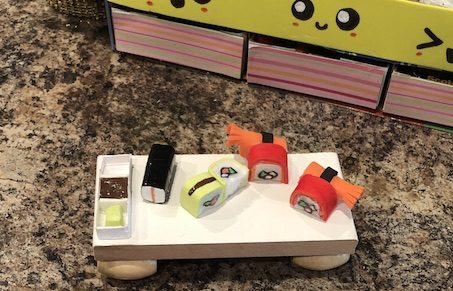
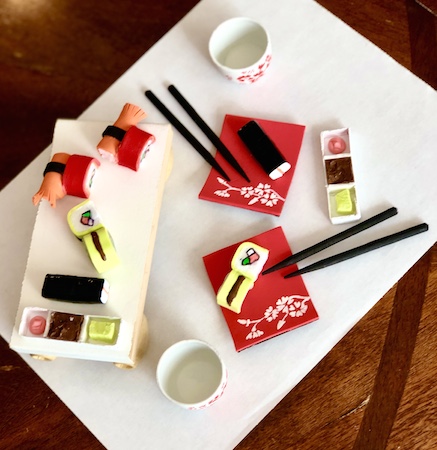
To make the sushi board is pretty simple. All you will need is a piece of wooden board and some wood beads. We had a random wood block in our crafting cupboard so we just used that. It needed to be cut in half. Then we glued wooden beads to the bottom for feet.
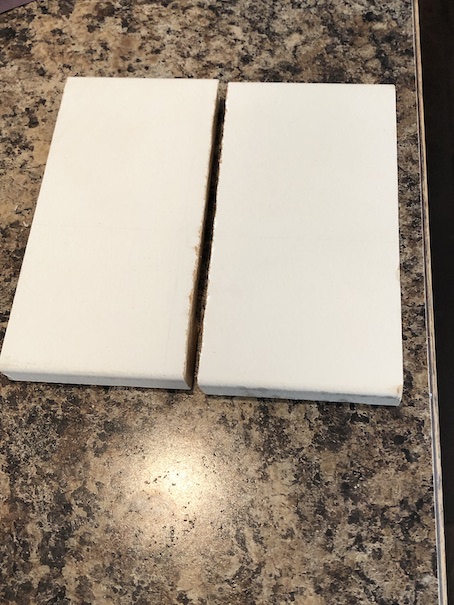 Our sushi board is 2.75 inches by 5.5 inches.
 To make the plates, you will need red craft foam and a piece of thick cardstock. We had a random sleeve from phone packaging. It was kind of plastic coated paper.
 Cut two squares, one for each sushi plate. Ours are 6cm by 5cm.
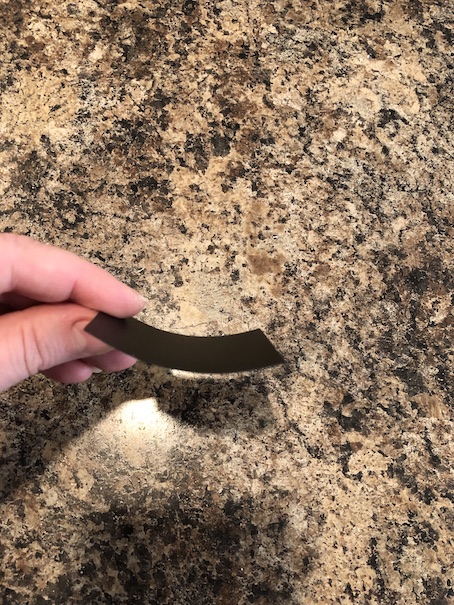
 Wrap the square around a small spray bottle and secure with tape.
 Let it sit for a few minutes. When you remove it, it will hold a bit of the shape.
 Cut a matching square of red craft foam.
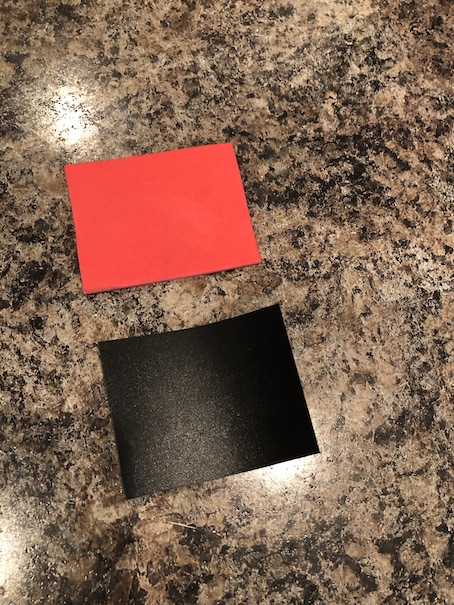 Glue the craft foam to the paper. It will conform to the curved shape.
 Paint some pretty white flowers on your plates if you like.

We added a ring from a handsoap bottle to the bottom of our plates. We just hot glued it on and painted it black to match the plate bottom.
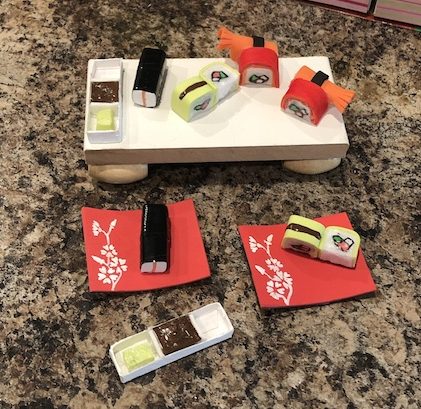 Next, to make the wasabi trays. We used a Popeye’s candy box for this. I don’t know if everyone has heard of these. They used to be candy cigarettes for children. That is frowned upon now, so they have changed to be candy sticks. The Little Miss loves these things and has no idea that they used to be candy cigarettes.
 Cut the box in half. Use hot glue to stabilize the sides. Then trim them down into trays. We painted the boxes white. Then we used craft foam to make separate tray compartments.
Fill the middle compartment with brown puffy paint. Put a square of green craft foam for wasabi. We put a dollop of pink playdough in the other end for the pickled ginger, but we were having so much fun at this point that I forgot to take a picture. Oops!
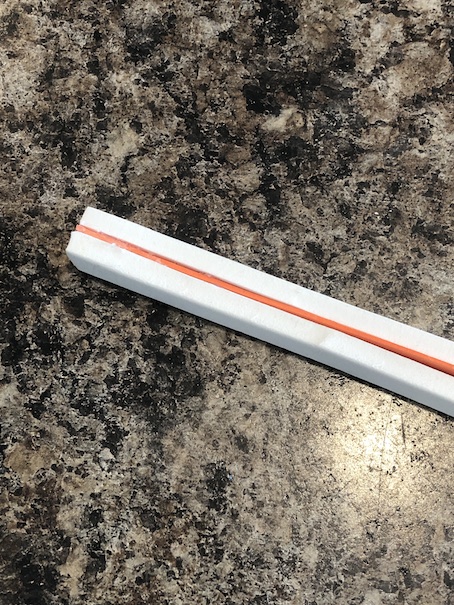
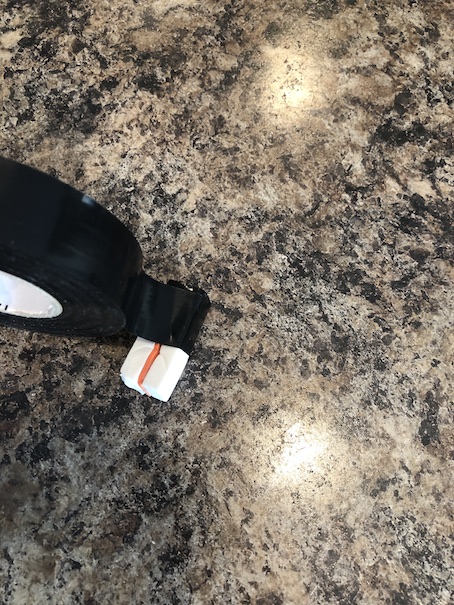
To make chopsticks, simply cut down BBQ skewers and paint them black.

Finally to make the cups, we had these caps from some bodyspray bottles.
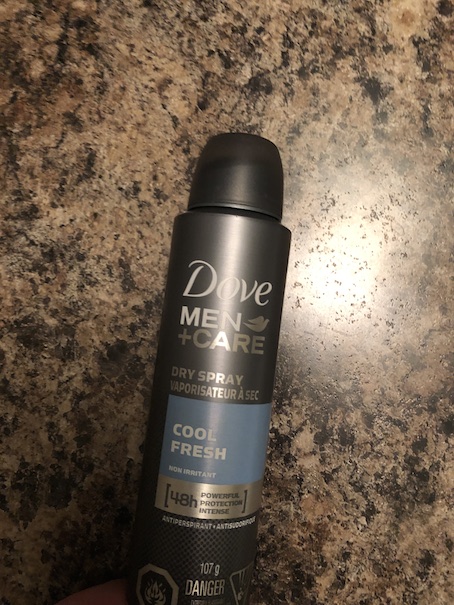
All we did was spray paint them white and paint red flowers on them. One tip is to prime the plastic cups first before you paint as that way the paint will adhere a lot better.
 And there you have it! Your very own absolutely adorably deliciously cute sushi set!!
 So love! 🙂
  There’s that pink pickled ginger!
 Who’s craving sushi? Because we are!! ❤
 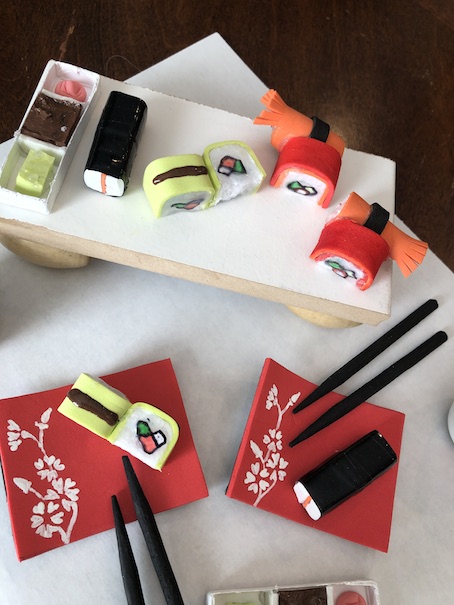 Eeee! Heart eyes emoji!
 ❤
❤  Cost: $0 How cool is that? And we got to recycle some stuff too!
 ❤
❤  We can’t even with the serious cuteness of this set, you guys! We are just loving it!
I hope you all enjoyed! Thank you so much for joining us, and have a crafty kind of day!!
Also, don’t forget to leave a comment below and tell us, do you like sushi? What kind is your favourite?
The Little Miss loves California Rolls. We even learned how to roll our own at home! 🙂
❤ ❤ ❤

This is amazing!
LikeLike
Thank you! I absolutely loved this set when it came out, but being in Canada I wasn’t going to be able to get it. So I got creative like I do. 🙂
LikeLiked by 1 person
ahhhhh I love this so much 😀 I have sadly never had a chance to try sushi 😥
Most crazily, ~Olive
LikeLike
What?!! You have to try it! It is one of my favourite foods! 😊
LikeLiked by 1 person
Thank you so much for sharing this with folks! I’ve managed to use a free pdf creator to make it into a pdf for later use as I don’t always have access to the internet 🙂 Can’t wait to make some yummy foods for my doll 🙂
LikeLike
Aaah they’re so cute and tiny! You made a whole set; I’m so impressed!
❤ ,
IrishAG
LikeLiked by 1 person
Thank you! I was so excited to make this set! I just thought it was so cute! I’m glad you enjoyed! 🙂
LikeLiked by 1 person
Love your version! Thank you for sharing.
LikeLiked by 1 person
You’re welcome! I am so glad that you liked it! 🙂
LikeLike
Totally awesome! Actually prefer this to the thick & clunky plastic version. Love your creativity and generosity in sharing.
LikeLiked by 1 person
Aww thank you so much! We just love creating for our dolls! I actually prefer DIY projects to store bought items too. There is just so much more you can do with it! 🙂
LikeLike
At first, I thought this was the actual AG sushi set! It looks perfect! I LOVE Japanese cuisine and sushi 💖 My favorite sushi is the California roll with cream cheese!
LikeLiked by 1 person
Thank you!! ❤ We love Japanese food too! Little Miss likes the California roll the best too.
LikeLiked by 1 person
Great work !! thank you for this perfect tutorial.
LikeLiked by 1 person
You’re welcome! I am so glad that you liked it! We really had a lot of fun making this set!
LikeLike