

Hi guys! I’m back with some more DIY Fan Merch on a budget! If you want to check out my Part One Fan Merch post, you can find it HERE.
So, my original mission was to take all of the decor in my house, and turn it into something more special, more fun, and more personal, something a lot more, well…me. Basically, I wanted my home decor to be made up of things that I loved, or in the words of Marie Kondo, things that spark joy, rather than things that I just own because they look nice, or they just ended up in my house somehow. Blah, boring. 🙂
My other mission was to try to stay within the boundaries of my decor style. In short, I don’t want to live in a Harry Potter house, but I don’t want just a bunch of generic decor either. I also didn’t want to have to spend an arm and a leg to do it.
I had some ideas. One of them was to create better wall art by painting over some of my existing wall art, some of which I had already painted myself. Hey, a girl can change her mind! 🙂 Besides, I only have so much wall space, and the art that I already owned was taking up most of it. It only made sense that I recycle it into something beautiful, and more unique. ❤
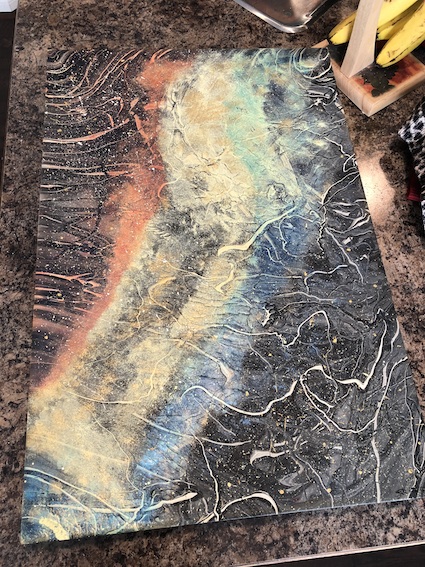
 I had two of these kind of crazy, kind of cool wall hangings. They’re super cool, right? Here’s a close up.
 Don’t get me wrong, I really liked these pieces a lot, but I got to thinking.
(I do that. I stand around my house at night, and stare at everything, and then I get to thinking.)
What I started to think was how wibbly and wobbly, how timey wimey, how just like a space time vortex these two wall hangings looked. That’s when I decided that I had to change them up a bit.
I started by adding some metallic paint. I did this with a sponge.


Then I added some more metallic paint in more colours.

Seriously cool, right? Now we were getting somewhere. Here they are side by side on my countertop. Next I added lettering. I just used a stencil for this. I also added in some silver sequin stars, and some steam punk style gears, keys and watches that I had leftover from another project. I have a bit of an obsession with mixed media pieces lately. 🙂
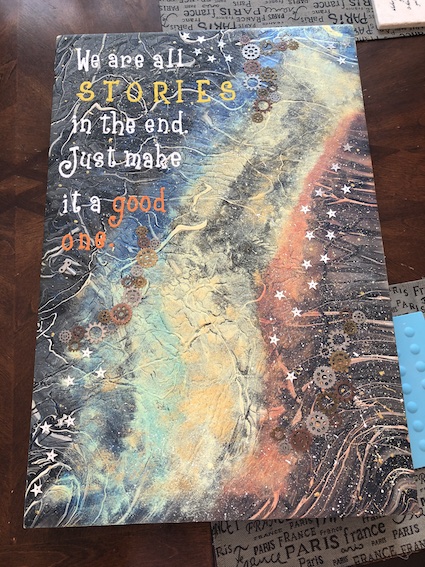
 Something was still missing. I wanted something subtle, but something that also made it clear that these were definitely Doctor Who inspired.
So, I made a stencil. I just printed this off online, and used my exacto knife to carefully cut it out.  Yay! Actually, to tell the truth I started this not knowing what in the world I was doing. LOL! Sometimes you have to attack a project that way, even if you’re terrified out of your wits that you’re just going to muck it all up. That’s like pretty much every project that I’ve ever done in my entire life. 😛
Anyway, I wanted it to look less like a stencil, and more like a vintage stamp, so I used black paint, and a sponge to gently print it on there.
 And I made a Tardis stencil for the second one. LOVE! ❤ ❤ ❤
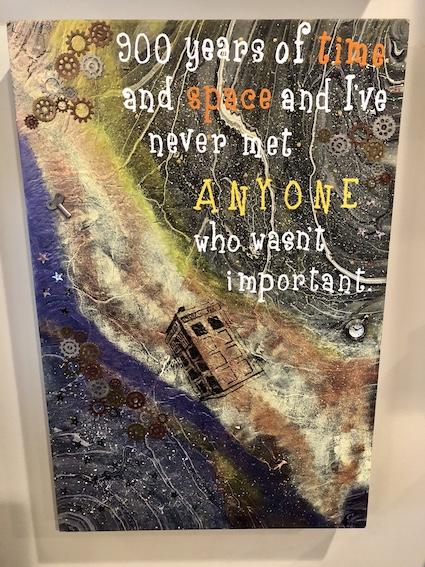 Happiness!!! 🙂 ❤
I hung these in my kitchen. I love them so much, and I have had numerous compliments on them! ❤
 So nice!! ❤ Sparkly joy!!

Yes, I also printed out a Dalek sign to put by my coffee machine. 🙂  ❤ Happy day.
Okay, moving on to more artworks. I had a purple flower painting hanging in my dining area that I had painted a very long time ago, and although I liked it, I wasn’t really loving it, you know?
 So, I decided to paint over it.
 Any Moriarty fans out there? ❤ 🙂

I’m a HUGE fan of Sherlock, however, I was not a fan of that three part picture frame that was now hanging below my new Moriarty piece. So I took it down, and replaced it with the Sherlock cityscape that I had made to hang in my guest bathroom.

That’s way better!
Now, what to do with that three part picture frame? I’m big into reusing and recycling, so I removed the art that was in the frame (it was boring and generic to me), and I replaced it with my favourite Doctor Who quote silhouettes.
 I used tea bags to make the backgrounds more vintage. Sometimes, I see an idea in my head, and after that, anything goes, even tea. LOL! 🙂
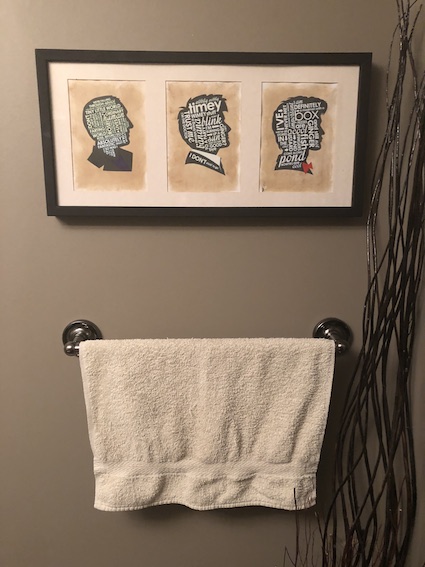
I know this photo is dark and terrible, but I just adore this piece!! 🙂
Next, I took a look at this random palm tree art that I had hanging in my bathroom upstairs. It wasn’t my thing either. Seriously, I have no idea why I even own half of the stuff I do. No wonder I had to do a huge declutter of my house this year!!
Anyway, I scraped off the picture. It was glued on a piece of MDF.
 Then I painted, and mod podged, and tinkered with it until it turned into something that I loved. Basically, I took pieces of stuff, and laid them on there to see if it looked any good. I ended up using metallic paint, glitter, pieces of tissue scrapbook paper, gems etc. I felt like I was in grade school again making a collage. LOL! 😛
Next, I printed off the Doctor’s name in Gallifreyan, dabbed it with more tea bags, (I really like the vintage look of tea), and glued it on there. Once I was done, I gave the whole thing a coat of varnish.
I had no earthly idea what I was doing, but it turned out so original, and it looks so cool! Way better than random palm trees. ❤
 I hung it with my other Doctor Who artworks in my guest bathroom.
Can you spot the Tardises? I printed them, cut them out, and glued them in the framed IKEA prints below. 🙂
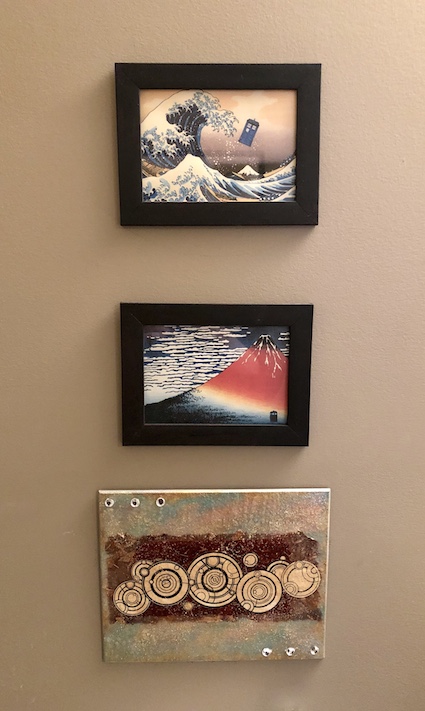 LOVE! ❤ ❤ ❤
I had these two beautiful specimens to work with next. Yes, I know, gorgeous stuff. LOL! 🙂 You can see why I wanted to change it all up.
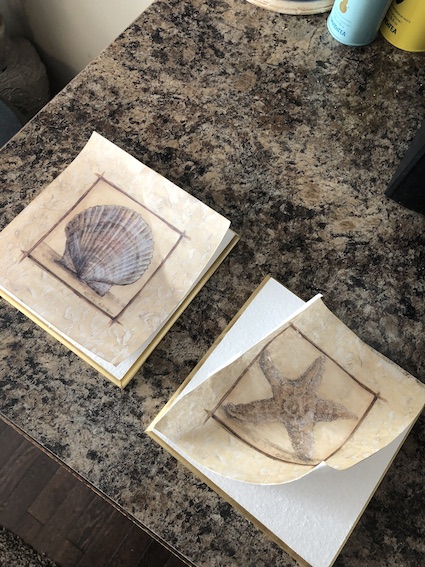
I’m a huge fan of Supernatural (I’m a Dean girl ❤ ), and I had purchased some SPN vinyl stickers awhile back, but I didn’t know what I wanted to do with them. I decided that I would use them for this project. Once I removed the seashell pictures, I painted the plaques silver. Then I added a black square frame, and stuck the vinyl stickers in the centre.  They still seemed too plain for me, so I decided that I wanted some silver charms to glue to the frames. I looked online, but everything I found was either not what I wanted, or just too expensive for shipping. So, I decided to make the charms myself. Why not, right?
 I made these out of Model Magic clay. Then I painted them metallic silver.
 Sometimes, when I am making things, I’m just holding my breath the whole time hoping that it all works out. I’m not an expert by any means at all. I’m just winging it most of the time.
Anyway, I was really thrilled with how these turned out! I used hot glue to attach them to the frames.
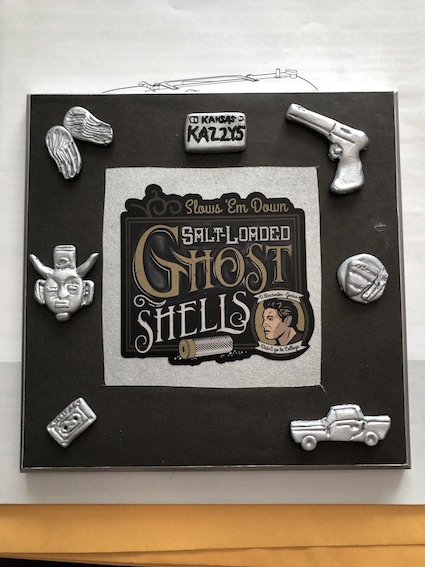 I also added a tiny bottle of salt, and a little match stick I made from a toothpick.
 Don’t mind my sewing machine instruction manual in this pic. LOL!

At this point, I realized that I had seven charms on Dean’s plaque, but only six charms on Sam’s plaque. I decided to add a pair of vampire teeth to make it even. 🙂

I love these!!! ❤ And I found the perfect place to hang them.

Yes, that’s our Halloween pumpkin. LOL! 🙂
I had a picture of this next piece of fan art in my head for a long time before I even started to think about how to create it. I have wanted a golden snitch for the longest time. However, I didn’t want something that looked like a traditional snitch, and I didn’t want a toy.
Instead, I had this strange abstract idea in my head. I searched and searched online for one similar, but eventually I had to give up, and face facts. If I wanted to realize my vision for my perfect golden snitch, the one inside my head, then I was going to have to make it myself.
Was that even possible? I ask myself this question every time I start a project, and I usually don’t have an answer for myself until I am done.
The answer is almost always, and wholeheartedly, YES. 🙂


Time to add some colour!
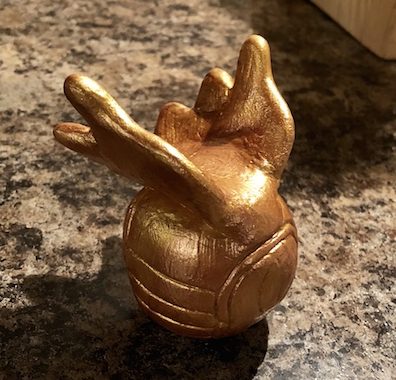 Yes, this thing was living in my head for a very long time. My daughter thinks it looks like a moose. LOL! 😛
I say, it is a golden ball with wings. There is only one way to interpret that. It is a golden snitch, and it is wonderful. 🙂
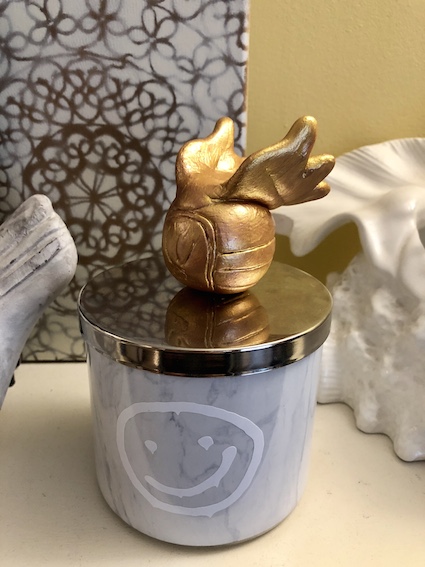 So, I put it on my mantle. ❤ Sparks of joy.
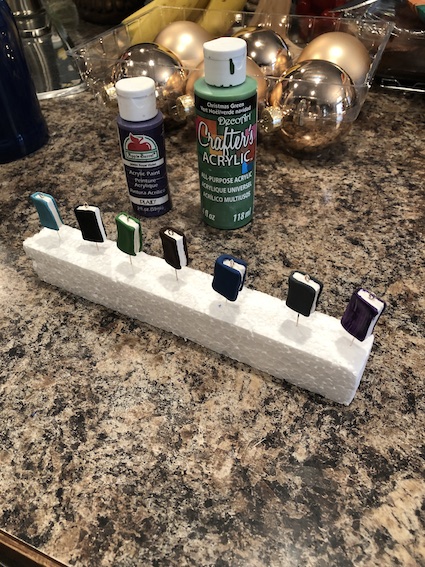
The next piece of fan art that I made was actually a gift for my daughter. She is a huge fan of the Keeper of the Lost Cities series, and I wanted to make her something related for Christmas.
I set about making her a charm bracelet with all of the books in the series. I had seen a similar Harry Potter book bracelet online.
There are seven books in the series so far.

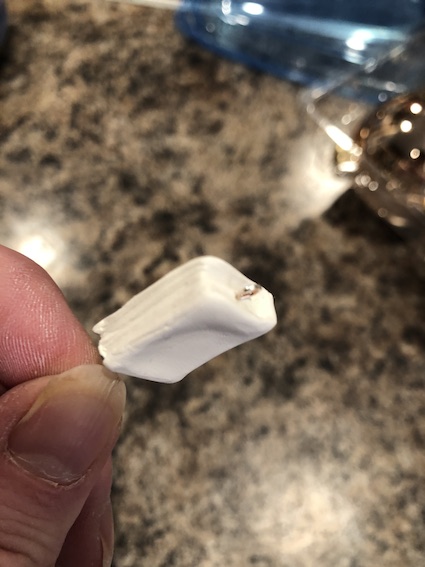
I made these out of white polymer clay. I baked them. Then I painted them all different colours.
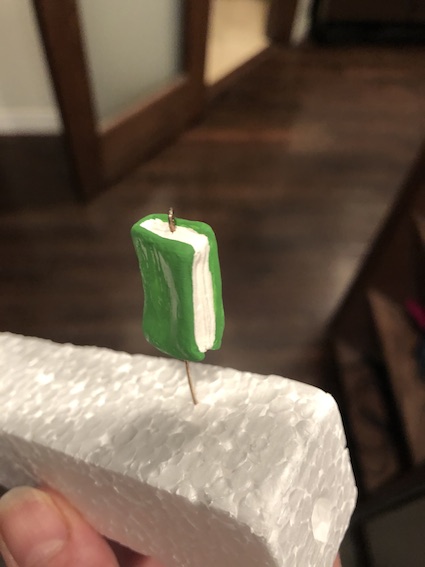
I printed tiny covers online to glue onto the front of the books.

Then I used nail varnish to seal them.

My daughter was so surprised, and completely thrilled on Christmas morning! 🙂 
I even left a space for Book #8. ❤
The last piece of fan art that I made was a hat. Not just any hat, mind you. It is the Mad Hatter’s hat. I have been wanting a replica of the Mad Hatter’s hat for a while now. I wanted an actual cloth-like hat, not something made out of clay, although I did entertain the idea at one time.
Instead, I found a hat ornament at the Dollar Store. It was covered in sprigs of pine, and holly, so I removed them.

Then I wrapped a ribbon around the hat, and glued on a peacock feather. I added hat pins, and some steam punk jewelry.
 I included the 10/6 tailor’s card, and a wonderful giant clock button that I’ve had in my stash for years.

Then I perched the hat atop my teacup tower that I made. To me it tells the story of a topsy turvy tea party, and right in the middle, the Mad Hatter has left his hat. ❤ 🙂
Whew! That was a long post!! I’m still not completely finished with my DIY fan merch quest. I do have a few more pieces that I want to redo, but I am so much happier with the decor in my home! 🙂 I hope that this gives you some ideas on how to make some fan merch for your own place, whether it be your house, or even just your room.
And again, if you missed Part One you can find it HERE. I hope that you enjoyed!
Leave a comment below!
❤ ❤ ❤

O.M.G.–girl, when do you sleep???? I loved all of the Dr. Who stuff at the beginning, didn’t think you could top that…then I came to the “You Should See Me In A Crown” and I literally squealed!! LOVE, LOVE, LOVE Moriarty, that episode is my absolute favorite. Great ideas!
LikeLiked by 1 person
Thank you!! OMG I know right? I LOVE Moriarty too! I’m kind of obsessed with DIY fan merch now I think. LOL! I like home decor, I just can’t bear another random floral picture on my wall. 😛 It’s just so boring to me. I’ve been having so much fun personalizing my world! 🙂
LikeLike
Wow!! You’ve definitely inspired me!! I’m a HUGE Doctor Who fan, along with Artemis Fowl, Ranger’s Apprentice, and Undertale, and I already have some ideas in my head. I’ve been redoing my bedroom, and I was planning to go for a minimal theme, but now I’m thinking that may go out the window so I can cover the walls in fan merch, lol.
Wonderful post!
LikeLiked by 1 person
Hooray for Doctor Who fans!! I am so glad that I inspired you! It is definitely worth it to DIY your own fan decor. I’ve been having so much fun. I just love that I can create pieces that are truly one of a kind. Best of luck on the room redo! That’s super exciting!! 🙂 ❤
LikeLiked by 1 person
I do not regret having discovered your blog, it is a pleasure to read you each new article. Congratulations again for your creations so creative.
I tried the Model Magic clay thanks to you, I think Sculpey will be forgotten now, thank you very much.
LikeLiked by 1 person
You’re welcome! 🙂 ❤ I am so glad that you are enjoying my blog! I have forgotten the Sculpey in favour of the air dry clay too. I just find it so much easier to work with, and cheaper.
LikeLike
Ditto. Speechless. LOVE IT ALL.
LikeLiked by 1 person
Thank you so much! 🙂 ❤ ❤ ❤
LikeLike
I’m left speechless; you are more talented than I am, so I enjoy looking at your blog!
LikeLiked by 1 person
Aww, thank you so much!! ❤ I am so glad that you enjoy my blog!! 🙂
LikeLike