
Hi guys! We are full into the swing of things for 2019! We have made some resolutions which I will be posting about soon, and we are definitely not short of doll projects already! Whew!
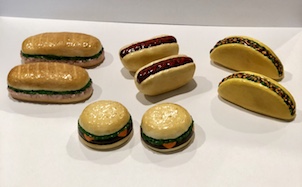
Since I made a whole bunch of doll food for Christmas, and I am now making more for a special little girl for her birthday, I wanted to get all caught up on my doll food tutorials. For this tutorial we are going to be making hamburgers and hotdogs for our dolls!
I try to make my doll food tutorials simple so that anyone can do them, so I hope that these fit the bill. I am a bit of an instant gratification kind of crafter, so anything fiddly that takes longer than 5 minutes to make, I tend to lose interest in right away.
Okay, let’s get started!!
For this craft you will need:
Model Magic or any air dry clay in white
Toothpick
Poking tool (I just use the end of my exacto blade)
Paint
Chalk colours (optional)
Varnish
I will start with the hamburgers!
First, roll a ball. I made two balls because I wanted two hamburgers of equal size. I figure one hamburger doesn’t make for much fun in a doll play set because dolls should have friends to share lunch with! 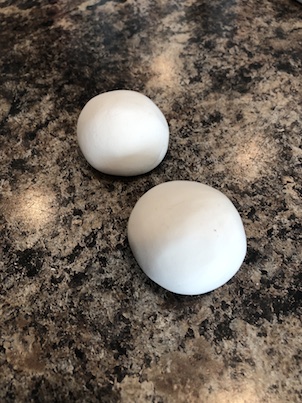
Okay, seriously, these are actually the same size, the picture just makes them look like two different sizes. Jeepers. I guess I’m not very good at photography. Oh well, you get the point. LOL! 🙂 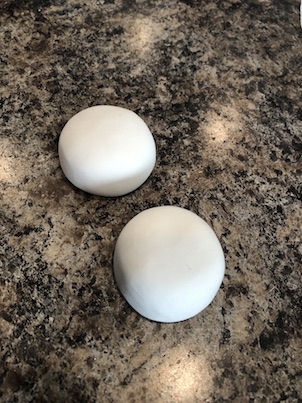
Next, flatten the tops of your hamburgers a little and shape them to look like buns. The bottom of the bun will be completely flat where the top of the bun will be rounded a little. We make our doll’s hamburgers about 1.5 inches in diameter and 1 inch tall. 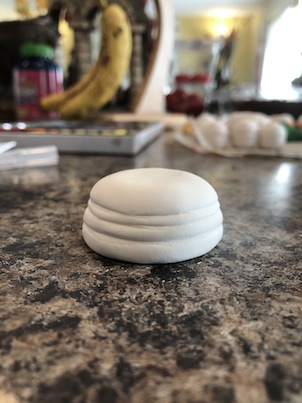 Using a toothpick, draw three lines around your hamburger as shown. Lay your toothpick horizontally flat against the side of your hamburger to make an impression and lightly draw the lines, rather than poking the toothpick into the surface of the clay. Try not to touch the clay very much after this point to avoid squishing your creation.
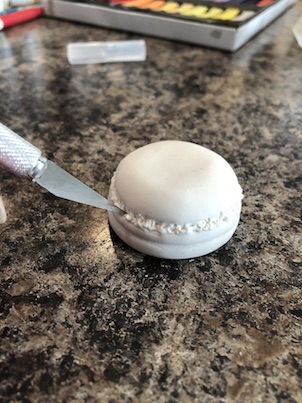 Next. use the pointed end of your exacto knife, or poking tool to texture the space between the top two lines in your burger. This will be the lettuce.
Use a toothpick to gently poke some sesame seeds into the top of your bun. Set aside your creations to air dry.
Once your hamburgers are dry, use some chalk to colour your bun. I use my fingers to rub the chalk into the clay. I use brown, orange and yellow chalk mixed together to get a nice golden bun colour. If you don’t have chalk, you can just paint your bun.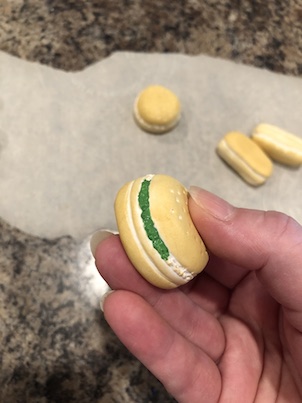 Time to paint the lettuce! I use the tiniest little paintbrush for this part. Size 2 I believe it is. You can get one at Michael’s for $2 or so. Also, see where the yellow chalk got all over the hamburger patty? That’s just fine. We will be painting that next.
 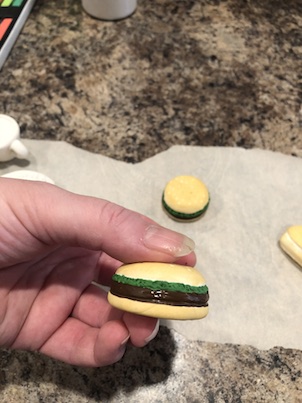 There, that’s better! We just used brown paint. Now I don’t know about you, but our dolls like cheese on their burgers, so we will add that next.
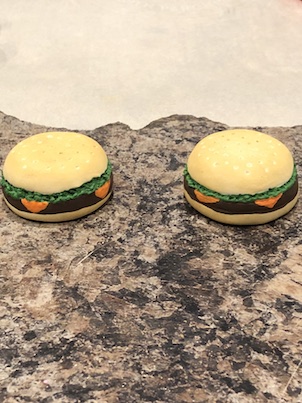
Again, using the tiniest detail brush, and some orange paint, paint some orange triangles all the way around your hamburger patty. I did about four or five triangles. Try to space them evenly apart. 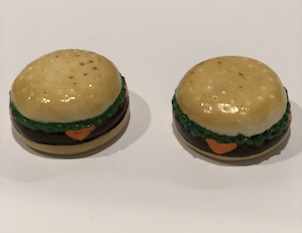 Add some varnish, and you’re done!
Next, let’s work on making the hot dogs!
Roll two balls. Again our dolls want to share their lunch with a friend, so we will make enough hot dogs for two.
 Next, roll your balls into cylinder barrels. We make our hotdogs about 1.5 inches long and 1 inch tall. Flatten the bottom of your cylinders, and shape them into a sort of loaf.
  Flip the loaf over. The underside should be flat as shown. This is actually going to become the top of your hot dog.
 Now it is time to draw your lines. Remember, just like the hamburgers, you want to gently lay your toothpick flat against the clay to make an impression rather than poking the end of the toothpick into the clay.
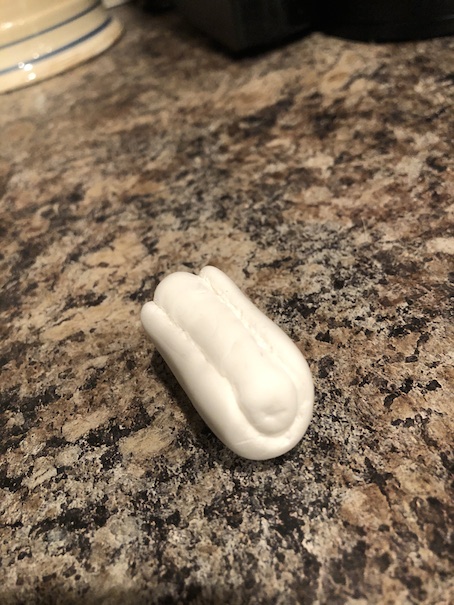
  Draw two lines down the top first. Then gently drag your toothpick down either side of the ends of the bun.
 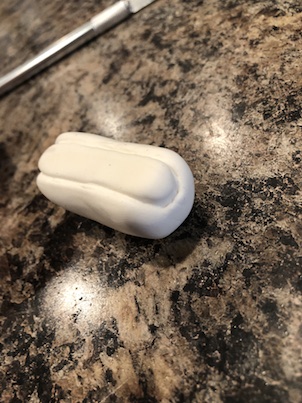 This is what the ends of your hot dog should look like, but at this point, the hot dog part will be flat on the top and on the sides. We want it to be more rounded like a real hot dog. For this, I use the back end of my exacto blade.
 Basically any round edged tool will work for this. Working in the groove between the bun and the hot dog gently smooth and roll the edge until the hot dog appears more rounded, or three dimensional on top. Do this gently. You don’t want to squish your hot dog, you just want to gently smooth out the squared edges.
I used my toothpick to add a little star mark on each end of my hot dog. Colour the hot dog bun using the same chalk as used for the hamburger buns, or paint if you don’t have chalk. Next paint the hot dog a deep red brown. You can add a squiggle of ketchup on there using red paint. If you want to use red puffy paint for ketchup, then you must wait until after you have varnished the hot dog to add some. We used red paint, and it worked fine.  Varnish and you’re done!
There you have it! An easy way to make hot dogs and hamburgers for your dolls! If you want to make even more doll food, please refer to our other clay doll food tutorials. We will be doing more tutorials once we reveal all of the little doll food that we have been making! 🙂
Also be sure to check out some of the doll foods that we made from clay in years past:
I hope you enjoyed this neat little tutorial, and I hope that you have tons of fun cooking up some food for your dolls!
Leave a comment below!
❤ ❤ ❤

I am just learning to make food for the dolls. What type of paint do you use. I bought some clay today and now need to just read your tutorials again and again as you make it look so easy. WhT supplies do you recommend to a beginner.
Patty
LikeLike
I am so glad that you are giving it a try!! You might just find that it is much easier than you think! 🙂 I used Model Magic clay, and regular acrylic craft paint. Once everything is dry and painted, I seal everything with Sargent Craft Gloss varnish. I just buy it on Amazon. Other supplies you will need are toothpicks, an old toothbrush for texturing, a small rolling pin (I just have a plastic one), an exacto knife or straight cutting tool, a poking tool (I just use the sharp end of my craft exacto knife). I also have some circle cookie cutters, and a small heart cookie cutter. Cookie cutters come in really handy. Another thing I find extremely useful is a size 2 fine point detail paintbrush. This is a must for painting details. I also have a set of chalks that I like to use to colour baked goods (bread, buns, pancakes, croissants, cinnamon buns etc.) I use my fingers to colour the clay with the chalk rather than brushing it on with a brush. Use a butter knife to scrape your chalk colours onto a piece of paper. Mix until you get a colour you like. Then use your fingers to gently rub the chalk on the clay. Once everything is shaped, I put it on parchment paper to air dry. Parchment paper is best, because absolutely nothing sticks to it. One thing that I can’t emphasize enough when working with clay is to put it down. Try to avoid touching the clay with your hands as much as possible. So, once you get the basic shape, put the item down, and use your tools to finish the details like texturing and poking. This helps your clay to not get too squished out of shape, although I do like Model Magic air dry clay because it doesn’t pick up fingerprints as much as the Sculpey polymer clay. I hope that this helps. If you have any other questions at all, feel free to ask!! 🙂
LikeLike
I found it. Thank you. You don’t need to resend. Off to michaels and hobby lobby
Patty Sent from iPhone
>
LikeLike
Good morning. When you refer to “chalk”. Is this kids chalk or a craft type chalk paint? Sorry to be so naive! Lol.
Patty Sent from iPhone
>
LikeLike
Hello! No problem at all! The chalk that I am referring to is like a chalk pastel. You can get a set of them at the craft store like Michael’s. I use a butter knife to scrape a fine chalk dust that I use to rub into the clay with my fingers to get a more subtle colour than paint. It works really well for any foods that have a baked look such as cinnamon buns, bread, buns, pancakes etc. By baked I just mean that the colour is uneven, golden in some places like the tops of buns, and less ‘baked’ in other places. Of course, you can just paint with acrylic paints too. The chalks are completely optional. I hope this helps! 🙂
LikeLike
I will be making these for both of my granddaughters, you make them look so easy.
LikeLiked by 1 person
They are easy! Your granddaughters will love them! 🙂 ❤
LikeLike
All of your food looks awesome!
LikeLiked by 1 person
Aww thank you so much! I have been making so much doll food lately for the little girls in my life! It’s so much fun to do! 🙂
LikeLike
These look amazing!
LikeLiked by 1 person
Thank you! And they are so simple to make that anyone can do it! 🙂 ❤
LikeLiked by 1 person