

So here I am tying up some loose ends. I won’t leave you all hanging! Instead, I will get on with the fridge tutorials that I promised back in October before all of the crazy hit. Sorry for the long delay! Of course, before we begin, be sure to check out the full build of Maryellen’s Fridge.
Okay, let’s get started shall we?
First up is that ice cube tray!
This is seriously cute, and it’s so easy to make! All you need is a small rectangular lid, and some Model Magic clay. We painted our ice cube tray with silver paint.
Fill the lid with clay. We used a wooden lid from a small rectangular box. We just cut it to size. We were using this box for other projects too, so the ice cube tray was made from a leftover scrap. 
Next, use the butt end of a paintbrush, or other handled tool to make impressions in the clay for the ice slots.
Let the clay dry completely. Once dry, paint the entire tray silver.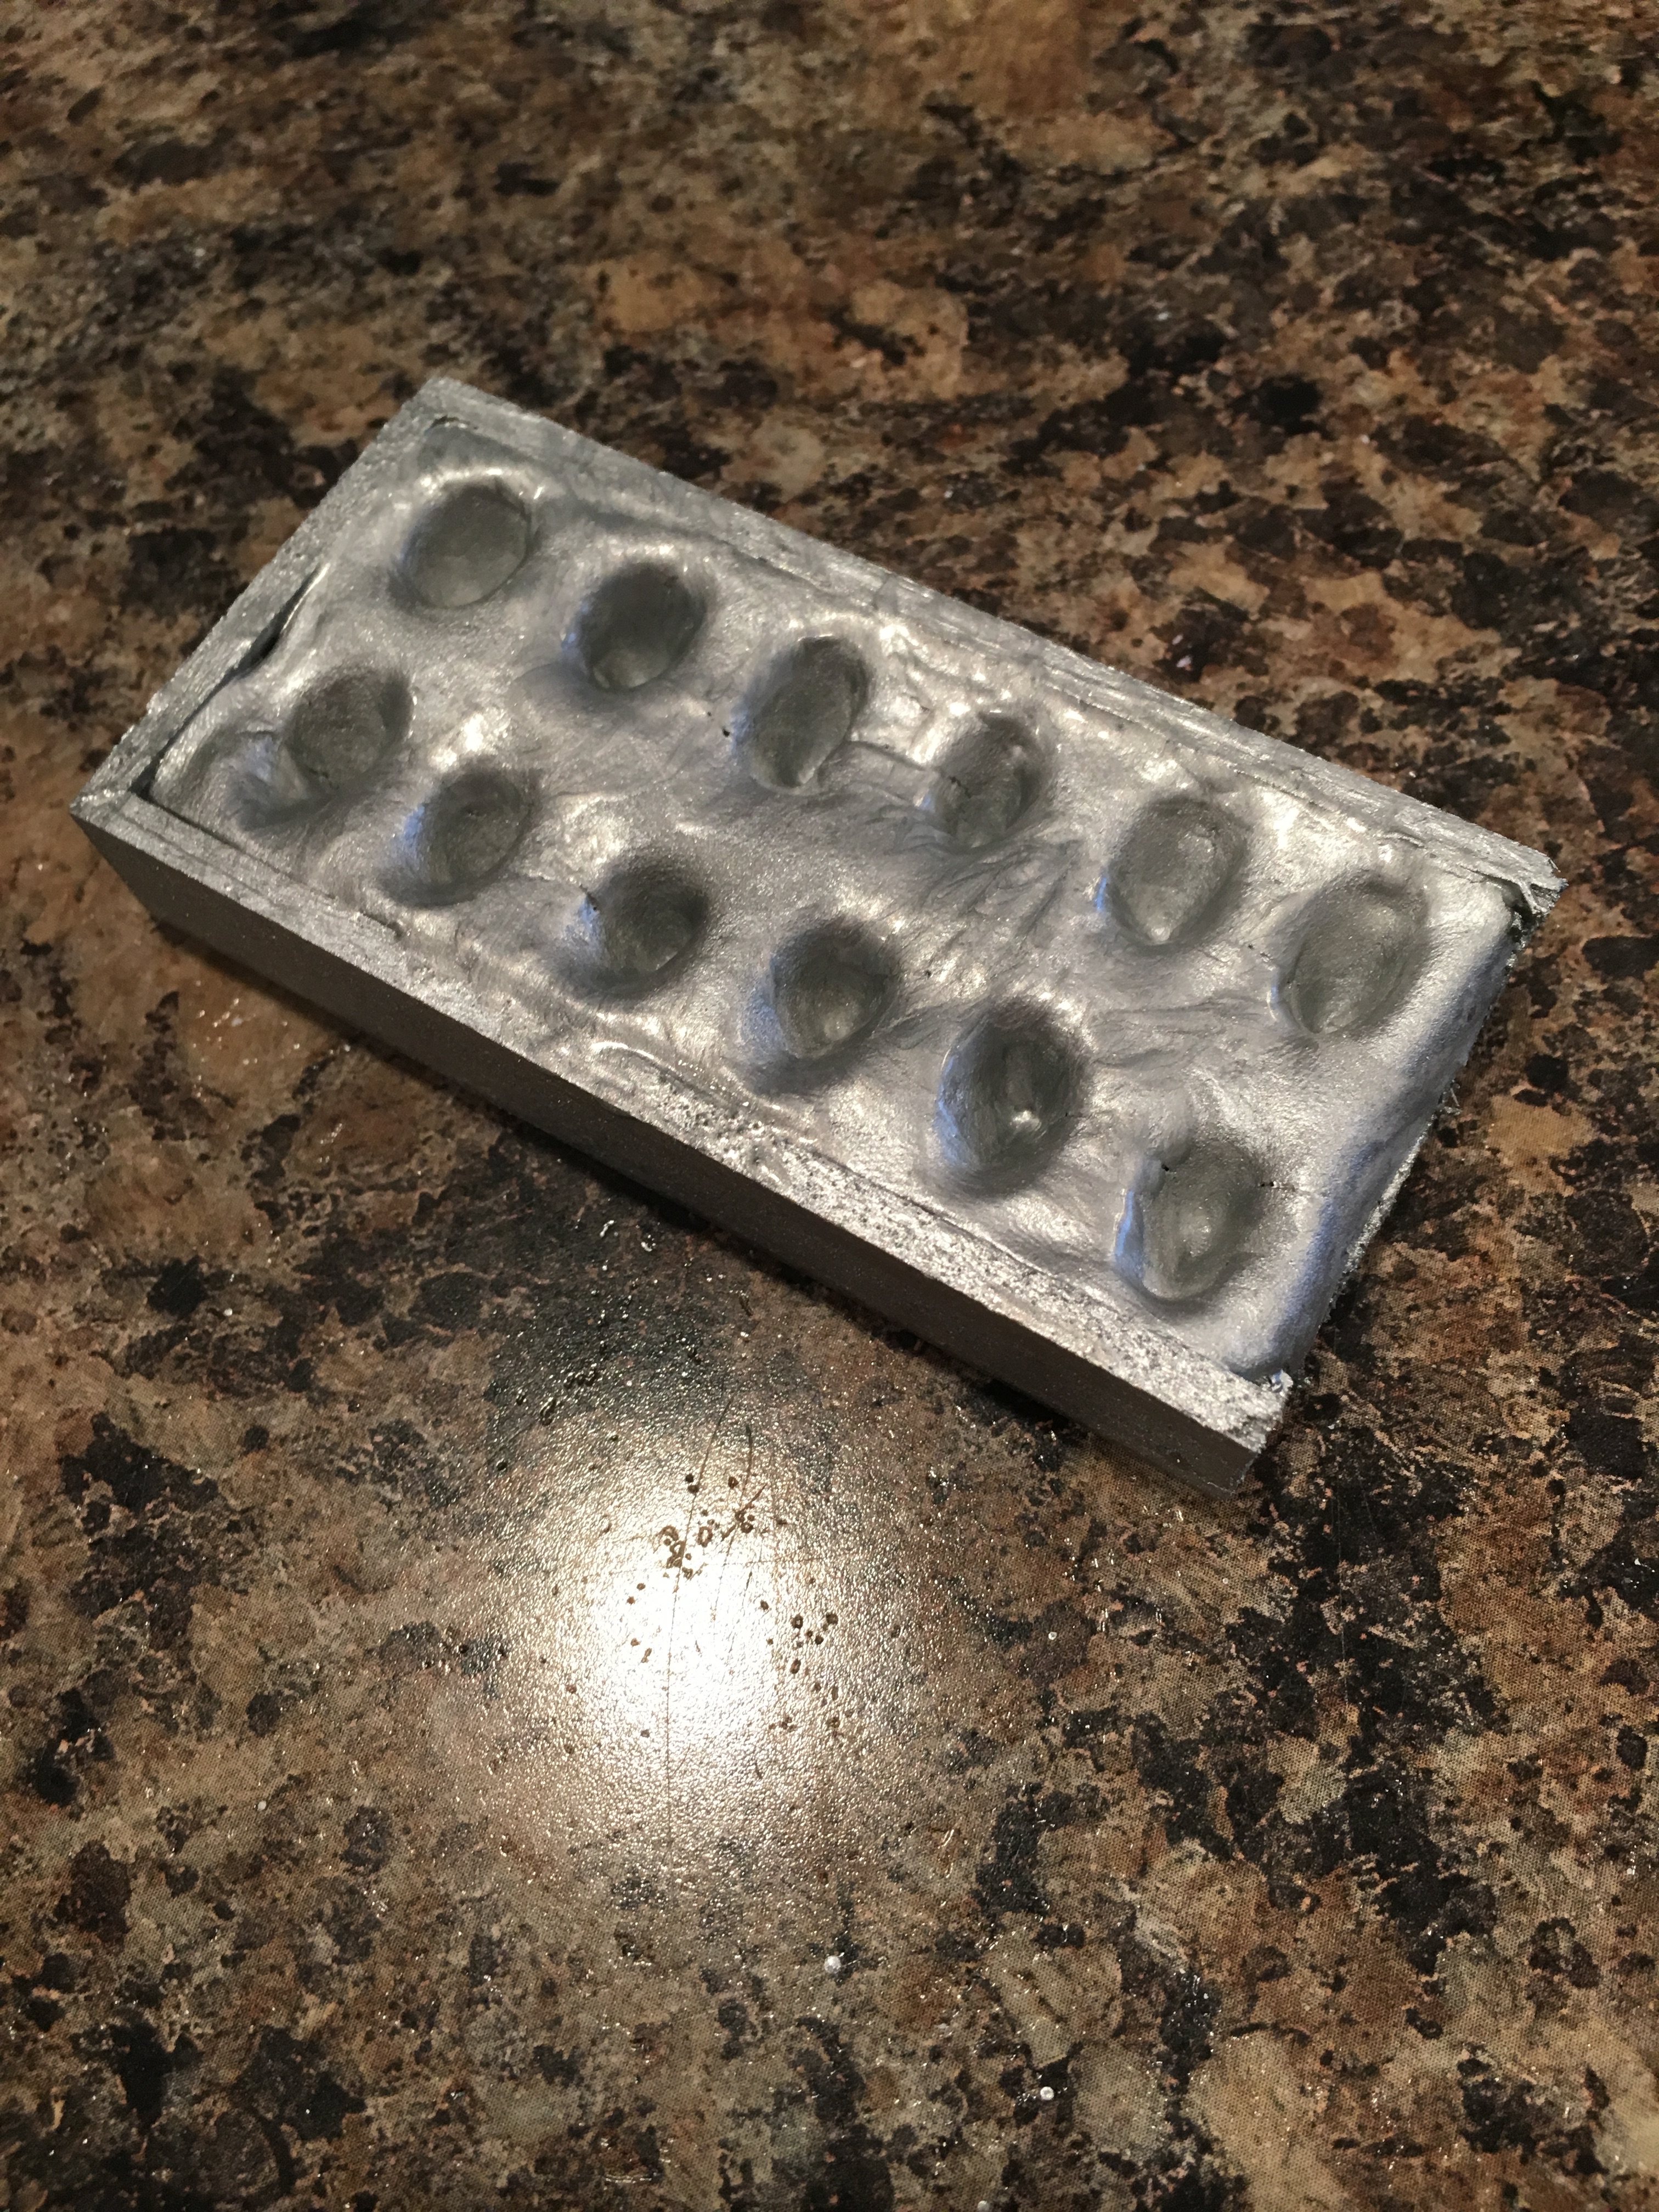
And you’re done!
Next up is the butter!
In hindsight, if I had to make butter blocks again, I would probably just use model magic clay and paint it yellow.
Since I was being uber crafty at the time, thinking that maybe I could wrangle up something cool and magical, my butter blocks ended up being an overly thought out, super complicated project, in other words, perfect for crazy people to do at midnight, or beyond. 😛
Ahem. Let’s commence.
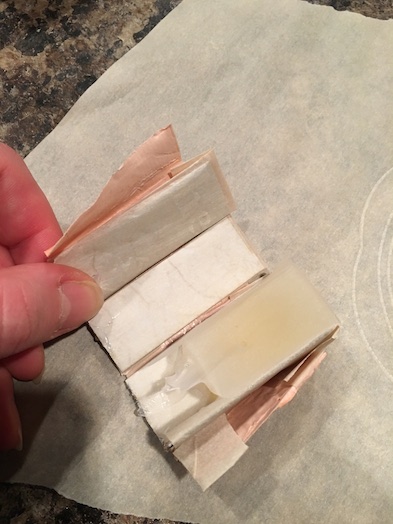
I first cut out four rectangles of thin cereal box cardboard. My plan was to wrap the rectangles in parchment paper, and create a butter block mold that I could fill with hot glue. Hot glue doesn’t stick to parchment paper, so a 3D mold made of the stuff would be perfect, right?
Wrong. LOL!
Lo and behold, in actuality, nothing sticks to parchment paper. Literally nothing, you guys. Seriously, and for real. I tried everything. I tried taping the parchment paper to the cardboard strips. I tried packing tape. I tried glue. Nothing sticks to this stuff. Good for flat hot glue projects. Not good for 3D hot glue projects.
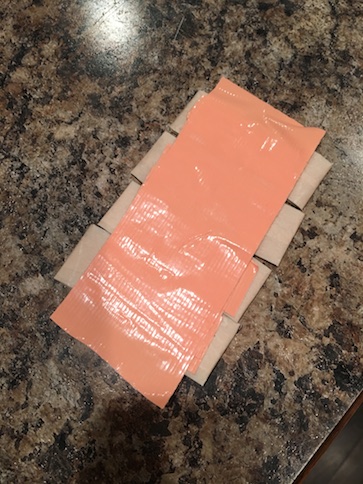
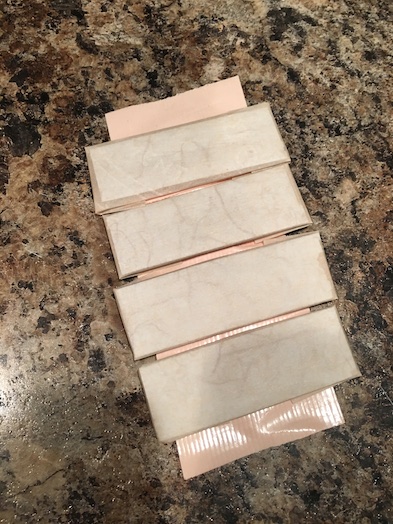
I was finally able to get duct tape to stick to it somewhat, long enough to hold a basic rectangular butter block shape anyway. This was pretty much me just sticking it on there, and wrapping it around the whole block so that the tape would just stick back onto itself. I was kind of losing my marbles by this time, and ready to scrap the whole project altogether. LOL! 😛 
Needless to say, the butter blocks turned out cute, but next time, I think I will save all the hassle, along with the hot glue.
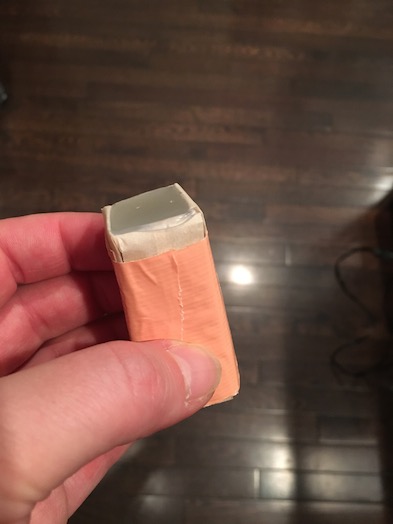
These blocks are dense. About one stick of hot glue each. Jeepers. Lesson learned. Good to know about the parchment paper though. DIY and always learning. LOLing at myself mostly. 
Next, I created labels for my butter blocks using Mac Word. 

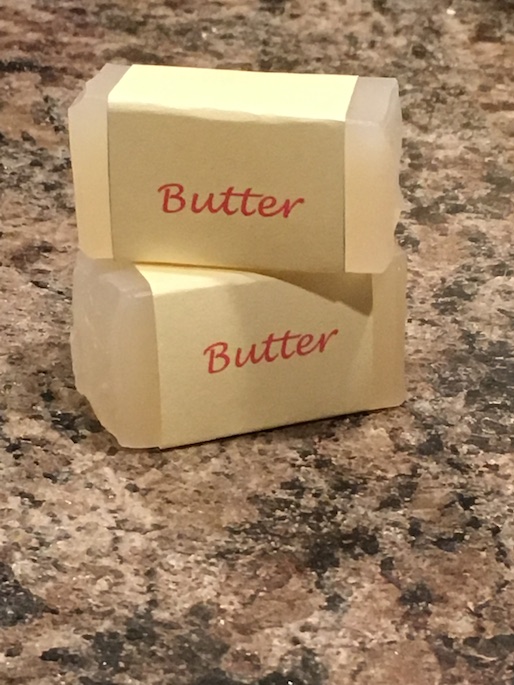
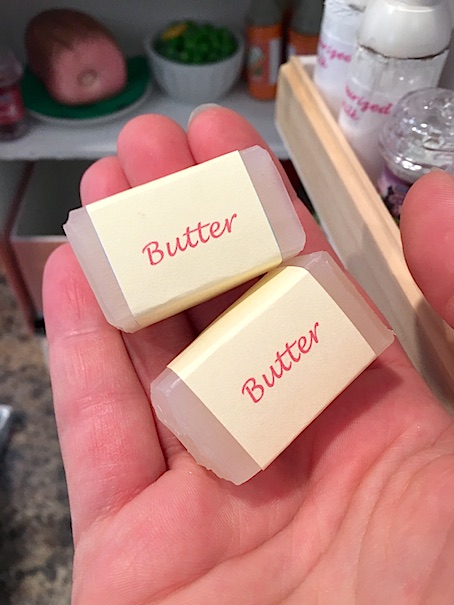 Tada! 🙂
Next up are the jam jars. These were easy. I used salt shakers from the dollar store, and some model magic. 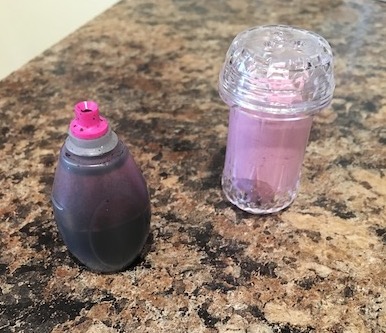
I used food colouring to colour the model magic but you could use paint, or just buy the coloured clay. Fill the jar with clay. 
I printed some jam jar labels from Google Images. I cut them out, and taped them around my jars. Too cute! 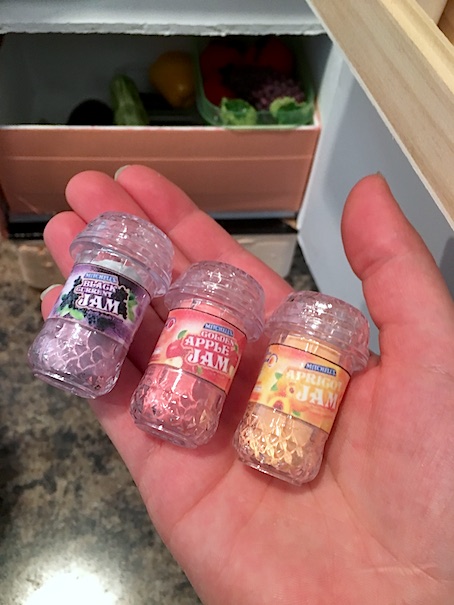 You can make as many flavours as you like!
Lastly, we added some peanut butter. It doesn’t necessarily belong in the fridge, but we thought it was a staple anyway. To make this, I used a small bubbles favour from a birthday party. I cleaned it out, and printed a peanut butter label much the same as I did the jam jar labels.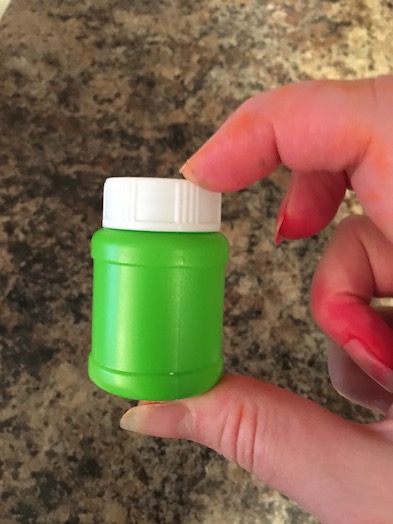 (Don’t mind my food colouring stained fingers. LOL!)
 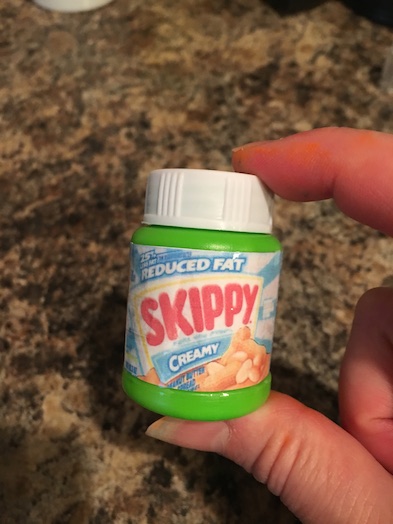 Just tape the label on. Cute! 🙂
Thanks for joining us today!
Be sure to check out our other fridge tutorials:
I hope that you enjoyed!
Leave a comment below! And have a crafty kind of day! 🙂
❤ ❤ ❤

Thank you. It looks just like Mary Ellen’s!!!
LikeLiked by 1 person
Thank you! 🙂 I’m glad that you like it!
LikeLike
I love this!
LikeLiked by 1 person
Thank you! 🙂
LikeLiked by 1 person
My pleasure!
LikeLiked by 1 person
It’s so cute! 😀
LikeLiked by 1 person
Thanks! It was a bit late getting posted, but I’m glad you enjoyed! 🙂
LikeLiked by 1 person
Wow, so cute!! I love them all!!! I KNOW WHAT YOU MEAN, LITERALLY NOTHING STICKS TO PARCHMENT PAPER
LikeLiked by 1 person
Right?? It’s great for some things, but since nothing sticks to it, it’s kind of difficult to work with. I’m glad that you enjoyed! 🙂
LikeLiked by 1 person