
 Hi guys! We are excited because we’ve been working on something lately that we think is pretty amazing, and we can’t wait to share it all with you! 🙂 So be sure that you stay tuned for that!
Up first though, we want to show you how to make your doll a soda pop bottle! I just love pop bottles! They beat drinking from a can hands down, and these are just too cute to resist making. 🙂
Okay, let’s get started!
To make your doll pop bottles you need:
Aluminum foil tube or other sturdy tube
Exacto knife (parent’s supervision required)
Hot glue
Buttons
Thermometer probe covers (we have these for our digital thermometer. The drug store sells refills of them)
Orange/Silver paint
Printable labels (we just printed a logo from online, but there is a printable at AmericanGirlIdeas that might work too)
Small beads
Packing tape
Let’s begin!
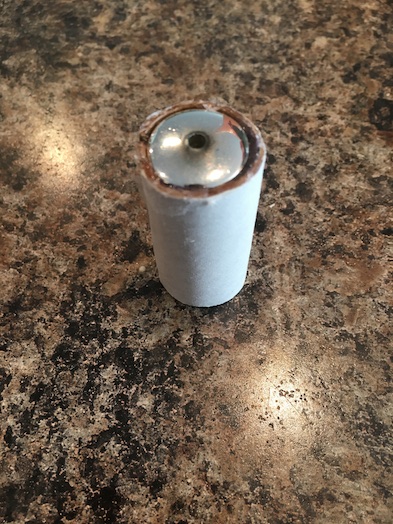
Take your aluminum foil tube, and using an exacto knife, cut off sections that are an inch and 3/4 long.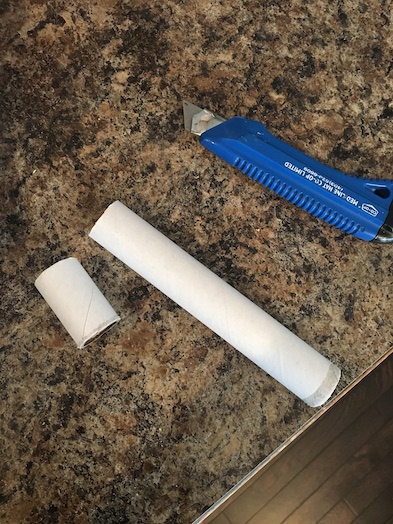 Now you want your pop bottle to have a diameter of 3/4 inch. My aluminum tube was too wide so I cut a slot down the centre.
 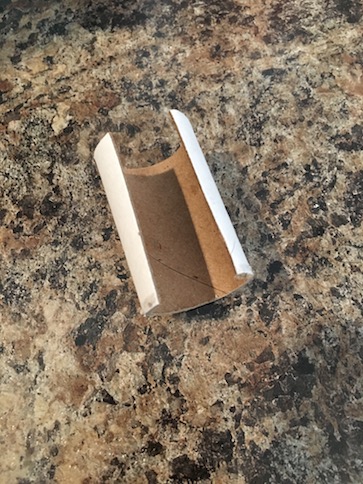 Next I pinched the tube back together, and hot glued the seam closed.
 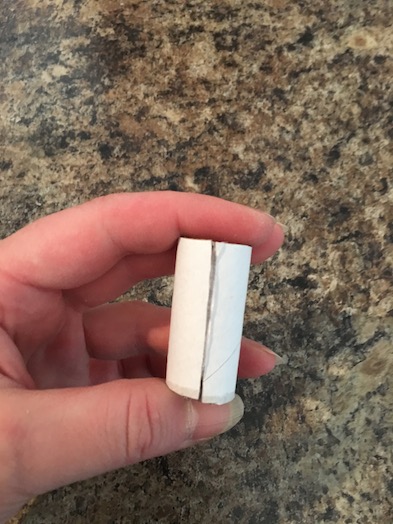 This actually worked very well. I can see using these tubes to make other doll accessories too, like maybe a telescope, a flashlight, some binoculars, or even just some canned food/canned pop. Anyway, I digress. 😛
Take one of your thermometer covers and fill it with hot glue. I was afraid at first that the heat from the glue would simply melt the flimsy plastic cover, but it worked really well, and it held up nicely.
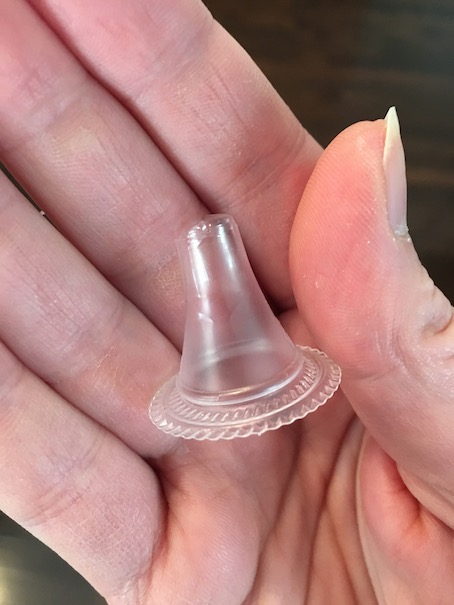

This will be very hot so you might want a small bowl of ice water nearby to dip it in to speed up the cooling process.
Once it is fully cool, you can trim off the bottom rim of the thermometer cover.
Next, you need to build up the top of your bottle a little. I just used a button for this.
First, I hot glued the button inside the top of my tube. Then I squirted a small mound of hot glue on top of the button.

Hot glue the glue filled thermometer cover to the top of your button. 
Very cute! ❤
All that is left is to put the label on, and to stick a bottle cap on top.
Before putting on the label, I painted the entire white part of the bottle with orange paint. Then I printed an image from online that I thought was suitable.
 I used a glue stick to attach the labels. I stuck one logo on the front of my bottles and one on the back. I left a little bit of the white paper on the labels so that it looks like it wraps all the way around the bottle.
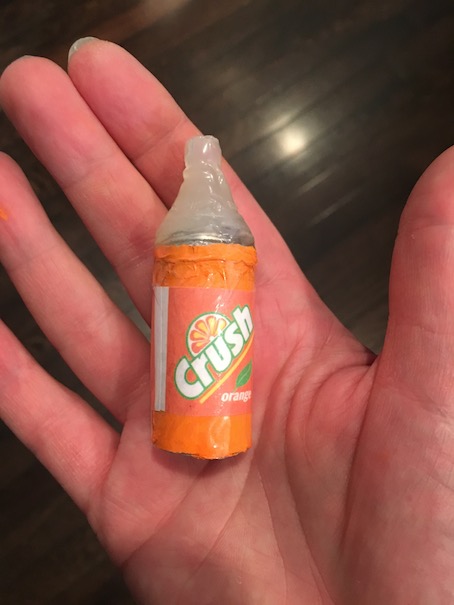
For the bottle tops, I used small plastic beads.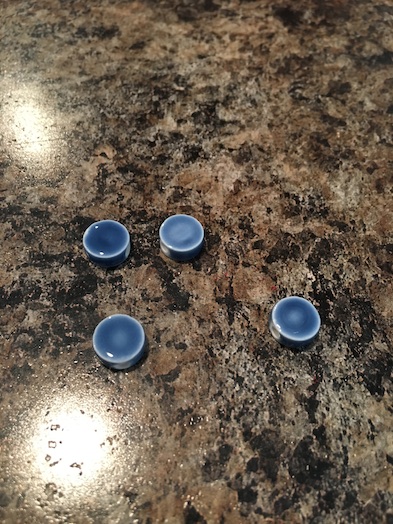
I painted them silver.
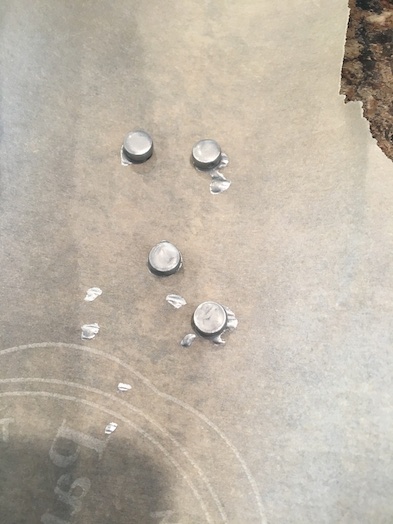
Then I just used hot glue to attach them to the bottle tops. The last step was to laminate. I wrapped the entire orange tube of the bottle with packing tape to make it shiny. I also added a button to the bottom of the bottle to close it up.
And you’re done!
 I am so pleased with the results!! They turned out so cute, and the cost was relatively nothing! 🙂
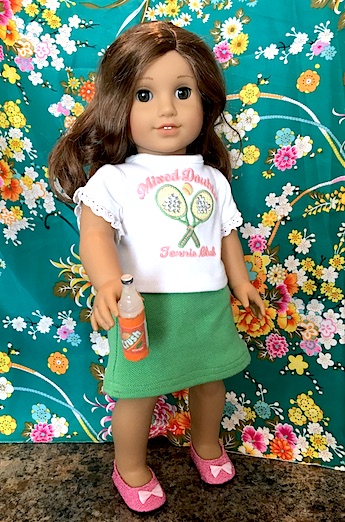
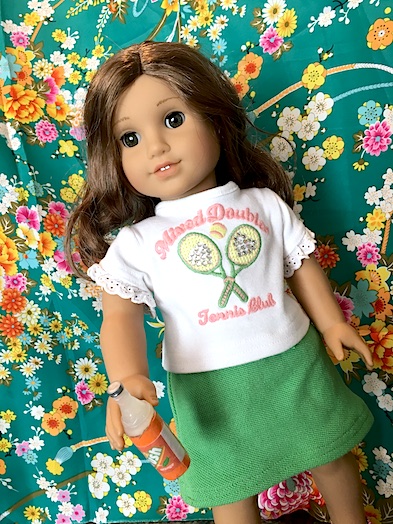
Here’s our Rebecca enjoying a cold drink on a beautiful day. 🙂 
That’s all for now, but I hope that you enjoyed! And I hope that you stay tuned for all of the interesting, and crafty things that we’ve been cooking up lately. 🙂 I know that we can’t wait!
Thanks for dropping by!
Also Happy Canadian Thanksgiving!
We are thankful for each and every one of you! We are also looking forward to celebrating with friends and family all weekend! 🙂
Leave a comment below!!
❤ ❤ ❤

What an ingenious method! Saving this one for later. Thanks!
LikeLiked by 1 person
You’re so welcome! I’m so glad that you enjoyed! 🙂 ❤
LikeLike
Very cute!
LikeLiked by 1 person
Thank you! 🙂
LikeLike
Oh my goodness, that is SO cute and amazing! So super realistic! I love your DIYs.
★Madison
LikeLiked by 1 person
Awww! Thank you so much!! ❤
LikeLike