

Hello everyone! Are you ready for the weekend? We are heading to a wedding all weekend, but this post has been floating around in my brain for a while. I finally decided to get down to work, and get it written down. 🙂
When I got Josefina for my birthday, one of the things that I really wanted her to have was her adobe oven. I also really wanted all of the little foodstuffs that went along with her oven, but more on that later.
Okay for those of you who know us well, you know that a lot of the time our real food ends up in our crafts. This time was no exception. LOL!
Alright, with that in mind, here we go!
How to make Josefina’s Adobe Oven
(This is Faking It Mostly at its finest 😛 )
You will need:
One medium sized spaghetti squash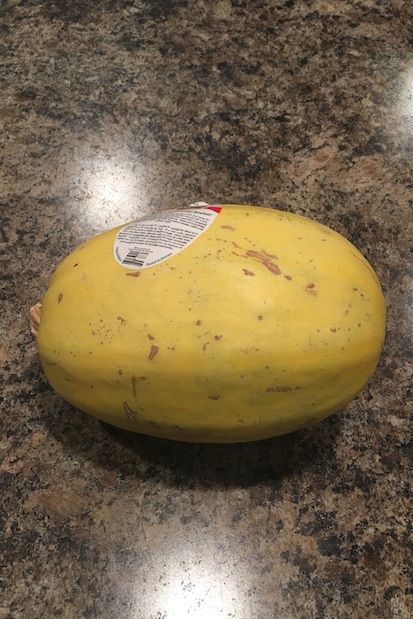
(Now I know what you are thinking already, but please bear with me. LOL!)
Strips of newspaper
Flour and water
Plastic wrap
Tin foil
Pencil
Scissors
Paint
Hot glue
If you haven’t guessed it already, we are going to do some papier mache! Yay! 🙂
We always love using this method for our doll crafting because it is sturdy, it costs virtually nothing, and it holds up to play wonderfully.
I only have one warning before we get to it. Papier mache is about as messy as crafting gets, so be sure to cover all surfaces, and wear an apron. 🙂
Alright, let’s begin!
Step 1: Cut the bottom off of your spaghetti squash. We made ours 6 inches high.

Step 2: Cover your spaghetti squash with plastic wrap. This is very important. You don’t want your papier mache to adhere to the skin of the squash. (You also might want to eat the squash later. Just kidding! Don’t eat it! Well actually, I’m not completely sure about that. I can’t see that it would be totally ruined. It does sit out for a day or two though. Okay, you can feel free to eat the squash at your own risk. LOL!) 
Step 3: Mix 1 part flour to 1.5 parts water. This is your glue. Take your newspaper strips, and one by one soak them in your glue, and begin pasting them in layers on top of your squash. (This is pretty much just like in kindergarten where you use your fingers to squeegee most of the glue from the strip before placing it on your project 🙂 )
Do a few layers so that your oven will be strong. I put strips over the top of the squash, as well as around the base. Do not put any strips of newspaper underneath on the bottom opening. You want to be able to get the squash out after it is dry. Once it is done, set it aside, and let it dry completely overnight, or longer.
Now it’s time to make the oven base:
Step 4: Take a piece of aluminum foil and fold it into a square shape. Approximately 6.5 inches by 6.5 inches is a good size give or take.
Step 5: Next, roll up some tin foil to build up the sides and the middle of the square. You will want it to be about 1-2 inches high with rounded corners. Wrap your square up with more tin foil to contain the edges.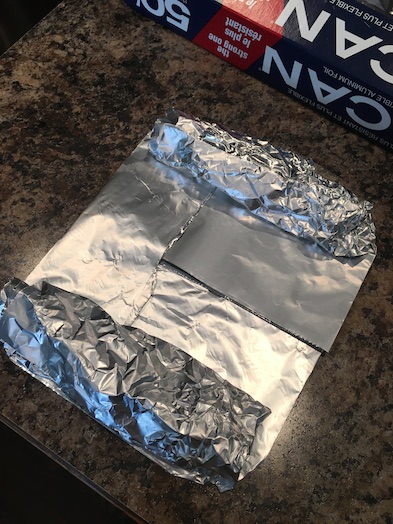
Step 6: Begin wrapping your tin foil square in newspaper strips. You can tear the paper a little at the corners so that you get more rounded edges. Wrap a good amount of layers to make it sturdy. Set aside to dry. Don’t worry, papier mache dries as hard as a rock. The tin foil will be completely contained, and it won’t sag. (Save your flour glue, and leftover newspaper strips for the next part though) 
Step 7: Once your oven kiln is completely dry, remove it from the spaghetti squash. I just tugged at the plastic wrap, and it came free quite easily. Remove all of the plastic wrap.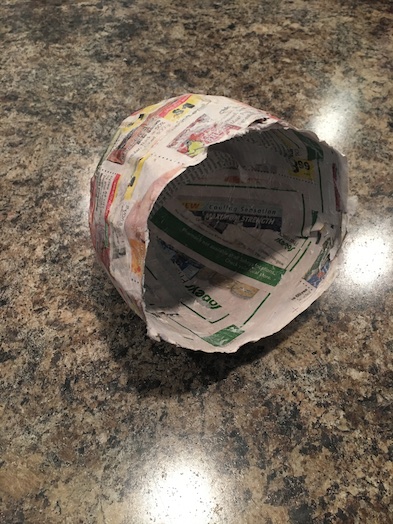

Step 8: Using a pencil, freehand an opening in the front of your oven. Carefully use a sharp pair of scissors or an Exacto knife (parental supervision please) to cut it out. 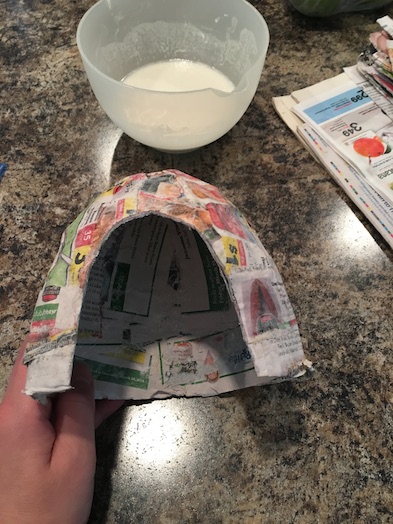
Step 9: Using more strips of newspaper and glue, reinforce around the front opening as well as all the way around the bottom lip of your oven. I just wrapped strips around the bottom and up toward the inside of the kiln. Let it dry completely once more.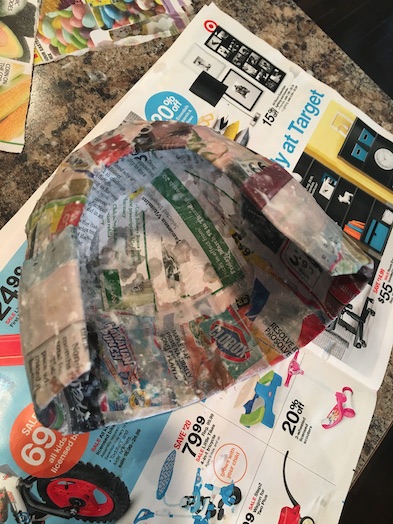


Step 10: Paint both the base of your oven as well as the roof. I just mixed paint until I got a nice light terracotta colour. Let dry.
Step 11: Using hot glue, attach the roof of the oven to the base.
Step 12: Next, I used black chalk to add soot to the floor of the inside of the oven as well as to the rim around the door. Then I used yellow and brown chalk to make the rest of the oven look more used. I just rubbed the chalk all over with my fingers. 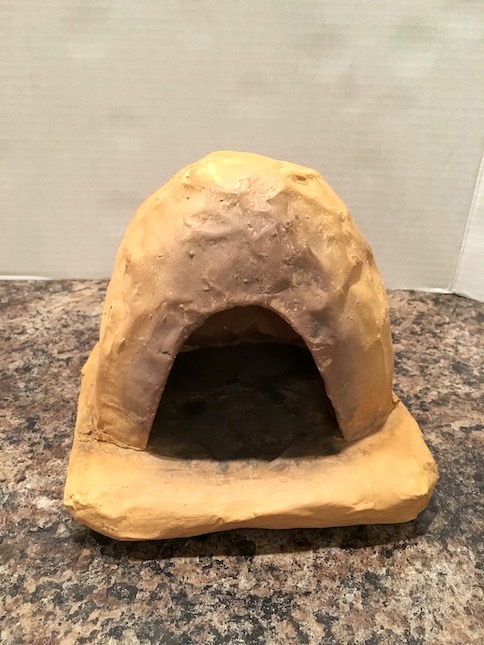
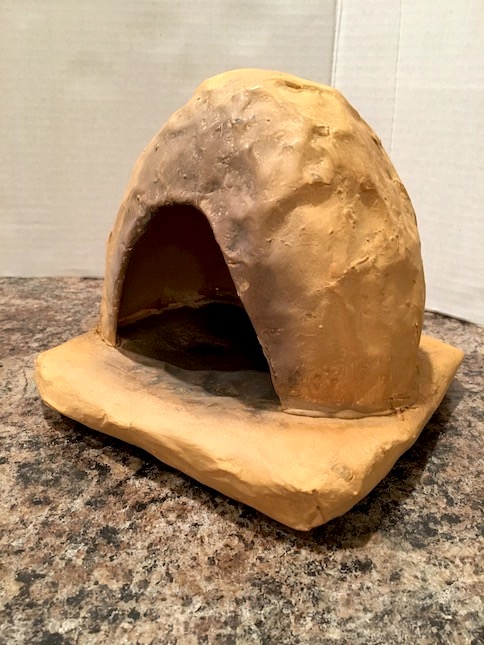
And you’re done!
Here’s a look at our handmade Adobe Oven and our AG Adobe Oven side by side for comparison. We got this AG oven on eBay. 
The Little Miss’ verdict is that she likes the homemade one better because it has a wider door. She wonders how anyone can fit a pizza in the other one. I kind of agree with her. Where the AG oven is cute, not only does it have a narrow opening, but there is also a huge lump of coal in the center of the oven floor. I don’t know how anything could sit flat in there to bake.
Oh well! There you have it!
Now the dolls can bake bread to their heart’s content in their brand new adobe oven! ❤  I just made some bread from Model Magic Air Dry clay.
 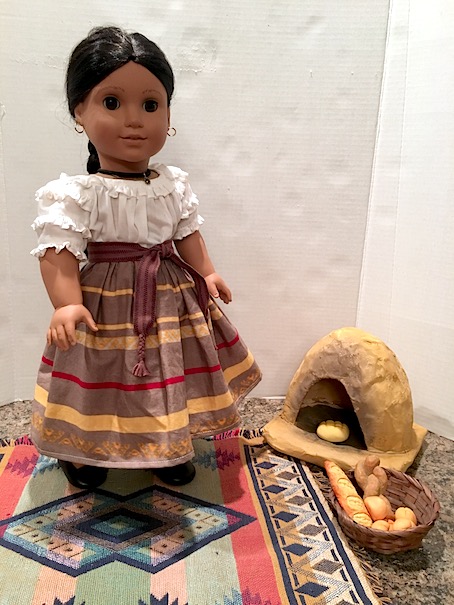 Too cute! ❤
See also Josefina’s Food and Accessories
I hope that you enjoyed this tutorial! Happy Weekend!
Be sure to Like, Follow and Subscribe to keep up with all of our doll crafty fun! Leave a comment below!
❤ ❤ ❤

You are amazing! That’s awesome!
LikeLiked by 1 person
Aww thank you so much! 🙂 ❤
LikeLike
Big thumbs up!!!! I was laughing along with the whole to eat the squash….to not eat the squash. 🙂 Love the humor. Yours turned out fabulous, and I like the way you think about the usability of your oven versus the AG one. Terrific job!
LikeLiked by 1 person
Thank you so much! 🙂 We didn’t end up eating the squash. LOL! 😛
LikeLike
I like yours better because it looks more realistic. The AG one is too perfect if you know what I mean? Great idea!!!
LikeLiked by 1 person
Yes! That’s what we thought too! I like how bumpy ours is. It looks rustic and used! 🙂
LikeLike
It looks great!
LikeLiked by 1 person
Thanks! 🙂 It’s crazy what one can do with a squash and some imagination. LOL! 😛
LikeLiked by 1 person
I know right! 😉 😛
LikeLiked by 1 person
The handmade one looks much more real too! Love it!
LikeLiked by 1 person
Yeah when I placed them side by side like that, I was actually pretty surprised at the odd shape of the AG one.
LikeLiked by 1 person
Yours is much better shape!! Good job!!
LikeLiked by 1 person
Thank you! 🙂
LikeLike
Wow! I was a little confused at first with the squash, but you guys are so creative!!! Josefina’s skirts are gorgeous, too. 🙂
❤ , IrishAG
LikeLiked by 1 person
Not as confused as my poor husband was! He was like, what the heck are you doing?? I think that he pretty much expects the unexpected from us now though. LOL!
LikeLiked by 1 person
XD
❤ , IrishAG
LikeLike
Absolutely fabulous!! Love it!
LikeLiked by 1 person
Aww thank you so much! 🙂
LikeLike