

Hi everyone! Are you like us in that every time a new doll arrives at your house, you just have to make a place for her? We are always worried that our dolls don’t have anywhere to sleep!
So far, everyone in the doll’s house has a bedroom except for the new girls, Maryellen and Tenney. Now, most of the time, Maryellen just lives in her diner, but today, we are going to show you a project that we have been diligently working on that we think is just fab! We are also excited to announce that Maryellen is finally getting her own space!! Yay! 🙂
Ever since we created the Murphy Loft Bed for the Newberry dolls, I have been eyeing up AG McKenna’s Loft Bed thinking that maybe I could make it in a similar way.
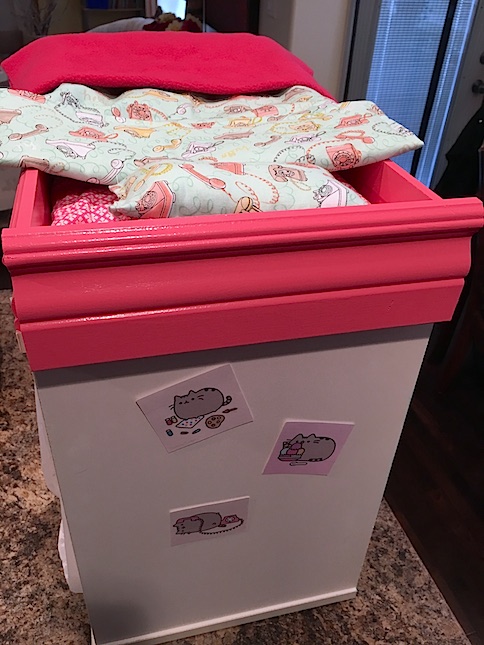
Here is what we started with. We found this thing of beauty at the thrift store for $4. Doesn’t look like much does it? Well, to me, it looked just perfect. 🙂

First things first, remove the handle from the fake drawer. That’s right, the drawer is a fake designed to look like a real drawer, but when you look at the back, there is nothing there.
Next, flip the whole thing on its side. 🙂 Can anyone see my vision yet?

After that, I began to create the insides.
Thank you to my dad for helping me once again to cut my wood. 🙂

I made a desk as well as a shelf along one side. I just used gorilla wood glue to attach these. This glue is tough as nails, but as you can see at the front corner of the desk, I also used one finishing nail along with the glue to attach the desk leg.

Then I glued some shelves on the other side.

I added two pieces of chair rail to the top for the bed.

I also made this doll chair to go with the desk. The little trunk is a thrifty find that fits nicely under the shelves.

So far so good. It just needed some paint as well as a headboard and footboard for the bed. I decided to use colours that matched our DIY Maryellen’s Diner.

Too cute! Everything that was already white I just left white because it had a nice finish on it.
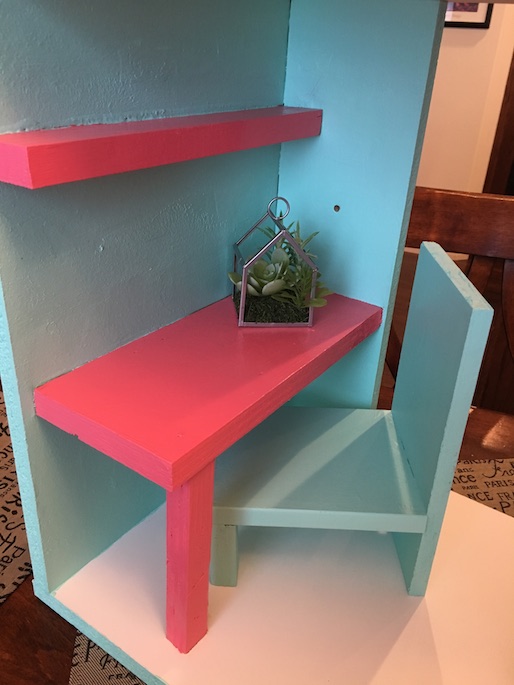
I found this adorable little mini terrarium at Michael’s that I thought would be perfect for Maryellen’s new loft room.

I love the pink and green colour scheme! ❤

And of course we painted the bed rails to match.
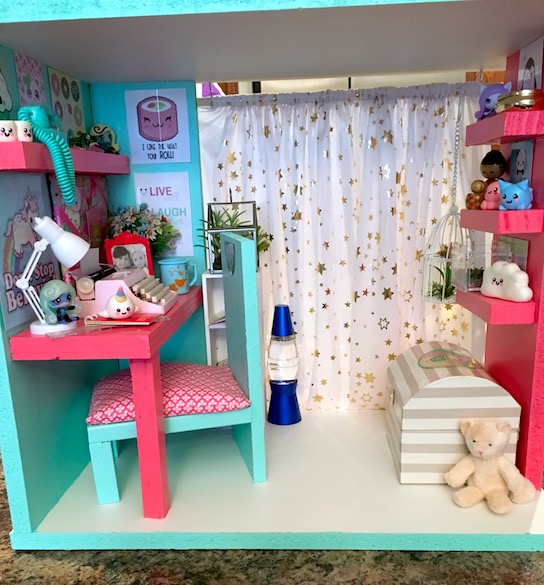
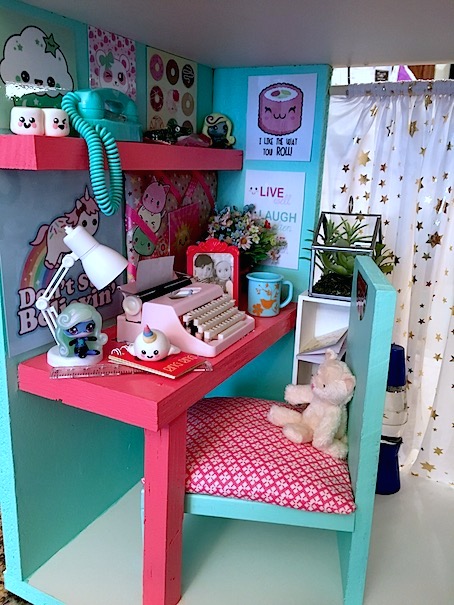
Now for the fun part! Decorating!
First, we went online, and found all kinds of cute kawaii posters to go on the walls because, well, cute kawaii!!! 😛 We just printed a bunch out onto card stock paper, and used packing tape to laminate them.
Next. we added some accessories!
I didn’t permanently attach any of the posters because that way they can be rearranged or changed out whenever we want.
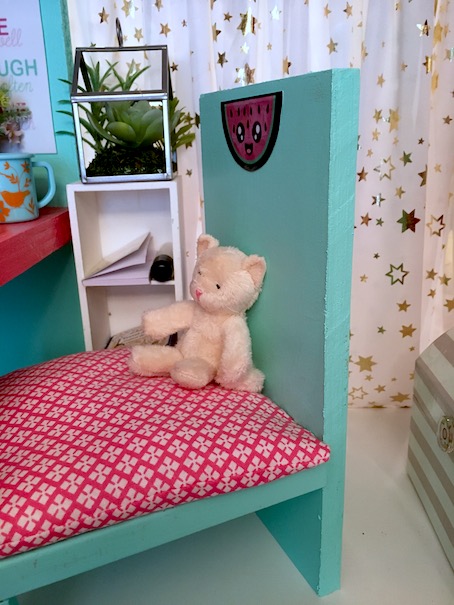
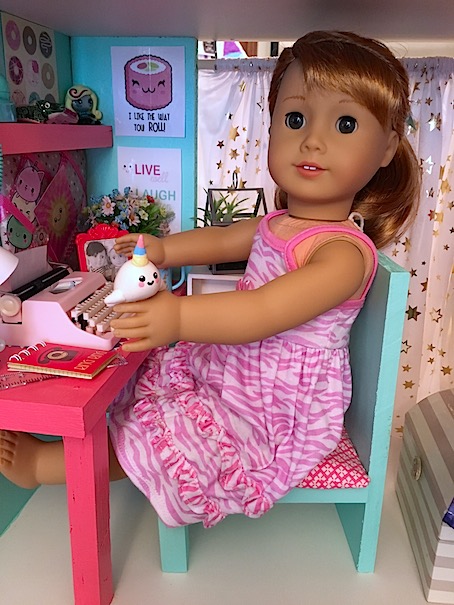
I sewed up a cushion to attach to the chair.

Check out the tiny lava lamp that we found at a garage sale! I know, it’s probably more Julie but we just think it’s adorable! We permanently attached this shelf to the floor beside the desk.

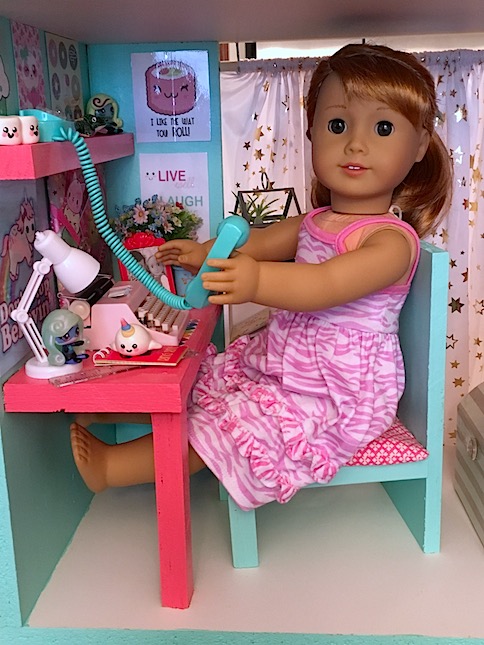
So many goodies! I highly recommend the OG retro phone and the typewriter sets. They are so adorable, and well worth the price. We got ours at MastermindToys. The typewriter buttons type, and the rotary phone dials! 🙂 LOVE!
(We also purchased the OG retro radio set, and again, so well worth the price!)

The memo board is removable. I made it out of a piece of foam board. I upholstered it with fabric, and wrapped it in ribbons. Then I just stuck some cute kawaii posters in there. 🙂
I ended up making a few model magic pieces for the room. These little marshmallow buddies are so sweet! I also really like the rainbow unicorn poster. Unicorns are kinda huge with my daughter right now.
“Don’t Stop Believin'” 🙂

No kawaii room is quite complete without a teeny weeny little narwhal. I made him from model magic too. 😛

I found this tiny little croc at a garage sale. 🙂 So cute!
I got the star fabric from another garage sale. We have been to a lot of garage sales lately. 🙂 I used hooks and a dowel to make a curtain rod for the star fabric to hang from.
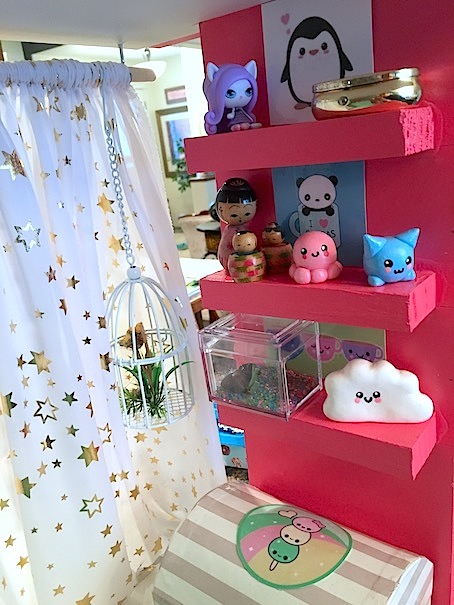
We also hung the birdcage from the dowel on this side of the room. The little brass container on the top shelf is a pill box.

I made the cloud, kitty and octopus from model magic clay.

Cute little turtle aquarium!! ❤
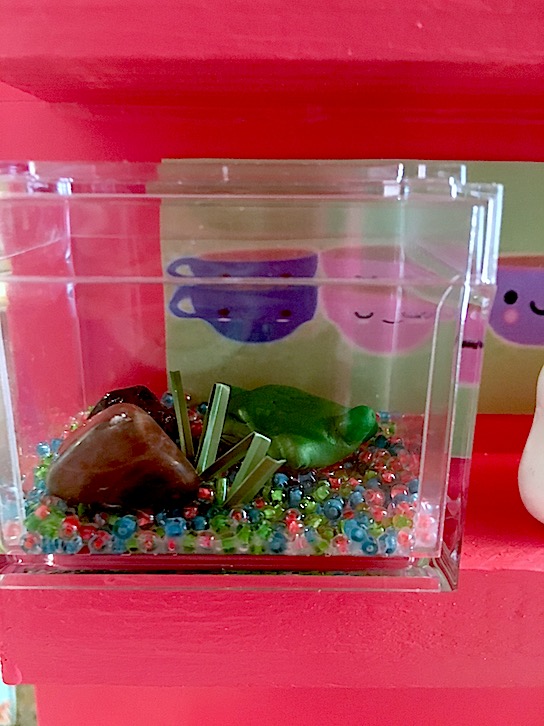
I made the little turtle out of model magic clay. The rocks are actual rocks and I just glued some colourful seed beads to the bottom of the plastic container.
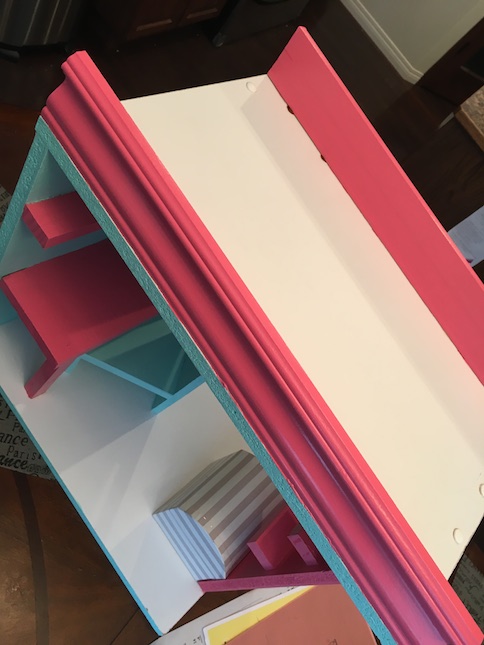
Here’s a top view.

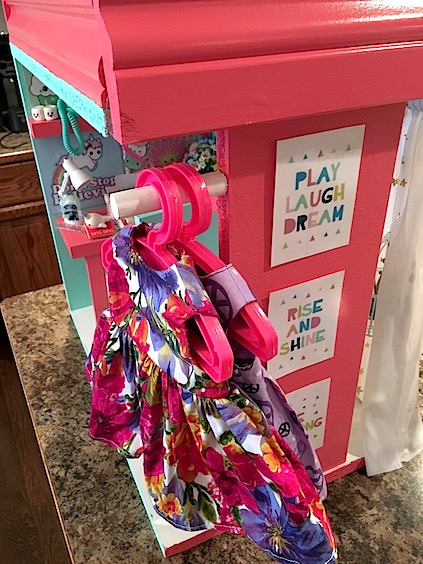
Along with the little clothes trunk, Maryellen can also hang up her clothing on the dowel rod that we glued to the side of the bed. I just used wood glue for this.
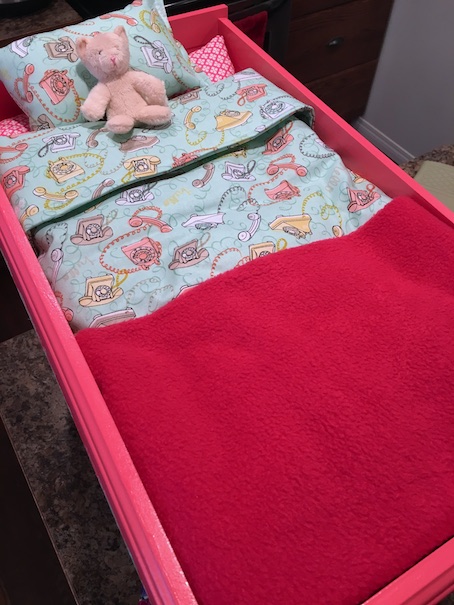
Up top we find Maryellen’s comfy new bed with a mattress, a retro telephone print comforter, a matching pillow as well as a pink fleece throw blanket for extra cold nights.
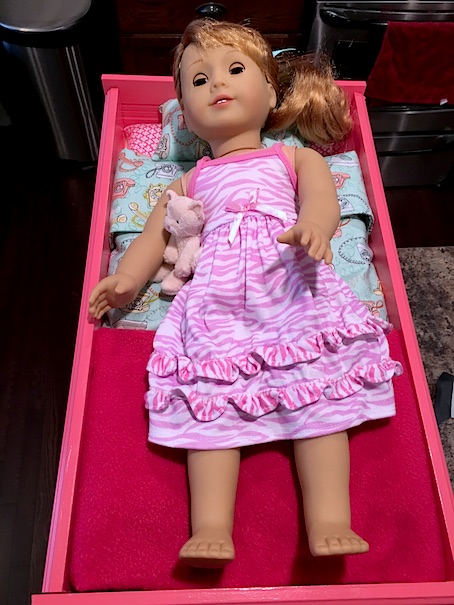
Here’s Maryellen now! Looks like she is ready for bed.
Before she goes to bed however, she would like to check out her new space.
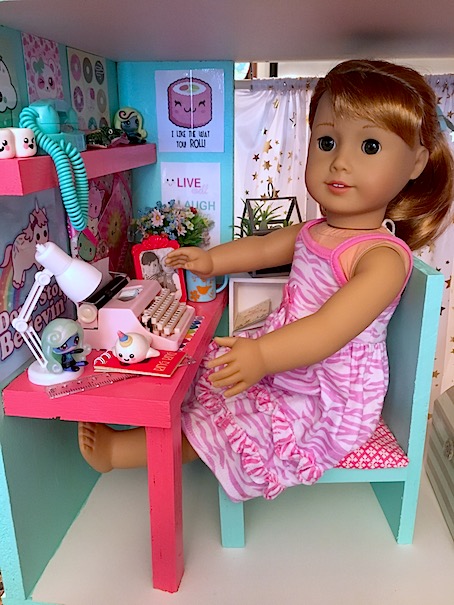
Looks like it’s a perfect fit!
We can already tell that she is going to be spending a lot of time in here.
No one can resist our wee baby narwhal! LOL! 😛

Okay Maryellen, time for bed.

All tucked in.

This will be perfect to add on as a private space for Maryellen to live at her diner. The Little Miss tells me that she wants to live here. LOL! 🙂
This side of the bed is quite blank yet. We are thinking of adding on a vanity mirror with a table here, but we haven’t fully decided yet. That’s the great thing about DIY. You can pretty well do whatever you want! 🙂 We haven’t decided where to attach the ladder yet either.
Oh well, for now, Maryellen just seems to be happy to finally have a bed!

I hope that you enjoyed our DIY! Here’s a teeny weeny narwhal for your troubles! 😛

Leave a comment below!
❤ ❤ ❤

I am so sorry I am reading this so late! I love how this ADORABLE loft came out! It is perfect for Maryellen! Great job!
LikeLiked by 1 person
Thank you!!! This one was a fun one to create! 😊💖
LikeLiked by 1 person
FABULOUS! This looks awesome! I love the attention to detail. MaryEllen must love her new room.
Who puts a fake drawer on a bed table?! That’s as bad as fake pockets on pants! Although, in this case it made it easier to work with. You didn’t have to remove any drawer rails.
LikeLike
I know! I was wondering about that fake drawer too! Oh well, it worked for what we wanted! 🙂
LikeLike
I LOVE, LOVE, LOVE this project! So adorable! My favorite thing about it is how you used a thrift item and made it new. One of my favorite things is makeovers! I laughed too at your blog title – I too forget to cook when I start doll crafting.
LikeLike
I am terrible! I get crafting, and everything else goes out the window! LOL! 🙂 I love DIY makeovers too! I love taking something old, and repurposing it into something great.
LikeLike
Oh my word, this is adorable! I love how you take a regular piece of furniture and turn it into something completely different, this is genius!
LikeLiked by 1 person
Thank you! We always love to repurpose and recycle! 🙂
LikeLike
I love her loft bed!!! The narwhal is super cute!
LikeLiked by 1 person
We love narwhals! 🙂 And unicorns. But narwhals are pretty much mermaid unicorns in my opinion. 😛
LikeLiked by 1 person
I totally agree! 😛
LikeLiked by 1 person
Amazing you can imagine all that in your head and then be able to actually do it! So cool!
LikeLiked by 1 person
Thank you! There are some things that I can just picture what I want to do, and then do it. Other things no matter what I try, it doesn’t seem to work. I’m getting better at building things with wood though. Small scale doll size is a lot easier than building furniture for humans. There is some wiggle room for error, whereas human furniture has to be pretty solid. 🙂
LikeLiked by 1 person
This is absolutely perfect!!! If you had bought this, it would have cost a pretty penny! I love DIY, so much more personal! Thank you for sharing!
LikeLiked by 1 person
I know! If we had bought it we would have been limited to what the manufacturer provided. For DIY the sky’s the limit really. We can do whatever we want. 🙂
LikeLike
Hi! Long time lurker here. I really love you DIY projects, and this one is especially inventive. I’m sure your daughter is thrilled!
LikeLiked by 1 person
Hi Sharry and welcome!! I see you over on Flo’s blog sometimes! 🙂 I am so glad that you enjoy my DIY’s!
LikeLike
Wow! Great job! It turned out SUPER cute!
LikeLiked by 1 person
Thank you! 🙂 We are very happy with how it turned out, better than we expected even!
LikeLike