

Hi everyone! We are back with a fun lasagna craft for you to make for your dolls! Who likes lasagna? Well, the Little Miss doesn’t, but the dolls do, and so do I! 🙂
The inspiration for today’s craft comes from the American Girl Lasagna Dinner set.

Here is what you will need:
An oyster/mussels/sardine tin (any oval shaped tin will work really)
Coloured duct tape (any colour will do)
Washi tape (optional)
Craft foam (yellow/red)
Green paint/paint brush
Yellow and white puffy paint
Spices (we used cilantro, chill powder and mustard)
Glossy varnish sealer (optional)
Hot glue
Scissors
Okay let’s get started!
First we will make the lasagna pan. To do this, you want to remove the top of your oyster tin and wash it out. Ours had a little lip on it, so we used a can opener and scissors to remove it.
**Please wear gloves, and get an adult to do this. The cut edges of the tin can be very sharp and WILL slice through your finger if you don’t wear gloves.**
Once the top of the tin is removed, cover the entire outside surface of the tin with the coloured duct tape. This seals off any sharp edges. You can use washi tape to decorate the edge of the pan if you like.
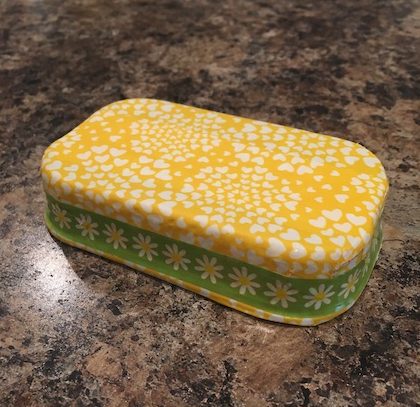

The only part we didn’t cover was the inside bottom of the tin.

Time to make the lasagna!
Cut a strip of yellow craft foam. The strip should be as wide as half of the lasagna pan.

Using hot glue, fold the craft foam like a fan, gluing each fan fold down as you go.
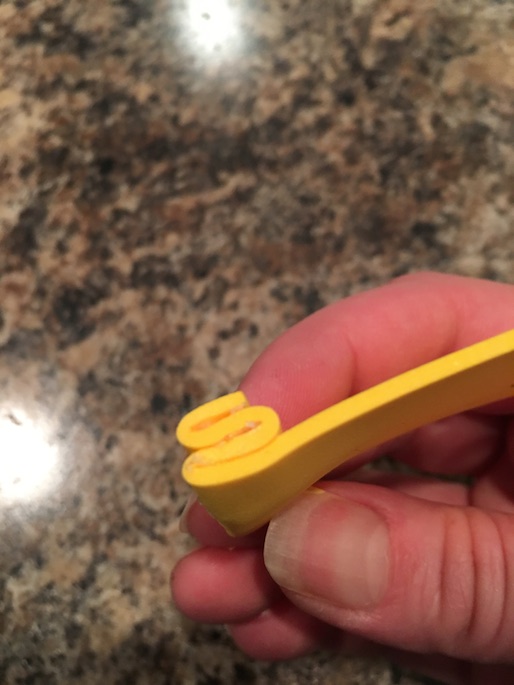
Once you have enough folds, cut off any excess from the foam strip. It should look like this:

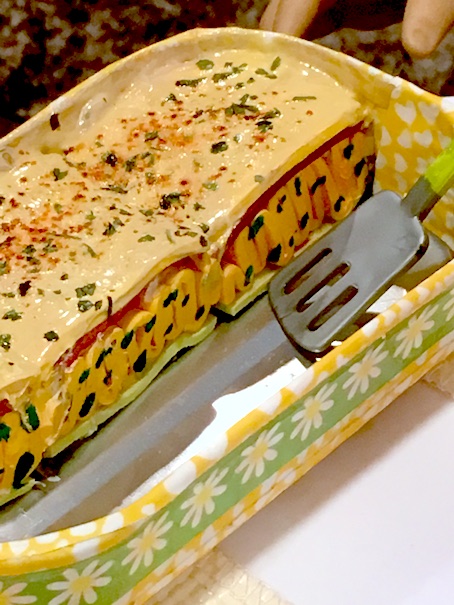
Now if you are making the corner lasagna pieces, place your accordion piece into the pan. Measure to be sure that it fits snugly into the corner. Cut a rounded corner edge to make it fit.

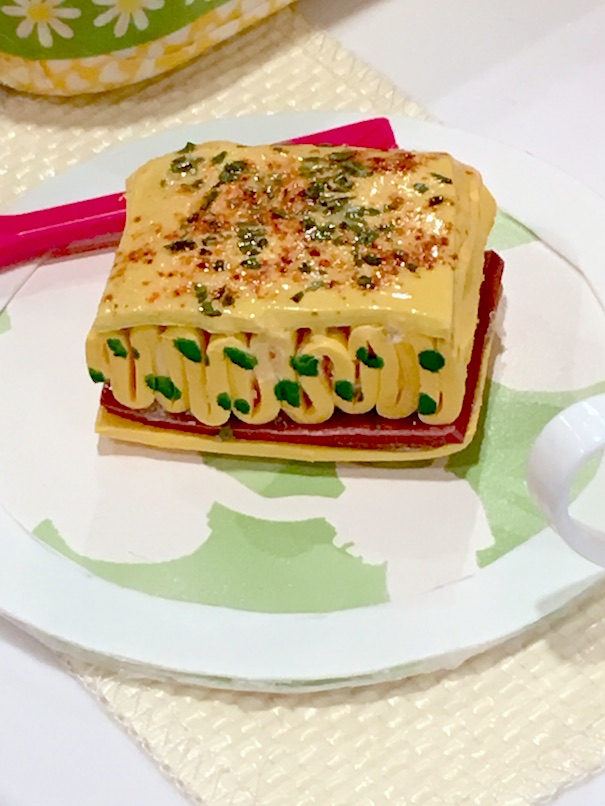
Here is how we stacked ours. We hot glued a light yellow/green craft foam square down in the pan for the first layer of the lasagna. Then we glued the accordion folded foam on top.
 Next we added red craft foam for sauce and yellow craft foam on the very top. Notice how we also rounded the corners of each layer to fit the corner of the pan.
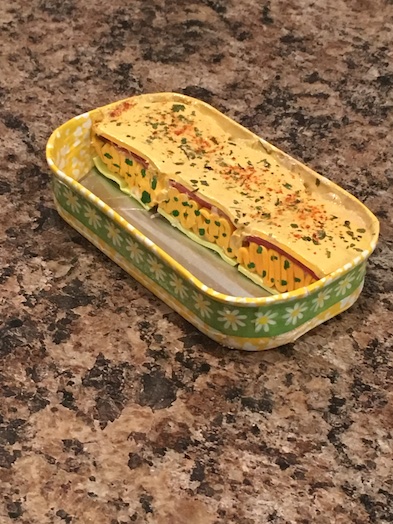
Once you have the first three pieces secured in your pan, mix yellow and white puffy paint and spread on top for cheese. Use green paint to add some detail on the sides of the lasagna. For realism, we used actual spices on top. We just sprinkled them on before the puffy paint was dry.

When the paint is dry, you can use glossy varnish to seal the spices.
Next, we made two lasagna servings that are loose from the pan.

We just used the exact same method as before, making sure that the pieces fit in the pan, but instead of gluing them in, we made them removable.
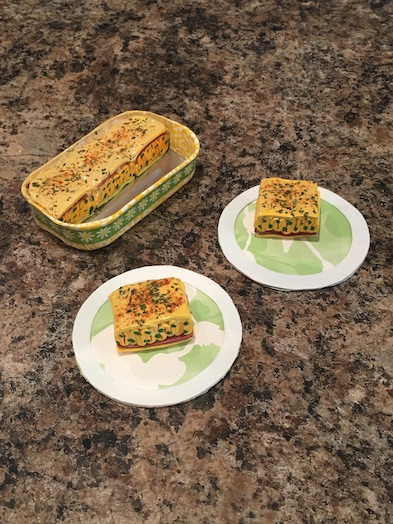
We love the result!!
To make the plates you will need:
Two paper plates in a design of your choice
Two plastic butter lids or any other plastic lid
A small circle tracer and a larger circle tracer
Nailpolish remover
Hot glue
Scissors
Let’s begin!
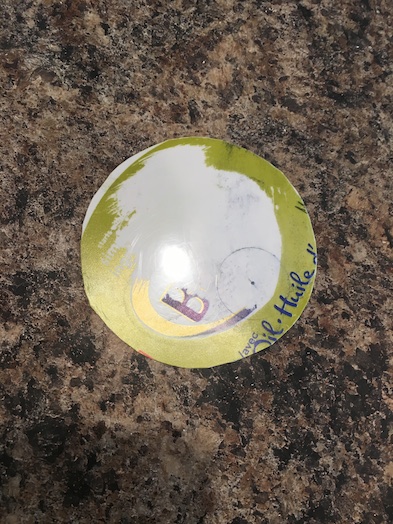
First remove all writing from your plastic lids.

To do this, you will need nail polish remover and a piece of kleenex or a cotton ball.

It will come off fairly easy.
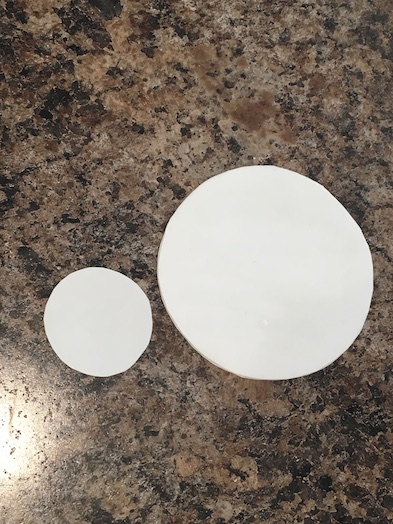
To make one plate, start by tracing two circles on the blank plastic lids, and one circle onto the paper plate.

We just traced the bottom of a large coffee mug. Cut the three circles out.
Set one of the plastic circles as well as the paper plate circle aside.
On the centre of the remaining circle, glue a smaller circle cut from the plastic butter lid. This will be the bottom of your plate.
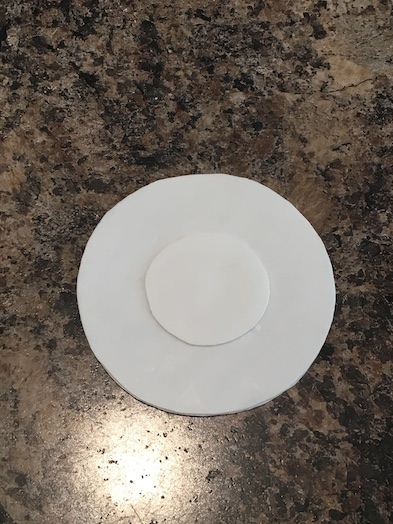
Take the other plastic circle that you cut out, and trace a slightly smaller circle inside it. Cut out the smaller circle to form a ring.
Here is what you should have now:
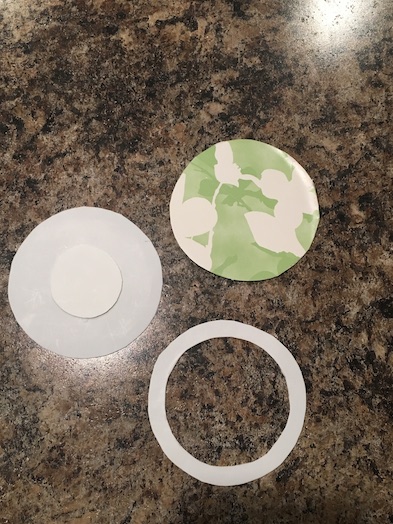
You are now ready to assemble the plate! Glue the ring to the top of the paper plate circle. Next glue the bottom of the plate on. Trim away any excess, then repeat to make a second plate.

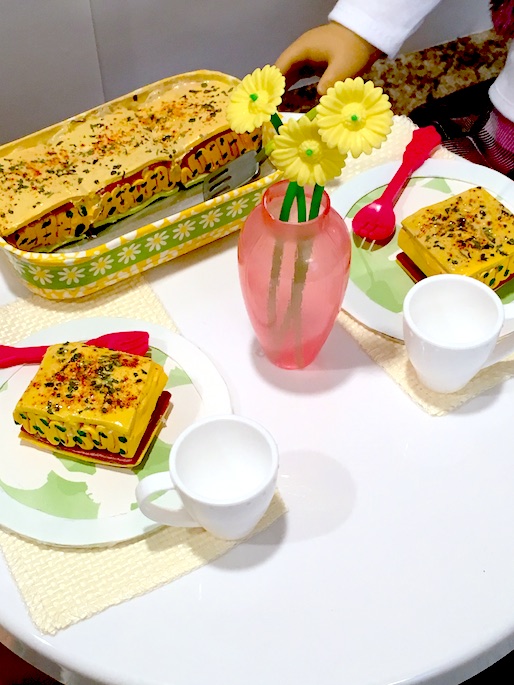
Now your dolls can enjoy their lasagna dinner! 🙂 So much fun! So delicious!!

This is the MyLifeAs dining table and chairs set from Walmart. You can find our review of this set here. We initially bought this set for my niece’s dollhouse, but we liked it so much that we had to get one for our doll’s house.

Brianna is wearing an outfit from Maplelea called Florabundance. I am always very impressed by the quality of Maplelea. It is definitely equal to AG quality.

Caroline has come to dinner wearing the Our Generation outfit A Taid Plaid.

The lasagna is so cute!

It looks good enough to eat! 🙂

I hope that you enjoyed this craft!
Leave a comment below!
❤ ❤ ❤

Fantastic! I’ve been wanting to DIY the AG Lasagna set, but couldn’t find doll-size baking dishes that would work. Thanks for the ideas and inspiration! Now for a trip to the grocery store!!!
LikeLiked by 1 person
🙂 Awesome! I’m glad that you are going to make it! We’ve been dreaming about the idea for awhile now too. The oyster tin worked really well, and is the perfect size, but it was tricky to get the top edge of the tin off. I hope that you enjoy making this! 🙂
LikeLike
That’s really cool!
LikeLiked by 1 person
Aw thank you! 🙂 I’m glad that you like it!
LikeLike
That turned out great, what an awesome idea!
LikeLiked by 2 people
Thank you! 🙂
LikeLike
Looks better than AG’s!
LikeLiked by 1 person
Aww thank you! 🙂 We’ve been wanting to craft this for awhile now. I think it turned out great! I’m glad that you enjoyed! 🙂
LikeLiked by 1 person
What a wonderful craft!!! I will definitely have to make this! Lasagna is one of my favorite meals! Thank you!
LikeLiked by 1 person
I am so glad that you liked it! 🙂
LikeLike