

Hi guys! Today we are making some cakes in a similar fashion to our large sheet cake that we made on Opening Night at Grace’s Bakery. I had a couple of inquiries into how we made it, so I thought I would show you now! 🙂
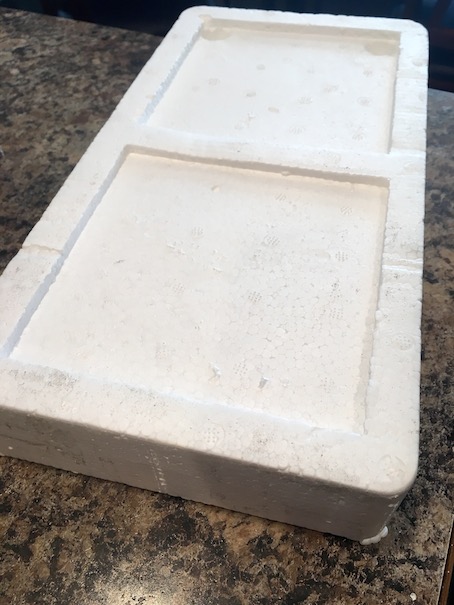
For the large sheet cake, I had a large styrofoam packaging insert similar to the one above. It happened to be the perfect size to make a cake. 🙂 I love recycling!

For this craft, I have several smaller styrofoam cylinders, so we are going to be making smaller scale cakes in the same fashion as the large sheet cake. I found these inside a Pez candy tube. More recycling! 🙂
If you don’t have styrofoam you can also use a mini box. Just paint it all over white before you begin.
You will also need:
Puffy Paint (There is a great tutorial over at AmericanGirlIdeas on how to make homemade puffy paint!)
Felt (You can use any colour you like for the ‘icing’)
Hot glue
Scrapbooking embellishments, stickers, silk flowers, beads, trim (optional)


Start by tracing the top of your cake onto the felt.
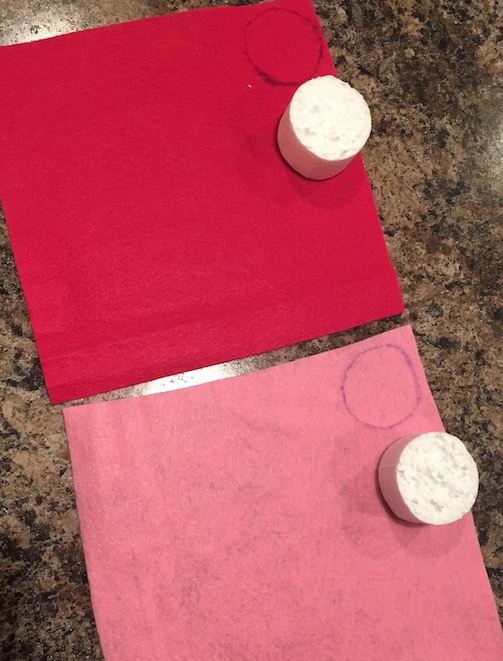
Cut it out and hot glue it to the top of your cake.
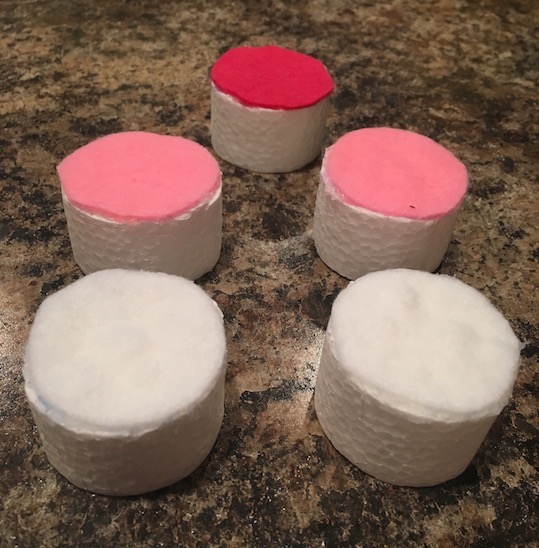
This is your icing. It also provides a nice uniform surface to decorate. Our foam had some punctures in it, so the felt helped to smooth things out a bit.
Next take your puffy paint and decorate! Stick your cake on a toothpick so you don’t smear your work.

You can do polka dots, flowers, stripes, the sky is the limit really. I like the hanging swag technique. It is cute, and it looks like a real cake! 🙂 You can also write on your cakes. I love the puffy paint because it puffs up to look just like real icing.
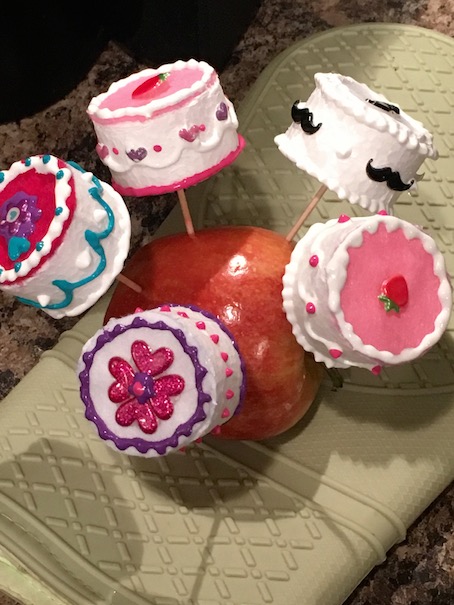
After your puffy paint is dry (yes, I stuck them all in an apple to dry 😛 ), you can add your embellishments. Use hot glue to add stickers, beads, flowers, or whatever you have on hand. This is a great way to use up some of your scrapbooking materials! 🙂
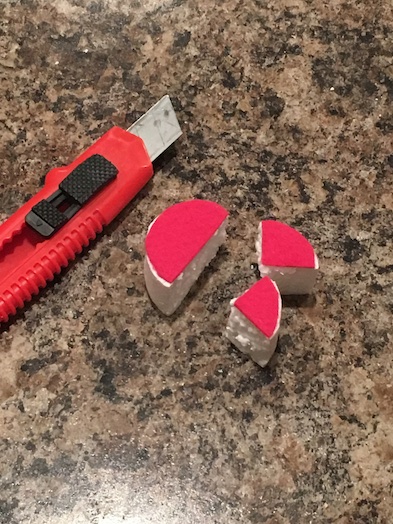
To make one slice of cake, simply use an exacto knife to slice one of your cakes in half. Slice it in half again, and then you can decorate the pieces separately.
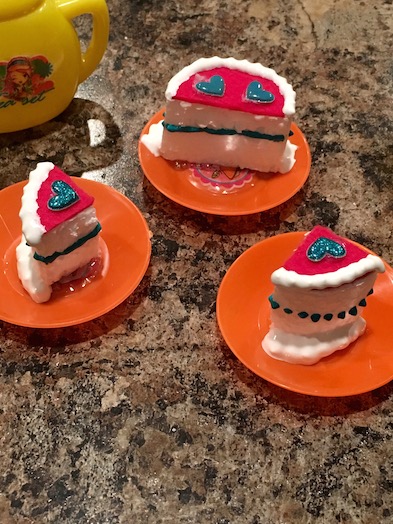
I just hot glued my pieces to the plates because styrofoam is pretty light and flimsy on its own. This way you can make some single servings for your dolls!
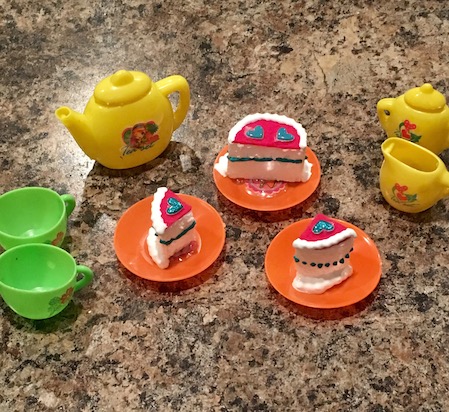
I got this little tea set from the dollar store. I only had one complaint, and that was that it would only serve three. To me, that just seemed a bit odd. In fact, it is odd now that I think about it, since three is an odd number after all. LOL!
But for real, isn’t that strange? Who makes a tea set to serve three?
Luckily, we also found this little tea set at the dollar store.
This set serves four, like it ought to.
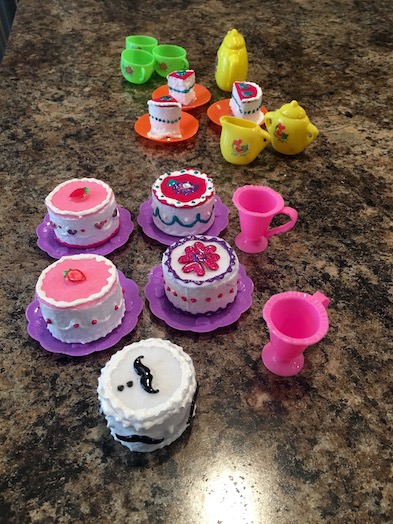
Do you like our moustache cake? Isn’t it cute!! 🙂
Anyway, I hope you enjoyed making cakes with us today!
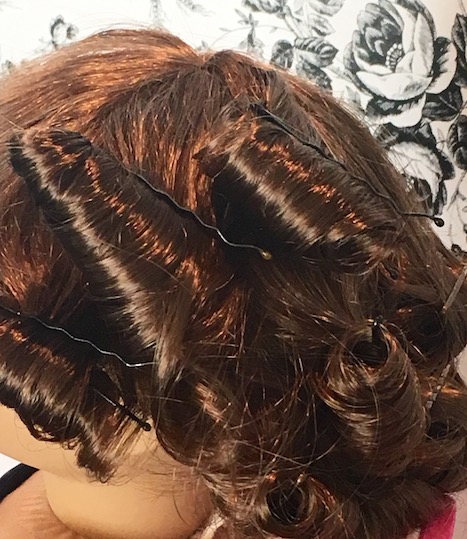
BONUS: Samantha’s new room mate has been at the salon all day getting her hair done, so she is definitely looking forward to eating some cake. 😉
LOVE! ❤ ❤ ❤
Leave a comment below!
And go make some cake! 🙂

Adorable!!
LikeLike
Thanks! 🙂
LikeLike
Adorable! I will have to make t hem! 😉
LikeLike
Yes they are so cute! 🙂 You could fill a whole doll bakery with these!
LikeLiked by 1 person
Yep! ❤
LikeLike
Very clever! I love the mustache cake too, so cute.
LikeLike
Thanks! 🙂
LikeLike
I love the mustache cake!
LikeLike
I know! So cute!! 🙂
LikeLike
Oooh, look’s yummy! *drools* XD Can’t wait to see the hair when its done!
LikeLike
🙂 lol!
LikeLike